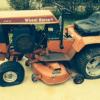
oliver2-44 9,759 #1 Posted February 3, 2022 (edited) While I'm laid up with my back/neve issue I've been working on my list of final parts and things I need to do to finish my Suburbans. I have 3 Suburban front axles I possible should drill out and bush the center pivot hole and the axle hole. If I had a good enough repeatable jig set up I would do my 2 C series axles while it was set up. I've read a few threads on here about doing it, but there's not a lot of detail of ways to set it up and at what angle the hole originally were machined at. I stole this picture from a comment @ri702bill made about clamping. I like the way he put a long pin through the center pivot hole and used this to level the axle on the horizontal plane. But I need some ides on how to establish the other angle of the spindle holes since their not square. I have a drill press with a slotted round table and a small 2 axis vice. The table is not big enough to block and clamp the long axle. I have some 3/8'x 6" flat bar I'm thinking I could bolt down as a possible table extension. I may have a scrap of 4 or 6" channel iron at the farm as well. So how do you setup to redo your axles? Can I drill them with a drill bit or do I need to drill them slightly undersize and ream them? Since the hole is 3/4" can I drill to 7/8" and use a 7/8' to 3/4" thin wall bushing? or should I drill them to 1" and use a 1" to 3/4" bushing. ? I've looked at some reamers that have a pilot guide pin, but their expensive and the guide doesn't seem long enough to help on this task. Anything else I should think about? @pacer I seem to recall you have a mill and have done some of this work. Edited February 16, 2022 by oliver2-44 Share this post Link to post Share on other sites
953 nut 55,298 #2 Posted February 3, 2022 Some jobs are best left to professionals with proper tooling. 2 Share this post Link to post Share on other sites
wallfish 17,011 #3 Posted February 3, 2022 (edited) I've done several axles and pivots with a 7/8" construction reamer and a cordless hand drill. No special clamping or set up necessary. Turned my father on to this method and he has also done quite a few himself without issues. If the reamer has a top edge bigger than the flutes like the one linked and the one I have, you will need to drill from both sides because of the depths of the holes are to long for a single pass. It's best not to completely sink the reamer up to that edge on one side but estimate the wide part to about 1/2 way and complete the hole from the other side. This keeps the hole better aligned and straight. Because the bronze bushings go it tight (which you want) it may squeeze the hole too tight for the 3/4" Dremel with a fine grit drum easily solved this but sand, test, sand repeat in order not to remove too much material. Don't forget to drill the hole for the grease zerk. https://www.amazon.com/Drill-America-Qualtech-High-Speed-Uncoated/dp/B00FXJGURA/ref=asc_df_B00FXJGURA?tag=bingshoppinga-20&linkCode=df0&hvadid=80058242473102&hvnetw=o&hvqmt=e&hvbmt=be&hvdev=c&hvlocint=&hvlocphy=&hvtargid=pla-4583657821672122&th=1 Edited February 3, 2022 by wallfish 1 5 Share this post Link to post Share on other sites
WHX?? 48,828 #4 Posted February 3, 2022 I pretty much did the same thing as Bill. Used a round bubble level on the flat machined part of the axle and wooden shims on a drill press Never though about the bar through the pivot hole to level one way. Good idea. Used split bushing then ran a reamer through both to correct for any misalignment, Was a little off but good enough for the women I hang out with. 4 minutes ago, 953 nut said: Some jobs are best left to professionals with proper tooling. I approached several machine shops to do it and they turned me down ... said set up would be too costly and not interested in saving an old tractor. Never thought to take pics of the setup just the finished piece. My first mechanical only resto. 1 6 Share this post Link to post Share on other sites
pacer 3,173 #5 Posted February 3, 2022 I did do a couple axles ... some several yrs ago, and my aged memory doesnt recall it in much detail. However, that pic helps to brush away a few cobwebs --- and remember that ------- it was a pain in the butt!! and I wouldnt want to attempt it in a drill press. Instead of the drill press, you might try @wallfish method...... 1 Share this post Link to post Share on other sites
WHX?? 48,828 #6 Posted February 3, 2022 I could see doing it that way 'Fish. Did you use full length bushings? Share this post Link to post Share on other sites
SylvanLakeWH 25,598 #7 Posted February 3, 2022 @WHX?? nice job! You do know more than just how to raise @Pullstart remotely… 2 Share this post Link to post Share on other sites
wallfish 17,011 #8 Posted February 3, 2022 Just now, WHX?? said: I could see doing it that way 'Fish. Did you use full length bushings? At first I couldn't find full length and just used 2 for each spindle hole, one from each end, Last one was full length bushing material cut to length. 1 1 Share this post Link to post Share on other sites
WHX?? 48,828 #9 Posted February 3, 2022 (edited) 17 minutes ago, pacer said: - it was a pain in the butt!! Not to mention a nail biter the whole time! I was about to start the press and chickened out. Took it to a bike shop I hung out at and used his larger equipment and got it clamped much better. They also had the reamer. More I think about it the more I like 'Fish's tapered reamer. Edited February 3, 2022 by WHX?? 1 Share this post Link to post Share on other sites
WHX?? 48,828 #10 Posted February 3, 2022 (edited) 4 minutes ago, wallfish said: At first I couldn't find full length Yep exactly then the fellas turned me on to McMaster who has them. Edited February 3, 2022 by WHX?? Share this post Link to post Share on other sites
pacer 3,173 #11 Posted February 3, 2022 12 minutes ago, WHX?? said: 30 minutes ago, 953 nut said: I approached several machine shops to do it and they turned me down ... said set up would be too costly Set up ---- thats the kicker here, the holes have ovaled out and the 2-3 different angles --- and to have to do twice, its time consuming. But, I rarely begrudge these things, My well equipped shop (man cave?) is where I do my .... golfing, fishing, hunting, etc----NOT! 1 Share this post Link to post Share on other sites
WHX?? 48,828 #12 Posted February 3, 2022 (edited) 9 minutes ago, pacer said: Set up ---- thats the kicker here, Well that's why I didn't hold a grudge with the pros. They would have had it + - .001. because that's what they do. I couldn't explain to them that this tractor wasn't going to the moon. Just had to look good from Berlin. While we're at it Ollie.... more of my bushing madness... she steers like a Cadillac tho. Edited February 3, 2022 by WHX?? 1 Share this post Link to post Share on other sites
wallfish 17,011 #13 Posted February 3, 2022 The bronze goes into the hole tight (which is what you want anyway) so it may squeeze the hole too tight for the 3/4". I used a Dremel with a fine grit drum. Sand, test, sand and repeat. You don't want to over do it and clean the dust out well before final fit. Don't forget to drill the hole for the grease zerk. Take your time and this method works pretty easy. Test on the pivot hole first then do the axle because you have a feel for it. After all these are not 200 mph race cars so it's hard to totally screw this up. Like Jim you may end up bushing everything since you have the tool to do it. For $60 bucks you can now do the entire herd of axles and pins. 5 Share this post Link to post Share on other sites
WHX?? 48,828 #14 Posted February 3, 2022 1 minute ago, wallfish said: drill the hole for the grease zerk Share this post Link to post Share on other sites
WHX?? 48,828 #15 Posted February 3, 2022 2 minutes ago, wallfish said: bronze goes into the hole tight One did get a little loose on me but green locktite holds it in place. 3 Share this post Link to post Share on other sites
Pullstart 62,905 #16 Posted February 3, 2022 I think the outermost wall of the axle is the least likely to wear. If one were to indicate in that wall as vertical, that would be the best possible way in my mind. They could also double check with that indicator the flatness of the top of the axle too. It should have been machined square to the hole. Aim small, miss small. If you don’t have a long enough “feeler” on the indicator, you could use a piece of 3/4” drill rod in the hole and some shims or @wallfish’s toothpick collection to wedge the rod into it’s most likely position then indicate that vertically. 1 Share this post Link to post Share on other sites
Pullstart 62,905 #17 Posted February 3, 2022 On vehicle kingpins, they are a press fit and ream to fit the spindle once in place. Share this post Link to post Share on other sites
wallfish 17,011 #18 Posted February 3, 2022 2 minutes ago, Pullstart said: @wallfish’s toothpick collection to wedge the rod into it’s most likely position then indicate that vertically The construction reamer eliminates all that precise set up and doesn't waste those toothpicks. It basically self guides into the hole like a thread tap does but you want to keep it straight as you drill. 4 Share this post Link to post Share on other sites
ebinmaine 67,592 #19 Posted February 3, 2022 1 hour ago, wallfish said: reamer Ordered. @oliver2-44 good thread. 1 Share this post Link to post Share on other sites
oliver2-44 9,759 #20 Posted February 3, 2022 1 hour ago, Pullstart said: On vehicle kingpins, they are a press fit and ream to fit the spindle once in place. Back in Highschool I did those on my 66 Ford F150 with a home made spring compressor. Young and Dumb, but lucky once! 1 hour ago, Pullstart said: I think the outermost wall of the axle is the least likely to wear. If one were to indicate in that wall as vertical, that would be the best possible way in my mind. They could also double check with that indicator the flatness of the top of the axle too. It should have been I tested them a while back with a 3/4" rod and they seem to be worn on the inside at the top and outside at the bottom. I suspect this is due to them being installed with toe out. 1 hour ago, WHX?? said: While we're at it Ollie.... more of my bushing madness... she steers like a Cadillac tho. Yep I already stole that idea. 1 hour ago, pacer said: I ------- it was a pain in the butt!! Pacer you probably don't realize the satire in this considering my current Sciatic nerve pain in my hip, I'll look into the Walfish method. I have some comstruction reamers, but not much straight section as I recall 2 Share this post Link to post Share on other sites
wallfish 17,011 #21 Posted February 3, 2022 Just now, ebinmaine said: Ordered. Now you can change your handle name on here to Bushwacker I realize they're a little expensive but not too bad If you order a 3/4" reamer too you can easily ream to open up the squeeze of the bushings. But order the one with the handle because it can be done by hand and won't accidentally over do it with a drill. 2 1 Share this post Link to post Share on other sites
ebinmaine 67,592 #22 Posted February 3, 2022 1 minute ago, wallfish said: Now you can change your handle name on here to Bushwacker I realize they're a little expensive but not too bad If you order a 3/4" reamer too you can easily ream to open up the squeeze of the bushings. But order the one with the handle because it can be done by hand and won't accidentally over do it with a drill. I'll make Trina use it. She won't overdo it. 😂 2 Share this post Link to post Share on other sites
pacer 3,173 #23 Posted February 4, 2022 15 minutes ago, oliver2-44 said: Pacer you probably don't realize the satire in this considering my current Sciatic nerve pain in my hip I would say that was my intention ..... but, nah it didnt cross my mind, but was a pretty good unintended mild 'dig' 1 Share this post Link to post Share on other sites
WHX?? 48,828 #24 Posted February 4, 2022 45 minutes ago, wallfish said: Now you can change your handle name on here to Bushwacker Now if that don't fit the bill 'Fish.... Been the Psychotic nerve route Jim ... backcracker, although I don't particularly believe in them or doctors and lawyers , really did seem to help. Pacer's an old coot he should know. Share this post Link to post Share on other sites
ranger 1,750 #25 Posted February 4, 2022 12 hours ago, WHX?? said: I could see doing it that way 'Fish. Did you use full length bushings? In situations like this it’s usually better to use two bushes and leave a small gap in the middle, or use a one piece bush, full length with a ‘relief’ in the centre. The idea is to reduce the ‘Barreling’ effect, (rocking), as the outer ends of the bushes wear due to side loads, but the centre only wears through turning. Leaving a space in between the bushes also provides a lubricant reservoir, and moves the pivot, (leverage) point away from the centre. Not much, but every little helps. 3 1 Share this post Link to post Share on other sites