
-
Similar Content
-
By Oldskool
Hey guys I have been given a box of these flap wheels.
5.25" x 1.5" with a 1" arbor hole.
I instantly thought great I can put one on my bench grinder.
Nope! Not that simple.
The arbor size is different, and it's to wide to fit inside the the guard.
I thought of removing the guard but would like to have it there.
I guess I could make an arbor adapter and a spacer for the guard,and a new tool rest,etc. More time involved then first thought.
Does anyone use these, and if so what do you have it on?
-
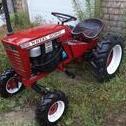
 By c100rider
Hello fellas. I bought this 211-3 tractor. I have no clue how this mower deck comes off. I need to fix some areas on the deck, as well as replace a clutch cable. I can't seem to find pictures of a complete deck for this model as it should be. Need help.
-
By Oldskool
Let's see your view from your workplace "window". I know some are driving truck,or tractor, work in shops/offices or outdoors. What is it that surrounds you during your work day?
-
-
By Oldskool
I started a thread a little while back "Something from Nothing". It has been upgraded to this thread because now I'm building something from something lol. I started with a new frame and strengthened the transaxle mount a bit.
-