Jump to content
Wheel Horse 3D

Custom 3d printed badges, ornaments etc.

Recommended Posts

Wheel Horse 3D

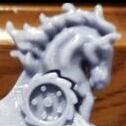
@roadapples Here's a horse for Jay!

Capture.JPG

Edited by Wheel Horse 3D
  • Like 3

Share this post


Link to post
Share on other sites
 
Wheel Horse 3D

K @Jeff-C175 heres a prelininary profile of a snap-in cover!

SmartSelect_20210302-162520_Gallery.jpg

SmartSelect_20210302-162538_Gallery.jpg

Share this post


Link to post
Share on other sites
 
Wheel Horse 3D

Edit dimensions and fiddle qith removing portions of that rim to make "teeth" that stick down.

Share this post


Link to post
Share on other sites
 
Jeff-C175
22 hours ago, Wheel Horse 3D said:

if that does pop out,


I just stuck a flat blade in one of the slots and gave a push.  It didn't pop and I'm not about to force it.  Unless someone can give me assurance that it will pop out, I'm not going to try! ;)

  • Like 1

Share this post


Link to post
Share on other sites
 
Jeff-C175
2 minutes ago, Wheel Horse 3D said:

prelininary profile of a snap-in cover!


Weird that I was in the shop trying to pop that cover while you were posting!


Share this post


Link to post
Share on other sites
 
Wheel Horse 3D

So how does the steering wheel attach?

Share this post


Link to post
Share on other sites
 
Wheel Horse 3D
Just now, Jeff-C175 said:


Weird that I was in the shop trying to pop that cover while you were posting!


Military drones and satellites are wonderful tech! I still have a few connections!

  • Haha 4

Share this post


Link to post
Share on other sites
 
Wheel Horse 3D

:ROTF:Ooorrrrrrr, the universe is saying "Jeff, Jeeefffffff, pop the cover!"

Edited by Wheel Horse 3D
  • Haha 2
  • Confused 1

Share this post


Link to post
Share on other sites
 
Jeff-C175
6 minutes ago, Wheel Horse 3D said:

how does the steering wheel attach?


Roll pin through the side.  (not my photo)


image.png.ac0a2cf69f57ea90af6433251d9897b9.png


I think the sillycone attachment is best...

Edited by Jeff-C175

Share this post


Link to post
Share on other sites
 
Wheel Horse 3D

Seriously though she's your Horsey! Cant say I blame ya for caution!

Share this post


Link to post
Share on other sites
 
Wheel Horse 3D

Hmm wonder what the topside of the steering wheel looks like, or the back of the cover from the underside!

Share this post


Link to post
Share on other sites
 
Jeff-C175
5 hours ago, Wheel Horse 3D said:

a horse for Jay!


That's the 'Horse of a different color' I was talking about!


I took over the painting chores of my ornament from my bride because I was afraid that it might end up looking something like that!

  • Haha 3

Share this post


Link to post
Share on other sites
 
Jeff-C175
5 minutes ago, Wheel Horse 3D said:

wonder what the topside of the steering wheel looks like


I posted a pic of mine previously.  That center disc is 1.875 measured with calipers.

Share this post


Link to post
Share on other sites
 
Wheel Horse 3D
8 minutes ago, Jeff-C175 said:


I think the sillycone attachment is best...

If thats the case how much lower is the perimeter than the center of that dome?

Share this post


Link to post
Share on other sites
 
Wheel Horse 3D

Something like so....

SmartSelect_20210302-170202_Gallery.jpg

SmartSelect_20210302-170143_Gallery.jpg

  • Like 1

Share this post


Link to post
Share on other sites
 
Wheel Horse 3D

Exactly how big is the headlight "hole"?  im hoping the lens can simply be captured between the frame and body for easy replacement.SmartSelect_20210302-170902_Google.jpg.63bf0282975889a59284dbf83f9c3a37.jpg

Share this post


Link to post
Share on other sites
 
Jeff-C175
1 hour ago, Wheel Horse 3D said:

how much lower is the perimeter than the center of that dome?


That's what I need to figure out how to accurately measure.


I think if I lay a straight edge across the wheel and measure down from that I should be able to get it pretty accurate.


I'm sure it's not more than a quarter inch though.  I'll go measure it once I finish patching the holes in the butt of my Carharts.  They're not supposed to wear out there.  Means I'm spendin' too much time sittin' and not enough time workin'!!

(credit where credit is due though, they ARE 30 years old!)


51 minutes ago, Wheel Horse 3D said:

Something like so....


That would work nicely.  Flat area for the logo, sloped down to catch the perimeter.

  • Haha 1

Share this post


Link to post
Share on other sites
 
Wheel Horse 3D

Sounds good, ill also add a couple circular ridges underneath, to sink into the silicone

Share this post


Link to post
Share on other sites
 
Wheel Horse 3D
2 hours ago, Wheel Horse 3D said:

Exactly how big is the headlight "hole"?  im hoping the lens can simply be captured between the frame and body for easy replacement.SmartSelect_20210302-170902_Google.jpg.63bf0282975889a59284dbf83f9c3a37.jpg

After Looking a some pics, Im gonna widen the lens and insert area for the lens probably about 1/4 of an inch. The lens need to span above and below the screw holes.

  • Like 1

Share this post


Link to post
Share on other sites
 
roadapples

I can check tomorrow, but if I  remember  correctly the original  lens barely covers top to bottom...

Share this post


Link to post
Share on other sites
 
Wheel Horse 3D
1 hour ago, roadapples said:

I can check tomorrow, but if I  remember  correctly the original  lens barely covers top to bottom...

Thats what im thinking, need to see how far above and below the screw holes the opening is. If absolutely need be i can widen the bezel a couple mm top to bottom. I really want to keep the plexi lens easy to replace. Otherwise id just epoxy it into the bezel lol.

Edited by Wheel Horse 3D
  • Like 1

Share this post


Link to post
Share on other sites
 
roadapples

20210302_232449.jpg.dac3a996743c2acaa85bd65c9d7d1644.jpg20210302_232542.jpg.2190151b14194019fb603da4e8c42c2a.jpgabout  2  1/4"

Edited by roadapples
  • Thanks 1

Share this post


Link to post
Share on other sites
 
Wheel Horse 3D

They certainly didnt leave us much to work with! Ill have it figured sometime tomorrow im sure, even if I have to sandwich the lens between two pieces!

  • Like 1
  • Excellent 1

Share this post


Link to post
Share on other sites
 
Wheel Horse 3D

K even after widening that im right at 2.25 for the lens. By widening, all thats being accomplished is further weakening the front frame and still not being able to pin the lens between it and the body. Legthening the lense and drilling the screw holes still would not prevent the lens from bowing inward. Soooooo...were gonna return to the original lens size, add a back plate the same thickness as the lens, and samich the lens between the inside and outside frame.

This way the lens remains replaceable/customizable, less cost in plexi,but we do add additional time to print the back plate. Combined thickness should end up right around 1/4 inch, a couple mm thicker than the original.

What do yall think?

SmartSelect_20210303-063809_Gallery.jpg

SmartSelect_20210303-063549_Gallery.jpg

  • Like 4

Share this post


Link to post
Share on other sites
 
Wheel Horse 3D

Thank you guys for your patience, and your input! You all have had a hand in creating a viable Wheel Horse option for aftermarket headlight lenses! These originals are getting rare and pricey and im not sure of any repro stuff out there!:romance-grouphug:

  • Like 2

Share this post


Link to post
Share on other sites
 

Create an account or sign in to comment

You need to be a member in order to leave a comment

Create an account

Sign up for a new account in our community. It's easy!

Register a new account

Sign in

Already have an account? Sign in here.

Sign In Now

  • Similar Content

    • Donavon1
      By Donavon1
      Project black Betty the diesel 1054
    • Wheel Horse 3D
      By Wheel Horse 3D
      Our customized ornaments have a base identical to our version of the original style ornament, but can be topped with 3 different styles of horse head and 3 different styles of wheel! Each is available unfinished, primed, or fully painted.
      They also include the pictured mounting hardware and the base spacer for a clean finished look. Can be ordred here https://greystone-3d.square.site/product/customizable-wheelhorse-hood-ornaments/10


    • Wheel Horse 3D
      By Wheel Horse 3D
      Welcome, and thanks for visiting our vendor area.
      We got our start in 3D printing for customers right here on Red Square!
      If you'd like to see how every thing gets developed and the contributions of Red Square members, please visit the thread that started it all and browse through our progress to date.
      We love our clients' input and work closely to turn ideas into reality. If you have an idea, request, or questions, you can post to that thread, message us or tag us here on Red Square, or visit our online store and reach out to us through there.
      Https://greystone-3d.square.site
       
    • Donavon
      By Donavon
      Need ideas to convert my 1054 A Frame plow into a snow blower
      Any idea's?
×
×
  • Create New...