Jump to content
Wheel Horse 3D

Custom 3d printed badges, ornaments etc.

Recommended Posts

SylvanLakeWH
45 minutes ago, ebinmaine said:

t's possible I may have a couple of extra reinforced, small scale, grenades at the house... 


:scared-eek:


  • Like 1
  • Haha 1

Share this post


Link to post
Share on other sites
 
buckrancher
14 hours ago, Wheel Horse 3D said:

Still a little adjustment needed for finish

16795261465738100535679883270391.jpg

looking goog:handgestures-thumbupright:

Share this post


Link to post
Share on other sites
 
Wheel Horse 3D
1 hour ago, ebinmaine said:


Very interesting you'd say that Richard...


What tractor is Trina restoring right now?


It's possible I may have a couple of extra reinforced, small scale, grenades at the house... 

Includes 7/16 pocket to slide over the 3/8 shaft to get the threads up into the body of the grenade, and a pilot hole into the body so ya can drill and tap.

20230317_201849.jpg

20230317_202244.jpg

  • Like 1
  • Excellent 3

Share this post


Link to post
Share on other sites
 
Wheel Horse 3D

A painted shifter knob that's DA BOMB!

16797952850286122009128164131456.jpg

  • Excellent 1

Share this post


Link to post
Share on other sites
 
ebinmaine
8 hours ago, Wheel Horse 3D said:

 shifter knob 


Grey is there enough substance to the center that if Trina wants to set the grenade right side up we could drill the bottom?


Share this post


Link to post
Share on other sites
 
Wheel Horse 3D

Yup!

  • Thanks 1

Share this post


Link to post
Share on other sites
 
Wheel Horse 3D

New listing up for grenades. Hopefully the will be satisfied this time around!

20230327_191128.jpg

20230327_191146.jpg

20230327_191212.jpg

20230327_190846.jpg

  • Like 1
  • Excellent 2

Share this post


Link to post
Share on other sites
 
Wheel Horse 3D

Another gt14 attempt...fine tuning the letter height to be just enough for fully white.(layers are so very thin ya need 3 or 4 layers, but don't want em to stick up too much!

16799637050335779778912884315947.jpg

  • Like 4

Share this post


Link to post
Share on other sites
 
Wheel Horse 3D

Ok now I'm happy with the lettering! I'm thinking the surface still may need work, but I may be picking knits. The surface is super smooth you cant even feel the lines,but ya can still see a little unevenness in the pattern. What do ya'll think?

20230328_213300.jpg

16800537878954804885744470588973.jpg

  • Like 2
  • Excellent 4

Share this post


Link to post
Share on other sites
 
Wheel Horse 3D

Also need to rotate that 45 like the one before so the lines run left and right or up and down rather than at a 45.theres also 2 other "ironing" options I haven't tried yet and a few parameters under those I can tweak. One basic ironing pattern gave results like this: came out very well except for the right edge. The tolerances here are so close a variance in the glass thickness can matter and cause an issue like this.

16795261465738100535679883270391.jpg.100ac50c1d0baf69277558613d2528d5.jpg

Edited by Wheel Horse 3D
  • Like 1

Share this post


Link to post
Share on other sites
 
Wheel Horse 3D

@buckrancher what do ya think of the latest run? Gonna do one more 45 degrees rotated. Have a console plate running now, should be ready to change color when I get home.

20230328_213300.jpg

Edited by Wheel Horse 3D
  • Excellent 1

Share this post


Link to post
Share on other sites
 
Wheel Horse 3D

I think were FINALLY there! I want to do one more set with the horizontal layer(rotated 45)

But these look pretty good I think.and these at only a slight increase in thickness feel a bit more rigid to me. Mounting should still be done with Glenn Pettits good advice...rubber washers, finger tight, with a dab of locktight on each screw. I think over tightening contributes to the failure of a lot of these dashes.

16802285860636032645970693837886.jpg

16802286157391304774677009595438.jpg

16802286353552528777788237533081.jpg

  • Like 2
  • Excellent 2

Share this post


Link to post
Share on other sites
 
953 nut

:bow-blue:                 Those GT-14 plates are first class.           :woohoo:

  • Like 1
  • Thanks 1

Share this post


Link to post
Share on other sites
 
Wheel Horse 3D
5 hours ago, 953 nut said:

:bow-blue:                 Those GT-14 plates are first class.           :woohoo:

And custom colors are easy to do, just load the base color, then the text color!

  • Excellent 2

Share this post


Link to post
Share on other sites
 
Wheel Horse 3D

Gonna take tonight off from the print lab.

Tomorrow, hitting the road to go visit the Roadapples estate and pick up his c-160 auto and bring it back to it's new home. Some 3d printed accessories will be in the works to honor Jay and the critter will be appropriately named " 'Apples".

SmartSelect_20230320-110044_Chrome.jpg

  • Like 1
  • Heart 2

Share this post


Link to post
Share on other sites
 
Wheel Horse 3D

Be on the lookout for the final final versions if the GT14 dash and console plates early next week. I'll be starting those Sunday. BIG thanks to @buckrancher who provided the model parts and has patiently waited 2 YEARS to see this project completed!

Now that the machine has been tuned and all the variables tested, future dashes of all types will be pretty much design then print.

Edited by Wheel Horse 3D
  • Like 3

Share this post


Link to post
Share on other sites
 
Wheel Horse 3D

Ok most of the time ya get decent results...but every now and then ya get the old school horror flic...  aka. THE BLOB! So starting the dash over. This machine MAX1 will from now on be just for dashes and plaques etc. Pretty sure the nozzle needs swapped, got plastic all the way up into the fan!

20230403_211641.jpg

Edited by Wheel Horse 3D
  • Sad 3

Share this post


Link to post
Share on other sites
 
Wheel Horse 3D

While that has now had a nozzle change and seems to be running correctly, on MAX#2(12x12x12inch) the hardware portions of a thompson sub machine gun have started!

16805751465576062459523112489879.jpg

  • Like 2

Share this post


Link to post
Share on other sites
 
Wheel Horse 3D

In other news...all proceeds are currently being hoarded for the purchase of a, faster, multicolor 10x10x10 machine, will take a bit, but I finally found one I think is worth the price.

Has remote monitoring and printing features, multi lidar beam leveling and AI detection of failures etc. Looks to reduce most print times to about a 3rd of current times. And while I'll start with 4 colors, can do up to 16 colors. I can leave multiple colors loaded and have them ready for what ever job comes up, or combine colors in a single print.

  • Excellent 1

Share this post


Link to post
Share on other sites
 
Tractorhead

Had the same issue sometimes.


Especially after a longer Printing breaks,

thought also it must be the nozzles and each time after a cleaning it works for few day‘s

my results where 2 things

1. since i allway‘s keep the feedroller clean,

to do that i use piece of sponge slides over the Filament what removes dust and dirt.


2. ground the Frame

to remove electrostatic charge /discarge 

that solves lots of problems i had before with dust and dirt clamped via static on the Filament.


the Static issues in my opinion be the reason for the clogging of nozzles and for printer troubles,

sometimes more than moisture.

but depending on moisture also this can happen a clogging in the nozzle.


i heat up my printer 1/2h first after a longer break, to be sure no moisture is in bthe nozzle, 

than feed some filament and we‘re ready to go.


No problem since and my again actual used nozzle is now 3 years old.

Edited by Tractorhead
  • Like 1
  • Excellent 1

Share this post


Link to post
Share on other sites
 
Wheel Horse 3D

@Tractorhead I must've bumped that bed and knocked it outta perfect alignment, then the resulting blob etc did the nozzle in. Usually run a brass nozzle forever unless I run glow in the dark filament or run it against the bed. Have some steel nozzles that last even longer. I releveled the bed and double checked my probe offset and still wouldn't run correct until I swapped that nozzle. Probably had a side blowout that caused curling. I should have monitored those first layers closer, durn thing ended running all day just spewing plastic while I was at work. Filament and machines stay in a heated enclosure to combat moisture. Nifty idea on the grounding! Not only help keep the filament clean but should help with dust n debris on the guide rails and rollers etc.  Basically all over.

Edited by Wheel Horse 3D
  • Like 2

Share this post


Link to post
Share on other sites
 
Tractorhead

Yap, that helps me to solve a lot of problems i had in the beginning.


Because i mostly print prototypes, i be not soo focused on each small detail,

 i use it primary for quick testimonials, to check the results before, or if they will fit.


i.eg like my carb spacer i built for my Ford Transit Project, before i machine them in Aluminum.


The few meters plastic is much cheaper and easier to get than a machined Part.


My Bed is just manually leveled once and secured by spring preloaded Screws.

while the whole printer is in a heated enclosure, i never need a recalibration since.


image.jpg.0298fd3ef1ef56f853da6bde2185d03a.jpg


that all helps me a lot.

Used print heights are between 0.4mm - 0.25mm 

thats accurate enough for my needs.

Another big help was the electric separating of my z- axes, each motor has its own Driver now.


actually there be much better motor drivers available, but i use it not that much that i was the upgrade worth.

my biggest wins where the grounding and the enclosure with Leaded Airstream for Cooling.


  • Like 1

Share this post


Link to post
Share on other sites
 
Wheel Horse 3D

@Tractorhead sounds like my bed screws are similar, but then my "thick" layer heights that I use are .2mm, I usually run 0.12 to 0.16mm. The slightest backing off of one of the bed screws can be a huge difference. Would be neat to have a set screw or somethin to lock it in. As much as I run I have to recalibrate the bed ever couple months or so. A lot of my prints can take up to 2 days or more to complete, so the machines are getting a workout.

Enclosure has been a lifesaver and I'm definately gonna try that grounding trick.

Edited by Wheel Horse 3D

Share this post


Link to post
Share on other sites
 
Wheel Horse 3D


1680665382231496613144736624051.jpg

  • Like 1

Share this post


Link to post
Share on other sites
 
Wheel Horse 3D

20230406_191823.jpg

20230406_204856.jpg

  • Like 4

Share this post


Link to post
Share on other sites
 

Create an account or sign in to comment

You need to be a member in order to leave a comment

Create an account

Sign up for a new account in our community. It's easy!

Register a new account

Sign in

Already have an account? Sign in here.

Sign In Now

  • Similar Content

    • Wheel Horse 3D
      By Wheel Horse 3D
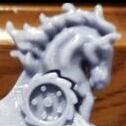
      Our customized ornaments have a base identical to our version of the original style ornament, but can be topped with 3 different styles of horse head and 3 different styles of wheel! Each is available unfinished, primed, or fully painted.
      They also include the pictured mounting hardware and the base spacer for a clean finished look. Can be ordred here https://greystone-3d.square.site/product/customizable-wheelhorse-hood-ornaments/10


    • Wheel Horse 3D
      By Wheel Horse 3D
      Welcome, and thanks for visiting our vendor area.
      We got our start in 3D printing for customers right here on Red Square!
      If you'd like to see how every thing gets developed and the contributions of Red Square members, please visit the thread that started it all and browse through our progress to date.
      We love our clients' input and work closely to turn ideas into reality. If you have an idea, request, or questions, you can post to that thread, message us or tag us here on Red Square, or visit our online store and reach out to us through there.
      Https://greystone-3d.square.site
       
    • Donavon
      By Donavon
      Need ideas to convert my 1054 A Frame plow into a snow blower
      Any idea's?
    • Burnerman
      By Burnerman
      I’m building a lowered 300 series wheelhorse. So far it’s a combination of 3 scrap tractors. 
      the frame, trans and tins are from a GT2500 anniversary special given to me by a neighbor with a trashed Briggs. The Kohler M12 is from a junkyard 312 that was roached. The parts tractor I’m using for the build was another older 312. I’ve got the k301 in the garage. The trans was toast. Both axles wallowed out keyways and 1 axle actually broken. 
      Anyway! I needed a project and a toy to putt around the neighborhood. I couldn’t find any other posts on how to do the whole thing. I’m trying to keep it cheap using stuff I have on hand and looking as “stock but cooler” as possible. So here we go. 
      I’ll update this as I go along. 
×
×
  • Create New...