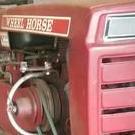
RetroMower 349 #1 Posted March 29, 2019 Finally saw some signs of life starting my C100 in the form of some sputtering and pops. I think the coil maybe weak but my real problem is fuel delivery. Im getting fuel to the pump and I even primed the line to the carb but nothing is making it into the fuel bowl. Are these pumps rebuildable or possibly replaceable? I was going to rob the one off the B100 but if these are diaphragm pumps then both are likely bad from sitting so long Share this post Link to post Share on other sites
ebinmaine 69,375 #2 Posted March 29, 2019 You've got multiple options there. Replacement with new style plastic pump Rebuild existing pump with kit from then and now Add electric pump However.... It's possible that the pump is working ok and you need to prime the system by creating your own vacuum or using a primer bulb. 1 Share this post Link to post Share on other sites
953 nut 56,511 #3 Posted March 29, 2019 7 hours ago, RetroMower said: primed the line to the carb but nothing is making it into the fuel bowl. If fuel is present at the inlet to the carburetor but not going into the fuel bowl there is probably a bad needle valve and the carburetor needs to be cleaned and rebuilt. 1 Share this post Link to post Share on other sites
Achto 28,093 #4 Posted March 29, 2019 Pull the line off of the carburetor, put the end of it in a bottle and crank the engine over. If you have fuel pumping into the bottle, then the next step would be to look into the carburetor needle & seat. It maybe as easy as a stuck needle. 2 Share this post Link to post Share on other sites
bottjernat1 2,190 #5 Posted March 29, 2019 (edited) Rebuild or buy new. The new style works well! You shouldn't need to go electric keep her original. My 953 has the factory pump on her and she is still working like a champ! I bought my 953 in 2017 from the original owners son. Edited March 29, 2019 by bottjernat1 2 2 Share this post Link to post Share on other sites
Mike'sHorseBarn 3,045 #6 Posted March 29, 2019 On a metal body pump, I always rebuild them. Once you do that, that pump will outlast you! 6 Share this post Link to post Share on other sites
WHX?? 49,651 #7 Posted March 29, 2019 Man after my own heart Mike! Nothin against electric or the plastic ones just prefer the old skool originals so as long as there are kits available... http://www.then-now-auto.com/kohler-fuel-pumps-2/ Finally got one with the elusive primer lever on it. It sat for many years with nothing in it but very stale gas and still works. I would clean the carb regardless Retro. I have inlet needles hang up all the time particularly if the tractor has set awhile. 2 2 Share this post Link to post Share on other sites
RetroMower 349 #8 Posted March 29, 2019 2 hours ago, Achto said: Pull the line off of the carburetor, put the end of it in a bottle and crank the engine over. If you have fuel pumping into the bottle, then the next step would be to look into the carburetor needle & seat. It maybe as easy as a stuck needle. I actually did do this and it wont pump at all. I will try to rebuild my original pump and remove and clean the carb while I wait for parts to arrive. Thanx all for the advice 3 Share this post Link to post Share on other sites
WHX?? 49,651 #9 Posted March 29, 2019 Yes check that arm that rides against the cam. Never had that fail but Murphy's law.... 1 Share this post Link to post Share on other sites
RetroMower 349 #10 Posted March 29, 2019 Using several great suggestions I managed to get a few variables eliminated. I removed the pump to better identify which rebuild kit I would need and I noticed a good bit of air moving as I worked the fuel pump arm . I thought my previous priming attempts didn't work so I after replacing it and priming it again it worked wonderfully . I then removed the carb and removed the needle and gave the whole thing a good cleaning. Finally I was getting fuel in the bowl . Now the motor us trying desperately to run. As long as the starter is spinning its firing and heating up the exhaust. Once or twice it kicked enough to disengage the starter. So close its agony lol. Got the battery on the charger right now. I dont want to overheat and kill the starter 2 3 Share this post Link to post Share on other sites
WHX?? 49,651 #11 Posted March 29, 2019 (edited) Our bad ..nobody suggested to check the tank outlet and the petcock not plugged. I would also suggest all new fuel lines and filter. Edited March 29, 2019 by WHX22 2 1 Share this post Link to post Share on other sites
ebinmaine 69,375 #12 Posted March 29, 2019 11 minutes ago, RetroMower said: Using several great suggestions I managed to get a few variables eliminated. I removed the pump to better identify which rebuild kit I would need and I noticed a good bit of air moving as I worked the fuel pump arm . I thought my previous priming attempts didn't work so I after replacing it and priming it again it worked wonderfully . I then removed the carb and removed the needle and gave the whole thing a good cleaning. Finally I was getting fuel in the bowl . Now the motor us trying desperately to run. As long as the starter is spinning its firing and heating up the exhaust. Once or twice it kicked enough to disengage the starter. So close its agony lol. Got the battery on the charger right now. I dont want to overheat and kill the starter You're getting there man! if you crank the starter for about 15 seconds and then let it sit for about 15 seconds you should be able to do that a few times in a row without getting it overheated. 2 Share this post Link to post Share on other sites
RetroMower 349 #13 Posted March 29, 2019 I think im beating a dead horse, no pun intended, trying to start my c100. As soon as it starts to fire on it own and the starter disengages, its sputters to a stop like the key was turned off. I think theres something im missing here. Share this post Link to post Share on other sites
ebinmaine 69,375 #14 Posted March 29, 2019 I don't have enough familiarity with that electrical system to give you a really straight answer but perhaps in a way you've already just done so. If it sputters to a stop like the key is turned off, perhaps you have a broken wire? Bad ignition switch? Something along that line? Maybe some D VOM or test light testing is in order. 1 Share this post Link to post Share on other sites
953 nut 56,511 #15 Posted March 29, 2019 Have you cleaned the points and replaced the spark plug? 1 Share this post Link to post Share on other sites
RetroMower 349 #16 Posted March 29, 2019 9 minutes ago, 953 nut said: Have you cleaned the points and replaced the spark plug? Yes and yes. Used 1000grit paper and a few light passed to remove any corrosion and the plug is new as well. What is the points gap supposed to be? And please correct me if i am wrong but the function of the ponts is break ground when opened to fire the plug at the correct time? 1 Share this post Link to post Share on other sites
pfrederi 18,091 #17 Posted March 29, 2019 .018 is a good start point. Also you should not use sand paper in points. t can leave grit behind that shortens their lie. There is a points file (or borrow your wife's metal nail file) 1 Share this post Link to post Share on other sites
RetroMower 349 #18 Posted March 29, 2019 I will check the gap and dress it properly but until then i discovered something. When the pto is engaged it kills the starter, what about the seat switch, does it kill the starter or just the ignotion system? Reason i ask is because the seat switch was bypassed by previous owner by clipping the wires off the seat switch and wire nutting them together. I untied the wires and the starter still works. Im wondering if the wires are broken elsewhere killing the ignition system when the key is returned to the on position. Share this post Link to post Share on other sites
Achto 28,093 #19 Posted March 29, 2019 Here is one thing to check. Make sure that the + side of the coil has power when the key is in the on position. Reason for this statement - I worked on an engine where some one had hooked the power wire for the coil to the start circuit. It would fire until you stopped cranking the starter. 21 minutes ago, RetroMower said: And please correct me if i am wrong but the function of the ponts is break ground when opened to fire the plug at the correct time? You are correct in this statement. 2 Share this post Link to post Share on other sites
squonk 41,781 #20 Posted March 29, 2019 Seat switch kills the ignition. When the points open it breaks the primary coil circuit. The magnetic field collapses and induces a high voltage surge in the coil secondary winding. 2 Share this post Link to post Share on other sites
953 nut 56,511 #21 Posted March 29, 2019 1 hour ago, RetroMower said: please correct me if i am wrong but the function of the ponts is break ground when opened to fire the plug at the correct time? Well, sort of. The opening of the points also sets the ignition timing. The attached PDF at the bottom of the page tells you how to set the timing. With a battery ignition system, the ignition points are closed the majority of the time. With the points closed and the ignition switch ON the primary windings of the ignition coil have current flowing through them and are developing a magnetic field in the iron core of the ignition coil. The moment the ignition points open the magnetic field collapses and induces a momentary high voltage pulse in the secondary windings of the coil which goes through the spark plug wire and arcs across the gap of the spark plug. If this occurs in the presence of a compressed fuel/air mixture of the proper ratio an explosion will occur within the cylinder. If this explosion occurs at the proper time in the engine’s cycle there will be pressure applied to the piston forcing it downward on the power stroke. The ignition points will continue to open further after this has occurred. How far they open is immaterial, their work has been done for that cycle of engine operation. What is important is when they open relative to the position of the piston on its compression/power revolution. If it occurs too soon there will be backfiring, too late and there will be a reduction of power. In the case of our Kohler engines the sweet spot is twenty degrees Before Top Dead Center, that is what the “SP” mark on the flywheel is set to). At the moment the points open the condenser quenches the arc across the points extending their life, the rest of the time it just sits there. Kohler static_timing.pdf 2 Share this post Link to post Share on other sites
RetroMower 349 #22 Posted March 29, 2019 (edited) 55 minutes ago, Achto said: Here is one thing to check. Make sure that the + side of the coil has power when the key is in the on position. Reason for this statement - I worked on an engine where some one had hooked the power wire for the coil to the start circuit. It would fire until you stopped cranking. This is exactly whats happening to my unit. It fires until i stop cranking. But to answer your question, yes i have 12v on the + side of the coil when key is in on position. I believe this wonderful tractor has taken the brunt of many poor mechanical decisions. Every wire has a new ring or prong connector crimped on making me wonder how close to original the wiring is. Edited March 29, 2019 by RetroMower Share this post Link to post Share on other sites
WHX?? 49,651 #23 Posted March 29, 2019 (edited) 59 minutes ago, RetroMower said: this wonderful tractor has taken the brunt of many poor mechanical decisions Welcome to our world then. Not too many left out there that hasn't been maimed by it's well meaning but under educated PO. Get the wiring diagram and trace wires out to make sure they land where should. Good luck and keep us posted. Edited March 29, 2019 by WHX22 1 Share this post Link to post Share on other sites
Sarge 3,464 #24 Posted March 30, 2019 Get an ohm meter and test all of those wires - locking the meter onto the wires and moving the harness around will help a lot when looking for broken/worn wiring that causes intermittent problems. If the wiring is original it is quite common for breaks to occur in the copper over time inside the insulation - which leads to an open circuit. I never trust old, original wiring on these tractors - vibration and time will cause problems. Replace with good quality, stranded automotive grade wire of the same gauge or slightly heavier. Do not ignore grounding points - they need to be clean/bright to make a complete circuit and are generally the issue on most older equipment. Same goes with the main battery cables - just because they look good on the outside doesn't mean they are making a good, complete circuit that is capable of handling the given amperage flowing through them. Lack of a proper engine ground will cause issues with the ignition coil, condenser, and other parts. Sarge 2 Share this post Link to post Share on other sites
RetroMower 349 #25 Posted March 31, 2019 11 hours ago, Sarge said: I never trust old, original wiring on these tractors - vibration and time will cause problems. Replace with good quality, stranded automotive grade wire of the same gauge or heavier I guess replacing as much of the wiring and doing it correctly if i can find a wiring diagram, is the smsrtest route here. One of the first things i did was change the battery cables. Not only were they stiff as sticks but the ground cable ony had a few strands hanging on to its loop connector so makes sense the lighter gage wires are probably worse in areas i cannot see. Thanks for the advice 2 Share this post Link to post Share on other sites