Jump to content
Sign in to follow this  
sorekiwi

1968 "500 Special"

Recommended Posts

sorekiwi

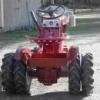
This is a tractor I got from Jon Bell last week. I try to limit myself to the Round Hoods, but when I heard he wanted to move this one, I knew I needed a 500 Special.

I've spent way too many hours of my life at the Indianapolis Motor Speedway, but as much as I hate the place I have to admit that Race day at the 500 is an awe inspiring experience. There's just something about the place that gets into your brain and haunts you.

Before I leave Indiana, I am hoping to get this tractor respectable enough ttat I can take it to the Speedway and get some pictures of it on the "yard of bricks" and in front of the Pagoda. (I think I know someone that will let this happen...)

Anyway, enough history, onto the tractor:

IMG_2062.jpg

It's really a pretty solid tractor. I dont intend to do a full on restoration, I'm just going to address a few small "issues", fit a motor and put it to work. It'll be getting a recoil strart Kohler(sorry WH Police), but otherwise I'll try to keep it reasonably "correct".

First task was to fix some of the cracks in the rear fender pan:

IMG_2072.jpg

most of the welding got done today, weather permitting (temperature!) I'll get a little more grinding done tomorrow, and a skim of filler.

Next on the list will be getting some of the play out of the steering.

  • Like 1

Share this post


Link to post
Share on other sites
 
Rollerman

Mike thats great...to get that one up & running plus a photo op at the brickyard. :whistle:

I'll be watching for updates on this one. :thumbs:

Share this post


Link to post
Share on other sites
 
bell

AWESOME idea Mike! :thumbs:

It's good to know that it is in good hands! :whistle: :whistle:

Share this post


Link to post
Share on other sites
 
sorekiwi

Found this picture online the other night, from a practice day at the '68 500.

ims_2.jpg

Dont think the tractor is a 500 Special though, can anyone identify it?

Share this post


Link to post
Share on other sites
 
TT

It looks like one of the infamous 1968 Charger 9 models (complete with Kelly's whitewalls!) :thumbs:

Share this post


Link to post
Share on other sites
 
sorekiwi

Thanks TT, havent got these square hoods worked out yet... :imstupid:

Here's a zoomed in version of the tractor:

close-up.jpg

Share this post


Link to post
Share on other sites
 
Rideawaysenior

Sounds like a nice plan. Those sure were the days. The 500 Special's leading into the raceway. Sure wish I was old enough to have seen that.

Share this post


Link to post
Share on other sites
 
Rollerman

Very cool pic Mike....I like the Indy car too. :thumbs:

I see "Hawkeye" already put his eye on the tractor in question.

Can't wait to see pics of your on the track.

Share this post


Link to post
Share on other sites
 
sorekiwi

No pic's this time, just a comment that this ones being a SOB.

The rear hitch was frozen up, and took oxy acetylene to free up. But the hitch pin is frozen real good...

Both rear hubs are well frozen too. Time to build a better puller, and refill the oxy tank. The axle seals werent leaking, but I doubt they're any good now with the amount of heat I've used so far...

Time for the kiwi to get angry and show it whose boss!

:thumbs: :whistle:

Share this post


Link to post
Share on other sites
 
CasualObserver

I missed this one the other day.... Anyone notice the Massey MF 10/12/? about 10 feet behind the Charger?

Share this post


Link to post
Share on other sites
 
Rollerman

I'm still checking out the vintage Indy car. :thumbs:

Mike worst case scenerio...cut the pin on both sides on the inside of the hitch (carefully)

With the hitch off I've always had real good luck knocking whats left of the peices out.

A new pins pretty easy to make to if you have access to a lathe?

Can't help you on the hubs...I have one of Dale's super pullers here & never have bought the hardware to finish it yet. :whistle:

Share this post


Link to post
Share on other sites
 
sorekiwi

I missed this one the other day.... Anyone notice the Massey MF 10/12/? about 10 feet behind the Charger?

Yeah, noticed that but didnt know what it was. I guess Wheel Horse didnt have an "exclusive" deal at the Speedway in those days...

Share this post


Link to post
Share on other sites
 
sorekiwi

Mike worst case scenerio...cut the pin on both sides on the inside of the hitch (carefully)

With the hitch off I've always had real good luck knocking whats left of the peices out.

A new pins pretty easy to make to if you have access to a lathe?

Can't help you on the hubs...I have one of Dale's super pullers here & never have bought the hardware to finish it yet. :whistle:

Well it was a long and bloody battle for us both, and we are both showing scars...

IMG_2096.jpg

Yes I broke a hub, I think I cracked it the other night in the preliminary scuffle. I build a "Dale Puller" and it worked much better, but I still had to use a lot of heat, and it was a struggle all the way.

IMG_2089.jpg.

IMG_2092.jpg

The hitch pin was relatively easy. I did as Stephen suggested and cut the pin each side between the hitch and the case. (Never attacked a horse with a Sawzall before, but this was war!) Again it required heat, but the pin was finally beaten out of the case. I wasnt going to go into the box on this one, but with the amount of heat I used, I'm thinking I better had. The good news is that there was no signs of water in the gear box! :whistle:

Looks like this ones turning into a bigger project than I intended... :thumbs:

IMG_2095.jpg

Share this post


Link to post
Share on other sites
 
CasualObserver

Well it was a long and bloody battle for us both, and we are both showing scars...

I hope that's paint on the bench (or floor?) in the first picture.... otherwise I'm not sure if i could declare an honest winner. :thumbs:

Glad you got it loose without any more permanent damage Mike.

Share this post


Link to post
Share on other sites
 
bell

DOH! I bet there were some interesting words coming from the Kiwi during that ordeal... :dunno:

Just wondering, but... if the seals weren't leaking... and this was just a "tidy-up"... why'd the hubs have to come off? :thumbs::whistle: (Going to be another FULL RESTO, isn't it... lol ) I knew you wouldn't be able to resist.... :whistle:

Share this post


Link to post
Share on other sites
 
sorekiwi

DOH! I bet there were some interesting words coming from the Kiwi during that ordeal... :whistle:

(Going to be another FULL RESTO, isn't it... lol ) I knew you wouldn't be able to resist.... :thumbs:

I was swearing in Kiwi, so as not to upset the neighbors...

Its not a full resto, just a tidy up, gearbox rebuild, repower, and a coat of paint (if Indiana ever warms up enough!!).

But it wont be a Garage Queen either, she's gonna have to earn her keep!

Share this post


Link to post
Share on other sites
 
nwpahorseman

Looks like this ones turning into a bigger project than I intended...

arent they all :thumbs:

Share this post


Link to post
Share on other sites
 
sorekiwi

Despite frigid conditions in my shop today, I got her stripped into a pile of pieces, and started to see what she needed. The frame is pretty good, I didnt find any cracks, and apart from missing one of the belt guard mounting tabs, it wont need to much repair.

Most of the slop in the steering was caused by a combination of this:

IMG_2102.jpg

and this:

IMG_2103.jpg

The front part of the steering shaft was worn about .080" and the hole in the frame that supports it was worn another .040". Not sure why they didnt use the bearing support on the front of the steering shaft on this model, but its getting one now...

(shown sitting on the right hand frame rail in this shot):

PICT0003.jpg.

Otherwise it was just a matter of getting things ready for a trip to the sand blaster for the big bits, or my small blasting cabinet for the little stuff.

PICT0007.jpg

PICT0008.jpg

I'm gonna follow my normal routine of trying to get the frame ready first, so as the other pieces are finished they can be bolted straight back onto the tractor.

I'll try to get a mock up done tomorrow to be able to fab up some belt guard mounting tabs, and a little bit of welding to tidy up some small details such as the worn pins that the hood hinges on:

IMG_2081.jpg

At least I wont be going to bed toniight cursing that stinkin' tractor! :thumbs:

Share this post


Link to post
Share on other sites
 
Brian1045

I dont intend to do a full on restoration,

You were saying? :whistle::whistle:

Hell, You might as well go for it! The cussing part is just about over. That would be a sweet restore! To late to just polish her now. :thumbs:

Share this post


Link to post
Share on other sites
 
clintonnut

Sorekiwi,

An easy fix for that hub is to throw the hub and the broken piece on the grill or in the woodstove until they're red hot. Then take them out and weld them back together. Make sure they are prepped before you heat them. After you weld them, grind the mount side flush. The welds come out REALLY HARD. We've done this with suburban steering sectors and hubs :thumbs: .

Good Luck

Charlie

Share this post


Link to post
Share on other sites
 
sorekiwi

Well, its going back together:

IMG_2109.jpg

Just kidding, this is the mock-up to put the belt guard mounting tabs back on. Now I know where they need to go, I just need to find out what they look like...

Also did some tidying up on the frame. I straightened the hood mounting hinge pins, and brazed up the deep groove that had been worn into the pin by running the tractor without the nylon bushings in place.

IMG_2104.jpg

I brazed it because there was a lot of wear on the backside of the pin, and I couldnt get the mig gun back there. It was relatively easy to "float" the bronze to the back side of the groove. A few minutes with a file, and I think it will work fine.

Not sure if I'll repair the engine mounting holes or not. They've been slotted a bit to fit a different motor. The holes will be hidden once the motor has been bolted in place, but non round holes really annoy me, and I know I'll wish I'd fixed it every time I look at them...

IMG_2105.jpg

Share this post


Link to post
Share on other sites
 
KyBlue

Good progress so far...

So much for a simple freshening up...

Share this post


Link to post
Share on other sites
 
sorekiwi

Got the belt guard mounting tabs built and welded in today. The hardest part of the job was removing the broken piece of the tab that was still there. The tabs were spot welded on, but also had a small bead run down each side. Because they were inside the "console", close to the top flange and one was really close to the hoodstand it was a real ***** to get a grinder in there to remove them.

I had no pictures of what the origionals looked like, so I just winged it, and plug welded them in through the holes I made drilling out the spot welds. It came out OK, especially since they'll be hidden by the belt guard itself

IMG_2115.jpg

Belt guard mounted up:

IMG_2117.jpg

The almost finished seat pan in place:

IMG_2122.jpg

With the cracks in the seat pan welded and the subframe underneath it straightened there is now some clearance under the front of it:

IMG_2126.jpg

Bit more welding still to do, before I can start sending bits for sand blasting.

Share this post


Link to post
Share on other sites
 
jusjeepn

Mike, If I just freshened up the way you do, I could have the whole herd restored inside a year. :thumbs: Excellent work! You trying to get this done before the move? Looking great!!

Share this post


Link to post
Share on other sites
 
KyBlue

I agree. Looks great!

Share this post


Link to post
Share on other sites
 

Create an account or sign in to comment

You need to be a member in order to leave a comment

Create an account

Sign up for a new account in our community. It's easy!

Register a new account

Sign in

Already have an account? Sign in here.

Sign In Now
Sign in to follow this  

×
×
  • Create New...