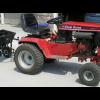
Ken in Iowa 0 #1 Posted December 19, 2008 Snows coming fast, and of all things I had the outer bearing on my PTO go to pieces and looks like its going to cause me problems in using my snow blower. I have searched through this group but have not been able to find anything on the subject, and I can't find any information in the manuals that I have on hand. I tore it apart and bearing, #36, in the attached drawing appears to be the only part that was bad. After replacing it, the clutch lever wouldn't move very far forward to engage the clutch, as if something was bent or knocked out of adjustment, but I can't see anything that was damaged. I adjusted the trunion #14, and was able to get the PTO to engage and disengage, but the belt just coasts on disengagement. Part #23 appears to be a brake shoe, that should rub against the pulley, #37, when the clutch is disengaged, but I couldn't get it to put enough pressure against the pulley, to stop it from turning. The brake pad, #23, was worn to the point that the brass rivets were hitting, but the part had to be ordered and won't be here for a week. I planned on using it until the new part arrives, as it was working before the bearing went out. What am I missing? Everything appears to be running smoothly but the pulley appears to be rubbing against the clutch material and the brake pad, both, at the same time, and dosen't appear to have much movement in and out. I feel like the clutch should be pressed against, when the lever is pushed forward, and it should pull away from the clutch, and rub against the break, when the lever is pulled back, and I'm not sure how to achieve that. I hope the attached GIF that I have used isn't to large. I tried to make it smaller, but it didn't look clear and I was affraid to leave it out as I wanted to be clear on what I was talking about. Thanks in advance, for any help this group can provide. HELP. Share this post Link to post Share on other sites
TT-(Moderator) 1,169 #2 Posted December 19, 2008 Did you install both snap rings (#34) on the stub shaft? (#33) One should be inside the bearing and the other on the outside. Is the new bearing fully seated in the PTO pulley? If you managed to get the internal snap ring (#35) installed again, that answer would be "yes". Did you thoroughly check for old bearing pieces inside the PTO pulley? As for the PTO brake..... you can take it or leave it. They never showed up until the 70's when all the safety regulations started. Most of the time they never work - even with a new pad and proper adjustment. (do you really think a tiny little brake pad like that could stop a snowthrower auger or a 48" mower deck? ) Share this post Link to post Share on other sites
Confused99 2 #3 Posted December 19, 2008 My parents in Marengo said they might get some ice with this storm too. I hope that's not the case for both of you guys down there. I can't help with your clutch problem but if I were a betting man, I would guess that the new bearing and parts in that area were not installed quite right hence not letting the clutch pully move over far enough to lock in. Jason Share this post Link to post Share on other sites
Duff 206 #4 Posted December 19, 2008 Hi, Ken, I think TT has given you the best troubleshooting advice, and I concur with him about the brake pad - next to useless IMHO. If it serves any useful purpose, and this may be just my own experience, it keeps the PTO from spinning when I've got the deck and deck drive belt off the tractor. On my 312-8 the amount of "travel" of between engaged and disengaged on my PTO (part #37) is very, very short and it seems to work just fine. Just my two cents worth...... Duff :D Share this post Link to post Share on other sites
WheelHorse_of_course 100 #5 Posted December 19, 2008 I concur with the above. I see two general areas where a problem could be: 1) Somehow 33 through 36 are sticking out too much (wrong assembly order, something not seated, etc) or 2) Something with 17 is wrong. Possibly flipped over ? or 31 is inserted through the wrong hole? or something similar. Best of luck. Share this post Link to post Share on other sites
Ken in Iowa 0 #6 Posted December 19, 2008 Boy I sure appreciate the fast feed back. I was very careful with reassembly of the parts. I put the first snap ring on the long end of the stub shaft, so I wouldn't have to slide the bearing over the hole in the end, then I installed the bearing on the shaft and then the snap ring on the short end. I have snap ring pliers and made sure the rings were seated in the grooves. Then I put the bearing and shaft assembly in the pulley and installed the snap ring in the ID to hold it in place. The bearing was a snug fit in the bore, but it would slide if pushed with some force. There was about .005 movement, in and out, between the back shoulder and the snap ring, with the bearing, after I installed it. All the balls came out of the old bearing, and the stub shaft, rattled around and tore up the seals in the old bearing, making them pop out of the bearing in pieces. With this mess, I was worried that something else was damaged, and looked over the inside of the pulley very closely, and made sure the needles looked OK, and that there weren't any extra pieces left inside. I never took out the needles, I just rolled them, and inspected them with a light, and added new grease. I looked at the break pad, and wondered how this was going to stop much, but I felt that it used to at least slow the rotation down somewhat, and eventually stop the blades. The pad is also worn enough that the slots for adjustment of the pad have the bolts all the way to one end, and may be preventing me from putting any more pressure, with the pad, on the drum. It may work better with a new one. I assumed that when the lever was engaged, the break pad would have .015, (or some amount), clearence, and then when it was disengaged, the clutch pad would have the clearence, and the pulley was supposed to be pulled outward, and rub against the pad, but it sounds like that is not the case. Does the break pad rub the pulley all the time? It will get me through the coming snow, but I just though there was some adjustment that I didn't know about. Thanks again for your help. :D Share this post Link to post Share on other sites
Duff 206 #7 Posted December 19, 2008 but I felt that it used to at least slow the rotation down somewhat, and eventually stop the blades. The pad is also worn enough that the slots for adjustment of the pad have the bolts all the way to one end, and may be preventing me from putting any more pressure, with the pad, on the drum. It may work better with a new one. I assumed that when the lever was engaged, the break pad would have .015, (or some amount), clearence, and then when it was disengaged, the clutch pad would have the clearence, and the pulley was supposed to be pulled outward, and rub against the pad, but it sounds like that is not the case. Does the break pad rub the pulley all the time? I think the worn out pad is part of your problem; with the new pad you'll have some room in your adjustment slots. The brake pad does NOT rub against the pulley all the time, only when the PTO is disengaged. When I replaced mine, I engaged the PTO (engine off, of course!) and then set the pad to the thickness of an index card away from the drum. I don't have any feeler gauges, but this seems to be working pretty well. The pad does slow down my 37" SD deck when I disengage but it certainly doesn't stop it quickly. Hope this helps, and Happy Holidays! Duff :hide: Share this post Link to post Share on other sites
WheelHorse_of_course 100 #8 Posted December 19, 2008 Ken, Something is not right. Remove the brake pad for the time being. With the PTO disengaged there should be plenty of slop - you should have a visible gap between the clutch and the pressure plate (pulley, whatever you call it). If there is no gap with the PTO disengaged you will be wearing out your clutch whenever the PTO i disengaged so this is important. If this is ok then engage the PTO (engine off) and then install the PTO brake pad with 0.012 gap between it and the brake pad. So, once the above has been done with the PTO disengaged you would get 0.012 between the clutch and the pressure plate. NOTE: the trunion adjustment should be only 1 turn beyond the point where slippage occurs. Best of luck. Share this post Link to post Share on other sites
WH854 45 #9 Posted December 19, 2008 Here is a thread about adjustment of a PTO clutch! http://www.wheelhorseforum.com/index.php?showtopic=3464 Might help some! Chas. Share this post Link to post Share on other sites
Ken in Iowa 0 #10 Posted December 19, 2008 Thanks Duff and Glen for your comments. The way your describing, is the way I think it should work also, but right now, I never get any clearance in either piece. I'm going to try your suggestion of taking the brake pad off and seeing what clearance I have. I think something got bent in the linkage, and even when it's in the off position, the linkage won't allow the clutch to separate. I've adjusted the trunion towards the end of the threaded shaft, as far as I can go, and still get it to align up and go into the hole in part #17 and put in the hairpin. I'll play with it today. We got quite a bit of snow, and it looks like a lot of ice under it. I'm half affraid to go out and even look at it. It's really good when you can put togeather this many experianced users to share this kind of knowledge. I've had this tractor about three years, and have really enjoyed using it, and following along in the group to learn from others. Thanks again. :D Share this post Link to post Share on other sites
Duff 206 #11 Posted December 19, 2008 Ken, my machine (twin to yours) is in storage so I can't get to it right now to check, but are you sure you went the right direction with the trunion on the shaft (#14 on #11)? Did you try adjusting it in instead of out to see if you got a better result? Just thinking about options..... Duff :hide: Share this post Link to post Share on other sites
Confused99 2 #12 Posted December 20, 2008 Would it be possible to snap a couple pics? Might help Jason Share this post Link to post Share on other sites
Ken in Iowa 0 #13 Posted December 20, 2008 Well I got the clutch working great, thanks to the help of all of the members that responded. It's funny how when something breaks just before the threat of a big storm, nothing goes right. It's probably the fear of being forced to use the old snow shovel standing in the corner. I basically had the clutch and break, pinched to tightly to do any adjustment. I took the break pad off altogeather at the start, and was able to then adjust the clutch to about one turn tighter after it engaged. I also noticed that there was a hairpin, #32, missing from the bottom of the "C" shaped part, #31, that I think was letting the part, #31, drop down and put the linkage in a bind. It must have sheared off when all the ball bearings flew out. After everything was working good, I put the old break pad back on, using a .012 shim as a spacer, and even it's working pretty good. I think a new one will help but as someone said, theres a lot of motion to try and stop with such a small pad. At least it's not just coasting forever now. I spent the afternoon blowing snow all over the neighborhood. I am amazed at how these single stage blowers will throw snow, and also what power the motor produces when it is put under load. There were some drifts that the city plows pushed into driveways that were packed pretty tightly, and you can just LETT'ER EAT! I would love to try a plow on the front of mine, to see how they would work for me. Using a snow blower has it's advantages, with no piles of snow around, but they are messy with out a cab. There were places that I couldn't keep from blowing the snow, into the wind and wound up with more snow on me than I like. I'm going to keep and eye open this spring for a plow to try. Thanks again for the help and I hope everyone has a Happy Holiday. :hide: Share this post Link to post Share on other sites
WheelHorse_of_course 100 #14 Posted December 21, 2008 Ken, good to hear the news. :hide: Share this post Link to post Share on other sites