Jparkes43 329 #76 Posted March 21, 2016 (edited) Hello all again. well progress has been slower than i had hoped but we are getting there. so i had to get a new wire wheel attachment as i wore my last one out which set me back a bit. and then being ill/busy a few times meant i hadn't the time. so my main work has been done in the evening after dinner when i'm free which means any painting is off the cards so only prep work can happen. painting etc i really want to find time to get on with but don't worry i will do. started off one night with the front steering. by this time i had no new wire wheel so i was working with a flathead screwdriver and a wire brush. ewwwwwwwwwwwww one i had got the most of the very loose stuff that wanted to come off manually (and its looking alright) i started to think about other parts that needed doing. so the gearbox it was. i took the hubs off the gearbox so they are awful!! the greasy mud is so thick and it will take a long time to get to the point where they are ready for a wire brushing. the left one i had started on, the right is for comparison. james p.s. I hope to do something tonight but sometimes i'm not always on my computer to do an update so not sure when you will see that. Edited March 21, 2016 by Jparkes43 2 Share this post Link to post Share on other sites
Jparkes43 329 #77 Posted March 29, 2016 Hello all. something here for you guys. had a nice easter holiday away so wanted to get back into the swing of things ahah. so it was back on with cleaning etc etc. ok so started out on the hubs but cleaning them by scraping the stuff off them and then a good soak in petrol and then a brush up. to be honest they were quite nice under all that grease etc. i can actually see red!! ahah not looking to bad. then i got a bit bored of cleaning etc (p.s i have now got more wire wheels and paint etc) so i wanted to start tinkering. started off with my key situation. i wanted the battery isolator look but using my key. so i combined the two then i started to think about my rev counter. made a bracket up out of leftovers but hadn't got any pictures. will do soon. thats all for now. james 1 Share this post Link to post Share on other sites
Jparkes43 329 #78 Posted April 1, 2016 Hello all. so back again with the cleaning and painting etc etc shiny shiny! 1st coat of primer applied. this was done earlier today that is all james 5 Share this post Link to post Share on other sites
Jparkes43 329 #79 Posted April 1, 2016 Hello again today. well a mid day update earlier and now for a end of day update. well i got another coat of primer on and i think it looks great! then i started on my dash piece/bodywork so i managed to get off the bolts that were very tight!! some force was required. all in bits!! started cleaning those bits with a manual wire brush and a few scrapers etc. very similar to what I've been already doing. sorry for the bad last picture! james 3 Share this post Link to post Share on other sites
callum12 256 #80 Posted April 1, 2016 wow, doing a proper job there, that front axles looks freshly cast! looking really good! Callum 2 Share this post Link to post Share on other sites
Jparkes43 329 #81 Posted April 1, 2016 (edited) Hello Callum ah thanks she sure is looking good and yes i am trying to ah it does! i'm loving the new wire wheel doing such a good job. thanks! will keep you guys updated. i'm also glad i got that dash apart because not only did i get it clean but its also easier to store. Saturday i wouldn't expect anything just to say as i may be quite busy but not sure what i'm doing Sunday james Edited April 1, 2016 by Jparkes43 Share this post Link to post Share on other sites
Jparkes43 329 #82 Posted April 11, 2016 Hello again. well i'm very sorry for my big gap in updates but its not been a quiet holidays like i thought it would be! and also trying to save some money aswel doesn't help so heres all for now. James 1 Share this post Link to post Share on other sites
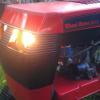
Jparkes43 329 #83 Posted April 13, 2016 Another small update for you guys. well i'm trying to get along with this while school takes up more and more of my time for preparation of exams and also money seems to disappear ahaha. so i gave my front steering/axle a small wert and dry, the reason i didn't go to the full extent i had with other parts is because its cast and its going to be rough anyway so i have it a little flattening down and some red paint applied. only a few light coats so far needs more (but i will need some more paint soon ) looks nice however. James 3 Share this post Link to post Share on other sites
Pullstart 64,398 #84 Posted April 14, 2016 Just ran through some of your past updates, it might be a good idea to replace axle seals if your hubs are that greasy and coated with grime. It would be a shame to see a nice paint job get all oily let alone running your transmission dry 4 Share this post Link to post Share on other sites
JPWH 6,250 #85 Posted April 14, 2016 Looking good James. Lots of work to do with a wire wheel. Good job so far. 1 Share this post Link to post Share on other sites
Jparkes43 329 #86 Posted April 14, 2016 Hello. yes great thinking i am going to look around for some if i can as what you say makes perfect sense. haven't got onto the transmission yet so when i come to it i will do so. Thanks a lot and yes it is!! james Share this post Link to post Share on other sites
Jparkes43 329 #87 Posted April 17, 2016 (edited) Hello again. little few bits here for you all. got some more paint so thats a good start. (side note, pictures from now on are going to be worse than before, very sorry but my phone decided to completely go downhill until it wasn't useable so i'm using and older phone with a not so good camera, sorry, hopefully a new phone should be sorted soon though) any way back to what is important. I got the final few coats of paint on the front axle and its looking rather nice, let it cure and paint the associated parts and it will be ready to go back on I also got around to taking the front wheels off the front hubs etc and undoing the ball joints etc. i think i'm going to need new ball joints and rubbers etc as these ones have had it. i have also soaked them in petrol and given them a quick clean after that picture, haven't got one of it but next time i do something with those i'll show you. James Edited April 17, 2016 by Jparkes43 2 Share this post Link to post Share on other sites
Jparkes43 329 #88 Posted April 18, 2016 Hello all. Nice little update for you here! Ok so i wanted to get my front axle put back on so this morning before school did some prep work on this and by the end of the day the paint was cured etc. Picture is first coat. Guess whats cleaning in here (hint its not the above) If you guessed, grease nipples, bolts and washers then you were correct. Back in and looking good. (i may get some new ones at some point) but they work well and look alright so there isn't a need i suppose. Meanwhile this is great!! All back in! looking superb! Another pic Thats all for today Thanks James 3 Share this post Link to post Share on other sites
Jparkes43 329 #89 Posted April 19, 2016 Not to much to report tonight. only an hours work though, but better than nothing i guess. (had to stay at school late etc) Any way heres a quick before And after James 1 Share this post Link to post Share on other sites
Jparkes43 329 #90 Posted April 24, 2016 (edited) Hello. Well despite being out all day i still managed a few hours in the garage today to do some tractor work in the evening. todays task. more stripping of the gearbox. And this left me with this. (does anyone know if i can get the brake linings?? because mine appears to be absolutely disintegrated. then i started on the drive pulley which was very stuck so i spent over an hour just trying to get this off!! but eventually it came off and thats it for the gearbox stripping. just got to clean it up etc now oh and i'm swapping over my engine drive pulley for the one on my gearbox and vice versa. I do have a separate topic talking about the pulley swap. james Edited April 24, 2016 by Jparkes43 Share this post Link to post Share on other sites
953 nut 57,654 #91 Posted April 24, 2016 1 hour ago, Jparkes43 said: anyone know if i can get the brake linings?? Contact @rmaynard, he is a vendor here and sells them. 1 Share this post Link to post Share on other sites
russellmc301 600 #92 Posted April 24, 2016 i used a piece of conveyor belt works great, will sent some if you need a piece for brake lining. Share this post Link to post Share on other sites
Jparkes43 329 #93 Posted April 25, 2016 8 hours ago, 953 nut said: Contact @rmaynard, he is a vendor here and sells them. ok Thanks 8 hours ago, russellmc301 said: i used a piece of conveyor belt works great, will sent some if you need a piece for brake lining. Oh interesting! That would be lovely if it works. I will PM you thanks James 1 Share this post Link to post Share on other sites
Jparkes43 329 #94 Posted April 27, 2016 Hello. Ok so more gearbox work here. Got round to giving the gearbox a proper wire brushing and sanding down. After many coats of paint here we are. Yes were going matt black for the box! will fit nicely with the red and black theme I think it looks pretty nice. James 1 Share this post Link to post Share on other sites
Jparkes43 329 #95 Posted April 27, 2016 Hello all again. Well those photos were from yesterday. So today i decided i was going to take off the masking tape. take off the gear selector (previously i didn't know it came off unless you took the box apart) looking good so i bolted it back on. so i put the engine on just for the picture. i think the red and black looks really good! Now to get on with the rest of the running gear. James 1 Share this post Link to post Share on other sites
Jparkes43 329 #96 Posted April 28, 2016 Hello. Continuing today with the idea of getting a rolling chassis. I started off with cleaning up the rear cast hubs. same story as doing the front axle and gearbox All primered up (for tonight anyway, we will see how it looks tomorrow) Really enjoying spending my evenings in the garage after a good few hours doing coursework Happy with how its going along, tomorrow everything is due in so i hope to do bits from lunchtime onwards. Now just got my exams to do in a month or so! got to do revision for that. Thanks James Share this post Link to post Share on other sites
callum12 256 #97 Posted May 2, 2016 the black gear box looks really good! I can't wait to see it all together, that pulley swap will be pretty fast. being quite a small pulley there may be chance of the belt slipping that said it might be just fine. I would definitely use a cogged v belt though. callum Share this post Link to post Share on other sites
Jparkes43 329 #98 Posted May 2, 2016 Thanks Callum!! oh neither can i. i have another update to post tonight when i have downloaded the pictures more exciting stuff. It should be!! yes i have been warned so we will have to see how it goes. ah ok thats a good idea i will get one ordered up thanks James Share this post Link to post Share on other sites
Jparkes43 329 #99 Posted May 2, 2016 (edited) Hello. as promised heres a nice update for you. I got the hubs painted in red. Im quite happy with how they turned out. got the gearbox bolted on When they were cured i put them on the gearbox using my newly cleaned bolts That is all for the gearbox side. up next, front end. I thought it was fitting since the gearbox was on to get the engine mounted up Then i had got the pulleys on the correct item. big pulley on the engine, small pulley on the gearbox. excitement intensifies I have also cleaned up and painted the front hubs they are cured so may put them on tonight. I did clean a few more items up but not much to photograph. Many thanks James Edited May 2, 2016 by Jparkes43 2 Share this post Link to post Share on other sites
Jparkes43 329 #100 Posted May 4, 2016 Hello. Bought a set of cir clips (i think they are called). they should be here start of next week so i can put some of the front end together. James Share this post Link to post Share on other sites