Jump to content

Recommended Posts

km3h

Yes Geno, I have been there and done that too. How about when you are looking for one of your several drills and can't find it. You look and look and suddenly there it is right out in plain sight. You have spent half an hour looking for it and probably saw it half a dozen times, it just didn't register. So then the rest of them pop up too.

  • Like 3

Share this post


Link to post
Share on other sites
 
Martin

sounds just like how i work too.


i have an added bonus of having a teenager who 'borrows' my tools as well. they are easy to find afterwards though, i usually spot most of them outside while I'm mowing or doing any yard cleanup.......

  • Like 1

Share this post


Link to post
Share on other sites
 
Geno

At least I'm not the only one here with old man disease.    :laughing-rolling:

  • Like 1

Share this post


Link to post
Share on other sites
 
km3h

Old Man's Disease!!!!!!! I represent that remark.

  • Like 1

Share this post


Link to post
Share on other sites
 
km3h

Believe it or not, I did actually get some tools put away. Then I got sidetracked. My garage is an attraction for the neighbors and they stop by often. We had a few beers and after they left I decided to do a little more on the tractor.

Got the shift plate on and the fuel tank. Don't want to get too far ahead as I know I will have to drill a hole in something after I get the foot pedal from Matt. I also got the brake band on and bolted down the dash pedestal.

After I get the foot control all bolted up, I will put the wheels on and get it down on the floor to finish it up. I need to get new tires for it but that will have to wait till next month.

post-2564-0-88079000-1410643644_thumb.jp

  • Like 2

Share this post


Link to post
Share on other sites
 
Geno

Looks great Nick, just don't work on it after tooooo many beers.   :teasing-poke:

Share this post


Link to post
Share on other sites
 
km3h

Geno

I go weeks and months without a beer and then the neighbors come over and I have to offer them one but two is my limit even when I have steamed crabs.

I went back out and got myself into trouble. I found a spot that I had scratched on the dash pedestal and like a dummy I tried to fix it without thinking about it first. Wound up putting too much paint on it and now I have a run. Should have rigged up a light so I could see better but was too lazy and thought I could get away by cheating a little. I'll let it dry a couple of days and sand it down and reshoot it. More delay.

All in all, I am very pleased with the way things are going and the progress I am making.

Share this post


Link to post
Share on other sites
 
km3h

What do you guys use to glue the rubber mats on the floorboards?

Share this post


Link to post
Share on other sites
 
woodchuckfarmer

3M weather strip adhesive ..works great. .......Wayne

  • Like 1

Share this post


Link to post
Share on other sites
 
Geno

The weather strip adhesive is pretty tough.  :)

  • Like 1

Share this post


Link to post
Share on other sites
 
Wayne

Yeah, 3m deluxe weatherstrip adhesive. even comes in a red and white tube. I used some to glue the rubber trim back onto a car door once... was still holding when i sold it :) tractor is looking good!

Edited by Wayne
  • Like 1

Share this post


Link to post
Share on other sites
 
km3h

The new decals from Terry came today. Thank you Terry they look great as I knew they would. Also got th new tie rods. When I started to put them on the tractor I noticed that the mounting holes on the spindals were elongated. Has anyone put bushings in them for a tighter fit? I guess I can weld them and then rediroo, but would rather not as they are already painted.  


I am going to have to build a smaller shack to paint in as I have noticed foreign objects in some of the pieces I ahve painted recently. I have no experience with wet sanding and I am afraid that I will just ruin something by tryinge it. Damn rattle can paint dries slow and you can't put hardener in it. Think this will be the last one I do that to.

Share this post


Link to post
Share on other sites
 
Geno

If the mounting holes were elongated they must have been loose at some point.  You should be fine to just use it as is, once you tighten the rods they wont move arond.  :handgestures-thumbsup:


Wet sanding is easy, just dont spend too much time on the corners or edges and make sure the paint is cured. 

Edited by Geno
  • Like 1

Share this post


Link to post
Share on other sites
 
KyBlue

To be honest, I will be money that you'll be the only who notices the foreign objects unless they REALLY want to find something to knit pick, and tbh if they do that...they're just jealous!


You're doing a awesome job!  Keep up the work, Loving it!

Share this post


Link to post
Share on other sites
 
km3h

If the mounting holes were elongated they must have been loose at some point.  You should be fine to just use it as is, once you tighten the rods they wont move arond.  :handgestures-thumbsup:


Wet sanding is easy, just dont spend too much time on the corners or edges and make sure the paint is cured.

I have several grits of emery paper from 80 to 1,000. What would you start with and do you stick to one grit or progress gradually up?


To be honest, I will be money that you'll be the only who notices the foreign objects unless they REALLY want to find something to knit pick, and tbh if they do that...they're just jealous!

You're doing a awesome job! Keep up the work, Loving it!

I am sure there will be some jealous guys around here. They are already making remarks about why anyone would go to so much trouble for an old tractor. The truth is I will know it is there and that will not make me happy. I don't care if I have to repaint the thing 5 more times, I am going to get it right and to my standards. That's just me. It won't be as good as some folks can do but it will be as good as I can make it. Why go to all this trouble to settle for less.

  • Like 1

Share this post


Link to post
Share on other sites
 
Geno

You sound more like me every day.  You drive yourself crazy like I do don't you?   :laughing-rolling:   "I don't care if I have to repaint the thing 5 more times, I am going to get it right and to my standards."


A pic of the "damage" will help pick a starting point on grit.  What do think it is in the paint?

  • Like 1

Share this post


Link to post
Share on other sites
 
km3h

There is a tiny bug in one spot and some dirt in another few places. I am going to let it dry for about a week and then I will sand it down a bit.

There was a product that came in a tube I had some years ago that you could fill in spots after you had put a coat of paint on let it dry and sand it lightly and then paint over it. It was the color of red rouge and came out of the tube about the same consistency. Don't remember what it was but I am going to go to an auto paint store and ask a few questions. It is right in the center of the hood and I really want that thing to look good.

I tried to take some photos of it but they did not turn out with my cell phone. Tomorrow I will take the SLR out there and take some good quality photos.

I ran into another problem. As many photos as I took of this project, I did not get any of the routing of the fuel line. Now I am scratching my head trying to figure out where it goes. If I have to I can take the covers of one of my other tractors and take a look.

Share this post


Link to post
Share on other sites
 
Geno

May have been red spot putty. 

Share this post


Link to post
Share on other sites
 
km3h

Does that stick to paint and get hard?

Share this post


Link to post
Share on other sites
 
Geno

It's what you use over pitting, or to fill the small air bubble holes and sand marks in bondo. 

Share this post


Link to post
Share on other sites
 
km3h

Got some stuff today that comes in two parts. It is for fixing stuff like this and can be used over paint. Going to give this paint some time to get hard before try to fix it. I was thinking that I might get away with removing the foreign material and then using a tooth pick spray some paint on it and fill the resulting holes and then sanding it down. Bought some more sand paper today 1,500 and 2,000 grit. I am going play with it a bit and if all fails I will repaint the whole hood. All it takes is time and paint and I have plenty of both. Each time you do something it becomes a learning experience.

  • Like 1

Share this post


Link to post
Share on other sites
 
Geno

It's just gonna get worse with this cool weather coming on, especially the bugs.  :eusa-doh:

  • Like 1

Share this post


Link to post
Share on other sites
 
km3h

This morning I went to Tractor Supply. They sell hardware by the pound. Bought four pounds of bolts. Zink coated and really cheap. I was really surprised how many pieces you get in Four pounds. Also bought a couple pair of Jeans while I was there.

Came home and fooled around out there for a while and decided to repaint the hood. Sanded it down smooth and painted it. This time it turned out the way I wanted it to. No bugs or dust.

I also finished installing all the hydraulic lines.

post-2564-0-34009600-1411087597_thumb.jp post-2564-0-21172700-1411087639_thumb.jp

While sanding it down, I believe I discovered what wet sanding will do, if it is done right. While I did not wet sand it, I did use some very fine paper. I could see the orange peal just disappear as I sanded. When I get this job finished I am going to experiment with an old MTD hood I have laying around here. I believe it would be worth the time to teach myself to do this and then polish it up real good.

  • Like 2

Share this post


Link to post
Share on other sites
 
Geno

You're gonna really like wet sanding.  When it's wet you can see exactly what you'll end up with better. 

Share this post


Link to post
Share on other sites
 
km3h

Yes, I think I will but not on this project. I am scared to touch this hood again and it will do just fine the way it is. I will wait two days and then move it inside to the basement. Going to leave it sit there for a few weeks before I touch it again. This Rusty O paint does not dry very fast. When I was sanding I could tell that it was not really hard yet. Next one gets sprayed with a gun and hardener.

Share this post


Link to post
Share on other sites
 

Create an account or sign in to comment

You need to be a member in order to leave a comment

Create an account

Sign up for a new account in our community. It's easy!

Register a new account

Sign in

Already have an account? Sign in here.

Sign In Now

  • Similar Content

    • t_furl43
      By t_furl43
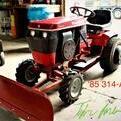
      A really nice 1995 wheelhorse 416H runs and drives great no leaks only 920 hrs, motor runs strong, starts right up, brand new back tires 23x10.5x12, has slot hitch, comes with 42” RD deck and 42” snowplow, wheel weights and all 4 hubcaps, I’ll also throw in an extra set of tires, will need a seat but that’s it, pickup in millersville pa 17551, price is negotiable, will trade for an Economy Powerking tractor or John Deere 318
    • Bill D
      By Bill D
      I picked up a low hour, (189.6) abandoned 416h yesterday.  Does anyone know what size the o-ring is that seals the carb to the air cleaner?  Mines cracked and I expected it to break in pieces when I remove it there by making it useless for sizing at the hardware store.  Also, the voltage regulator is missing.  Has anyone tried used a regulator from a Kawasaki as a replacement?  I have a couple here and thought about trying them.  Can anyone tell me if this engine has the governor spacer with the tab?  Thanks.


    • HorsePower58
      By HorsePower58
    • HorsePower58
      By HorsePower58
    • HorsePower58
      By HorsePower58
×
×
  • Create New...