Jump to content

Recommended Posts

Geno

Oops, sorry Martin, I meant for the painting side.   :)

Share this post


Link to post
Share on other sites
 
km3h

OK now I see what you are talking about. Looks like I will be doing a hood on Monday. Should be able to get it down to metal and painted in a few days. I hate working on the underside of the hood though. Getting behind the headlight panel is a pain but I want to take it down to bare metal. At least while it is drying I can start assembling the rest of the tractor. I will not put the 417 hood on this tractor. Might as well do the seat pan too. It won't take long either.


Martin I am glad you caught that. Thanks.  

Share this post


Link to post
Share on other sites
 
Martin

no problem.


like i said its your tractor and you can put on there which ever hood you want to. some don't like the louvers, but i think they are kind of neat. i really think i eventually need to add a 417 (or 418) to my collection. nothing against the 520s but i think the 400 series is where its at for me....

Edited by Martin

Share this post


Link to post
Share on other sites
 
Geno

I like the hood louvers, makes it look beefy.   :icecream:

Share this post


Link to post
Share on other sites
 
km3h

After all, the tractor is a 416, so I may as well keep it looking like one. I will be doing the 417 in the future and I would have two mismatched tractors if I put this hood on the 416. My goal is to have two nice tractors to take to the show in Pa. next year. My next door neighbor likes to go to these things and I want him to have something to ride on that looks good. He comes over almost every day and jumps in to help when needed.  


Glad I did not put the decals on the hood before you pointed this out to me. Does Terry make the Wheel Horse ID tags?


post-2564-0-41744500-1409494922_thumb.jp


Share this post


Link to post
Share on other sites
 
Geno

He makes some but I don't see one like that on his site.  I would give him a call tomorrow and email him that pic and see if he can help. 

Share this post


Link to post
Share on other sites
 
Martin

i think he has done some already, but they weren't 'accurate' enough for me so we hunted down the font for doing the model and serial 'fill in'. I was in contact with him yesterday and i think later this next week we are going to get back into the Onan spec decals for mine, so i will mention it to him. i need one that style and a couple the later 90s style.


i already have a sample he can scan to get the correct size. scanning works better sometimes as the picture is more accurate and not stretched and/or skewed from a camera lens.

Share this post


Link to post
Share on other sites
 
km3h

This one is for the Wheel Horse. It is done in Chrome. I will want several more of them and some for Kohler and Onan. I can actually mail him this one if he wants. I will give him a call in a few days. If you talk to him before I do mention it for me. I will also need some of the later style.  


Mean time I have gotten the 416 hood down and will start on it soon. There is no rust on it so it will be an easy job. 


post-2564-0-17935700-1409503514_thumb.jp


post-2564-0-70565900-1409503534_thumb.jp

Edited by km3h

Share this post


Link to post
Share on other sites
 
km3h

Geno

I like the louvered hoods too but I want to keep this one as near original as I can.

Share this post


Link to post
Share on other sites
 
Martin

You mentioned decals a little earlier and just wanted to add one thing. Wait as long as you can after painting before applying them with any paint that cures by solvent evaporation. (Sprayed paints, not powdercoat) The paint needs to fully cure first.

Sent from my iPhone using Tapatalk

Share this post


Link to post
Share on other sites
 
km3h

I will wait till the entire thing is finished to put the decals on.

Share this post


Link to post
Share on other sites
 
km3h

Today I took the decals of the hood and tried to get the glue off. Tried every solvent I had but it either took the paint off or did nothing. I was going to try sanding the paint smooth and painting over it. Since that wasn't going to work, I decided I would just use a wire brush and take it down to bare metal. What I should do anyway. Why treat the hood any different than the rest of the machine.  

Share this post


Link to post
Share on other sites
 
Geno

We use 3M adhesive remover, O'reilly's has it.  The decal adhesive may not completely come off with sanding and some may spread around that you may not see or even feel.  You may find it when you paint though and have to start over.  :eusa-doh:

Edited by Geno

Share this post


Link to post
Share on other sites
 
Martin

if you heat the underside of the part the decal is on and then just peel them off, the adhesive will come with it. i use a heat gun and rarely does any adhesive stay on there. even decals that have been there for 40+ years will come off easy this way if they are mostly intact......

Edited by Martin
  • Like 3

Share this post


Link to post
Share on other sites
 
Geno

I think the problem will be is that the decal is already off.  We take off decals with a steamer, but if some glue doesn't come off we use the 3M stuff.  :)

Share this post


Link to post
Share on other sites
 
Martin

yeah, i didn't address the problem at hand right now, only how to avoid the problem next time......

  • Like 1

Share this post


Link to post
Share on other sites
 
km3h

Too late now, I have started the job already. Using a grinder with a wire brush is fast and easy and won't take very long. As I already said, I took the rest of it down to bare metal so I might as well do the hood too. Next time I will try the 3 M stuff the next time which won't be very long from now. Learn something new every day.

  • Like 1

Share this post


Link to post
Share on other sites
 
Martin

Nick, next time, try the heat gun method first. Terry (vinyl guy) showed me how to do it way back when and i won't use any other way now. makes them very easy to get off in one piece and almost never any cleanup afterwards. just need to get the right amount of heat there before peeling them off. too little and the adhesive will separate from the decal and be left on the part. 


and you know what problems that causes.......

  • Like 2

Share this post


Link to post
Share on other sites
 
Navig8r

3-m also makes a "stripe removal" wheel..... Like a bunch of thin discs of some sort of sacrificial material stacked.... Works like a wire wheel, but leaves paint intact. I have used them (not on wh decals).... They work well.

Sent from my ADR6350 using Tapatalk 2

Share this post


Link to post
Share on other sites
 
km3h

Went out early today and tried the wire wheel but too slow and went back to chemicals stripped it right off. Tried to upload a video of the striping but it was too big. Will have to learn how to do that. It really works good. Just paint it on and use a putty knife to scrape it off. Too hot out there now and am going to go to Tractor Supply with my neighbor and get a few things. Might go back out this evening.


post-2564-0-91216400-1409671599_thumb.jp


post-2564-0-05191300-1409671615_thumb.jp

Edited by km3h

Share this post


Link to post
Share on other sites
 
Geno

Did you end up using paint stripper?

Share this post


Link to post
Share on other sites
 
km3h

Yes I did and it works great. I even made a short video to show how easy it was but when I tried to upload it, it said the file was too big. Paint it on wait a few minutes and then use a putty knife to peal it off. I will have to do some research on uploading videos. It can't be that big I used my IPhone to shoot it.  

Share this post


Link to post
Share on other sites
 
Geno

It works great but can be very dangerous as well.  Personally I never use it.  You Must be Sure to pressure wash every crevice and crack (like where the hood panels attach toward the front, the seam, behind the headlamps, etc) and get every single bit of that stuff off.   If not, the first time it gets washed or wet it will reactivate and take off your new paint.   :eusa-doh:

Share this post


Link to post
Share on other sites
 
km3h

Pressure wash is the first thing I do when I am finished. Then use a tack rag to wipe it good and dry. After that I use the wire brush to remove the new rust that will start to form.  

Share this post


Link to post
Share on other sites
 
km3h

I ran out of the paint remover I had been using so off to Home Depot for more. I had to get another brand and don't like it as much as the other. Does not work as good.I had a hard time getting the area behind the headlight bracket clean.


post-2564-0-29627000-1410115046_thumb.jp


post-2564-0-75010900-1410115068_thumb.jp


So I removed it. I drilled out the spot welds and will of course weld it back when finished.


post-2564-0-01705700-1410115082_thumb.jp


I did the same thing on the hood for my 417-H. I know it can't be seen, but there was a lot of rust back there and now I can get rid of it and know it won't come back.


Share this post


Link to post
Share on other sites
 

Create an account or sign in to comment

You need to be a member in order to leave a comment

Create an account

Sign up for a new account in our community. It's easy!

Register a new account

Sign in

Already have an account? Sign in here.

Sign In Now

  • Similar Content

    • t_furl43
      By t_furl43
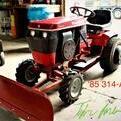
      A really nice 1995 wheelhorse 416H runs and drives great no leaks only 920 hrs, motor runs strong, starts right up, brand new back tires 23x10.5x12, has slot hitch, comes with 42” RD deck and 42” snowplow, wheel weights and all 4 hubcaps, I’ll also throw in an extra set of tires, will need a seat but that’s it, pickup in millersville pa 17551, price is negotiable, will trade for an Economy Powerking tractor or John Deere 318
    • Bill D
      By Bill D
      I picked up a low hour, (189.6) abandoned 416h yesterday.  Does anyone know what size the o-ring is that seals the carb to the air cleaner?  Mines cracked and I expected it to break in pieces when I remove it there by making it useless for sizing at the hardware store.  Also, the voltage regulator is missing.  Has anyone tried used a regulator from a Kawasaki as a replacement?  I have a couple here and thought about trying them.  Can anyone tell me if this engine has the governor spacer with the tab?  Thanks.


    • HorsePower58
      By HorsePower58
    • HorsePower58
      By HorsePower58
    • HorsePower58
      By HorsePower58
×
×
  • Create New...