Jump to content

Recommended Posts

kudzu3

Real nice, you're almost there. :)

Share this post


Link to post
Share on other sites
 
zanepetty

Guess I should've taken the exhaust nipple out before I painted it..what's the best way to get this thing out without ruining the paint on my engine. I tried a pipe wrench with no luck..

post-11334-0-43855600-1390597829_thumb.j

Share this post


Link to post
Share on other sites
 
shorts

2 medium/large hammers, take the larger of the 2 and hold it on the pipe as close to the engine as you can, take the other hammer and HIT the pipe 180* from the first hammer several times, you want to try to shock the pipe and loosen up the carbon and rust on the pipe threads. your second approach would be to cut the pipe off a couple of inches from the block and then heat it up from the inside, again trying to loosen up the rust and carbon in the threads. third choice cut the pipe closer to the block and then take a hacksaw blade and cut 2 slots lengthwise inside the pipe until you just see the cast iron threads in the block and then use a hammer and chisel from the outside of the pipe to deform the pipe at the cuts and then turn the pipe out.

Note pipe threads are tapered so once they start to turn out they should be easier to turn

Share this post


Link to post
Share on other sites
 
zanepetty

Thanks so much. I'll try some if those. No pb blaster or anything right? I'm afraid it will ruin my paint..

Share this post


Link to post
Share on other sites
 
zanepetty

I got the exhaust nipple out today. I ended up putting two pipe wrenches on the 180 degrees apart, pushing down on one and pulling up on the other. It finally gave in. Got a nice new one and put my custom muffler on! Its an IH muffler that I had a piece of pipe welded to and I painted. I like it a lot. :) I also put my uni drive sticker on. Not a big deal but it breaks up all the red back there. After doing ALL this and putting all new seals and bearings in the trans I almost regret not rebuilding the engine. But I ran good and didn't smoke..

post-11334-0-42570600-1390779273_thumb.j

post-11334-0-78420500-1390779375_thumb.j

post-11334-0-29333100-1390779432_thumb.j

Edited by zanepetty
  • Like 2

Share this post


Link to post
Share on other sites
 
chazm

Looking good Zane... :handgestures-thumbupright:   Just a thought , you may want to put some kind of support bracket on the muffler to keep the nipple from breaking :scared-notify:

Share this post


Link to post
Share on other sites
 
51Chevy

That's a good idea I had problem like that on my suburban It was ripping the threads out of the motor so I fixed it with a bolt and some hose clamps.

Edited by 51Chevy

Share this post


Link to post
Share on other sites
 
kudzu3

That's gonna be one fine tractor :bow-blue: What did you use to paint the exhaust? I want to paint mine silver but don't know what would be a good heat resistant paint.

Share this post


Link to post
Share on other sites
 
zanepetty

I used high heat paint from advanced auto parents. Its vmp brand. & I've never heard of that kind of thing. Please tell me about what kind of support I can make! I do NOT want that to happen!

Share this post


Link to post
Share on other sites
 
honestcharlie56

your making my 753 look terrible!!

Share this post


Link to post
Share on other sites
 
JERSEYHAWG /  Glenn

hello zane, been following your project along. It looks GREAT. I started tearing down my 854 and as I get on with my project there are many things you did that I have learned from. So I just wanted to say thank you.


Glenn

  • Like 1

Share this post


Link to post
Share on other sites
 
zanepetty

Thanks so much, Glenn. I have learned SO much and I still have a lot to learn but I'm thankful for all the guys helping me out so much. Couldn't have done it without them. I appreciate the comment Glenn.

  • Like 1

Share this post


Link to post
Share on other sites
 
Wheel Horse Kid

Looks great! Liking that exhaust! ;)

Share this post


Link to post
Share on other sites
 
zanepetty

Thanks!

Share this post


Link to post
Share on other sites
 
Hodge71

I would seriously consider some sort of bracket to help with the load of that muffler. That thing is huge to begin with and then you added 3 feet of pipe to it. Thats a ton of load for that nipple and head to handle when driving around. It wont be long before it creates an issue. I also would not consider mowing under any trees or its a goner

Edited by hodge71

Share this post


Link to post
Share on other sites
 
zanepetty

It won't be mowed with. Just grading and plowing sometimes. I don't know how I would go about making a bracket at all. Do you have any ideas? I would GREATLY appreciate it.

Share this post


Link to post
Share on other sites
 
Hodge71

Do a search for stack brace or stack bracket in the forums.  I just don't want to see you break that casting Zane. Its such a gorgeous machine and once you break that casting the engine is difficult to fix and use again. I went with a much smaller Gravely muffler and a 1 foot stack on my 18 Automatic.  

Share this post


Link to post
Share on other sites
 
zanepetty

Thanks a bunch. I don't want to do that for sure. If I went with a smaller one would the brace still b necessary?

Share this post


Link to post
Share on other sites
 
rexman72

thanks for sharing with us.

Share this post


Link to post
Share on other sites
 
Hodge71

Honestly Zane I can't answer that as I have never put a stack on my single cylinder Kolhers. My 18 is a twin cylinder with very big cast iron exhaust manifolds so The weight is well distributed on both heads. A single cylinder engine is much different as all the load is on one thin casting. There are tons of guys on here with stacks. Just post a question in the tractors section looking for pics and suggestions for a brace

Edited by hodge71

Share this post


Link to post
Share on other sites
 
zanepetty

OK will do.

Share this post


Link to post
Share on other sites
 
zanepetty

Thanks for everyone's help so much. Ive learned a lot with this project. I didn't know anything going in to it! I still don't know much but you gotta start somewhere I guess. I wanted to post a few pics of her this morning. (Steve, I finished up at 130 your time so I took the liberty of NOT calling you ;)) found out that the break drum shaft and the dang fuel pump mounting gasket have a little leak today. I might never be totally done:( but here it is with dirt and grease all over it :)

post-11334-0-46345500-1392051648_thumb.j

post-11334-0-80687700-1392051672_thumb.j

post-11334-0-19941200-1392051701_thumb.j

post-11334-0-46274400-1392051727_thumb.j

post-11334-0-94841100-1392051752_thumb.j

post-11334-0-46774500-1392051783_thumb.j

post-11334-0-96345200-1392051826_thumb.j

Edited by zanepetty
  • Like 3

Share this post


Link to post
Share on other sites
 
redrooster

Nice looking tractor! I'll certainly be glad to have mine back together! :-)

Share this post


Link to post
Share on other sites
 
chazm

Well Zane ,from these pics.. it's safe to say your not a :teasing-newbie: anymore... You did an excellent job my man :handgestures-thumbupright: :handgestures-thumbupright: ... BE Proud of your work... :greetings-clappingyellow:

Share this post


Link to post
Share on other sites
 
zanepetty

Thanks guys! I appreciate it. Maybe one day I'll get her just right!

Share this post


Link to post
Share on other sites
 

Create an account or sign in to comment

You need to be a member in order to leave a comment

Create an account

Sign up for a new account in our community. It's easy!

Register a new account

Sign in

Already have an account? Sign in here.

Sign In Now

  • Similar Content

    • bigbuck
      By bigbuck
      I had a fire in 2019 which destroyed my pole barns and some wheel horse tractors and parts. i'm looking for someone who can use the engine that went thru the fire. It is not pristine but there must be some usable parts
      please call George at 517-499-5678 for more info.
    • Wheel Horse 3D
      By Wheel Horse 3D
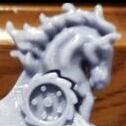
      Our customized ornaments have a base identical to our version of the original style ornament, but can be topped with 3 different styles of horse head and 3 different styles of wheel! Each is available unfinished, primed, or fully painted.
      They also include the pictured mounting hardware and the base spacer for a clean finished look. Can be ordred here https://greystone-3d.square.site/product/customizable-wheelhorse-hood-ornaments/10


    • Wheel Horse 3D
      By Wheel Horse 3D
      Welcome, and thanks for visiting our vendor area.
      We got our start in 3D printing for customers right here on Red Square!
      If you'd like to see how every thing gets developed and the contributions of Red Square members, please visit the thread that started it all and browse through our progress to date.
      We love our clients' input and work closely to turn ideas into reality. If you have an idea, request, or questions, you can post to that thread, message us or tag us here on Red Square, or visit our online store and reach out to us through there.
      Https://greystone-3d.square.site
       
    • cJ_3D
      By cJ_3D
      Hey all!
       
      Replacing the drive belt on my 252-h. Anyone know the torque specification for the center screw when I put this pto clutch back on? I know it was on there tight it took a minute for the impact to break it loose. Thanks!
       
      CJ

    • giant_g2
      By giant_g2
      Not sure on specific model. This 8 spd came attached to a plow I bought. It had some water in it for a couple weeks according to the prior owner. I drained it, sloshed some diesel in it, drained that, then filled with fresh oil. Spinning the input shaft by hand, I can see the axels turn. Hasn't leaked any oil. I'm not really interested in shipping, so I'd prefer local sales.

×
×
  • Create New...