Jump to content

Recommended Posts

Coadster32

Sweet!! Paint is mostly about prep work, and you did great!! :handgestures-thumbupright:  Looking forward to the rest of this build. Thanks for feeding us scavengers pics. :beer:

Share this post


Link to post
Share on other sites
 
zanepetty

Thanks for looking! I'm learning a lot.

Share this post


Link to post
Share on other sites
 
stevasaurus

Merry Christmas Zane...I can't believe you would not be happy with that present.  :)

Share this post


Link to post
Share on other sites
 
zanepetty

I can't imagine a better present Steve. Unless.. someone bought it for me :)

Share this post


Link to post
Share on other sites
 
zanepetty

Here's my frame. Fixed up and ready to go! I think this will be just about as strong as new!! Just have to prime and paint the back again :(

post-11334-0-58725800-1386458304_thumb.j

  • Like 3

Share this post


Link to post
Share on other sites
 
kudzu3

Looks good :).

Share this post


Link to post
Share on other sites
 
zanepetty

I found out something today..the last group of parts I primed, I put a few good coats of primer followed by a final mist coat so it would dry with a matte finish and I wouldn't have to Scotch pad AGAIN (as it says to sand or scuff up the primed surface with 400 grit or finer on the data sheet.) I also checked around and confirmed the the sanding or scotch padding was needed. Anyway, the paint chips off with your finger nail on the parts that I Scotch padded, and it stuck good to the ones I mist coated. I've already scotch padded EVERY LAST THING. So I'm pretty much screwed it seems like. This is why I ask so many questions because I have such horrid luck, and even if I do things by the book the still don't work. I don't get it. Any advice?

Share this post


Link to post
Share on other sites
 
rmaynard

What kind of primer did you use?

Share this post


Link to post
Share on other sites
 
zanepetty

Acme finish 1 from Napa. I used valspar tractor paint over it. It makes me want to just quit. >:(

Share this post


Link to post
Share on other sites
 
rmaynard

Is that a 2K or epoxy?

Share this post


Link to post
Share on other sites
 
kudzu3

That's a shame :eek: . I may be the furthest thing from an expert here but, I have done a lot of rattle can painting and sounds to me like the surface prior to painting has something on it that's preventing the paint from adhering as it should. I know this is a stupid question, because I see that you are really doing a good job but, could it be that there's some sanding dust left on the surface prior to painting? What are you cleaning the surface with prior to paint? I believe that the primed surface can sometime be too slick, so much so that paint has nothing to "hang on" to. I have found that it is best not to worry too much about the primed surface, but the time to really slick things up is after the first coat of paint. I believe that paint sticks to itself better than to primer. These are just my thoughts, I'm sure there's some real help out there, and am looking forward to learning more on this subject, as I will start paint soon. Good luck!


:eek: DON"T QUIT!!! :angry-nono:  Your tractor looks too good.

Share this post


Link to post
Share on other sites
 
zanepetty

Its 2k, Bob. Thanks tommy. I agree with you but I was just following the data sheet and some advice from body shops. Here's how I did all the prep work up to paint: sand blast or grind down to metal, scrub thoroughly with mineral spirits, prime with etch primer and let it flash for 20 mins then prime with 2k urethane primer, block sand or scotch pad, then clean again well with mineral spirits, tack cloth and paint. I think that may even be extreme because I've seen friends who just power wash and paint and their tractors may not be slick but the paint sticks and they've got 1/8 of the time in there tractor.

Edited by zanepetty

Share this post


Link to post
Share on other sites
 
kudzu3

.

Edited by kudzu3

Share this post


Link to post
Share on other sites
 
zanepetty

Ya I read that. But I let it evaporate for a very long time. I just don't know if that would cause it to not stick like that. Maybe a gotta get more of the primer I was using and mist coat everything. Or get good automotive paint. If I could paint everything with a qt. I would do that as opposed to hitting everything with primer again.

Share this post


Link to post
Share on other sites
 
kudzu3

I just don't know what more you could do. Do you have a controlled atmosphere spraying and drying area? Don't know if that matters, probably not, but with the humidity and cold...just wondering. I sure hope you figure it out, and with the help of the good folk here, you probably will. There is a bright side...restoration is usually a winter project and winter ain't even got here yet. :)

Share this post


Link to post
Share on other sites
 
zanepetty

Ya. I painted when it was almost 60. Can says 40-90. Just got off the phone with Steve. I'm going to try some things right now. He has a good way of looking at things :)

  • Like 1

Share this post


Link to post
Share on other sites
 
kudzu3

Please keep us posted, this is a learning experience for me, and as little as I know, I need to learn as much as I can.

  • Like 1

Share this post


Link to post
Share on other sites
 
stevasaurus

Tom, this is a learning experience for me also, Zane was ready to melt his horse down into an ingot.  We can not let him do that. :)   After talking to him, and what everyone else has said, we think we have a game plan.  If it works...could be good and we can go from there.  The Valspar paint is not sticking to the primer he is using.  It should stick...do not know why.  :eusa-think:

Share this post


Link to post
Share on other sites
 
clintonnut

I have found mineral spirits to be goofy. Have you tried wiping for prep with lacquer thinner?


Charlie

  • Like 2

Share this post


Link to post
Share on other sites
 
squonk

This may sound stupid, but I think the solvents in the Valspar aren't aggressive enough to bite into the high tech 2k primer

Share this post


Link to post
Share on other sites
 
AMC RULES

Over application of that tack cloth can produce a negative effect on paint adhesion too.  

Share this post


Link to post
Share on other sites
 
Save Old Iron

when you scotchbrite the dried primer, what color scotchbrite pad did you use ?


maroon = 400 grit

grey = 800 grit

if you used grey, the topcoat does not have enough mechanical adhesion


you need mechanical adhesion as cured 2k urethane will not chemically bond to solvents used in inexpensive valspar tractor enamels.


even in the best of cases, inexpensive enamels have very little resistance to chipping off the primer coat. that is exactly why there is great interest in using automotive quality top coats .


also, what thinner did you use in the topcoat?

Edited by Save Old Iron

Share this post


Link to post
Share on other sites
 
zanepetty

I've heard not to use lacquer thinner, charlie. As you can tell I'm no expert but I was told to wipe it down with thinner that you used to thin the paint with but I don't know. I scotch brited the parts I painted with the maroon pad, save old iron. Its worn out but I thought it was 320 grit new and still 400 worn out? On the hood I did use the gray pad for around the grille. Maybe not a good thing. Steve and I came up with a plan to try aresol valspar primer over the 2k primer, then put the enamel over that. I'll check to see if that worked today. If I got the acme finish one enamel which is the same brand as my primer, would paint stick then do ya think?

Edited by zanepetty

Share this post


Link to post
Share on other sites
 
Save Old Iron

 If I got the acme finish one enamel which is the same brand as my primer, would paint stick then do ya think?

Mineral spirits are the very lowest quality thinner you can use {plus several 'types' of mineral spirits exist}. Most types still contain paraffin wax which may have contributed to your adhesion problem. First step to recover your [arts would be to wash the parts in a bath of Dawn dishwash liquid and water. The dishwash liquid will break down the film residue and leave you with a useable surface.  Do not sand the parts with this film still present as you will embed the film into the primer coat. Once the parts have been de-waxed and dried properly, scuff the parts again with a new scuff pad (cause you wouldn't use a worn out 400 grit paper - right?). Wash the parts again in the dishwashing liquid bath and dry. Then try any further experiments you wish.


Bottom line, stay in the 'family' of paint products you started with. Beyond the wash etch primer, stay with the Acme 1 product line. You went off the reservation by using mineral spirits.

Edited by Save Old Iron
  • Like 2

Share this post


Link to post
Share on other sites
 
zanepetty

Oohh. OK. Well maybe I'll buy some acetone to wipe things down with then. As for the pad, I though a new one was 320 and a worn out one wouldn't be finer than 400. That's why I used it because I wet sanded my tins with 400. What do you think of just spraying a mist coat to "etch" the surface of pieces like foot rests that have to be re-done to save time on scotch briting and eliminate a chance of getting down to the metal in raised spots of the cast?

Edited by zanepetty

Share this post


Link to post
Share on other sites
 

Create an account or sign in to comment

You need to be a member in order to leave a comment

Create an account

Sign up for a new account in our community. It's easy!

Register a new account

Sign in

Already have an account? Sign in here.

Sign In Now

  • Similar Content

    • Donavon1
      By Donavon1
      Project black Betty the diesel 1054
    • bigbuck
      By bigbuck
      I had a fire in 2019 which destroyed my pole barns and some wheel horse tractors and parts. i'm looking for someone who can use the engine that went thru the fire. It is not pristine but there must be some usable parts
      please call George at 517-499-5678 for more info.
    • Wheel Horse 3D
      By Wheel Horse 3D
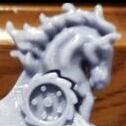
      Our customized ornaments have a base identical to our version of the original style ornament, but can be topped with 3 different styles of horse head and 3 different styles of wheel! Each is available unfinished, primed, or fully painted.
      They also include the pictured mounting hardware and the base spacer for a clean finished look. Can be ordred here https://greystone-3d.square.site/product/customizable-wheelhorse-hood-ornaments/10


    • Wheel Horse 3D
      By Wheel Horse 3D
      Welcome, and thanks for visiting our vendor area.
      We got our start in 3D printing for customers right here on Red Square!
      If you'd like to see how every thing gets developed and the contributions of Red Square members, please visit the thread that started it all and browse through our progress to date.
      We love our clients' input and work closely to turn ideas into reality. If you have an idea, request, or questions, you can post to that thread, message us or tag us here on Red Square, or visit our online store and reach out to us through there.
      Https://greystone-3d.square.site
       
×
×
  • Create New...