Jump to content

Recommended Posts

Rboski

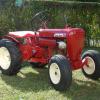
I bought this 1960 400 from Taycotrains a couple years back now. I was missing a couple of the usual suspects, belt guard, throttle controls...  I tracked down what I needed here and there and with the help of a couple RS members.  Last fall I finally got around to disassembling the tractor and started to freshen things up.  Currently I don't have access to a sand blaster so I used a combination of e-tank, chemical stripper sanding and wire brushes to get the parts down to clean metal for new paint.  I've replaced some hardware as needed or just for personal preference. At the show this year I picked up a pair of '61 cast foot rests and cast brake pedal. 


There where two pieces that needed some repairs. First the hood had torn in two places where the rear tank strap was spot welded and second the hood stand was cut up at some point to accommodate a different engine. Learning as I went, I managed to weld the cracks from the tank straps without burning through the hood and when I was done (after I wiped the sweat from my face and unclenched my teeth) decided I didn't want to do any more welding on that thin original metal. One morning while having  a coffee and perusing the forums I stumbled on Duke's RJ Hood stand modifications and decided I would do something similar.  First, since I'm still tying to learn to weld, I wasn't going to modify an original part. I needed to build a RJ style hood stand that I could bolt onto the frame, then I could add some hood support and maybe even hang the tank from this structure instead of damaging the hood again.  This is what I have so far...  


Img_3729_zpsa2ecd8be.jpg


Img_3789_zps938cf9b3.jpg

  • Like 3

Share this post


Link to post
Share on other sites
 
AMC RULES

Hood stand turned out great...   :handgestures-thumbsup: 

can't wait to see that modified tank mount though.    :popcorn: 

Share this post


Link to post
Share on other sites
 
953 nut

:text-coolphotos:   you are doing a great job, keep us posted.  :text-goodpost: 


:USA: 

Share this post


Link to post
Share on other sites
 
welderman85

Great work

Share this post


Link to post
Share on other sites
 
speedyleedy

It looks like your doing i very fine job to me :eusa-think: keep up the good work ! :handgestures-thumbupright:

Share this post


Link to post
Share on other sites
 
Rboski

This is what I came up with for the tank mount/hood support. I'll use a setup similar to the original straps to secure the tank.  Each "strap" will  actually be three pieces. One piece over the top and then two pieces underneath from each side with a bolt to snug it up.  At least that's the plan so far.  


tank1_zps64db0172.jpg

  • Like 3

Share this post


Link to post
Share on other sites
 
AMC RULES

Definitely looks a lot more secure that the original strap setup...

tank still will utilize the factory fill hole in the hood that way?  

Share this post


Link to post
Share on other sites
 
Rboski

Same factory fill hole, No modification to the hood. There is a little play in the tank positioning so I'll leave it loose and then put the hood on to fine tune the fit before snugging it up. The new bracket is just a bit below the underside of the hood so I'll be able to put some sort of a buffer on top to cushion things, foam, rubber....  not sure yet. The tank sits just above the mount and touches the underside of the hood.  I may need to put some sort of buffer between them so its not metal on metal since they'll now move independent of each other.  I'll have to see how it comes together once I make the straps.

Share this post


Link to post
Share on other sites
 
51Chevy

Where did you get your front tires are thy new?

Share this post


Link to post
Share on other sites
 
Rboski

51Chevy, yes they are new.  They are Kenda Loadstar 4.80-8 LRB 4 Ply Bias Trailer Tires.  Found them online at trailertiresandwheels.com for $16 a piece.  Of all the different new tires I've seen in this size, the sidewall ribs on these seemed the most pleasing to me.


http://www.trailertiresandwheels.com/product/4.80X8-load-range-b-4-ply-kenda-loadstar-bias-trailer-tire 


BT4808B.png

Edited by Rboski
  • Like 1

Share this post


Link to post
Share on other sites
 
speedyleedy

Do you have the tank frame bolted or welded to the hood stand ? That is a really neat idea :eusa-think:

Share this post


Link to post
Share on other sites
 
Rboski

Thanks Tim. I've been commingling ideas from different models and from modifications other RS members have come up with.  Originally I was going to weld the tank frame to the hood stand, but I ended up adding a plate to the stand so I could bolt them together. Plus I'm just winging it here so I wanted some play since the tank frame is also a hood support, now I'll be able to put some rubber on the top edge to buffer the hood from the frame. As it is now I had to shim a bit to get the angle right for the hood to sit correctly, so the bolts where the right way to go for sure.  


My current hood had some damage from the straps being pulled off so I wanted to avoid that problem and a tank frame/hood support seemed like it would solve that issue for me.  But I also wanted to leave them both flexible enough that I could use the hood stand without the tank frame if I switched to another hood, so again bolting them together seemed the way to go.  I think it will be strong enough just being bolted. Its not a lot of weight, its the bouncing I'm worried about with the front end of the frame floating.  I'm still looking at maybe dropping a front leg down inside the hood and attaching at the same bolt that holds the hood to the frame.  That might also open up the possibility for hanging some weight. But it's getting pretty tight up in the nose. I'm still playing with it. I might see how this goes for now and adjust later if needed. I'll keep you all updated.

Edited by Rboski

Share this post


Link to post
Share on other sites
 
timo4352

I'm more interested in those rear tires - What are they and where can I get them?

looks like the old town and country snow tire. :eusa-think: 

Edited by timo4352

Share this post


Link to post
Share on other sites
 
Rboski

They are BF Goodrich Silvertown All Purpose Garden Tractor.  They were on the 552 I have.  They're just on this machine temporarily while I finish painting the rear wheels. 


Here's a couple of better pics of the tires from an old post by Zeek.  

Share this post


Link to post
Share on other sites
 
AMC RULES

Are those the Kenda's mounted up in the picts you've posted here?    :icecream: 

Share this post


Link to post
Share on other sites
 
Rboski

Yup, those are the Kenda's mounted up front in the pics above. I'll get a pic later of them with the hood on.  I think for new tires they look pretty good.  I'm going to get a set of Bridgestone Farm Service Diamond Tread Turfs for the rear (take a look at the cover of your final edition).  I've also have a set of AG's that I got with the machine that I'm going to mount on an extra set of wheels I just cleaned up and painted.  So I should have the right shoes for any occasion.

  • Like 1

Share this post


Link to post
Share on other sites
 
AMC RULES

You can't beat the price of 'em, that's for sure.   :handgestures-thumbsup: 

Would like to see a ground shot, full screen pict of one if you could?

You know...when you get a chance...no rush.   :thanks: 

Share this post


Link to post
Share on other sites
 
Rboski

Can do!

Share this post


Link to post
Share on other sites
 
Rboski

So here's a couple of better pictures of the front tires on the machine. And the requested full screen shots.  I put the motor on today, threw in a temporary plastic fuel tank, set the hood on for giggles and gave it a couple laps around the yard.  Still have  a few things fine tune and a handful of pieces to paint but I'm getting close.


1960-550_zps1aaffd7f.jpg


loadstar1_zps5fb02fa8.jpg


loadstar2_zps712fd7e9.jpg

Share this post


Link to post
Share on other sites
 
AMC RULES

WOW! Thanks Rich...those things really do look sharp.

Look perfect on our little   :wh: round hoods.    

Hood looks AWESOME!     :handgestures-thumbsup: 

Share this post


Link to post
Share on other sites
 
Rboski

Thanks Craig. I'm very pleased with how they look. Almost as good as a pair of clean originals.  I was pretty lucky with the hood.  It was straight and only had some small dents and a couple of small cracks and tears.  Was able to pound out some of the small stuff, welded up some of the cracks and tears.  There's some filler here and there to smooth out the top and the nose. Made a few mistakes painting it, followed by some wet sanding and a respray but I managed to make them disappear.  All in all I'm very happy with how it's coming out. Learning a lot for the next one.  This is what I started with. 


gallery_3621_325_143820.jpg

Edited by Rboski
  • Like 1

Share this post


Link to post
Share on other sites
 
51Chevy

Forgot that I asked you about the tired there what I needed coming in the mail thanks alot

Share this post


Link to post
Share on other sites
 
Rboski

51Chevy,  I hope you are as happy with them as I am. Please share a pic with us when you get them mounted.

Share this post


Link to post
Share on other sites
 
51Chevy

I'll be posting lots of pictures because I'll be restoring my 64 857 that's been in the family since new

Share this post


Link to post
Share on other sites
 
Rboski

That's great!  I got my start on my Gramp's 69 Raider, he's still got it and it's been running strong since the day he brought it home. I'll be looking forward to following your project.

Share this post


Link to post
Share on other sites
 

Create an account or sign in to comment

You need to be a member in order to leave a comment

Create an account

Sign up for a new account in our community. It's easy!

Register a new account

Sign in

Already have an account? Sign in here.

Sign In Now

  • Similar Content

    • Wheel Horse 3D
      By Wheel Horse 3D
      Our customized ornaments have a base identical to our version of the original style ornament, but can be topped with 3 different styles of horse head and 3 different styles of wheel! Each is available unfinished, primed, or fully painted.
      They also include the pictured mounting hardware and the base spacer for a clean finished look. Can be ordred here https://greystone-3d.square.site/product/customizable-wheelhorse-hood-ornaments/10


    • Wheel Horse 3D
      By Wheel Horse 3D
      Welcome, and thanks for visiting our vendor area.
      We got our start in 3D printing for customers right here on Red Square!
      If you'd like to see how every thing gets developed and the contributions of Red Square members, please visit the thread that started it all and browse through our progress to date.
      We love our clients' input and work closely to turn ideas into reality. If you have an idea, request, or questions, you can post to that thread, message us or tag us here on Red Square, or visit our online store and reach out to us through there.
      Https://greystone-3d.square.site
       
    • Donavon
      By Donavon
      Need ideas to convert my 1054 A Frame plow into a snow blower
      Any idea's?
    • Vaughan32850
      By Vaughan32850
      Has anyone got a WT-30 tiller they can send pictures if pleas? It’s the one fitted with a K91 engine for RJ models. 
      Many thanks

    • Burnerman
      By Burnerman
      I’m building a lowered 300 series wheelhorse. So far it’s a combination of 3 scrap tractors. 
      the frame, trans and tins are from a GT2500 anniversary special given to me by a neighbor with a trashed Briggs. The Kohler M12 is from a junkyard 312 that was roached. The parts tractor I’m using for the build was another older 312. I’ve got the k301 in the garage. The trans was toast. Both axles wallowed out keyways and 1 axle actually broken. 
      Anyway! I needed a project and a toy to putt around the neighborhood. I couldn’t find any other posts on how to do the whole thing. I’m trying to keep it cheap using stuff I have on hand and looking as “stock but cooler” as possible. So here we go. 
      I’ll update this as I go along. 
×
×
  • Create New...