Jump to content
Sign in to follow this  
WoodMotorsports

Project C-160 Automatic

Recommended Posts

WoodMotorsports

I've lurked here on and off for some time gathering info as needed for a B-80 that was given to me several years ago. The reason it was free was because it wouldn't start...if it hadn't been an old Army buddy who gave it to me I would have been embarrassed to file the points and start it within minutes of unloading the thing. I was a Weekend Freedom Machines fanatic at the time and a JD140 was sucking my play money fund, so the B-80 pretty much just sat, mowing the lawn when the ZTR was down. 3 years ago I traded it to my son-in-law for a utility trailer with the only rule being that if he wanted rid of it, it had to come back here. Last week it came back home, tie rods falling off, flat tires, and bad gas in the tank and carb. Here it is four days later back to mowing grass:

B80atwork.jpg

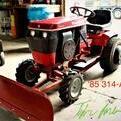
So I was perusing craigslist for a parts tractor that would let me keep the B80 working while I slowly did the resto. Instead I found a C-160 auto fairly complete for $50! And I didn't even have to pay extra for that spiffy boat seat.

228ab79b.jpg

The fellow said it was running when he parked it two years ago. 240 mile round trip later and here it is getting a bath:

e954b31a.jpg

Here are some of the "extra" parts that came attached to the old girl. I'm not sure why it was deemed necessary to shorten the PTO rod rather than adjust it. I'm not sure what the bracket in the center is for, but it was attached to the rear axle and I'm guessing it's for a center or front blade. Also at the top is a home made shroud that was on top of the cylinder head. The factory shrouding it all on there I believe, this was a "special modification" at some point.

08ebbac8.jpg

First surprise...frame has been completely broke in half at the point where the lift cylinder attached to the frame. This will be redone with a bit more artistry than the fix that is currently there:

b47b4fe6.jpg

a3a2592b.jpg

Next up is the parking brake lever that is so worn that it wasn't releasing...so it was just unhooked and left hanging. I little mig wire should fill that void nicely:

f5aa0d47.jpg

And finally, the back strap of the battery box is long gone...guess I'll be using the welder there too.

ce0531cd.jpg

Carb is soaking right now and I'll be ordering the kit and also the carb shaft bushing kit. Looks like Stens is going to get me for another $30 for some more tie rods. Hopefully I'll have enough parts by Friday to fire her up and exercise the hydro a bit to make sure I've got pressure.

Used stuff needed:

Serviceable stock seat and springs. Yep, I do know how hard these are to come by. If it comes down to it I'll go aftermarket, but still need the springs to mount it.

PTO engagement linkage.

Dipstick for the Hydrostat....it's just got a plug covering the hole now.

Steering wheel...the one on it is pretty bent and sad.

Share this post


Link to post
Share on other sites
 
squonk

That plow bracket is worth what you paid by itself :thumbs:

Share this post


Link to post
Share on other sites
 
AMC RULES

Real good deal.

:WRS:

Share this post


Link to post
Share on other sites
 
Ken B

Nice score on the C-160. I had one and it was a snow pushin monster! Kelly probably has most of the parts you need. He is listed in the Vendors section.

Nice to see you are going to keep that B-80 living. I don't have one but one is on my want list.

Share this post


Link to post
Share on other sites
 
312Hydro

Great deal on the tractor! That bracket is also used for a rear mounted tiller. From reading your post ,it seems like you have the repairs well covered. :handgestures-thumbupright: :WRS:

Share this post


Link to post
Share on other sites
 
Jake Kuhn

That was one good deal! :WRS: Jake

Share this post


Link to post
Share on other sites
 
Don1977

With that much damage to the frame you need to check the plate the transmission is bolted to. It may be better to get a different frame. A lot of members have parts tractors.

Share this post


Link to post
Share on other sites
 
WoodMotorsports

This evenings progress. The parking brake lever no longer has a divot in it (yes, I already know about Fram filters. The replacement Wix is on the bench):

e9a26cf7.jpg

The battery box has a back strap again:

9cda1855.jpg

I decided to go ahead and make some working room by getting tin and wheels out of the way:

783dceb6.jpg

I'm not sure what's up with the spindle on the right. It's got a center bolt like a JD. Both spindles had been run on bad bearings. Deep grooves in both.

be58a839.jpg

c9e81b69.jpg

At first I thought there was quite a bit of play in the differential...it turns out the right axle keyway is wallowed and the key was nearly sheared. Both hubs have a pretty wallowed keyway. Not sure what I'm going to do about that yet:

811136a8.jpg

521d5366.jpg

56e9a6b5.jpg

And finally, I've got an axle seal to replace:

5147a8e1.jpg

  • Like 1

Share this post


Link to post
Share on other sites
 
bowtiebutler956

:WRS: You have my Dream Horse there! I love my B-80 with a K301 12hp on it, but I really want to own a C-160. You can't beat the price, and I look forward to watching your progress! :thumbs:

Matt :flags-texas:

Share this post


Link to post
Share on other sites
 
Martin

looks like a good project. look forward to seeing your progress.....

one thing with the hydro dipstick, did you remove the plug to see if there is a dipstick? the earlier hydros had the dipstick on the bottom of the square pipe plug, much the same as the early kohlers. somebody could have replaced the dipstick with a plug and maybe you already checked that. if you did, just ignore my question, just wanted to throw that out there that not all of them have what 'looks' like a dipstick at first glance......

Share this post


Link to post
Share on other sites
 
oldredrider

Any local machine shop can cut a new key way in that hub. Suggestion, if you go that route, have them drill and tap for 2 set screws 90° apart

Share this post


Link to post
Share on other sites
 
WoodMotorsports

Paul, I've got a call in to one of my old instructors at the local tech college where I used up my GI Bill in the welding and machinist programs. Hopefully I can get in there between the day and night classes one day this week to cut new keyways myself. If not I do have a go-to guy that can get it done as well.

Martin, the "plug" that is on the hydro now is just some plastic cap someone was using to plug the hole. I guess I should be thankful they did that much. I did look down the tube in the case that the dipstick had separated from the handle at one point, but no dice.

Don, since I'm going to have to pretty much strip the frame to fix the old repair, I'll make sure and check the mounting plate as well. I'm afraid if I did find a replacement frame I'd probably pay more in shipping than I paid for the tractor. Not to many of these old Horses in Georgia that I've seen.

Still waiting on carb kit that should be waiting at NAPA in the morning, along with the axle seal. I've searched the entire town for the bushing that tightens up the throttle shaft with no luck. Will probably have to order that from Brian Miller I guess.

The only real progress tonight was breaking down the back tires/wheels. Tires are shot, and from the looks of the inside of the wheels they are probably the originals. This is possibly the first time I've cracked the beads on a pair of garden tractor tires and neither of them had slime or fix-a-flat in them.

7a507069.jpg

d82f69ad.jpg

  • Like 1

Share this post


Link to post
Share on other sites
 
WoodMotorsports

Got the carb kit this morning but could not find the throttle shaft bushing anywhere local. I went ahead and put it together to see if it would fire up...it did!

First start without the belt:

Then another go with the hydrostat hooked up. Seems everything is working, though there are some leaks and the dash tower is cracked and moves when the lift cylinder is all the way in.

The worst leak was easy to track down...the piece of gasket on my finger was hanging out of this housing:

110d9cda.jpg

Share this post


Link to post
Share on other sites
 
WoodMotorsports

...........and away we go.........

f46952e5.jpg

2278f26a.jpg

Share this post


Link to post
Share on other sites
 
jay in nc

your progress is amazing. should be done by the time the snow plow bracket gets to me, you don't need that in ga. do ya? :ychain::text-welcomewave: Jay

Share this post


Link to post
Share on other sites
 
WoodMotorsports

Don1977, good call on the trans-axle mounting plate.............

209d6b69.jpg

Here are a couple pictures of the old repair to the frame:

f993617a.jpg

0480f563.jpg

The frame is on the trailer to head to my work warehouse in the morning, where the "big welder" resides. One of the things I was looking at today is just how easy it would be to duplicate the frame in 2x2 tubing. The only clearancing needed would be at the steering at the front, and of course some things would need to be bushed. I'm betting a 3/8" mounting plate for the axle won't crack. I've got an old Johnson loader frame I got from a salvaged Bolens HT20 several years ago, so this is looking more like a loader tractor build all the time.

Has anyone done a tube frame Horse before? Also, anyone know of any members who've put power steering on a B or C?

Share this post


Link to post
Share on other sites
 
whittsons

Got the carb kit this morning but could not find the throttle shaft bushing anywhere local. I went ahead and put it together to see if it would fire up...it did!

First start without the belt:

Then another go with the hydrostat hooked up. Seems everything is working, though there are some leaks and the dash tower is cracked and moves when the lift cylinder is all the way in.

The worst leak was easy to track down...the piece of gasket on my finger was hanging out of this housing:

110d9cda.jpg

I had the same issue with my C-160 throttle shaft and no luck finding a bushing so I removed the shaft and inserted a mix of o-rings to minimize the play and try to plug the air leak. Probably not as good as a bushing but seemed to do the trick. I'm curious to see what you find when replacing the axle seal. My leaking seal led to a loose shaft, destroyed outer needle bearing and both inner ball-bearings on each side of the differential ruined. The needle bearing is available but no luck on the ball bearings. Even with the broken frame, that was a really good deal. Jeremy

Share this post


Link to post
Share on other sites
 
Martin

Got the carb kit this morning but could not find the throttle shaft bushing anywhere local. I went ahead and put it together to see if it would fire up...it did!

I had the same issue with my C-160 throttle shaft and no luck finding a bushing so I removed the shaft and inserted a mix of o-rings to minimize the play and try to plug the air leak. Probably not as good as a bushing but seemed to do the trick. I'm curious to see what you find when replacing the axle seal. My leaking seal led to a loose shaft, destroyed outer needle bearing and both inner ball-bearings on each side of the differential ruined. The needle bearing is available but no luck on the ball bearings. Even with the broken frame, that was a really good deal. Jeremy

this is what i usually do with my throttle shafts........

http://www.wheelhorseforum.com/topic/32176-kohler-10-horse-k241-engine/#entry274473

Share this post


Link to post
Share on other sites
 
dwainw

Woodmotorsports,

Looks like you are doing this resto the right way - from the ground up. You'll have a lot more tractor than the B-80 when you are done.

I have one question, though. When you filled in the brake arm to make the top edge straight, does the parking brake want to engage and (stay) disengaged properly? The original factory drawing shows a cam dip in the top of that arm, though I have no idea what size or shape that dip should be:

C-160BrakeArm.jpg

The reason I ask is that I have a C-160 with a parking brake that slowly engages itself while the drive belt is engaged, which took out the brake pawl in the transaxle. Everything else in my linkage looks good, but the brake arm could be worn in the same place yours was. I have considered building this one up as well, but wasn't sure exactly how much or where. I was curious if your flattening of the brake arm surface ended up with a properly working parking brake.

Share this post


Link to post
Share on other sites
 
tommy3horse

Hello;

Nice project ya got there. Contact Brian Miller Enterprises in Columbia Mo (573)875-4033 and he will be able to provide the bushing for your carb, plus anything else for the Walbros. Good luck!

Share this post


Link to post
Share on other sites
 
Trouty56

Woodmotorsports,

Looks like you are doing this resto the right way - from the ground up. You'll have a lot more tractor than the B-80 when you are done.

I have one question, though. When you filled in the brake arm to make the top edge straight, does the parking brake want to engage and (stay) disengaged properly? The original factory drawing shows a cam dip in the top of that arm, though I have no idea what size or shape that dip should be:

C-160BrakeArm.jpg

The reason I ask is that I have a C-160 with a parking brake that slowly engages itself while the drive belt is engaged, which took out the brake pawl in the transaxle. Everything else in my linkage looks good, but the brake arm could be worn in the same place yours was. I have considered building this one up as well, but wasn't sure exactly how much or where. I was curious if your flattening of the brake arm surface ended up with a properly working parking brake.

I think this needs some clarification also. Every brake arm I see has a concave top edge. More than likely worn deeper but how much is unknown to me. Also the the belt tensioner assembly area that moves the brake lever has a groove that the lever rides in (or is worn there). So how much is wear and how much is supposed to be there?

I mean this looks normal too me...

f5aa0d47.jpg

Share this post


Link to post
Share on other sites
 
HorseFixer

Looks like a nice project and yer doing a good job. :handgestures-thumbupright: Gotta love those big blocks! :)

Duke

Share this post


Link to post
Share on other sites
 

Create an account or sign in to comment

You need to be a member in order to leave a comment

Create an account

Sign up for a new account in our community. It's easy!

Register a new account

Sign in

Already have an account? Sign in here.

Sign In Now
Sign in to follow this  

  • Similar Content

    • davidfindlay
      By davidfindlay
      Looking to find a new home for my 84 (I think) C-145. It has a dump trailer with the enclosure for leaves, the PTO impeller to get the leafs into the trailer, the hoses for deck-to-impeller, impeller-to-trailer.
       
      I haven’t run it in over a year.
      The battery and the cable to the battery probably need to be replaced.
      Comes with a new head gasket still in the bag.
      Seat is cracked but still comfortable.
       
      Happy to answer questions or take other pictures.


    • 87 416-8 horse
      By 87 416-8 horse
      I’m looking for wheel horse tractors for sale or for parts in the Eastern Nebraska or western Iowa area. Preferably 8 speed manuals. Pm me or comment with what you have. The worst I could say is it’s out of my price or distance range. Edit: engine is not important, it’s going to get an engine swap.
      Thanks,
      John
    • BrianStasC-101
      By BrianStasC-101
      Hello all. I am looking for suggestions on adapting the pto from my C series tractor to a harbor freight predator 420 13hp engine. I know the predator motors are a controversial topic however it is the route I have chosen for this particular machine. The intent was to mostly use it for plowing so no PTO required but it would be handy to have. Looking to hear from someone that has successfully done the swap that may offer any advice before I attempt to transfer it over. Just looking for any general pointers that will help me along the way to make it go as smoothly as possible. 
    • HumbleHans
      By HumbleHans
      Operator manual 810343R1
      Wiring
      34 pages 17.5MB
       
      Wiring Colored 
      1 page 228KB
       
      1984 C-105 8-Speed model 11-10K802
      1984 C-125 8-Speed model 11-12K802
      1984 C-145 Automatic model 11-14KE01 - Some used alternate inner axle bearing See PSB #369
      1984 C-165 8-Speed model 11-16K801
      1984 C-175 Twin Automatic model 11-17KE01 - Some used alternate inner axle bearing See PSB #369
      1984 C-195 Twin Automatic model 01-19KE02
       
       
    • t_furl43
      By t_furl43
      1979 c-101 nice project tractor just needs a few odds and ends, steering wheel, coil, carburetor bowl, the wiring was redone by previous owner....all 4 tires are good and hold air it goes into all gears no problem, transmission fluid has been changed, 10hp Kohler, message me or call or txt with any questions, it does run and runs well,  it’s been kept inside since I’ve had it, I would also trade for a mid mount grader blade thanks 


      92DB561C-FF95-4868-A52B-5725D4D3B9DE.mp4
×
×
  • Create New...