Jump to content
Sign in to follow this  
fireman

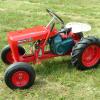
New Wheel Horse for the kids to ride around at shows!

Recommended Posts

 
AMC RULES

AWESOME! Thanks Jeff.

Share this post


Link to post
Share on other sites
 
Ken B

I call dibs after Steve takes his ride! Fantastic job as always Jeff. The Kent show is a great show guys, its grows every yr. The setting is about as New England as you can get, right smack dab in the middle of the woods! Very rustic. I'm gonna pack 4 roundies on my truck and trailer, bring as many as you can!

Share this post


Link to post
Share on other sites
 
stevebo

At least it is close enough to home that if you find a tractor you have to have that you can double back and pick it up. I may bring an off brand and horse this year...

Share this post


Link to post
Share on other sites
 
Ken B

Bringing the Economy? That'll look good at Kent.

Share this post


Link to post
Share on other sites
 
Wheel Horse Kid

Hope your son enjoys his new tractor! It looks like a nice one!

Share this post


Link to post
Share on other sites
 
stevebo

I am leaning toward bringing the economy, an rj35 and a burb or rj59??

Share this post


Link to post
Share on other sites
 
fireman

Ended up getting a piece of metal in my eye on Sunday. I had on safety glasses and was using a cut off wheel. Must have went under them. The piece must have been stuck under my eye lid. Went to bed and rubbed my eyes and whamo! Tried to get it out myself with no luck. Went to the hospital at 3:30 am and had it removed. Got home and got ready for work. Did my 24 hour tour then headed to my eye doctor to remove the "rust ring" that the metal left. Had to wear a patch for 24 hours then headed back to the doctor to check things out. Everything looks good. So needless to say I didn't get much accomplished in the last week. I did however layout some things. I have a nice 2" volt meter gauge and engine hour gauge I want to install. I don't have a step drill that goes up to that diameter. I remembered that good old Harbor Freight carries a hydraulic knock-out tool and I just got a 20% coupon and I had a page from a magazine that had some killer deals from them. Took a ride there and spent some cash. Picked up the knock-out kit, and the tool box/cart. The hydraulic kit was normally $99.00 and was on sale for $89.00 but I used the 20% coupon for that. The girl must have screwed up because when using the coupon it was supposed to be off the regular price and not the sale price. I ended up paying $71.00 for it. The tool box/cart is normally $229.00 and is on sale for $149.99. I had a special coupon for that and got it for $99.00. When I was there I also picked up a new pair of comfortable goggles to use.

I used the hydraulic punch when I got home to blow the two 2" holes through the steering tower on the Ranger. This thing went through like butter. Can't believe I went so long without one.

I ordered a 12 volt starter to replace the 24 volt one installed on the diesel engine. Hopefully that will be here some time next week. In the mean time I will pick up a 12 volt lawn tractor battery and get that installed under the seat pan along with all the wiring. This way when the new starter gets here all I will have to do is install it and hook up the one big A+ wire from the battery.

I have a few more parts to touch up with paint. I have the new piece for the throttle linkage machined and just have to add the holes, threads and bronze bushing. I think by the end of next week it should be done.

punch.jpg

toolbox.jpg

Share this post


Link to post
Share on other sites
 
bowtiebutler956

Sorry to hear about your eye. Been there, done that, several times. Those are some nice tool, maybe I'll have to go to HF, as I just got my coupons in my email. Sound like your making progress! :thumbs:

Matt :flags-texas:

Share this post


Link to post
Share on other sites
 
fireman

Got back from going to a tractor museum with SteveBo today and hit the work shop. Finished machining the last piece for the gas pedal linkage (first pic) and got that installed. Changed the location of the return spring for better function. Has a much crisper feel now. I added another adjustable stop (last two pictures) to the pedal to prevent the driver from mashing it and bending the linkage. Re-routed the fuel lines and secured them in place. Picked up the battery this morning but got the call from SteveBo about going to check out this museum so in my rush I forgot the cables. I'll head out tomorrow and pick those up. Task for tomorrow is to fabricate a battery tray to mount under the seat pan and run the cables. Finish the paint touch up and check all the bolts to make sure their secure.

101_1129.jpg

101_1127.jpg

101_1130.jpg

101_1131.jpg

Share this post


Link to post
Share on other sites
 
bowtiebutler956

Very nice work! I believe the extra stop is a very wise decision on your part. :thumbs:

Matt :flags-texas:

Share this post


Link to post
Share on other sites
 
fireman

Spent some time Sunday and today working in the shop. Had to strip and repaint a few parts due to some crazing in the paint. I think I didn't give it enough time between primer and paint. Problem solved, now just waiting for it to dry so I can wet sand and give a final top coat. Got the battery installed and locked down. Had to cut the ears off the battery and drill and tap the slugs that goes through it and raise the seat pan by 3/4" in order to have enough clearance. It's a tight fit, that's for sure. Hopefully the new starter will come this week. As soon as the steering towers paint is dry, I can re-install that, then put the gauges in and get the electrical all finished up.

101_1132.jpg

101_1133.jpg

Share this post


Link to post
Share on other sites
 
stevebo

Jeff,

Looks very nice. Is that an oil spot on the wall ....lol

Share this post


Link to post
Share on other sites
 
bowtiebutler956

Thats a tight fit for sure! Nice idea cutting the post off, and drilling and tapping the battery. I probabally wouldn't have even thought of that, I'd of raised things up higher to clear, but I like your way better! :text-datsphatyo:

Matt :flags-texas:

Share this post


Link to post
Share on other sites
 
SALTYWRIGHT

JEFF YOU NEED TO PUT A 45 DEG. ON THE TOP OF THE STACK TO KEEP THE EX. AWAY WHEN THE WIND BLOWS. I DID THAT TO MINE AND IT WORKS GOOD. RUSS

Share this post


Link to post
Share on other sites
 
fireman

More than one oil spot that's for sure! That drain pan will be on it's way with me to work tomorrow then into the dumpster it goes. Definitely a forgetful moment on my part that I will always remember !!!

Share this post


Link to post
Share on other sites
 
fireman

I haven't cut the stack yet because i'm not sure if that's the height it's going to stay. I am actually making up a second exhaust that just comes straight out of the head and turns upwards. I will try them both once the tractor is all back together and see which I like best.

Share this post


Link to post
Share on other sites
 
Terry M

Nice Ranger! :bow-blue::handgestures-thumbupright: Please post a video after you install the diesel :)

Share this post


Link to post
Share on other sites
 
Terry M

Nice Ranger! :bow-blue::handgestures-thumbupright: Please post a video after you install the diesel :)

After it's finished that is!! :)

Share this post


Link to post
Share on other sites
 
Ken B

As always, nice clean professional work Jeff. Ain't no grass growin under yer feet!

Share this post


Link to post
Share on other sites
 
fireman

Yah, for some reason i'm really driven to get this project done. My problem is every time I work on it, I find something else I want to change or do to it. I can't just leave well enough alone. I have to keep telling myself that this a driver for the kids and not a custom restoration! I probably have over 40 hours of labor into this including machine, paint, etc. But I guess in the end it will be worth it.

Share this post


Link to post
Share on other sites
 
bowtiebutler956

Yah, for some reason i'm really driven to get this project done. My problem is every time I work on it, I find something else I want to change or do to it. I can't just leave well enough alone. I have to keep telling myself that this a driver for the kids and not a custom restoration! I probably have over 40 hours of labor into this including machine, paint, etc. But I guess in the end it will be worth it.

Yes Jeff, its definitely worth it! I probabally had over 100 hrs, and way to much money in my sons Bantam, but it was worth every penny! I can't even guess how many hours seat time he has on it now, but its alot, and just seeing his smiling face, and the way he loves his tractor is all the payment I ever needed! Here is a pic of Danny's Bantam. Your doing great work, and for a good cause. :thumbs::bow-blue:

Matt :flags-texas:

post-6076-0-34343800-1347999784_thumb.jp

Share this post


Link to post
Share on other sites
 
fireman

Matt,

That is one nice tractor. I have been keeping my eye out for a Bantam. It's hard though because I know a bunch of guys that are hard wired to Ebay, CL and other selling forums looking for them. There are a bunch of collectors here in the Northeast and the Bantams, Bairds and other odd tractors are highly sought after. The few that do come up for sale are usually gone within the first 20 minutes if they are on CL. Even on Ebay when they are listed, people email the sellers and try to broker a deal to buy it offline! Maybe some day.

Your right about seeing your kids smile ridding on something that you worked so hard on. Those memories will last forever!

  • Like 1

Share this post


Link to post
Share on other sites
 
fireman

Got home from work this morning and spent a few hours in the shop. Got the straight exhaust (muffler bypassed) put together. Had to put some final coats of paint on a few parts. The new 12 volt starter showed up in the mail today and I got that installed. I had to pull the battery back out and cut and re-weld the battery tray as I had a bolt clearance issue when I went to put the seat pan back on. Seeing as I had to pull it apart again, I figured I would repaint the seat pan to my red verse the red it came in. Now it's a waiting game for all the paint to dry then I should be able to re-assemble everything when I get home from work on Sunday morning. I'll have to fire it up and see how loud the straight exhaust will be before I put the hood on. May have to go back to the muffler setup if it's too loud.

101_1135_zpsa1143ecd.jpg

101_1134_zpsf7d7f869.jpg

Share this post


Link to post
Share on other sites
 
Wheel Crazy

The tractor is going together great! If the exhaust is to loud you could do this...

I seen this on Youtube the other day and thought it was a neat idea. The guy took a muffler and put a rain cap on it so it still kinda looked like a straight pipe, but without the noise. Skip to 3:37 to see the exhaust.

http://www.youtube.com/watch?v=qQz4L61AM70&feature=plcp

I think this might be the muffler in the video?

http://www.tractorsupply.com/arnold-replacement-muffler-for-briggs-stratton-kohler-and-tecumseh-4440846

Share this post


Link to post
Share on other sites
 

Create an account or sign in to comment

You need to be a member in order to leave a comment

Create an account

Sign up for a new account in our community. It's easy!

Register a new account

Sign in

Already have an account? Sign in here.

Sign In Now
Sign in to follow this  

×
×
  • Create New...