Jump to content
Sign in to follow this  
1maidenfan

D 200 front loader going together.(finally)

Recommended Posts

1maidenfan

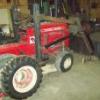
Started putting the front loader that I built on my D 200 today. I have everything but hydraulic hoses and those are in the process of being built. I was at napa this past week and had 1 of each of the hoses that I need made, now they have to get all the fittings ordered and the rest of the hoses made.

Installed wheel weights, 110 lb. each :omg: and will be making a 3 point bracket :thingy: to hold steel weights.

Redone the steering on this also, new thrust bearings on the spindles, new wheel bearings and one of the old thrust bearings I installed on the steering pivot so it has something to pivot on.

Fab'd a bracket for the hydraulic pump and a way to adjust belt tension, now I need a proper size belt.

Steering wheel needs new bushing in the top, very sloppy, so I have it sitting in a puddle of PB Blaster. ( wish me luck on that! )

Will update as time goes on and hoses come in.

post-4490-0-25992000-1338697602_thumb.jp 110 lb each.

post-4490-0-81274700-1338697658_thumb.jp

post-4490-0-51251300-1338697692_thumb.jp

post-4490-0-33533800-1338697880_thumb.jp All new bearings in the PTO

post-4490-0-78486900-1338698017_thumb.jpThe 160 had to make in too!

post-4490-0-78902400-1338697728_thumb.jp

post-4490-0-32757300-1338697752_thumb.jp

post-4490-0-95088600-1338697774_thumb.jp

post-4490-0-44727900-1338697793_thumb.jp

post-4490-0-99074100-1338697859_thumb.jp

post-4490-0-60754600-1338698070_thumb.jp

  • Like 1

Share this post


Link to post
Share on other sites
 
whfan74

Looking good John! That D-200 looks very familiar! Glad to see that it will have an attachment to work in the very near future!

Share this post


Link to post
Share on other sites
 
312Hydro

Your loader looks great! Did you build it from plans?

Share this post


Link to post
Share on other sites
 
coldone

That looks great. For the top bushing on the steering shaft. try one of the bearings thats like one on the wheel. It needs to be a lipped bearing it will be a little loose. you can shim it or us JB on it to fit it. I did this to one of my ross columns and it works great.

Share this post


Link to post
Share on other sites
 
1maidenfan

That looks great. For the top bushing on the steering shaft. try one of the bearings thats like one on the wheel. It needs to be a lipped bearing it will be a little loose. you can shim it or us JB on it to fit it. I did this to one of my ross columns and it works great.

Thank you for the info.

I have to get it apart first.

Your loader looks great! Did you build it from plans?

Just from my head.

Looked at pic's from other loaders here on redsquare and started cutting and welding.

Share this post


Link to post
Share on other sites
 
1maidenfan

Looking good John! That D-200 looks very familiar! Glad to see that it will have an attachment to work in the very near future!

Yep, that's the one Scott. I used it a couple times to mow when my D160 was down. It runs great and the seat is very comfy! Just need to get steering wheel tightened up and it will be great.

Thank you.

Share this post


Link to post
Share on other sites
 
Alan_Heist

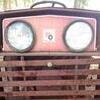
I like the lights!! Do you think that your forward braces are enough? Most I've seen seem to be a little more stout. It looks very capable thought. Can't wait to see more progress pics!!

Share this post


Link to post
Share on other sites
 
decksetter

Looks good John! Keep up the good work :handgestures-thumbupright:

Share this post


Link to post
Share on other sites
 
JamesBe1

Looks great! Very impressive that you designed and built it yourself. What kind of pump are you using?

I find the lighting is nice to have, but I don't really have much that I need to do with the loader at night. Also, the bucket and lift arms block a lot of the light.

Also, I see that you are attaching the brace to the top of the front hood shroud. That's a clever way to get around the adapters that are used with the standard ark loader. However, it might be a concern that the shroud might flex too much under load. I or anyone can post pics of the brace adapters if you want to go that route.

James

P.S. I love the fender mount tool box. Is that OEM?

Share this post


Link to post
Share on other sites
 
Horse'n Around

That looks terrific. You have a lot of talent in both planning and fabricating.Great work !!!

John

Share this post


Link to post
Share on other sites
 
1maidenfan

Looks great! Very impressive that you designed and built it yourself. What kind of pump are you using?

I find the lighting is nice to have, but I don't really have much that I need to do with the loader at night. Also, the bucket and lift arms block a lot of the light.

Also, I see that you are attaching the brace to the top of the front hood shroud. That's a clever way to get around the adapters that are used with the standard ark loader. However, it might be a concern that the shroud might flex too much under load. I or anyone can post pics of the brace adapters if you want to go that route.

James

P.S. I love the fender mount tool box. Is that OEM?

Thank you. The pump is off a dump truck, smaller one like a 1-2 ton. I believe it is a chelsea (spelling?)

I had the lights laying around for awhile now so I thought I would put them on, I dont plan on doing any work in the dark either but ya never know. Maybe snow storm at 3am :confusion-shrug:

I also am wondering about the down bracing for the uprights as their is some flex in the hood shroud. Might have to run more bracing or maybe some one can post a pic of how theirs is braced. :bow-blue:

Thank you for the kind comments. Alot of work in this thing! But it has been alot of fun :woohoo:

Share this post


Link to post
Share on other sites
 
KC9KAS

Great FEL build.

Is your hydro pump high enough off the ground that it won't get hit/damaged?

Share this post


Link to post
Share on other sites
 
1maidenfan

That looks terrific. You have a lot of talent in both planning and fabricating.Great work !!!

John

Thank you!

Its all about looking at something and being able to duplicate that. Alot of wire used through my welder on this one.

Will have to pull the bucket out from under the work bench and get pic'd of it posted.

Share this post


Link to post
Share on other sites
 
1maidenfan

Great FEL build.

Is your hydro pump high enough off the ground that it won't get hit/damaged?

I sure hope so. :huhs: Thats one of my main concerns on this build. :omg: One way to find out :chores-chopwood:

Thank you.

Share this post


Link to post
Share on other sites
 
1maidenfan

Looks great! Very impressive that you designed and built it yourself. What kind of pump are you using?

I find the lighting is nice to have, but I don't really have much that I need to do with the loader at night. Also, the bucket and lift arms block a lot of the light.

Also, I see that you are attaching the brace to the top of the front hood shroud. That's a clever way to get around the adapters that are used with the standard ark loader. However, it might be a concern that the shroud might flex too much under load. I or anyone can post pics of the brace adapters if you want to go that route.

James

P.S. I love the fender mount tool box. Is that OEM?

I believe the tool box is oem as it was a front loader tractor and backhoe tractor previously. One of our members I believe had this when it was a loader / hoe tractor.

Purchased this D200 from Scott (whfan74) what a great couple of guys him and his dad are!

Share this post


Link to post
Share on other sites
 
JamesBe1

I'd love to get one of the fendermount tool boxes, but I suppose they are hard to find. I guess I'll just get a run-of-the-mill toolbox and attach it somehow. Very handy thing to have. Almost as important as a cup holder!

Share this post


Link to post
Share on other sites
 
otrelwood

i took one off that i didnt think was supposed to be on there but if you saw some of the po improvements this jewel had you would have thought that too

Share this post


Link to post
Share on other sites
 
JamesBe1

Here are some pics of the support bracket on my FEL.

Anything else you need, just ask. I'd love to see your project turn out to be a major success.

Share this post


Link to post
Share on other sites
 
1maidenfan

Here are some pics of the support bracket on my FEL.

Anything else you need, just ask. I'd love to see your project turn out to be a major success.

Great pic's :text-coolphotos::happy-jumpeveryone::thanks:

:omg: I think I can make those no problem. :techie-eureka:

Looks to be a much sturdier way also. :handgestures-thumbup:

Share this post


Link to post
Share on other sites
 
JamesBe1

The pleasure is all mine sir! I am delighted to contribute in the slightest way to your fantastic project.

BTW, how would you make holes for the mufflers (assuming that you need to.)?

Share this post


Link to post
Share on other sites
 
wheeledhorseman

I was away over the weekend when this thread was posted and I've only just caught up with it.

This is simply awesome my friend. :bow-blue: I don't think I've seen as much steel going into a design and build project since I visited Stigian over here to see his 6x6 project.

I can do a bit of the make it up as you go along fab'n stuff but only on a very modest scale, as I said this is just awesome!

Oh well, perhaps one day.

Andy

Share this post


Link to post
Share on other sites
 
1maidenfan

I was away over the weekend when this thread was posted and I've only just caught up with it.

This is simply awesome my friend. :bow-blue: I don't think I've seen as much steel going into a design and build project since I visited Stigian over here to see his 6x6 project.

I can do a bit of the make it up as you go along fab'n stuff but only on a very modest scale, as I said this is just awesome!

Oh well, perhaps one day.

Andy

Thank you. It has taken 4-5 months on and off working on it. Now if I can just get hoses I think I will be in buisness!

I also watched the "stig special" go together, now that is a work of art!!!

The pleasure is all mine sir! I am delighted to contribute in the slightest way to your fantastic project.

BTW, how would you make holes for the mufflers (assuming that you need to.)?

Plasma cutter would be my first option. All else fails, the torch will do it.

Thanks again.

Share this post


Link to post
Share on other sites
 

Create an account or sign in to comment

You need to be a member in order to leave a comment

Create an account

Sign up for a new account in our community. It's easy!

Register a new account

Sign in

Already have an account? Sign in here.

Sign In Now
Sign in to follow this  

  • Similar Content

    • BuffaloD200
      By BuffaloD200
      '74 D-180
       
      My friction disc in gone on my clutch.  I saw the old post about making a new friction disc, so I'm not concerned about that.
      I managed to remove the front clutch plate and double v-belt pulley.  But I can't separate the two.  When I took the assembly off the spiraloc washer popped off on its own.  I HAVE READ THE MANUALS.
      So I should be able to just remove the pulley from the front clutch and continue with step 4.  The v-belt pulley is loose as all hell and flops around like a dead fish.  It seems to be hung up on a ring or bearing race.  
      So my thoughts are grab a BFH or sparky the blue tip wrench.
      Is there an unpublished step 3.5, or some trick?
    • BuffaloD200
      By BuffaloD200
      Hey all, 
       
      My '74 D180 has a lot of trouble pushing snow.  Weighted tires, but nothing else at this time.  I've found it gets stuck frequently and only one wheel spins.  Do these tractors not have a limited slip/locker arrangement?  How does everyone manage with the infamous one wheel peel?
    • BuffaloD200
      By BuffaloD200
      Hey all, I need to install a drive belt on my 75 D180 for my snowblower.  I've looked through a bunch of D-series owner's manuals, and none seem to mention replacement procedure.  The PTO pulley is fixed, save for engaging the PTO and there is minimal movement at the snowthrower pulley. There's no idler or tensioner as far as I can tell.  Do I have to remove the PTO pulley?  That seems to be a required service item.
      Same question for my 80 D200 as well really.  
       
      Using the recommended 4L490W belt.
       
      Thanks 
    • ihatephones
      By ihatephones
      I got a D-180 for $250, and the governor is messed up, the points won't open or close, and I took it apart and was being stupid and messed some stuff up in there, and now I need a new one.
      Where can I get one that's not on eBay for $200?
      I also forgot to say it was a Kohler K482, and I'll throw some pictures of the tractor in as a treat.


    • Southern_Secret
      By Southern_Secret
      Hello fellow Horse Heads long time no post for me, life gets crazy & a lot of things change sometimes but anyhoo. So back a few years ago when I first got my 1994 314-H I had it at my shop going threw it. One of my customers walk past as im working and said, you know I think Iv got a Wheel Horse & im thinking "no you dont buddy". I give him my # to send pics thinking it was a big waste of time & after getting the pics I realized he did have a Wheel Horse! I hand shake bought it right there, asked him to bring it to my store & he said no problem. Well after almost 2 years it is finally in my orbit. I know very little about it other than his father-inlaw got it new and used it around his house moving snow and stuff. His father inlaw moved down south here when his daughter got married and gave the tractor to my customer because he had a farm & his the inlaw had no use for it anymore. Same with every barn find, "it was running when parked" 8 years ago, said one of the axel seal is leaking. Im happy and hope I can get it back in running order soon cause it is going to be handy around the truck farm!!
       
      I will post Pics as soon as I reinstate my membership


×
×
  • Create New...