Jump to content
JamesBe1

7-1261 50" Tiller

Recommended Posts

JamesBe1

I felt bad about hijacking Paul's thread, so I figured I would start anew. Here goes:

To start, I got a 50" tiller a couple of years ago to go with my D-180. It had a leaking tine shaft seal, and almost no oil in it when I got it. The input housing was off it it, but at least it was there. I dismantled it to strip and repaint, but then my D-180 died, and I put off the tiller work. Well, now I need to put it back together again and get it working.

It was seized up yesterday when I went to look at it. But after spraying lots of PB Blaster and WD-40, I got it to turn. When I was satisfied that it was working, I drained it out of the input housing. I got about two cups of nasty rusty water.

My question for the group is what would you recommend to try to clean it out? If at all. I might be inclined to fill it back up with the appropriate amount of oil and run it for a few hours and then drain it. I was thinking about maybe adding kerosene, dunno.

Here are some pics:

I found most of the rest of the parts except for three. Two for them I think I can fab is someone would be kind enough to take pics and measure them for me. The last piece is a nice to have, but not a need to have.

Need to have:

Front Brace:

Upper Link:

Want to have:

PTO Shield:

Any input or help or suggestions would be much appreciated.

James

Share this post


Link to post
Share on other sites
 
JamesBe1

Making progress. I ordered an adjustable top link instead of worrying about fabricating an OEM style top link with the right dimensions. Should make life a lot easier.

I still haven't found my front brace, but I figure that I can fabricate one out of 1'8' steel with a hacksaw and a drill and some time beating it on the anvil. I'll take pics.

I still haven't found the PTO shield, but I think I can live without it.

I painted the tiller gearcase and started attaching parts:

I still have a box of parts to attach as soon as the paint finished drying on the other pieces. For all you Valspar fans out there, I started using the new paint from TS. It seems to work well.

I have to get to the store to pick up 2.5qts of 90W gear oil and fillerup once I get it upright. I hope the new seals that I put in are going to do their jobs.

This thing is getting heavier by the day. The gear case wasn't light to begin with. I find that having the FEL on the D-180 is a great way to raise and lower it from the workbench to the dolly when I am through throwing parts at it for a while. Beats throwing your back out trying to lift one of these things.

  • Like 1

Share this post


Link to post
Share on other sites
 
312Hydro

Interesting project and it looks like it's going together ok. I don't have a "D" series but I like following your build up. Maybe one day I'll get one. I think you have a good plan about running it and changing the oil , but it won't remove that rust on the shafts or other non contact surfaces. The adjustable top link might be pretty useful and that guard looks pretty easy to fabricate with some 16 gauge. Nice work!

Share this post


Link to post
Share on other sites
 
JamesBe1

Thanx Rich.

Good point about fabricating the guard. I sure wish I had a sheet metal sheer to cut out small parts like that. My only problem would be how to make the large hole for the pto. Any ideas?

Share this post


Link to post
Share on other sites
 
312Hydro

Thanx Rich.

Good point about fabricating the guard. I sure wish I had a sheet metal sheer to cut out small parts like that. My only problem would be how to make the large hole for the pto. Any ideas?

What size is it ? A chassis punch would do it. Greenlee makes them but I'd try to borrow one first. Maybe a metal cutting hole saw as my second choice.

Share this post


Link to post
Share on other sites
 
JamesBe1

I think the metal is only 1/8" Shouldn't be too much of a problem. But I have no idea of the actual dimensions or the size of the hole required. But then again, this isn't rocket surgery. Close enough is more than enough for a pto guard.

A chassis punch! I never thought of that. Great idea. I checked around, and the Greenlee ones are pretty expensive for something that I am not going to use very often. There is a cheap import hydraulic one at Harbor Freight, but I try to only buy import junk when I am desperate.

I might try a hole saw. I would hate to ruin one, but it should be able to cut 1/8" steel.

Share this post


Link to post
Share on other sites
 
JamesBe1

I finally made some progress. I have my tines shafts off of the tiller, but I figured that I would attach it to the tractor to see if everything goes together. Yesterday I had finished cutting down (by hacksaw) a 15 spline 1" shaft to use to connect the drive shaft yoke to the tractor rear pto.

I got the rear pto quick coupler cleaned up and functional, and the spline shaft sits in there perfectly. Except when it is attached to the tractor. Seems the the spline shaft from the tractor pto shaft go far enough into the quick coupler that I can't have the coupler attached to the tractor and spline shaft that I made, at the same time. So I had to cut an inch off the spline shaft. While I was at it, I was going to install a roll pin in the drive yoke to hold the spline shaft in, but the hole was too small and I broke my drill bit. There was a larger hole in the yoke, and I decided to use that and drill a hole through the shaft and keep it in with a nut & bolt.

I had the assembly secured in the drill press, ready to drill, and decided to tighten a vise clamp down just a little more, and when I did that, the assemble fell off the drill press plate onto the floor. When I picked it up, the spline shaft was no longer in the end. After over an hour of searching, I finally found that when the drive shaft hit the floor, the impact had launched the spline shaft out of the end with such a perfect trajectory, that it jumped up three feet and landed in the nearby trash can.

Of course, that would be that last place that anybody would ever look, but after not finding it anywhere within 15 feet, I looked in there. I didn't see then it and went on searching the barn floor some more (really messy and dirty). I got out the shop vac and vacuumed the ***** area. I was on the verge of packing it in for the night, when I decided to look through the trash can very thoroughly. I took the trash can to the shed and started removing everything (it was half full). I got everything out but all the little dirty bits and pieces in the bottom, and was ready to concede defeat when I decided to pull the trash bag out. Lo and behold, the spline shaft was covered in little bits of dirt, wrapped up in a fold of the trash bag. What a relief!

I called it a night (last night), and decided to finish in the morning.

This morning, I got the hole drilled out and secured the spline shaft in the yoke end with a nut & bolt. It hooks up the the tractor rear pto quick connect nicely now that spline shaft doesn't stick too far into the quick connect that it hits the tractor pto shaft.

I added 2.5 quarts of 90W oil to the tiller body, and closed it up. I maneuvered it behind the tractor, and tried to attach it to the tractor 3 point hitch, but the lower arms of the 3 point hitch won't spread far enough apart to get them both in. What gives? I think the lower 3 point hitch arms might be bent inwards a bit.

Anybody know what the dimensions are supposed to be for 3 point hitches???

While I had it in place (within a couple of inches), I hooked up the drive shaft to the tractor and the tiller. Seems I am missing a key for the tiller to driveshaft connection. I'll have to pick one up today or tomorrow. At least everything seemed to hook up. I started the tractor and gently moved the pto lever. The drive shaft spun, and there was enough friction between the parts that the tiller actually turned. Tada! At least I have a tiller that turns that I can almost attach to a tractor. I'll get that part sorted out in a few days.

Oh yeah, I ordered a tine from clean-cutters to see if it will fit my tiller. If it fits, then I will order the rest of the set.

Sorry for the long winded story.

I'll try to add some pics later.

Share this post


Link to post
Share on other sites
 
coldone

On the 3PTH arms, check and makes sure the ball sockets on the tractor side are swiveling. Mine are so tight that they wont allow the full range of motion on the lower arms, yet.

Share this post


Link to post
Share on other sites
 
JamesBe1

Thanx coldone. They swivel, but they don't move all that much. I think one of the arms is twisted a bit.

I took a small hydraulic jack and spread the arms apart to get the tiller in. The balls at the end of the arms are frozen, but were straight enough that I could get the tiller hooked up.

The tiller doesn't exactly sit level, but I think I can adjust for that with the arm adjusters on the 3 point once I get the unfrozen.

Share this post


Link to post
Share on other sites
 
JamesBe1

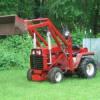
Couple of pics of todays activities. I even found time to take a break from this and install a sand blasting cabinet (barrel blaster).

The top link that I got was too wide to fit between the tiller uprights. I had to grind away part of the top link to make it thinner.

It kinda tilts to the right. Hope I can level it out with the 3 point adjusters. If not, then I will have a real headache on my hands.

Share this post


Link to post
Share on other sites
 

Create an account or sign in to comment

You need to be a member in order to leave a comment

Create an account

Sign up for a new account in our community. It's easy!

Register a new account

Sign in

Already have an account? Sign in here.

Sign In Now

  • Similar Content

    • BuffaloD200
      By BuffaloD200
      '74 D-180
       
      My friction disc in gone on my clutch.  I saw the old post about making a new friction disc, so I'm not concerned about that.
      I managed to remove the front clutch plate and double v-belt pulley.  But I can't separate the two.  When I took the assembly off the spiraloc washer popped off on its own.  I HAVE READ THE MANUALS.
      So I should be able to just remove the pulley from the front clutch and continue with step 4.  The v-belt pulley is loose as all hell and flops around like a dead fish.  It seems to be hung up on a ring or bearing race.  
      So my thoughts are grab a BFH or sparky the blue tip wrench.
      Is there an unpublished step 3.5, or some trick?
    • BuffaloD200
      By BuffaloD200
      Hey all, 
       
      My '74 D180 has a lot of trouble pushing snow.  Weighted tires, but nothing else at this time.  I've found it gets stuck frequently and only one wheel spins.  Do these tractors not have a limited slip/locker arrangement?  How does everyone manage with the infamous one wheel peel?
    • BuffaloD200
      By BuffaloD200
      Hey all, I need to install a drive belt on my 75 D180 for my snowblower.  I've looked through a bunch of D-series owner's manuals, and none seem to mention replacement procedure.  The PTO pulley is fixed, save for engaging the PTO and there is minimal movement at the snowthrower pulley. There's no idler or tensioner as far as I can tell.  Do I have to remove the PTO pulley?  That seems to be a required service item.
      Same question for my 80 D200 as well really.  
       
      Using the recommended 4L490W belt.
       
      Thanks 
    • ihatephones
      By ihatephones
      I got a D-180 for $250, and the governor is messed up, the points won't open or close, and I took it apart and was being stupid and messed some stuff up in there, and now I need a new one.
      Where can I get one that's not on eBay for $200?
      I also forgot to say it was a Kohler K482, and I'll throw some pictures of the tractor in as a treat.


    • Southern_Secret
      By Southern_Secret
      Hello fellow Horse Heads long time no post for me, life gets crazy & a lot of things change sometimes but anyhoo. So back a few years ago when I first got my 1994 314-H I had it at my shop going threw it. One of my customers walk past as im working and said, you know I think Iv got a Wheel Horse & im thinking "no you dont buddy". I give him my # to send pics thinking it was a big waste of time & after getting the pics I realized he did have a Wheel Horse! I hand shake bought it right there, asked him to bring it to my store & he said no problem. Well after almost 2 years it is finally in my orbit. I know very little about it other than his father-inlaw got it new and used it around his house moving snow and stuff. His father inlaw moved down south here when his daughter got married and gave the tractor to my customer because he had a farm & his the inlaw had no use for it anymore. Same with every barn find, "it was running when parked" 8 years ago, said one of the axel seal is leaking. Im happy and hope I can get it back in running order soon cause it is going to be handy around the truck farm!!
       
      I will post Pics as soon as I reinstate my membership


×
×
  • Create New...