Jump to content
Sign in to follow this  
Lars

Restoring the mover deck

Recommended Posts

Lars

Have I started with a little winter work will restore my moverdeck, so here are some pictures of it.

have taken it apart. and I need some new parts on it ... A little welding job on it due to rust and cracks ..

someone who has new decals for it? and other parts?

IMAG0322.jpg

IMAG0325.jpg

IMAG0327.jpg

IMAG0323.jpg

  • Like 1

Share this post


Link to post
Share on other sites
 
Lars

Hey guys Finaly som uppdate here.. i have e-tanked for the first time on the small parts to the deck.. wow it works..

IMAG0477.jpgIMAG0476.jpgIMAG0478.jpgIMAG0479.jpg and the here it is after som brushing...

IMAG0487.jpgIMAG0486.jpg Rest of the parts will be sandblast..

  • Like 2

Share this post


Link to post
Share on other sites
 
Rooster

Noticed you did some experimenting with different types of electrodes...

Maybe show us pics of the different ones you used and how well each worked?

  • Like 1

Share this post


Link to post
Share on other sites
 
ce318

That looks really nice. What solution did you use. What electrode did you use and how long were the parts in. I have never done that before and would like to know how. Great job.

  • Like 1

Share this post


Link to post
Share on other sites
 
Lars

That looks really nice. What solution did you use. What electrode did you use and how long were the parts in. I have never done that before and would like to know how. Great job.

well i used regulary whasing soda.. the natural one.. and i had it going for like 20-24 hrs and took it up and used a drill whit a steelbrush on .. because the steel went black of the rust. and it was easy to get it clean..

i think i used one cup of soda on 5 gallons of water...

Noticed you did some experimenting with different types of electrodes...

Maybe show us pics of the different ones you used and how well each worked?

yepp i wil come whit some pict and uppdate later roost..

Share this post


Link to post
Share on other sites
 
Jake Kuhn

Looks good Lars! Jake

  • Like 1

Share this post


Link to post
Share on other sites
 
gwgdog66

Good Job!!

I did one a fews years ago.

Share this post


Link to post
Share on other sites
 
AMC RULES

:text-datsphatyo: :text-coolphotos: :thanks:

  • Like 1

Share this post


Link to post
Share on other sites
 
kpinnc

Keep the copper and galvanized out of your tank, and it won't grow the orange or green stuff anymore. Ask me how I know...

  • Like 1

Share this post


Link to post
Share on other sites
 
meadowfield

Lars,

e-tanks are the future !!!!! I have a few different sets of decals for mower decks. PM me if you are interested in a set.

mark

  • Like 1

Share this post


Link to post
Share on other sites
 
Lars

Got time to prime some parts to day..

IMAG0490.jpgIMAG0491.jpg

will try to sandblast the deck and prime it this weekend

Share this post


Link to post
Share on other sites
 
bowtiebutler956

You are doing a fantastic job! :thumbs:

Matt :flags-texas:

  • Like 1

Share this post


Link to post
Share on other sites
 
Wheel-N-It

I painted and installed new blades on my 48inch side discharge deck this week. Yours is going to look great! Maybe next time around I can restore mine nicely like you are restoring yours :)

  • Like 1

Share this post


Link to post
Share on other sites
 
Steve in Mo

I strongly recommend the use of POR-15 to paint the boton side of the deck. two coats and you will be good for at least three or four years. You can find POR-15 in the internet.This stuff is hard hard hard and will insure that no rust will get started from the underside.

  • Like 1

Share this post


Link to post
Share on other sites
 
Lars

Well finaly got time to doing some more on my deck, had it sandblasted and some more E tanking..

And i have done some rust welding on it, hope to weld the last on it tomorrow and prime it.. 2 first pict is E tanking

IMAG0579.jpgIMAG0581.jpg

IMAG0582.jpgIMAG0583.jpg

IMAG0584.jpg and a new pice is welded IMAG0585.jpg

  • Like 2

Share this post


Link to post
Share on other sites
 
KATO

Awesome job !! :bow-blue: I still need to do my deck, but it will have to wait until next winter now.

KEN

  • Like 1

Share this post


Link to post
Share on other sites
 
Lars

well after all the welding and stuff i have coted the deck whit Ferro-Bet Rust Remover "Chemical rust removal as the steel becomes slightly blue of it" as u can see on the pict IMAG0594.jpg

And i have finaly primed it to day with epoxy primer IMAG0597.jpgIMAG0598.jpg

all the part's are primed.. but im not sure if im going to mount everyting back on it before paint.. what yah think?

  • Like 2

Share this post


Link to post
Share on other sites
 
Anglo Traction

im not sure if im going to mount everyting back on it before paint.. what yah think?

Quality work Lars . I like the Paint facilities you have. Paint/Assembly is your call, but I prefer to paint parts before assembly, it provides another layer of corrosion resistance between parts. I'm also happy to wait for the parts to dry and harden before assembly.

  • Like 2

Share this post


Link to post
Share on other sites
 
Rooster

Yep, paint then assemble!

Sometimes I just paint mating areas with a single coat, then paint the assembly after all is together.

  • Like 1

Share this post


Link to post
Share on other sites
 
Lars

well a small update i have painted the underside of the deck and will paint it outside on friday or saturday..

And i have done some more E-tanking.. here is a small video of it.

th_VIDEO0044.jpg

Share this post


Link to post
Share on other sites
 
stevasaurus

Hey Lars...you can not beat going through a thread of yours while on Skype and talking with you while looking at the pictures. This is worth a million bucks...thanks

:) :) :)

  • Like 1

Share this post


Link to post
Share on other sites
 
Lars

Hey Lars...you can not beat going through a thread of yours while on Skype and talking with you while looking at the pictures. This is worth a million bucks...thanks

:) :) :)

Thanks Dino... :)

i have too agree

Share this post


Link to post
Share on other sites
 
Lars

Ok fellas... Here is the final uppdate on my mower deck.. So i hope u guys like it.. :)

So here are some more pict.. here it is ready to get some paint IMAG0616.jpg

and here are the parts paintedIMAG0620.jpgIMAG0622.jpg

started to bring it back together..IMAG0623.jpgIMAG0624.jpgIMAG0625.jpgIMAG0626.jpg And im almost done.. just miss the roller.. IMAG0627.jpg

the roller was bad like this..IMAG0629.jpg so i had to make me some new ones of polyamide/nylon so i made them a bit biggerIMAG0630.jpg .. And the final resto pict is like this IMAG0632.jpg and Thanks to Glen for that nice BANNER..IMAG0631.jpg

And a few pict of the deck on the tractor IMAG0637.jpgIMAG0636.jpg

And i need to say thank u Rollerman(Stephen) for that nice deck spindels works perfect and in realy good shape..

  • Like 2

Share this post


Link to post
Share on other sites
 
Lars

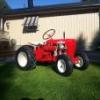
and i almost forgot the front mule IMAG0635.jpg

it should be mower deck dont mover LOL jim

  • Like 2

Share this post


Link to post
Share on other sites
 
WH520

Looks great, very nice job!

My 48" deck is starting to get some rough spots in it. When do you want it? :lol:

  • Like 1

Share this post


Link to post
Share on other sites
 

Create an account or sign in to comment

You need to be a member in order to leave a comment

Create an account

Sign up for a new account in our community. It's easy!

Register a new account

Sign in

Already have an account? Sign in here.

Sign In Now
Sign in to follow this  

×
×
  • Create New...