Jump to content
Sign in to follow this  
massey

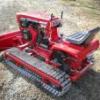
Restoring my C160

Recommended Posts

whfan74

That is coming along very nicely! Great attention to detail!

Hey is that the hood in the corner of one of the pictures waiting it's restore?

Can't wait to see the finished product! :)

Share this post


Link to post
Share on other sites
 
tgranthamfd

You are doing a very amazing job on this, keep up the nice work. I have a 74 8 speed that is due some attention after I get off my butt and finish up the suburban. :) :USA:

Share this post


Link to post
Share on other sites
 
buckrancher

very very nice, great job love the ag's on the front

this is a rebuild to be proud of :) :USA:

Share this post


Link to post
Share on other sites
 
MaineDad

What a great job! What I like best about this restore is that you are not painting every surface with red especially on the engine. It's a restore you should be proud of!

Share this post


Link to post
Share on other sites
 
btrrg1969

very sharp :)

Share this post


Link to post
Share on other sites
 
Wheelbearing

New Hydraulic lines as well?

Share this post


Link to post
Share on other sites
 
massey

Tom, I went with the PPG Omni 4021 Wheel horse red.

Scott, that hood will be used and the next one.

pumper.atv, I'm too slow.

Micah, I went with zinc plating on some parts just to add a little "color".

Wheelbearing, I bought the fittings and hoses from discounthydraulichoses.com.

Thanks for the compliments, I'll keep grinding away.

Share this post


Link to post
Share on other sites
 
Raider

Looks great! Which fittings and hose did you use and have you had a chance to run and test the hydraulics yet?

Share this post


Link to post
Share on other sites
 
KC9KAS

Looks very nice!

I'm looking for front tires right now...your ags look great!

Share this post


Link to post
Share on other sites
 
sgtsampay

It couldn't be more prurdy. Congrats!

Share this post


Link to post
Share on other sites
 
massey

Raider,

I haven't run it yet because the dipstick didn't paint the dipstick yet, when I shoot the pan and hood and air cleaner I'll splash some paint on that.

Here's the list of parts I got for the hydraulics:

R2-04 1/4 hose 6 ft

6801-04-05 90 deg elbow 1 ea

6802-04-05 45 deg elbow 1 ea

6801-04-06 90 deg elbow 2 ea

6400-04-05 1/4jic x #5orb 2 ea

6400-04-06 1/4jic x #6orb 2 ea

R2-04-604 1/4 hose x 1/4jic 8 ea

Share this post


Link to post
Share on other sites
 
WH854

:) I wish I had the skill and patience to do a job like that,but at my age what can I do :USA: Great Job :)

Chas :wh:

Share this post


Link to post
Share on other sites
 
bustedglass

You sure do nice work. Keep the pictures coming. We love to see em :) .

Share this post


Link to post
Share on other sites
 
Butch

WOW! She looks sweeeeeeet! Better than new!! :):USA: :wh:

Share this post


Link to post
Share on other sites
 
rickv1957

Looks great,nice work!, :) Rick

Share this post


Link to post
Share on other sites
 
massey

Thanks Rick and welcome back, hope everything's going all right.

Share this post


Link to post
Share on other sites
 
massey

Well, it's been slow going but it does start real nice and sound good, it has forward and reverse motion, and the hydraulic lift works nice so I'm happy about that. I painted the hood and some other parts. Had no luck finding a belt guard so I picked up a sheet of 16ga cold rolled and commenced-a-bending. The original was 18ga but I figured why not go a little stronger.

029.jpg

028.jpg

027.jpg

Share this post


Link to post
Share on other sites
 
B-8074

It's looking real nice. Great job on the belt cover. I need to do some metal work myself if I ever get the time and room.

Share this post


Link to post
Share on other sites
 
bo dawg

Man that's one beautiful tractor! :thumbs:

Share this post


Link to post
Share on other sites
 
jasoncracer

now thats what i call a restoration

Share this post


Link to post
Share on other sites
 
Horse'n Around

On top of all the rest of the 1st clas work youve been doing to it, Youo even fabricated a new belt cover for it.it sure looks great. Very impressive,You have mad skills!

Its going to be better than new!

John

Share this post


Link to post
Share on other sites
 
massey

I finally got all the painting done :thumbs: . I just need to let it set up for a few days then I can install it and apply the decals. The fender pan was a bear, it was bent, tweaked, dented, oil canned, and I think they used it for a step ladder at some point. I almost can't wait to start the next one which is a 1975 C-160 8 speed.

003-1.jpg

002.jpg

001.jpg

Share this post


Link to post
Share on other sites
 
wheelhorse656

buetiful paint job :thumbs::):):wh: :)

Share this post


Link to post
Share on other sites
 
jasoncracer

assuming you used rattle can what brand and type?

Share this post


Link to post
Share on other sites
 
massey

Jason,

I used ppg's omni acrylic enamel with an hvlp gun. It's actually all together and decaled, I just need to get some pics on here.

Share this post


Link to post
Share on other sites
 

Create an account or sign in to comment

You need to be a member in order to leave a comment

Create an account

Sign up for a new account in our community. It's easy!

Register a new account

Sign in

Already have an account? Sign in here.

Sign In Now
Sign in to follow this  

×
×
  • Create New...