Jump to content
Sign in to follow this  
JUSS10

first round hood restoration

Recommended Posts

JUSS10

well my last wheel horse haul brought home a 654 and 854 that i later found out was a 753. well i got the 654 up and running so i moved on to the 753. it needed some wiring work and before i new it i had it torn down the the frame with the motor out so i figured this would be a good tractor to start my first rebuild/resto. so this afternoon i tore it down to individual parts and started cleaning. it was caked with oil, grease, and grass clippings. so after a few hours of pressure washing and wire brushing i got most of he parts cleaned. a little wash with acetone and they should be ready for primer.

there was quite a bit of wear on the spindles but the steering shafts and linkages weren't to bad. i will probably try to fix some of the steering though i don't claim to be a machinist.

here are some before pictures and a picture of where i'm at.

DSC_1045.jpg

DSC_1047.jpg

DSC_0580.jpg

Share this post


Link to post
Share on other sites
 
JimD

It's funny how fast and easy they come apart. My problem is remembering where I put everything when it's time to put it back together. Box up your parts with labels so you don't end up like me... :thumbs: You'll thank yourself later. :D I'm looking forward to your progress pics. :D

Share this post


Link to post
Share on other sites
 
DMK855

Ditto with Jim D!!!

Good luck and looking forward to your progress!!

Share this post


Link to post
Share on other sites
 
JUSS10

all parts are bagged and labeled.

hope to have it primed sometime this week. maybe even get some color down.

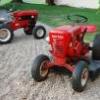
this one really needed some help. it had yellow wheels and a green motor. it was a bit of an eye sore when lined up next to my other round hoods

102_2618.jpg

102_2621.jpg

i'm a picture freak so as soon as any progress is made pictures will be uploaded :thumbs:

Share this post


Link to post
Share on other sites
 
rickv1957

Nice line up in your shop! :thumbs: Rick

Share this post


Link to post
Share on other sites
 
Kelly

I hope you plan to bring a few of them to the MI. WH show in two weeks :thumbs:

Share this post


Link to post
Share on other sites
 
JUSS10

i wish i could... made plans to visit my sister in north carolina that weekend. only see her once a year so as much as i would love to make it to the show, family wins out in the end. plan on me having some nice ones for the show next year :thumbs:

Share this post


Link to post
Share on other sites
 
Coadster32

Off to a fast start. Nice line up! :thumbs:

Share this post


Link to post
Share on other sites
 
JUSS10

ok last night my father and I worked on it for a few hours. got out the sand blaster and hit the frame, front axle, column and a few other things. got quite a few parts ready for paint so we went to TSC and got some primer and hope to lay down the primer on some of the parts today or tomorrow.

does anyone have a magical cleaning mixture that works well to degrease all the small parts? since our sandblaster isn't a cabinet type its a bit of a waste if i do a lot of small pieces. i wire brushed all the parts on our grinder with a wire wheel but there is still a greasy film that i want to get off. was looking at getting a parts washer tank as i found one for very cheap on craigslist. is that a good way to go?

Share this post


Link to post
Share on other sites
 
rickv1957

If you have a power washer you can cleanup parts or tractor easily,Easyoff oven cleaner works pretty good also,Rick

Share this post


Link to post
Share on other sites
 
JUSS10

the power washer couldn't cut through all the grease but that easy off i totally forgot about. i will give that a try. thanks :thumbs:

Share this post


Link to post
Share on other sites
 
JUSS10

alright so here is today's progress

started by soaking some parts in oven cleaner (thanks for the tip rick) which worked great to get that film off the parts.

dad did a bit more sanding on some of the body work and i fixed up the cracks on the back of the frame and welded a few other breaks that i found in some places.

dad got the spray gun out and we got everything primed and ready for paint except for a few parts that we need to be striped and sanded yet.

hope to get some color down on these parts by the end of the week so i can start reassembly.

also started tearing into the motor. pretty nasty. can't wait to get that all shined up.

DSC_0158.jpg

DSC_0159.jpg

DSC_0162.jpg

DSC_0163.jpg

DSC_0164.jpg

DSC_0165.jpg

DSC_0166.jpg

DSC_0160.jpg

DSC_0161.jpg

DSC_0172.jpg

DSC_0171.jpg

Share this post


Link to post
Share on other sites
 
DMK855

Justin, looks like some good progress to me!! :thumbs:

Share this post


Link to post
Share on other sites
 
tgranthamfd

Nice progress and Easy Off is the stuff to get rid of the crud. The couple of times I used it, I had very good results.

Share this post


Link to post
Share on other sites
 
Coadster32

I like the Christmas tree look of hanging parts. :thumbs:

Share this post


Link to post
Share on other sites
 
JimD

Nice progress so far. Keep the posts coming, you're doing a fine job. :thumbs:

Share this post


Link to post
Share on other sites
 
JUSS10

thanks for all the comments.

few questions. first is am i correct that most people say the restoration series IH red is a good color match? and second, once i get the motor cleaned, do you just use the same paint on the motor or is there a high temp paint you use?

when i have re built motors in the past for cars or motorcycles i always used special high temp paint and primer from an auto store. just wondering what you all use for this.

Share this post


Link to post
Share on other sites
 
DMK855

Justin,

If you go the Restoration Series, which I think looks pretty good, I would go with a gallon and use a spray gun. If not, you will spend a small fortune in paint. Seeing that you have more than one tractor to restore, I would think a gallon will do atleast 3 tractors!!

As far as the engine paint, I know some guys do use the high temp engine paint on the block. The paint on the tins, just use the Resto. On my RJ, I just used the Resto paint, but I don't plan on running it like the others I am doing next!!

Share this post


Link to post
Share on other sites
 
JUSS10

ok so at work this morning while doing some other 3D modeling i quick drew these up. it didn't come with a belt guard for the motor and tracking one down is costing more than i thought so i decided to just build my own. i've done my fair share of metal fab and i think i can pull this off. So to make my guard stand out i thought i would get the face of it laser cut as something cool so here are 3 ideas that i threw together. not sure which one I'll do just yet. i plan to back light it with red LED's as well.

untitled31.jpg

untitled30.jpg

untitled32.jpg

Share this post


Link to post
Share on other sites
 
rickv1957

Looking good there Justin! :thumbs: Rick

Share this post


Link to post
Share on other sites
 
massey

Nice work and that horse in the belt cover is too cool.

Share this post


Link to post
Share on other sites
 
JUSS10

well worked on it for a few more hours tonight. ran to TSC and picked up a gallon of restoration series IH red and hardener to the tune of $75. thats how much i got the tractor for.... haha oh well, it will go a long ways :thumbs:

got the motor all cleaned and degreased. hit it with a wire brush then threw down some engine primer. cleaned up all the engine tins and got those ready for primer. primed a few more parts. was going to lay down some color but it was a bit humid today so we'll see what tomorrow looks like. i guess a cold front is coming through so hopefully some cool drier air comes with it.

Share this post


Link to post
Share on other sites
 
DMK855

Justin, you will not be sorry about the gallon!! Did you get the hardener?? I have spent well over that in spray cans for my RJ and still have to do the hood and fenders!! :thumbs:

Share this post


Link to post
Share on other sites
 
JUSS10

yeah i got the hardener. i work all my tractors so anything that can make the surface tougher the better. hope to having a rolling frame by the end of the weekend.

Share this post


Link to post
Share on other sites
 
Ken B

She's coming along very nice Justin. I can't wait to see it finished. :thumbs:

Share this post


Link to post
Share on other sites
 

Create an account or sign in to comment

You need to be a member in order to leave a comment

Create an account

Sign up for a new account in our community. It's easy!

Register a new account

Sign in

Already have an account? Sign in here.

Sign In Now
Sign in to follow this  

×
×
  • Create New...