Jump to content

 
Countdown To Christmas!


cleat

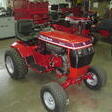
Work Horse GT1600 restoration and conversion to Hydro

Recommended Posts

MainelyWheelhorse

And I thought my IH red spray bombed tractor looked nice…. Excellent Work @cleat !!!

  • Like 2

Share this post


Link to post
Share on other sites
 
kpinnc
1 hour ago, Horse Newbie said:

This work and attention to detail is unbelievable !


It is like an assembly section in a manual. Not one of my restos come close to these. 
 

Needless to say, @cleat could sell his tractors as “remanufactured”. 

  • Like 4

Share this post


Link to post
Share on other sites
 
SylvanLakeWH

ATD - Attention to Detail.


Every step.


Fantastic!

  • Like 5

Share this post


Link to post
Share on other sites
 
cleat

Muffler bracket ready to bolt to muffler.

1028216775_Mufflerbracketreadytobolttomuffler1.JPG.2c0e1c7e07581c8ee0bf1806aad5bc87.JPG

426846325_Mufflerbracketreadytobolttomuffler2.JPG.7c952ea27b56fd18e7ce768201fcd32b.JPG


Muffler bracket loosely bolted to muffler.

675184336_Mufflerbracketlooselyboltedtomuffler.JPG.416aa241d60ee6988e63089816b5a678.JPG


Engine ready for muffler bracket to be installed (top 4 bolts of crankcase cover removed).

Muffler adapters coated in never seize.

2032286741_Enginereadyformufflertobeinstalled1.JPG.77b746b4407a514c4a638eab94cb990f.JPG

491076877_Enginereadyformufflertobeinstalled2.JPG.21d8eaa7b09553309dd671162473aef4.JPG


Muffler and bracket ready to be bolted to engine.

512226301_Mufflerandbracketassemblyreadytobolttoengine.JPG.4e39abd622f6edf438bcd5678d39e625.JPG


Muffler assembly bolted to engine.

Crankcase cover torqued to 225in/lb in proper sequence as per engine manual.

1174369335_Mufflerassemblyboltedtoengine1.JPG.316a6c9d70df8e5b5049e135bb59f14f.JPG

136271115_Mufflerassemblyboltedtoengine2.JPG.8a69e714fde1a2de4d4a24956e6d143f.JPG


Muffler to bracket bolts tightened.

368957480_Mufflertobracketboltstightened.JPG.51be7656ee375bd609b157d6f91ce42d.JPG 


  • Like 4

Share this post


Link to post
Share on other sites
 
cleat

Air guide frame ready to install.

703623135_Airguideframereadytoinstall.JPG.32bec11155d64ded0dcc7deedd4faccf.JPG


Air guide frame installed.

2087837900_Airguideframeinstalled1.JPG.ac6ac37a9f23da2a3be6e33053233b8b.JPG

1610583427_Airguideframeinstalled2.JPG.d64ef7ffa950535400a77406e65bb45e.JPG

1250220397_Airguideframeinstalled3.JPG.30f64159fc795e5b8c01063df664b65b.JPG


  • Like 4

Share this post


Link to post
Share on other sites
 
cleat

Nut and tooth washer ready to install onto starter.

580165350_Nutandtoothwasherreadytoinstallontostarter.JPG.c190134bda1526bf7596d0f084e02bf1.JPG


Starter cable ready to install.

609539037_Startercablereadytoinstall.JPG.c7c4ec18d1bde7fc5574da063a14b239.JPG


Starter cable installed.

776675860_Startercableinstalled.JPG.1d1ab63b2809d1b0f8f5ae129285b1e8.JPG


Solenoid to starter cable installed with cable clip.

2096042348_solenoidtostartercableinstalled1.JPG.844b307cfb4fdd870cd35954c49114d5.JPG


  • Like 2

Share this post


Link to post
Share on other sites
 
cleat

Ignition coil ready to install.

1826144870_Ignitioncoilreadytoinstall1.JPG.e96afb2a74431bf1de4fe3060a204410.JPG


Ignition coil installed spaced out as far as possible from flywheel.

780166426_Ignitioncoillooselyinstalled.JPG.546132a34bd6e58c38201c007b8ad7a4.JPG


Plug wires routed as per manual.

1992546611_Sparkplugwiresrouted.JPG.77b0c40f89cf36ac76fd23d503a3380a.JPG


Ignition stop wire ready to assemble.

I used blue because the wire diagram shows it as blue.

46289470_Ignitionstopwirereadytoassemble1.JPG.cda91eb81f48671a16dd53aceac16e56.JPG

1568739849_Ignitionstopwirereadytoassemble2.JPG.100cd8793c49c70b6e3b8ce925ae500d.JPG


Coil end push on connector soldered on.

402219438_Ignitionstopwirecoilendsolderedon2.JPG.8c62d8237283cb009ded6faacd126f09.JPG


Heat shrink complete.

1036030784_Ignitionstopwirecoilendheatshrinkcomplete.JPG.15c5995da7034525b7220502944a43a6.JPG


Wire cut to length and ring terminal installed.

1308430493_Ignitionstopwirecomplete.JPG.13498e39aca7c404bdd8dbbe55466ef3.JPG


Ignition stop wire installed onto coil with a little dielectric grease used to stop corrosion.

Other end routed up and bolted to connection block.

170668909_Ignitionstopwireinstalled3.JPG.9c3c13a3fdfe4417f25cd36294d2d963.JPG


  • Like 2

Share this post


Link to post
Share on other sites
 
cleat

Voltage regulator ready to install.

This machine originally did not have a voltage regulator.

I decided to mount it on the guard bracket.

1793347380_Voltageregulatorreadytoinstall..JPG.2362cf4d98f1549dda972aebf45cd148.JPG


Regulator bolts bolted up tight in bracket.

I need the space under the regulator because there is a protruding screw head on the bottom of the regulator.

814210085_Voltageregulatorboltsinstalled2.JPG.fca22b331c1585d7a4e8f6f0d11895e9.JPG


Regulator bolted on.

568917274_Voltageregulatorinstalled1.JPG.560f4561e3aa1a6f8fce7f54fbea0f08.JPG

228739598_Voltageregulatorinstalled2.JPG.91432bdabb759b863e0c72cd335c64d2.JPG


  • Like 2

Share this post


Link to post
Share on other sites
 
Wayne0

I have that same soldering gun! Do they still make them?

  • Like 1

Share this post


Link to post
Share on other sites
 
cleat

I have 2 of those and one higher powered model.

I think they still make them but they are not built as well.

  • Like 1

Share this post


Link to post
Share on other sites
 
cleat

Nipple for pulse fuel pump ready to install.

1007288827_Nippleforpulsefuelpumpreadytoinstall.JPG.0d4b9f173788b8695c7f91773fff9c7a.JPG


Engine block ready for pulse fuel pump nipple installation.

1081419142_Engineblockreadyforpulsefuelpumpnippleinstallation.JPG.73575117487478da88a3ccdaf4092509.JPG


Nipple for pulse fuel pump installed.

2032986768_Nippleforpulsefuelpumpinstalled.JPG.9678c5bc77ea5ea996e9e09612c39200.JPG


Hose for pulse fuel pump installed.

1242856683_Hoseforpulsefuelpumpinstalled.JPG.a7a967a0a1edf7a8a31573962ca448d8.JPG


  • Like 1

Share this post


Link to post
Share on other sites
 
cleat

Flywheel ready to install.

1977515021_Flywheelreadytoinstall.JPG.aafde1dbf4c5edc3b12db5d8d99c7cf2.JPG


Flywheel installed.

I kept the taper surfaces dry but put a tiny bit of never seize on the crankshaft threads.

184306672_Flywheelinstalled.JPG.65284257ebb65240ae405aed6f4c0bc1.JPG


  • Like 3
  • Excellent 1

Share this post


Link to post
Share on other sites
 
cleat

Feeler gauge used to set ignition coil clearance.

1330798876_Feelergaugeusedtosetignitioncoilclearance1.JPG.f8e4ff7a7b0f863b5f69695ae5373095.JPG

686775658_Feelergaugeusedtosetignitioncoilclearance2.JPG.dcd1be8f82506f1ff0912eda9f8be3b6.JPG

1493684211_Feelergaugeusedtosetignitioncoilclearance3.JPG.5a8681afcc26759ecf73e7e5f17644c2.JPG


Ignition coil proper air gap set.

1278256673_ignitioncoilinstalledwithproperairgap.JPG.72f04f4e717e4a485ef6b7f373f3831b.JPG


  • Like 3
  • Excellent 1

Share this post


Link to post
Share on other sites
 
cleat

This is the original carb.

It had the adjustable needle valves but unfortunately some previous owner replaced a needle valve with a screw effectively destroying the carb body.

1791741293_Originalcarb.JPG.baaa041a35609e6f7f305c689ef230ef.JPG

1272066940_Originalcarbstrippedhole.JPG.cb50acdbded291fe3920b2114506272c.JPG


Therefor I at least for now am going to install a cheap China carb.

Here is the carb, intake, and governor assembly ready to install.

1423073795_Carbintakeandgovernorassemblyreadytoinstall.JPG.0c4cae185f986cde67c9beac17b8edc1.JPG


Carb bolted to intake.

674462299_Carbboltedtointake.JPG.a1deb482358d501299cf22e0eef1eea5.JPG


Governor assembly installed onto carb and intake as per manual.

1518165757_Governorassemblyinstalledontocarbandintake1.JPG.bf55975aa0c7e2709f8c9a79cc25630e.JPG

929572638_Governorassemblyinstalledontocarbandintake2.JPG.390a32a3a112fa76ca5eb22ca91c5f8e.JPG


Carb, intake and governor assembly installed onto engine block and torqued to 90in/lb.

591756566_Carbintakeandgovernorassemblyinstalled1.JPG.4f6c58cc4d177002273688f6bf1df4d6.JPG


Governor static adjustment performed by ensuring throttle was held wide open and governor shaft rotated counter-clockwise as far as it will go then clamp bolt on governor arm tightened.

1530448826_Carbintakeandgovernorassemblyinstalled2.JPG.b42050784eb79ef0f905a55eaa06c80a.JPG


Vacuum hose installed onto fuel pump (sorry for the blurry pic, I took a few and this is the best one).

927032408_Fuelpumpvacuumhoseinstalled.JPG.8b90847aca574485b98b7d511594abaf.JPG


  • Like 4
  • Excellent 2

Share this post


Link to post
Share on other sites
 
kpinnc
6 hours ago, cleat said:

a cheap China carb.


And now you have a rebuildable spare to have ready to swap if needed. :thumbs:

  • Like 1

Share this post


Link to post
Share on other sites
 
Wayne0
2 hours ago, kpinnc said:


And now you have a rebuildable spare to have ready to swap if needed. :thumbs:

Not so much as the body is toast.

  • Like 1

Share this post


Link to post
Share on other sites
 
cleat

I'm hoping the China carb will work fine but if not I will track down a good OEM carb and rebuild that as needed.

  • Like 2

Share this post


Link to post
Share on other sites
 
kpinnc
1 hour ago, cleat said:

I'm hoping the China carb will work fine but if not I will track down a good OEM carb and rebuild that as needed.


I have had better luck with China carbs I guess. Of course I only have three Kohler-powered tractors left, but it allows me to have a rebuilt spare in a plastic bag. 
 

Even my Vanguards have a couple china copies in the mix. 


  • Like 2

Share this post


Link to post
Share on other sites
 
cleat

Blower housing and static guard ready to install.

1271434651_Blowerhousingandstaticguardreadytoinstall2.JPG.7bd9d98de68a33dfbaf7af8aa9f73dbd.JPG


Blower housing and static guard installed.

440948381_Blowerhousingandstaticguardinstalled.JPG.54977e1804749e06e98f3680e948485a.JPG


Top air guide and muffler heat shield installed.

946534147_Topairguideandmufflerheatshieldinstalled1.JPG.d5300abc43ad76af6aae726748798e67.JPG


Air guide #1 installed on rear cylinder.

1640408529_Airguide1installedonrearcylinder1.JPG.b02715bc19c70d1629b9d5f1c5e7b846.JPG

1628181817_Airguide1installedonrearcylinder2.JPG.90909c6e9e34342642eb693e952e923d.JPG


Dipstick assembly installed into tube seal with a light coat of grease then bolted into place.

545049143_Dipstickassemblyinstalled2.JPG.cea02e8dc674ca4329af80bbc2961bdb.JPG


Air guide #2 ready to be installed on front cylinder.

645788346_Airguide2readytobeinstalledonfrontcylinder.JPG.fc8586fe5398c9bead6d2364ae9fbd06.JPG


Air guide #2 installed on front cylinder.

Thanks again to cseriesdon for this nice straight cover.

453640995_Airguide2installedonfrontcylinder.JPG.bb2a1de14dcca30f4a0e54602831fd98.JPG


Engine air guides and guards complete.

216409315_Engineairguidesandguardscomplete3.JPG.f362b4b23f4af1c555b55eb652e2f80b.JPG

1800751057_Engineairguidesandguardscomplete4.JPG.dea61616ada3353d71494fbdd08cc263.JPG

375523751_Engineairguidesandguardscomplete5.JPG.76d4348d4993a8fb9d50e7a3a4b2abce.JPG

1804026428_Engineairguidesandguardscomplete6.JPG.275fd181a3d02ad467d64d0ebc7f642f.JPG


Edited by cleat
  • Like 2
  • Excellent 1

Share this post


Link to post
Share on other sites
 
cleat

Muffler deflector ready to be installed.

1867267749_Mufflerdeflectorreadytoinstall.JPG.134e58466d0986aa4a7f23c6d2b9a0d5.JPG


Muffler deflector installed.

157313176_Mufflerdeflectorinstalled1.JPG.f2e351b5d6dde2b9c55965d9a8731dd2.JPG

752285108_Mufflerdeflectorinstalled2.JPG.120a02be2795c1cb914acb0b3b21a8ed.JPG


  • Excellent 1

Share this post


Link to post
Share on other sites
 
bds1984
13 hours ago, cleat said:

I'm hoping the China carb will work fine but if not I will track down a good OEM carb and rebuild that as needed.


I've been running some of those cheap carbs across four machines for a decade now.  They work just fine but please disassemble them and clean them out if you haven't already.  Every single one of them had a cosmoline/gritty paste inside of them.  

  • Like 1
  • Excellent 1
  • Thanks 1

Share this post


Link to post
Share on other sites
 
cleat
8 minutes ago, bds1984 said:


I've been running some of those cheap carbs across four machines for a decade now.  They work just fine but please disassemble them and clean them out if you haven't already.  Every single one of them had a cosmoline/gritty paste inside of them.  


I just now took the top off to look inside.

Looks spotless.

Thank you bds1984 for letting me know to check.

1975563951_Chinacarbtopremoved1.JPG.39745305535dca0d29c67e42e181f582.JPG

1217589175_Chinacarbtopremoved2.JPG.14621c68947be2aef206bd64e9da2b17.JPG


  • Like 1

Share this post


Link to post
Share on other sites
 
bds1984
9 minutes ago, cleat said:


Thank you bds1984 for letting me know to check.


You're welcome.  Some of us learned the hard way and saved a few others from it.  I look forward to seeing this rig running.  

  • Like 1

Share this post


Link to post
Share on other sites
 
ebinmaine
2 hours ago, bds1984 said:


I've been running some of those cheap carbs across four machines for a decade now.  They work just fine but please disassemble them and clean them out if you haven't already.  Every single one of them had a cosmoline/gritty paste inside of them.  


Excellent advice 

Share this post


Link to post
Share on other sites
 
cleat

Rubber pad cut for the battery to sit on.

I have a new battery tray but the rubber pad seems to work just as well.

187858227_Rubberbatterypadcut.JPG.91d416db3f37d2105dd23fe1b5385db9.JPG554445443_Rubberbatterypadinstalled.JPG.d815ea16b87b503c44dc160e1fca732c.JPG


  • Like 1

Share this post


Link to post
Share on other sites
 

Create an account or sign in to comment

You need to be a member in order to leave a comment

Create an account

Sign up for a new account in our community. It's easy!

Register a new account

Sign in

Already have an account? Sign in here.

Sign In Now

×
  • Create New...