Leaderboard
-
in all areas
- All areas
- Markers
- Marker Comments
- Marker Reviews
- Articles
- Article Comments
- Article Reviews
- Classfieds
- Classified Comments
- Classified Reviews
- Wiki's
- Wiki Comments
- Wiki Reviews
- Blog Entries
- Blog Comments
- Images
- Image Comments
- Image Reviews
- Albums
- Album Comments
- Album Reviews
- Files
- File Comments
- File Reviews
- Posts
-
Custom Date
-
All time
November 28 2011 - April 17 2025
-
Year
April 17 2024 - April 17 2025
-
Month
March 17 2025 - April 17 2025
-
Week
April 10 2025 - April 17 2025
-
Today
April 17 2025
-
Custom Date
10/24/2024 - 10/24/2024
-
All time
Popular Content
Showing content with the highest reputation on 10/24/2024 in all areas
-
10 pointsYesterday I finally got around to putting on my rebuilt RJ transmission (thanks Keith Jones and Larry Eads). Put the rear wheels on this am. ( old Montgomery Wards ag tires with a different style tread) . Began to work on motor tins, cull together missing parts ( clutch rod, lift cable, transmission boot, read hitch, etc. amazed at the parts I have!) Here are some pictures of the first two days. Yes that hood had some purple paint on it! Sanding with three types of paper! Going to finish up with Rustoleum Matte Clear as the final cover coat.
-
6 pointsOnly tractor guys would understand making a statement about "tires" in the same way we would talk about the good looking girl across the aisle back in our school days!
-
4 pointsI did away with the Packard connector this morning. Looks better and I'm confident with the connections. It needed to be done anyways. I was talking to the bolts holding the coil. A socket didn't want to grip the head. Then I realized the plastic piece would flex over the bolts and easily come off. Cleaned up the magneto and the coil good. Reassembled getting the gap properly set. Put everything back together and it was ready for the barn. Something seemed different when I started it. My 2005 with the Command is set up with the same fuel pump. It would start with barely more than a bump after letting the pump whir a couple seconds first. The Magnum started easy but not like that. It did this time. I drove it around a bit and it seemed a bit better but that could have just been in my head. The only way to really recreate the issue will have to wait until the next mowing season.
-
4 pointsI’m careful when jacking to not wreck the grease zerk on the front axle and to chock the rear wheels against rolling. 🙂
-
4 pointsThis should be highlighted for sure. There is a hump cast into the bottom of the transmission, and the front section will not drain if left level. The front should be lifted as high as safely possible to get the rest of the oil out. If it’ too late, add it to the list for next time. Any good oil in there now is better than bad old oil from before. I have used hilo forks or an engine hoist in the past, to get the front end FEET above the rear end for this reason.
-
4 points
-
4 pointsThank you all for your support here! I was able to figure out a ton last night, through research and your help and just tinkering on my own end. Still have some things I need to figure out though... Here is what I've figured out so far, or at least I think I have through reading other pages here. Correct me if I'm wrong! Posting for review and also to help anyone in the future, as all of these things were scattered across many years and posts, and not conglomerated in a single spot: Figured out how to properly mount a new seat and remove the custom job the previous owner did. Ordering today! Oil capacity on this Kohler engine is 2 quarts, and looks like it'll need 10w30 as I'll be running in the winter mostly No oil filter on the Kohler engine Found the replacement foam pre-filter element as well as the paper air filter (Part # 235116) Light bulbs on mine currently are # GE4411-1; looks like any 4411 bulb would work though Fixed the seat not contacting the safety switch! Looks like someone was tinkering and put a thick washer underneath, between the sensor and frame, which artificially lowered it. I uninstalled, removed washer, and reinstalled and now it is contacting the seat and I was able to confirm it's working as it should. Hoping to get some help here with what I'm still a bit confused on. Wondering if this thread got too big and maybe I should make a separate updated post? Here is what I'm still tinkering with: Found an older post that had some paperwork showing what belt goes with what model. Am I right in thinking a 1985 312-8 with the Kohler K301 engine would only have one belt? According to the charts posted, mine needs Part # 7473 - does anyone know if that is right? Still confused on the spark plug, as I have a Champion J8C in it. Looking online it looks like I'm supposed to have a Champion H10C in it. Anyone know the difference? I believe the J8C might just be slightly shorter. I'm thinking I should go ahead and put a H10C in it right? Speaking of belts, anyone have a resource to show how to properly replace a belt on these? Having a heck of a time finding replacement rear tires for this model. Front tires are 15x6.00-6, which seem to be readily available online and appear to be tubeless, so I think pretty straight forward. The rear rims are 12" wide and the current tires are 22x7.50-12, and I can't seem to find replacements. Anyone know how much wiggle room there is on the rear tires? What's a common size for a 12" rim that would still work? And can the rears be tubeless too and DIY installed myself? I'd appreciate hearing anyone's experience!! Not seeing a part number on my inline fuel filter. Would any generic one work or is there some certain criteria I should be aware of?
-
4 pointsBeen shopping for tires for my C-120 when these showed up in an online auction. Not sure what the deal is with the 3rd tire on the bottom - tread looks a bit different. Wheels are a bonus, as mine are beat up on the inside flange and require tubes. Scored these for $12.50!!! May have helped me sneak in under the radar since the auction title read "Sears Tires and Wheels - 32x10x12". I think the cords are shot in my old Carlisle tires and significant cracking.
-
3 points
-
3 pointsThis is all I use. If it doesn't fit, return it for a full refund. I always measure the belt first just in case some challenged individual put it in the wrong sleeve.
-
3 pointsIf I haven’t yet, to the forum. Thanks for being a supporting member! People like you keep the lights on around here!
-
3 pointsOne of the RJ tractors I bought several years ago had a great deal of original literature and paperwork 📋 about the sale etc. what I have poster here is the cover for my original Master Catalina (probably 1958). A September 1, 1957 price list and an August 1, 1958 price for RJ tractor and all the dealers attachments, and tractor add ins! I think this is already on the Red Square site in publications etc but I thought I would post again for all you RJ Wheel Horse owners!
-
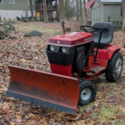
2 pointsGot the herd out for the last time before most of them go to bed for the winter. Just a 520 and 48" deck is still in service to mulch leaves and the 520HC and blade is getting ready to plow snow. I did some work to a 416-8 for a fellow redsquare member so I put it in the lineup as well. Next year the Work Horse will be in the lineup as well I hope.
-
2 points
-
2 points
-
2 pointsOh fer sure ... the 22/23 number is the outside diameter of the tire and most horses can easily clear a 23. Even a 24 stock or larger with a fender pan lift. The 7.5 8.5 10.5 number is the width profile. I forget what most rims measures in width ... 8 inches??? Kinda goes out the window tho as all GT tires run different with different manufactures. Tires are like a box of chocolates ... ya never know what you are gonna get ...
-
2 pointsI ordered another 6" plate this afternoon. This time 3/8" thick instead of 1/2". Before I apply any more pressure I'm going to make a plate to go 'sandwich' the hub flange. Then I'll give it all I got. If it breaks then well, so be it. I'll buy another one.
-
2 points@Pullstart also regularly check oil after usage , all 3 are clean / clear / full , just a regular look see after use , another thing since adding a tye wrap just above the shifter boot , and greasing the underside of the boot , so it easily slides over trans top irregularities , boots are solid , no tearing , cracking . check trans , engine oil , top off tank with STA-BIL 1,1/2 oz , no hose or carbuncle's , debris anywhere. filters are always clean , carb bowl clean / clear . regular checks for me , thanks for the response , pete
-
2 pointsYour tractor is 1985 model 21-12K801 It does not use a voltage regulator. You have two stator windings. One uses a diode to rectify the AC charge current to charge the battery with no regulation. The other AC power goes directly to the light circuit as the lights will operate on AC current. These files come up on a 21-12K801 search https://www.wheelhorseforum.com/search/?q=21-12k801&quick=1&type=downloads_file
-
2 pointsThe snowthrower shown for the 1981 model GT-2500 but all from 1973 will fit. 1981-82 model 06-42ST02 - (First model to use plastic collar for the chute but was a retrofit for older models. Last model to use wheels)
-
2 pointsFor the rear tires you can use a 23 X 8.50 -12 or a 23 x 9.5 x 12. The 8.5 or 9.5 number is the tire width. Sadly todays tires especially the foreign brands are undersize. A 23 x 8.5 Deestone now measures what a original Carslile 23 x 7.5 tire measures. Even american brand Carslile is getting smaller since they are now made off shore. it's like a 5 lb bag of sugar or flower than now has 5lbs in it. I run the old full size 23 x 9.5 x 12 Carsliles on my 312-8 and 23 x 9.5 Deestones on my C81. They are a little beefier, but work fine with the mower deck or any attachment. Here's the 312-8 as-found and with a cosmetic and mechanical refresh that I fixed up for my son.
-
2 pointsNice tractor! I have an 856 that I use for snow plowing. With wheel weights and chains you wouldn’t believe how it pushes snow. The short wheel base and tight turning radius makes it perfect for a driveway. Enjoy!!
-
2 points
-
2 points
-
2 pointsNo matter what I did to adjust the motion control lever on my 1996 416-H (same transmission), I could not keep it from drifting. After hours of pushing snow with one hand on the steering wheel, one hand on the lift control, and another hand on the motion control , I decided to install a foot control. Problem solved. However, if a foot control is not an option for you, your only solution after cleaning and adjusting your cam plate may be to keep a hand on the motion control lever. It seems like this problem is more prevalent on the Eaton transmissions than on the Sundstrands. My 59 year old 875 stays where it's put.
-
2 pointsLane I really have a thing for those tires, someday I’ll even own a set! I almost bought a non-wheel horse tractor at Portage just for the tires, I should have done it and tried to flip it with another set!
-
2 points
-
2 pointsToday to enjoy this beautiful weather we have been having, my wife and I oh and Lucy took a ride on the beach. We met up with our daughter, son in law and granddaughter. The past few days have been absolutely perfect weather wise.
-
2 pointsI am pretty meticulous about my main Ground connection. If I drill a hole or use an existing hole, I will also scrape away just enough paint for the flat side of the crimp connector (lug) to have clean metal to electrically bond to. I use a good amount of No-Alox (any of those products from Ideal or GB work) The purpose is to eliminate oxidation & corrosion from the disimilar metals reacting with each other over time as current is passing through them & the frame or engine block of our machine. Most of the time it is a bigger concern when joining an aluminium conductor to a lug or to a splice with copper under a split bolt or something like that in a big & older piece of electrical equipment. which, unless you are an electrician, you probably will never see such a thing... Anyway the best thing to do is put the stuff on like somebody else is payin' for it. tighten it down with an appropriate fastener ( meaning: the diameter of your fastener shoud be as close as possible to the same diameter {at a Minimum} of your conductor (wire) for example #3 copper is 0.229 inch so We would thiMk We should use at the very least 0.25 or 1/4" bolt for this connection, BUT let's consider this about the bolt & its diameter inclluding threads, is 1/4", including threads . So, how much material was removed from the round stock to make the threads & the resulting bolt? in this example of 1/4-20 the inner diameter is 0.196 inches. so we lose 0.054 of material. this is now much less than the diameter of our #3 conductor (wire) 0.229 Or that being said, if this is the Main ground, you suggested 3/8" & I DO agree with that because our inner diameter of 3/8-16 is 0.307 inch which is larger than the conductor in ouir example setting.... or say #2 copper is 0.2576 inch so our suggested bolt of 3/8 has an inner diameter of 0.307 inch So the 3/8 bolt will work here as well. Also when making my own cables I use Extra Hard usage SO conductors or welding cable because the insulation is very flexible & Exremely tough stuff. I use the correct type of crimping tool & I also like my Shrink tubing to keep dirt, oils, gasoline, water & other foreign debris out of my crimp connections. Kinda like fuel hoses, when they are brittle & dry, it is time to replace them. Cables Last a Lot Longer than fuel lines do & copper wire is Never cheap. Once in a whlie I will find a welding cable in good condition at a garage sale or swap meet & IF the price is right, I will buy it. So to give a shorter simpler answer to Enhancing a connection, Get some No-Alox anti corrosion compound & apply it to the threads of of your bolt, a dab of it in the barrel of your crimp on lug, the surface you plan on bolting to, the lug & any washers you are gonna use. torque to your desired tightness yet, remember that "Too tight's Broke" (Journeyman Jay....a guy I worked around a lot as an apprentice) & as electricians we have a tendancy to overtighten these connections sometimes. A lot of bolted connections on the machine will leave enough room for a Ground connection. Do As YOU Like. The points I mention are based on my preferences & what TO ME seems like common sense based upon My experience. These are some things to consider when making these connections Permenant, Efficiently & Safely..... I hope that helps. As I get things going on my "Herd", I will try to remember to at least take pictures & maybe even make a video to help the people who are often intimidated by electrical stuff as it can seem like teaching a fish to climb a tree in some cases & The unfamiliar territory factor can be intimidating for anyone with anything. For Moo-Wah, hydro static transmissions are new territory & somewhat intimidating because I am Not familiar with them. Well I tried my best to Not Nerd anyone's eyeballs out with a super long response here today... Just some points I have considered over the years in my experiences which I Hope will be able to help someone. As for improving a wheelhorse set up, I have yet to really tear into a system yet but I will certainly Chime in If I find something that I need to rant or rave about.... not that anyone really cares about opinions because we all know what they say about opinions.....
-
2 pointsI love those tires but old?? They look brand new minus the nubbies. Tread pattern is almost the 6-12 version of these. I get a lot of complements on the plow field about their performance.
-
2 pointsFinished and running good, Thanks for all the suggestions, they really helped. Jim
-
2 points
-
2 pointsThanks guys going to try to get to it today. Jim
-
2 pointsGet it going and bring it up to hopefully @Pullstart ‘s second annual plow day ! Be like déjà vu , selling Jim back a 67 , 6 speed tractor .
-
1 pointTrina has volunteered to build the 2025 Redsquare Calendar! She's in need of pictures! Post em up!!
-
1 point
-
1 point
-
1 point
-
1 pointThe model @gwest_ca shows is NOT one for your GT-2500. This model's frame connection to the front of the tractor does not use the Attach-a-matic you have--it is intended for earlier tractors and uses a through bolt. Depending on where you are, an ad in this Forum’s Classified Wanted is likely to get you some useful options.
-
1 pointResponded in blue above, thank you sir for answering all my questions! Means a lot
-
1 point21-12K801 is a 1985 312-8 with a Kohler K301S-47812 That was the first year for the 312-8 @Alrashid2
-
1 pointThe slot was worn in the tensioner arm. I welded the oval section, and machined it. It moves freely now, and the pulley turns with ease. My first issue is the 84” belt seems too short, and will not fit under the tensioner pulley.
-
1 point
-
1 pointI happen to run across your picture last night I don't understand how you got that puller behind the axle did you cut the piece of plastic tube off so you can sneak it around the axle I don't see any cutouts to go around the axle with the plates that are not painted. What am I missing in this picture? If it was you and the hub was broken that much would you just take a cut off wheel and put cuts in it and chisel off and break the rest if you look real close at my broken hub it is very very grainy like the cast wasn't made very well. Kind of lost and I'm sure a hub won't be cheap!!
-
1 point
-
1 pointMany ways to skin a cat, I use 2 of my pullers combined into one. **DISCLAIMER** I have never personally skinned a cat & no cat's were harmed during the removal of this hub...
-
1 point@Maxwell-8 you know what I had forgotten that we used to use on tough spots ? flange bolt on a weighted slide hammer ! we would be in a tough jammed spot , weld a solid steel rod to a bolt on flange , have a weighted slide on the solid rod , with a welded nut on the end , and slide impact to get things going , that would be something that would be easy to put together , and try out . brain fart , pete
-
1 pointI have a bottle jack puller that I have not taken a picture of but it is very much like the one @meadowfield made. I have only had one hub it wouldn't pull and that one went to the machine shop for the 100 ton press and some heat (my 20 ton press wouldn't budge it).
-
1 pointNo worries buck. We all got different talents. Just keep asking questions and learning.
-
1 pointI built one for the front bearing group on a 4WD 3500 Dodge Ram. What you can do is tighten the big bolt and tap it with a hammer each time you increase the pressure. the change in the pitch of the "ring' the metal makes tells you that something is moving and you can feel that it is easier to tighten. Those little air chisels can also help the penetrating oil move a bit. I told a few dealership mechanics about my homeade bearing puller, and they made one and liked it. i use a broken hub for my puller, but some GM disc brake rotors are very close to the same bolt patters. i should think that enlarge the holes a bit and it might work out






.JPG.9f2ecb26065c66527b0730084ab7fc7a.thumb.jpg.7dc8a04d9a53d44ee2b23f26ee94496f.jpg)


