Leaderboard
-
in all areas
- All areas
- Markers
- Marker Comments
- Marker Reviews
- Articles
- Article Comments
- Article Reviews
- Classfieds
- Classified Comments
- Classified Reviews
- Wiki's
- Wiki Comments
- Wiki Reviews
- Blog Entries
- Blog Comments
- Images
- Image Comments
- Image Reviews
- Albums
- Album Comments
- Album Reviews
- Files
- File Comments
- File Reviews
- Posts
-
Custom Date
-
All time
November 28 2011 - November 25 2024
-
Year
November 25 2023 - November 25 2024
-
Month
October 25 2024 - November 25 2024
-
Week
November 18 2024 - November 25 2024
-
Today
November 25 2024
-
Custom Date
07/04/2024 - 07/04/2024
-
All time
Popular Content
Showing content with the highest reputation on 07/04/2024 in all areas
-
11 pointsIt seems appropriate that on this fourth of July we celebrate the Liberty Tractor The Liberty tractor gives us an opportunity to learn some tractor history while remembering some political history. During World War One the United States had a quasi- governmental agency called the “National Vigilance Committee” whose self-appointed task was seeing that businesses didn’t ‘exploit the names being used for items intended to aid in achieving victory’. Trucks and machinery used by the military were commonly referred to as “Liberty” engines. The committee had no legal authority to do so but in 1918 they insisted that the name Liberty Tractor be changed. Elmer Pitcher, founder of the Liberty Tractor Company, responded that the name had been adopted in October of 1917, six months prior to our entry into the war. He gave no justification for taking the well-known patriotic name. Either the Vigilance Committee was satisfied by Pitcher’s answer, or the end of the war on Nov. 11, 1918, made the tractor’s name a moot point. Regardless, the Liberty tractor entered the farm equipment market in fall 1918. The company motto declared ‘Liberty’ means freedom from tractor troubles.’ The Liberty Tractor was designed by. J. McVicar of the McVicar Engineering Company who was one of the best tractor experts of his day. It was kerosene fueled and sales began in 1918. The Liberty tractor weighed 5,775 pounds and used a four-cylinder Climax engine with a 15-30 hp rating, and was built to pull four 14-inch plows. The two fuel tanks held 20 gallons of kerosene and 5 gallons of gasoline for starting. In preparation for the North Dakota Tractor Demonstration in 1918 Pitcher called the Oliver Chilled Plow Works to obtain a four-bottom plow. They asked about the Liberty’s weight, and when told it was only about 5,800 pounds, they doubted it could pull such a plow. At the tractor tests one skeptical farmer offered to bet $1,000 that the Liberty tractor couldn’t pull four 14-inch breaker plows. Lucky for the farmer, no one accepted his bet. Despite the detractors, the Liberty tractor pulled the plows ‘steadily and easily,’ according to a Farm Implements and Tractors report about the tests. At the Fourth National Tractor Demonstration held July 1918, in Salina, Kan., the Liberty tractor pulled four 14-inch stubble plows for six days under a variety of conditions without stopping. Shortly thereafter, the Liberty set a record with a fuel-labor cost of 93.8 cents per acre at the northern Illinois Tractor Meet held in September 1919. Just as Pitcher predicted, the tractor beat the odds and proved all skeptics wrong. P.J. Downes Co. was the distributor for the Liberty Tractor and sales were very good. When P.J. Downes Co. went into receivership in 1921 due to the nationwide agricultural depression, Liberty tractors had no outlet. In fact, the Midland National Bank owned all the tractors in the Downes distributorship, and none were left for Liberty to sell.
-
9 points
-
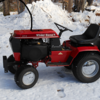
8 pointsI have a 1980 Wheel Horse C165 that is almost like new. It's been garage and not used for about 25 years. Does anyone have an idea of what it is worth?
-
8 pointsFrom the Josh Stertz vault… Omro Parade 2018–time sure flys! Happy 4th of July🇺🇸🇺🇸
-
8 points
-
8 points
-
7 points
-
7 points
-
6 points
-
6 points
-
5 points
-
5 points
-
5 points
-
5 points
-
4 pointsPulled the carb for the zillionth time (ok twice today and maybe two other times) . Also cut in an in-line fuel filter. Cleaned, reassembled and seems to be running great now. Hopefully it stays that way!
-
4 points
-
4 pointsToday’s adventure: pedaled 14 miles this morning before it gets too hot/humid. That train tressel pictured on the plaque would have be awesome to see! I pedaled over it but as you can see it has been filled in.
-
4 points
-
4 pointsHere's what I came up with for an idler setup. I used L brackets I'd ordered for the Two Stage Tall Chute snowblower last year. I pulled the digital tach out and checked the engine upper RPM limit. It was set quite low. I knew it getting quiet. 5 years ago I had it just over 3000 RPM. This morning it was at about 2500, 2600. Didn't really matter not having any engine driven implements on. I corrected that. Engine RPM max: Unloaded. 3300, 3325 Chipper engaged. 3275, 3295 Chipper RPM. 2475, 2500 Chipper could be a couple hundred rpm higher but we'll test it this way and see how it does. Likely leave it. I put all the decals on this morning.
-
3 pointsHere is a repair I did to my plastic gas tank on my B100 so this is mainly for the gas tanks in the 73-77 B and C series I believe those are the ones with the gas tank over the battery and the bushing and shutoff on the bottom of the tank. (Edit to add) BEFORE working on the tank throughly wash out the tank, I used soap and water and filled the tank to overflowing several times to make sure any and all fumes are pushed out of the tank. You can kinda of see the crack right on the edge of the hole where the light is. The first thing I did was use a utility knife and cut a V on the bottom of the tank where the crack is. Then you will need a black ziptie and what I used was a soldering iron. If you have a plastic welding iron that might work too if it has a fine enough tip. What I did first before even adding plastic was get the tip of the iron in the bottom of the V to melt together the crack Then you can start adding plastic using the black ziptie keep the iron in the crack being careful but keeping all the plastic melted so it can properly meld together. Eventually you will get something like this what I did have to do is roll the round part of the iron in the hole to smooth it out. Be very careful doing this not to enlarge the hole. I used some petroleum jelly reinstalling the bushing and have had no leaks after several days. You will need to check it for several days to make sure it's not leaking as well.
-
3 pointsExactly what I was gonna say. If you push it around, say in the garage- they burp. Especially true if it sits for a week or two between using it.
-
3 pointsAs @JCM said, be sure the plastic pipe isn't cracked. I have used Rectorseal with good results on everything from steam lines to oil drain plugs for over fifty years. You can find it at ACE, Home Depot, Lowe's or and plumbing supply house.
-
3 pointsHi Dave. Make sure there are no cracks in the thread. Find a pipe dope that is compatible with use on plastic. IMO I would stay away from teflon tape. It would not be beneficial to the Eaton Hydro if some of it ended inside it. Did you possibly over fill the trans a bit ?
-
3 points
-
3 points
-
2 points1972 Snowmobile trailer. It was completely stripped and powder coated. The leaf springs and axle were painted, wheels were also coated. Rust spots were cut out and new metal welded in. Has a new tongue, wiring harness, lights, and jack. Had new tires when redone. I've posted some pics of the restoration. Has a good clean title. It has served me well, but since I got a truck I don't use it anymore. I'd like to see it go to a home where it will be used. It's light so it's excellent behind a small SUV. Trailer deck is 8ft long.
-
2 pointsWanting to wish everyone a happy and safe July 4 Independence Day let’s see all the tractors that are patriotic this one we snapped a picture of at the big show !!!
-
2 points
-
2 pointsIf you have a local Toro dealer with a good parts guy, take the tractor model number, serial number , and carb number on a visit to that dealer and ask about a carb rebuild kit. He should be able to cross that information with the Kohler parts list. This won't be the least expensive option, but you should end up with the proper kit.
-
2 points
-
2 points
-
2 points
-
2 pointsA later model mid hitch will bolt up on the same holes as the original. I changed my 1971 Raider to a later model mid hitch.
-
2 pointsI don't have a spare angle lever. What I needed recently was a spare pin to connect the lift link to the lift arm on the tractor. This is a short pin, not commonly found in the parts drawers in the hardware stores. Got a replacement pin and a spare - just have to chop them to proper length and drill the hairpin hole.
-
2 pointsWell guess who no longer has a spare angle lever…ME! Have to start shopping
-
2 pointsIf the nipple broke off, you could maybe fit a metal nipple that is held with a nut and sealing washers, or perhaps one of the high pressure tubeless tire valves that fit the same way? Then attach an inline fuel tap?
-
2 pointsWhen did you first notice the oil ? Those Eatons can burp the oil up and out the tube as well making it look like a leak. Mine have done that as well.
-
2 pointsLooks like it is threaded and most likely made of plastic so be careful. That type of item usually has a National pipe thread and requires a thread sealer. Found picture but no longer available from Toro.
-
2 pointsUnless the valve stem is bent, cleaning both it and the guide should free it up.
-
2 pointsFound my spare plow angle lever (we all have a spare angle lever right??) . Installed it on the new 42” plow I was given that was missing the lever. Some acoustic ceiling tie wire was perfect to use from the squeeze handle to the triangle thingy , works perfectly now!
-
2 pointsThe Paint Department gave my Mackissic chipper front bracket a coat of cinnamon paint to match the rest of the tractor.
-
2 pointsJust got done installing my new seat I got at the big show from Brian at K & B Horse Parts @76c12091520h I had to drill new holes in the old mounting brackets for front to rear spacing. The dimples in the brackets were perfectly spaced at 7 inches like my 520 so all I did was drill out the dimples then it fit perfectly Brian did tell me the spacing was off so I expected to have to modify something.
-
2 points
-
2 pointsMy dad bought a Case 800 brand new in 1958. it don't look as pretty as those but it still runs and is in the family. Here's my loader tractor that I bought out in Michigan in 17, I think it is an early set of decals from @Vinylguy ERIC J
-
2 points
-
2 points
-
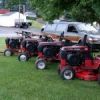
2 points4th of July 2018 My family’s collection of antique Case tractors ready for the parade!
-
2 pointsMostly the same tractors, but Happy Independence Day! ”My hair’s turning white, my neck’s always been red, my collar’s still blue” - Lynyrd Skynyrd
-
2 points
-
2 points


