Leaderboard
-
in Posts
- All areas
- Markers
- Marker Comments
- Marker Reviews
- Articles
- Article Comments
- Article Reviews
- Classfieds
- Classified Comments
- Classified Reviews
- Wiki's
- Wiki Comments
- Wiki Reviews
- Blog Entries
- Blog Comments
- Images
- Image Comments
- Image Reviews
- Albums
- Album Comments
- Album Reviews
- Files
- File Comments
- File Reviews
- Posts
-
Custom Date
-
All time
November 28 2011 - November 27 2024
-
Year
November 26 2023 - November 27 2024
-
Month
October 26 2024 - November 27 2024
-
Week
November 19 2024 - November 27 2024
-
Today
November 26 2024 - November 27 2024
-
Custom Date
03/20/2024 - 03/20/2024
-
All time
Popular Content
Showing content with the highest reputation on 03/20/2024 in Posts
-
16 pointsThe grain Reaper/Binder Harvesting grain crops by hand was an extremely labor-intensive operation. Men with a grain cradle, a type of scythe with long fingers attached on one side, would cut, gather, and bundle the grain stems by hand. This is the first function performed by modern combines. The grain reaper/binder was invented in 1872 by Charles Baxter Withington, a jeweler from Janesville, Wisconsin. In addition to cutting the small-grain crop, a binder also 'binds' the stems into bundles or sheaves. These sheaves are usually then 'shocked' into A-shaped conical stooks, resembling small tipis, to allow the grain to dry for several days before being picked up and threshed. This was a vast improvement over the McCormic reaper of 1834 which only cut the stems and deposited them in a windrow. Workers would have to gather enough stems to form a sheave and tie them by hand. Withington's original binder used wire to tie the bundles. There were problems with using wire and it was not long before William Deering invented a binder that successfully used twine and a knotter (invented in 1858 by John Appleby). Early binders were horse-drawn, their cutting and tying-mechanisms powered by a bull-wheel, that through the traction of being pulled forward creates rotational forces to operate the mechanical components of the machine. Later models were tractor-drawn and some were tractor-powered. Binders have a reel and a sickle bar, like a modern grain head for a combine harvester. The cut stems fall onto a canvas bed which conveys the cut stems to the binding mechanism. This mechanism bundles the stems of grain and ties the bundle with string to form a sheaf. Once tied, the sheaf is discharged from the side of the binder, to be picked up after drying. Prior to meccanization it took around 300 manhours to produce 100 bushels of wheat. The grain binder and thrashing machine cut this time of back breaking labor to less than 20 hours. With today’s combines it takes about three manhours to harvest 100 bushels of wheat.
-
10 pointsThe other day I was wrapping exhaust and used a trick to help temporarily hold the wrap in place until I installed the stainless ties. I usually work by my self and it allows me a third hand and the ability to regroup a points along the way. I use regular zip ties to hold the wrap and then clip them off when done.
-
8 pointsSome time ago I wrote about my 88 year old mom having serious surgery. She is surviving, doing as well as could be expected. We've had a sale and sold most all of her possessions and she will be in assisted living for the foreseeable future. One item in particular that did not sell is, as best as I can tell, a 130 year old organ. Some call them pump organs, parlor organs or reed organs. If someone had offered fifty dollars, it would be setting in their garage or living room. Mom bought this organ 20 years ago and re-finished it. The old saying "If it ain't broke, don't fix it." Well, this organ is broke and I hope to fix it. It plays but some keys are stuck. I've been studying working on these organs on the internet and decided to give it a whirl. It will likely be a rather lengthy process as I don't know how deep into it I'll have to dive. I have the mirror, but took it out before it fell out.
-
6 pointsBeen a busy couple of days around here, waiting on a gas tank for the Allis WC to get here from PA, so figured with the downtime on that project I’d get back to work on the old 9N. I rebuilt the hydraulic pump for this tractor last summer, but that’s as far as I’d gotten with it. Wanted to take everything apart and do a thorough cleaning before putting the rebuilt pump in. Well one thing leads to another and we now have a 9N in several pieces in the shop. Have all the parts to rebuild the lift assembly as well as to fix the extremely worn out steering. Has had a bad spot on the ring gear since I’ve owned it, figured now is the time to fix that and probably replace the clutch while I’m in there as well. And since I’m this far into it may as well pull the transmission apart and check/replace any worn bearings and all seals, then may as well clean it all up and paint it since it’s all apart, the list goes on and on
-
4 pointsHow does your garden grow? Cold season business is thriving. Planted a few warm season. Oaks are leafed out and we are mired in pine pollen so that should be fine however it is a little early.
-
3 pointsOrganizing picks today Just thought I would post BLAST FROM THE PAST. 1st. 1057 This motor was smoothest running engine I ever owned. 2nd was a hard find mission complete 607.This being I owned all of Manual 1967 models. 7th was my hot rod 1257 very nice tractor. I hope you enjoyed the picks.
-
3 pointsWell, I think you know that I would use them. Here is the thought behind that statment...first, the bearing turns between the axel and the housing, the axel will be fine if it turns a little in the bearing...second, those look pretty good. Use them and look for new ones. You could also have them sprey welded and turned, then they are new. I think you would be fine with those Jim.
-
3 points
-
3 points
-
3 pointsTransmission - maybe. Four studs, or setscrews, of the same length would be a bear (pun intended) to re-install onto a fully dressed frame. Perhaps only one or two....? Also, a commom Machine Building trick is to NOT use two studs of the same length. One slightly longer to pilot into the first hole, makes the lineup easier for the second.. I use a pair of short, 1-1/2" long 3/8-16 pieces of threaded rod screwed into the Unidrive to replace the two bottom bolts FOR REASSEMBLY. Mate it up, put in the top 2 bolts, remove the studs, install the lower bolts. I recall it is not too easy do do this on the uppers with the clutch rod in the way... I am Old School on the hubs - I altered a pair of old Chevy rear axle lug studs (7/16-20 thd) for removing and installing rear wheel & tires.....
-
3 pointsLike @JoeM says, shocking threads is always a help! I have an impact driver that helps break stuff loose as well. In a pinch before, I’ve found a big box end wrench fits a screwdriver handle well. Then tap the screwdriver in the same fashion while turning the wrench. Lots of ways to skin this cat.
-
3 points
-
3 pointsIf that's an original Kohler engine it should take a Kohler 2575701S carb kit. Have 2 or 3 cans of brake clean on hand to spray through the carb every which way you can and back again. It'll likely clean up just fine.
-
3 pointsUnfortunately, impacts on hex plugs will hammer out the flats and you end up in the above situation. Do more harm then good. I worked as a bush mechanic in the mining business for years and have taken out all sizes of stuck hex plugs and cap screws. The trick is to put constant tension on the plug or bolt and strike the head of the spud. The inward shock will help loosen without compromising the hex flats. The heat is a good idea. And there were times I would hit the plug or bolt head with a hammer before I tried to loosen with a key. Below is an example of how I took out stuck coil hex cap screws on a kohler block. They would not budge with just the Alan socket, so much the key was starting to twist. I held tension on the ratchet and rapped on the ratchet head to shock the bolt. The vid would not load for some reason. Small example but you get the idea. And these are not what a guy wants to snap or strip
-
3 pointsYou could tap a torx bit into that drain plug, or weld a nut to it and try backing it out. Sometimes with pipe fittings, you can’t loosen it but you can still tighten it. If you can get it to rotate right first, then it’ll spin left.
-
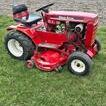
3 pointsWell this is one that falls under "any reason is a good reason to get a tractor out..." So Jack and his friends were making a small wiffle ball field in the woods behind our house and wanted dirt baselines...I couldn't watch them with a rake and shovel any longer so out came the Wheel Horse garden tractor implement system! Had to take off the snow plow that I never got to use this year. Then put together the cultivator and put on the old rear tires on the 312-8 and it was ready to go. Ended up adjusting the tines close together for a narrower line.
-
2 pointsHello everyone! And thanks for the wealth of knowledge here! I hope it continues for years to come, as I am just about to purchase my first horse. I had planned to buy a B 80 that I came across on Craigslist, since I am not on fb ( where everyone seems to sell everything now...) so I had plans to pick up the B80 8 h.p Koehler this weekend after doing lots of research which always led me here, so I finally decided to join... I was told though, if I wanted to do much tilling to try n find at least a 12 horse so I browsed marker place on the wife's account and came across a beautiful C160 16 h.p Koehler for about the same money... so I changed my plans and made a deal to pick it up this weekend.... I don't know a lot of ppl with knowledge or history of wheel horses, so any opinions would be cool to have.... lmk if I am making the right choice... and I will update when I officially become a newbie Sunday! Looking forward to it.... I just plan to mow some... plow a garden eventually.. when I get the attachments.. but for now, I will enjoy pulling the kids around in a wagon.... just maintain a "mini farm"... 5 acres... thanks in advance and sorry for the long post.. I know you like pics and im not sure if these sellers are already on here so I apologize for posting your horse if you are....the first pic is the 8 h.p. B 80 and second is the C160
-
2 pointsI have a six speed transmission I hope to revive. It's hard finding "perfect" parts when redoing these old tractors. Would you use them? On the 7202 the bearing area (bright area) measures 1.120 and other parts of the axle measure 1.125, also you can see roller marks/stains in the bearing area. This picture is after I polished it some on a buffing wheel with white rouge. There is also a line in the seal area that barely catches a fingernail. The bearing area on this 7203 axle measures 1.125 just like the rest of the axle, so that's good But it has the some rust pitting on just one area like that was the bottom it was resting on. I can just feel the pitting with my fingernail, but cant "catch" on it. I think I can polish the bearing area some with fine emery, then my buffing wheel. Bu I don't think all of the fine pitting will polish out. So just the pitting in one area of the axle is the question Here an overall picture.
-
2 points
-
2 pointsUnfortunately there's a worn out "isavetractors" carb on here. No worries whatsoever. I have a freshly rebuilt 1970 Kohler carb from the Charger Hydro attempt. Excellent use for that!
-
2 pointsA crying shame that so many of these things get junked, despite their beauty. I recall that many homes had a piano in my childhood and most could bash out a tune. Then along came TV and games consoles and 'tinternet and the pianos were dragged outside and smashed in their hundreds. Go for it and keep the old thing going a while longer. Best regards Mick
-
2 points
-
2 pointsFine threads are more resistant to loosening under vibration due to the lower angle of the thread. They are also a bit stronger due to the larger root diameter of the thread. I've had to change to fine threads to hold details in a few of the dies I was working with because the coarse thread bolts would loose torque, then fail. The 4000 ton press didn't care about the broken bolt piece in the die and went over anyhow - resulting with damaged die details, scrap parts, damage to the following dies, etc. Sometimes had to redesign the troubled details to get more load bearing area.
-
2 pointsThat's the line I was on too. The only way I'd have concern is if that was gonna be a HD worker.
-
2 pointsSearch the files on here for some free basic loader plans. But if you want good professional plans, PFEngineering.com It will save you a bunch of time and guessing or trial and error. Modify them to your needs if necessary. We can help with the sub-frame for a WH (That's the plans that were used for building the hoe.) Found it
-
2 points
-
2 pointsThis is the wonderful machine Trina and I got from @wallfish He added a factory implement front end loader and hand built the whole Backhoe and its frame.
-
2 points
-
2 pointsHeat it with a torch to break the rust. do this outside. Then tap a sacrificial torx into it.
-
2 pointsHood latch ready to install with the two slightly different length rivets as required and new rubber installed. Right side hood latch installed. Both hood latches installed. Hood latched shut. Tractor is almost done, needs a battery then to drive it around and check for any issues.
-
2 pointsThis one was the kind that was not required to soak. Different material. It stretched out nicely. A little more money tho.
-
2 pointsI can certainly see the benefit. Use thread locker just in case. Or... Use long setscrews so they can be torqued when needed.
-
2 points
-
2 pointsIf nothing else, it's a beautiful piece of furniture. If not fixable as an organ, a motivated person could probably replace that keyboard with an electronic keyboard, or a shelf to put one on. Or, just turn it into a really cool desk. Much nicer than IKEA crap.
-
2 pointsOriginal fasteners were Grade 5 - setscrews usually are, threaded rod is NOT.
-
2 pointsGood information on the clutch rod. This is kind of the line of thinking I was after but is there an actual specific reason why I would need to remove the two bottom studs instead of just installing nuts?
-
2 pointsAnother possible place may be at the carbureator to engine - helpful to hold the gasket in place....
-
2 points
-
2 pointsExcellent idea. Third hands come in handy Every once in awhile I remember to do something like this. Usually while using the zip ties to gather wiring harnesses up for neatness and safety.
-
2 points
-
2 pointsThey were warned in advance on their location selection. They want to learn the hard way so dad will let em. The hard way always sticks with you
-
2 pointsI had also stripped the drain plug using an impact wrench. Tried using a spiral bolt extractor. No luck. Then I used a left hand drill bit and inadvertently drilled all the way through—oil started dripping! From there I simplify drilled the rest of the plug body out and tapped new threads. Carefully flushed tranny several times and used a round magnet to trap any steel filings I may have created. Installed a bolt with a head and gasket. I can put a box end wrench on in the future. Downside is the Bolt head protrudes below the transmission housing. It is not flush like the original, but I don’t have any implements that it interferes with. If I had a welder handy, welding a nut to the plug would have saved me a lot of grief. A small flux welder is now on my list of next purchases.
-
2 points
-
2 pointsThe Combine, perhaps the greatest combination of good ideas ever made. Harvesting grain crops was the most labor-intensive operation on any farm prior to mechanization. The modern combine harvester, or simply combine, is a machine designed to harvest a variety of grain crops. The name derives from its combining four separate harvesting operations—reaping, threshing, gathering, and winnowing—to a single process. None of this just happened; it took hundreds of innovative improvements on one-another’s ideas to arrive at today’s modern combine. I will cover each of these operations in the coming week. Among the crops harvested with a combine are wheat, rice, oats, rye, barley, corn, sorghum, millet, soybeans, flax, and sunflowers. The separated straw, left lying on the field is then either chopped, spread on the field, and plowed in or baled for livestock bedding. Combine harvesters are one of the most economically important labor-saving inventions, significantly reducing number of man-hours needed to harvest crops In 1826 in Scotland, Reverend Patrick Bell designed a reaper machine, which used the scissors principle of plant cutting plant stems. The Bell machine was pushed by horses. A few Bell machines were available in the United States. In 1835, in the United States, Hiram Moore built and patented the first combine harvester, which was capable of reaping, threshing, and winnowing cereal grain. Early versions were pulled by horse, mule, or ox teams. In 1835, Moore built a full-scale version with a length of 17 ft and a cut width of 15 ft. This combine harvester was pulled by 20 horses John Deere claims to have developed the first self-propelled combine in 1946 but they seem to have missed a couple of predecessors. In 1911, the Holt Manufacturing Company of California produced a self-propelled harvester. Their 1888 14-foot cutting bar combine was pulled by an 18-horse team so a self-propelled version was a vast improvement. In 1923 in Kansas, the Baldwin brothers and their Gleaner Manufacturing Company patented a self-propelled harvester that included several other modern improvements in grain handling. The Gleaner used Fordson engines; early Gleaners used the entire Fordson chassis and driveline as a platform. In the 1920s, Case Corporation and John Deere made tractor drawn combines with a second engine on the combine to power it. Pull-type combines became common after World War II as many farms began to use tractors. These combines used a shaker to separate the grain from the chaff and ejected the straw while retaining the grain. Later combines were PTO-powered as larger, more powerful tractors became available. These machines either fed the grain into bags that were then loaded onto a wagon or truck, or had a small bin that stored the grain until it was transferred to a grain wagon.
-
2 pointsThese early Rangers were sharp little tractors. Yours look like a solid machine. Pound for pound, probably the toughest little tractors ever. I just finished one for my son. I couldn't find an early one, so I just made mine look like it.
-
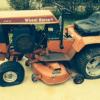
2 pointsTook the snowplow off my 310-8 and put the 42in SD mower deck and power flow bagger system on. Added a little oil, and greased. All ready for mowing season!
-
2 pointsKind of along the line of the Fire Extinguisher hanging on the wall in the shop.... "Better to have it and not need it than need it and not have it"
-
2 pointsLooks good! Since there's no attachment yet add a salt or sand spreader! That driveway looks treacherous. Or better yet, a big azz flame thrower to melt it. woo hoo!
-
2 pointsI'm not particularly a fan of underbody lighting in the practical sense. Because there isn't one. Cant drive anywhere in New England without asking to break the system. Exterior lights now!!! Well to be honest I'm one of those unfortunate redneck hillbilly types that truly believe there is NO such thing as too many lights on big trucks. Wouldn't want to own or maintain one. But they sure look cool!!
-
1 point


