Leaderboard
-
in all areas
- All areas
- Markers
- Marker Comments
- Marker Reviews
- Articles
- Article Comments
- Article Reviews
- Classfieds
- Classified Comments
- Classified Reviews
- Wiki's
- Wiki Comments
- Wiki Reviews
- Blog Entries
- Blog Comments
- Images
- Image Comments
- Image Reviews
- Albums
- Album Comments
- Album Reviews
- Files
- File Comments
- File Reviews
- Posts
-
Custom Date
-
All time
November 28 2011 - April 23 2025
-
Year
April 23 2024 - April 23 2025
-
Month
March 23 2025 - April 23 2025
-
Week
April 16 2025 - April 23 2025
-
Today
April 23 2025
-
Custom Date
03/03/2024 - 03/03/2024
-
All time
Popular Content
Showing content with the highest reputation on 03/03/2024 in all areas
-
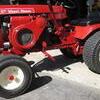
16 pointsI have been working on this since last year with a failed attempt because of cheap over the big pond rebuild kit. Want to give BIG thanks to @Docwheelhorse. For picking up this engine for me in January. It was a partial 856. Yes it has been that long. I had to switch over parts from the bad engine to this one witch is a vacuum engine being my first. Been a long good day out side in the sun. I hope you enjoy the picks and one Video. IMG_1467.mov
-
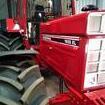
10 pointsI got this. I think it is a rare bird. It’s got the hood from the late 70s. 1” axles, and the Briggs 11hp. Altogether an ok combination. Does the seat needed to bolted to the seat pan/fenders just like that? Or, does it have a seat bracket that is missing? It’s got a home made switch on the left which grounds it and you have to take a screwdriver to the solenoid to start it! I have got the wiring printed out on it. The SB421 looks similar to the Kohler 310s without a Voltage regulator. The wheels need to be painted, wow! She needs some love, and she’s going to get it!
-
9 pointsSoil erosion control is nothing new. In response to the extreme soil drifting in Western Canada, Charles Noble developed a system to shear stubble and weeds below the ground and leave the residue on top of the soil to reduce evaporation and prevent erosion. Patented in 1937, more than 10,000 will be used around the globe by 1979 Amid the Great Depression and the Dust Bowl, soil health and regenerative agriculture practices were not commonplace. Soil drifted in "black blizzards," massive clouds of airborne soil that could travel hundreds of miles. Strip farming and planting crops in alternating strips were how farmers combated erosion at the time. But strips could eventually become useless, depending on the direction of the wind. Farmers also used tillage to control weeds at the time, contributing to soil disturbance. In an effort to get Noble away from some of the troubles of the Great Depression, his friends and family convinced him to take a trip to California. It was there that he saw a beet farmer using a straight-blade walk-behind tool to cut into the soil and loosen the weeds. The blade got to the weeds without interrupting the crops and soil. Noble ended up returning from California early with the idea for the first Noble blade. The Noble Blade was an underground 8-foot-wide straight blade with two vertical standards designed to leave trash above ground while cutting weeds at the roots to terminate them. Noble used an old grader blade with a borrowed forger and anvil. He reshaped the blade and fixed it with two stout arms and a frame. He added 2 wheels and a means of depth control. The initial design wasn't perfect, but it was functional. Charles Noble had taken the first step toward No-till farming.
-
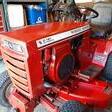
9 pointsDidn't get to do much tonight. I had some other stuff to do, so it was late when I started. As usual, unforseen issues popped up that had to be corrected. Bad starter solenoid- replaced. Pinhole in the fuel tank- soldered. Bad rectifier pushing 19VDC! Pic below was at idle! Replaced rectumfryer, and now charging at 14VDC. Stator is outputting 21.5 VAC. I need a new throttle cable. This one works, but is too short to route correctly. But now at least she's running! Carb adjustment probably needs fine tuning, but the puddle of gas distracted me... Got the welding done on the belt guard. Paint tomorrow!
-
8 pointsI have one of these UniStrut trolleys in the shop and it works really well and is inexpensive to purchase. Rated up to 600 pounds, nice for moving engines, decks etc. Just wanted to pass it along. Trolleys are $27 for a pair The strut is $36 for a 10' section.
-
7 pointsI found a place that strives to keep your old stuff running. It's way up in the U,P of MI and they strive to get OEM gasket kits and if they cannot order them direct, they will make them. I had an old Echo weed eater and after I gave him some numbers the owner said to look on the other side of the carb body and tucked way behind a low spot, I found what he wanted. They made the rubber part and I had it in three days. The company is called Discount Marine and they specialize in old boat motors carb kits clear back to when I was a kid and i am 71. The website for the chain saw and related stuff is dicarbs.com, This guy is older than me and still answers the phone to help you out, He called me back with a price on my made to order part within the hour and got my OK to add it to my previous order. I figure that buying USA neoprene rubber seals and diaprhams is worth every penny and the stuff will actually fit..I cant wait to hear my old made in Germany Stihl run again.
-
7 pointsNot much to show for todays effort. Spent some time making a bracket and positioning a couple safety switches. The one attached to the brake/clutch lever is the neutral safety switch. I used a motorcycle brake light switch for this purpose. This will prohibit the starter from working unless the clutch/brake peddle is depressed. Towards the rear of the tractor is the break away switch, same break away switch used on trailers with electric brakes. This switch will get tethered to the eliminator. If the tractor comes unhooked from the eliminator, the plunger will get pulled out of the switch. This intern will shut down the ignition and the fuel pump. Along with these switches I also made the brakes functional. Glad that did not change the clutch/brake lever when they switched to using separate clutch & brake peddles on the C series tractors. I set out to bolt the hubs on permanently but was met with a set back. Who ever rebuilt this transmission also cut full length key ways into the axles. Bonus - as I think this is a much stronger & better idea. Issue - they cut the key way for a 5/16" key instead of a 1/4" key. Good news is that they did cut the keyway 5/32" deep so it is in fact cut for a 5/16" key. Given this fact I guess I will have to cut the keyway in the hubs out to 5/16" to remedy the issue. I also pulled the head off from the engine & blasted it. This will be going to a machine shop this week to have about .050" shaved off to gain some more compression. This engine has a series 4 head witch is good for a stock puller, not as good as a series 1 (LP head) but it should serve my purpose well. As long as the head was off I measured the cylinder bore as well. The bore measures out well with in specs but there is very little cross hatch showing, so I'm thinking a good scuff and a new set of rings will be in order. Will not order parts until I measure the crank though. Want to make sure it is with in specs as well.
-
7 pointsI snuck this Wheel Horse sticker on my wife’s Explorer and she wasn’t happy. She left it on for probably a year until one day I noticed it was gone. This year at the big show I’m going to buy several so I can put one on her car and then when she removes it another one will magically appear!!
-
6 pointsThen you're in good conpany! I didn't paint the belt guard today. It was so pretty outside I just rode it around like it is. I'll paint later.
-
6 pointsUsed a lot of it as an electrician on construction sites, Kind of a big kid's erector set. Stuff is incredibly strong and versatile.
-
6 pointsI made up an engine balancing device years ago using a short piece of Unistrut, some 1/2" allthread rod, a trolley and a couple of chains. When pulling or installing an engine in a car I could tilt the engine as needed to clear the firewall or radiator with ease. That will hold well over the rated 600 pounds.
-
5 points
-
5 points
-
5 pointsBuilt this out of some left over steel the beam is too short, need to be minum of 8" longer but it works. Easy to get out of the trench, just back up. Have a cord attached to pull it back up, that thing jurks hard broke the cord a few times when it caught on something you don't want to be holding that cord when backing up. It might work better with the 16" adjustable clevis hitch I built.
-
5 points
-
5 points
-
5 pointsOK thanks for the advise so far - so I've already got a primer bulb in place as I saw the idea on another thread and the previous owner said they had to blow into the fuel tank to get it going! I'm a bit unsure how much I should actually pump it though before I end up flooding the engine? So I got started on taking the engine apart, removed the shroud and cleaned up all the cooling fins first. Then I set points to 0.02" and confirmed that they start to open when the flywheel hits the S timing mark, so hopefully timing is good. Going to clean up the carb and try and tune after this - I never try and change too many things at once, so I can figure out which thing helped - or broke it! So this is what I found today - but looks very heavy carbon deposits to me, and guessing the oil isn't too good..! Before and after photos after I cleaned it all up. Does it look OK after? I also measured the cylinder bore using a telescoping gaugue and digital calipers - looks like 3.749" when measured at 3 different points, so I guess its not too worn?
-
5 pointsA fun day of playing put together / take apart, a game that I have gotten good at with this project. First, unbolt the tranny & throw some paint on the ladder bar reinforcement that I made for the transmission. While I was waiting for the paint to dry I moved on to making a guard to take care of the excess exposed belt issue. Seemed simple enough but this took up a fair amount of my day. To make the guard everything was carefully measured with a micrometer, marked with chalk, & cut with an axe. By the time I finished making the belt guard the paint was dry on the ladder bar so I bolted it & tranny back in place. (hopefully for the last time) With the tranny bolted back in place I was also able to bolt the adjustable hitch back on.
-
4 points
-
4 points
-
4 points
-
4 points@953 nut UNISTRUT is the word , we used them every ware in plant , down in the stock room area , we had 55 gal drums , filled with the most popular , maintenance pick up parts , you would g to the parts counter for specific , smaller parts , but what ever else you needed was in the hallway getting there , flanges , pipe hangers , conveyor materials , glass pipe connection flanges , nuts/ bolts , almost endless grab and go theory, we had hundreds of pumps / drive set ups , stem jacketed pump set ups , for heavy material in winter flow points ,SWISS LEWA POSITIVE GEAR PUMPS , always constantly adapting to the situation , to keep production running , those strut bends were made on a 100 ton bend press , incredible build point , pete
-
4 pointsWhen BBT got her Pilot about a year ago I mentioned something about having a decal on it. Denied. Then a few months later @Sparky had a spare. THAT one was acceptable. 🤔 😅
-
4 pointsThis is excellent. We have one set up as well. Definitely recommend as a somewhat Mobile crane lifting device.
-
4 pointsMy tricks for seating beads -remove the valve stem core -use a decent sized FULL compressor tank -remove all bottle necks from the air hose/fittings. As in.....if you have a 1/4" NPT ball valve on the output of the tank, remove it. -I prefer only using type V 1/4" air line fittings or larger -soapy water along the beads with a spray bottle You want as much air as possible to get into the tube as fast as possible. My setup for seating beads is a 33G compressor with a 1/4" output that connects to a 3/8" hose to a basic air chuck. There have been a few times I've had to set the tire up on end, put my knee in the middle of the tread, and apply my body weight to the tire while filling to get it to bulge out and seat, but I've never had any real issues using that method........and I've seated 100+ tires car, motorcycle, tractor, 4-wheeler, you name it. Let'er rip with your face turned away and listen for the POP POP of the beads to seat. For low pressure tires like that, I've never thought twice about putting 30-40 PSI into them for a few seconds to get them to seat, then remove the chuck to let the air out. Then replace the valve core and air them up properly.
-
4 pointsAdded a big sticker on the 523-H hood. Tried to talk the wife into putting one on her truck window, but she said "no thank you". ...Or might have been "I'll kill you"? I wasn't really paying attention.
-
3 points
-
3 pointsNot sure where I first heard eyecrometer, but it should be a true word. An accurate measurement, based on one’s past experience. It looks close-e-nuff by my eyecrometer. My eyecrometer says that is 3/16” thick. My eyecrometer says we need to grind more.
-
3 points
-
3 pointsCredit to Kevin as I stated above. Maybe he's a trend setter and verbiage inventor?
-
3 points
-
3 pointsThose fans are designed to move at a certain speed and move a certain amount of CFM. There is some leeway. But an old crusty fan is compromised. Using an electric motor, if you hop up the pulleys the motor overload will usually kick off before the fan will explode. Using a 14 HP gas engine will certainly overload the fan and cause it to explode. Restricting air in or out will have the same effect. If the fan outlet is restricted, the fan can't push the air out fast enough and the incoming air will increase static pressure to the breaking point. If the inlet is restricted, the suction created will pull the blades right out of the wheel. I saw this happen on a new air handler at a school during covid. The facilities staff decided to put highly restrictive air filters in to "Clean the Air" Blades came out and went through the evaporator coil. Of course they wanted it covered under warranty! NOT!
-
3 points
-
3 pointsWindex. Slick as soapy water, spray where needed. And it will evaporate. Also works wonders when applying decals! Lets them slide around and squeegee bubbles easily. My wife thinks I drink the stuff!
-
3 pointsThe last 8" triribs I put on I used 650 tubes in it in front of a heat duct for a couple of days. Then used Armorall get the tires on. Then put the 400-480 tubes in, there still enough Armorall on to seat the tires. I leave the valve out and use what ever pressure it takes to seat the tire.
-
3 pointsLots of bead lube - and- about 30 to 35 psi. Then Bounce the tire on the floor! DO NOT be a hero trying to catch it - may end up with quite a pinch! May need to bounce it several times - it works!!
-
3 pointsLots of soapy water on the bead to help it slip into place. Maybe some carefully used heat source (like hair dryer, not a torch) to make the rubber softer and more pliable
-
3 pointsAmazing quality! Do you have a boot wash you run through before stepping onto these beauties?
-
3 pointsGot some steekers today! I've been buying Terry's decals since 2007, and am still amazed every time I get them. The quality is amazing, and the attention to detail as well. Guess I need to hurry up and finish this one. My Kohler letters moved accidentally but I fixed them.
-
3 points
-
3 pointsSeconded. .. except I'd just go right ahead and clean the carb. THEN Adjust it. I'd check the fuel pump condition as well. They're not the best at pulling fuel that far while not primed.
-
2 pointsI've read about using two pieces parallel then another hanging across 90⁰ from them. Makes it so the movable hoist can be located anywhere in a roughly 10 x 10 area.
-
2 pointsMy stepson wanted to buy a four wheel drive truck because he would get his two wheel drive stuck when he went hunting. I told him the only thing that would change is the length of the cable the wrecker would need to pull him out! Got to be a tad bit smarter than the mud you are driving into, He ain't!
-
2 pointsVery good idea and a shame it blew up. As others have said before me I would'nt bother trying to repair this unit. It failed for a reason. Chances are that the spot you repair will hold but then another section will give up. Looking at your exhaust nozzle I can imagine the pressure generated by the fan with the increased rpm's can't exit fast enough causing the fan to buckle under the increased stress. For a second attempt you could try to make the nozzle: - A, bigger or - B, transition smoother to the small diameter. This creates less pressure inside the blower but increases flow and speed at the tip of the exhaust nozzle, where you want it. No blower expert here though just thinking out loud and adding my
-
2 points
-
2 pointsThe likelihood of being able to patch it up and have the fan be balanced well enough to use it is slim to none. Get another fan and keep the rpms reasonable.
-
2 points
-
2 pointsI just finished building a leaf blower for the front of my horse. It moves an insane amount of air! I built a custom frame out of scrap metal to hold it on. You can feel a breeze at 55 feet away.
-
2 pointsYes start with the points at 020. Yes definitely adjust the carb and consider a cleaning. Sounds like the rest of your plan is a good start.
-
2 pointsI know the feeling. I am 6'5 and pushing 300lbs. I had a 66 Lawn Ranger. Here is a photo of how I felt on it.


