Leaderboard
-
in Posts
- All areas
- Markers
- Marker Comments
- Marker Reviews
- Articles
- Article Comments
- Article Reviews
- Classfieds
- Classified Comments
- Classified Reviews
- Wiki's
- Wiki Comments
- Wiki Reviews
- Blog Entries
- Blog Comments
- Images
- Image Comments
- Image Reviews
- Albums
- Album Comments
- Album Reviews
- Files
- File Comments
- File Reviews
- Posts
-
Custom Date
-
All time
November 28 2011 - November 27 2024
-
Year
November 26 2023 - November 27 2024
-
Month
October 26 2024 - November 27 2024
-
Week
November 19 2024 - November 27 2024
-
Today
November 26 2024 - November 27 2024
-
Custom Date
03/02/2024 - 03/02/2024
-
All time
Popular Content
Showing content with the highest reputation on 03/02/2024 in Posts
-
11 pointsLittle Giant Tractor. Several things make the Little Giant tractor unique. The fan and steering wheel were cast aluminum, unusual in that era. Another out-of-the-ordinary feature is the spring-loaded hitch for smoother driving and operation. And a recommended fuel blend of kerosene and water delivered extra horsepower: The Little Giant was an unusually powerful tractor. The Little Giant was the result of the brilliance of the Mayer brothers: Louis, Lorenz and Conrad. The three opened a machine shop in 1895. There, they produced a mechanical hammer, a revolutionary tool that in essence gave the blacksmith an extra hand, one stronger and more reliable than that of an apprentice. The hammer (also called a trip or power hammer) gained quick success, and the brothers formed the Mayer Bros. Co. The company sold more than 18,000 power hammers during 99 years of production. Shipped to every state in the U.S. and more than 30 other countries, the Little Giant Power Hammer was the best-selling of all brands of mechanical hammers. The innovative brothers manufactured and refined diverse products: boilers, gasoline and steam engines, hoists, steel beams, manifolds, road graders and ditchers, dredging equipment, traffic directors, woodworking equipment, band and circular saws, lathes, drill presses, retractable clothing reels and even a V-8 automobile. Except for the Little Giant trip hammer, which was perfected to peak efficiency, most others were produced for only a short time. The Mayer brothers began development of a gasoline farm tractor around 1910. In June 1914, company literature said, “Our work has been completed. In design, we have created a tractor that is good to look upon. In material, we have used high-grade metals with a prodigality heretofore unknown in tractor manufacturing. In workmanship, we have called to our side labor most skilled. In practical durability, we have produced an article that will outlive and outwork the horse and the ox. Offer it to your customers with the utmost confidence in the world.” Thus, was born the Little Giant tractor to the House of Mayer.” The Little Giant tractor was as expensive, about as much as the highest-priced automobile or truck then available, but the company promised the tractor was years ahead in terms of features, design, material, workmanship and durability. The Little Giant came with an ironclad warranty: Any defective part would be replaced within a year of shipment. The company claimed to know of no way to improve its product. The Little Giant tractor offered not only quality engineering, promotional writers noted, but intrinsic appeal as well” … it will make farming so interesting that your boys will rather remain on the farm than leave for the city.” No boys? No problem. “Every farmer operating a farm of 80 acres or more can solve the hired help problem with the Little Giant oil tractor.” The Mayer brothers had ambitious plans during the early industrialization of America. Several articles in Farm Implement News reported the company’s success. In 1914, the company announced plans to triple the size of its factory. Although the expansion never became a reality, architectural drawings showed a vast complex of buildings, complete with billowing black smoke suggesting full production and prosperity. Meanwhile, promotional pieces in 1915-16 extolled the Little Giant tractor’s advanced features. But the brothers soon found themselves overextended. With a workforce reduced by military recruitment in the months leading to the United States entry into World War One, the company was able to fill just 75 percent of Little Giant tractor orders in 1916. Though trip hammer sales continued strong, the tractor and other projects had seriously diverted income and focus from hammer production. When hammer deliveries were delayed, the company faced bankruptcy. Mayers Bros. was on shaky footing. In 1917 the board of directors took over the newly renamed Little Giant Co., The Mayer brothers resigned their corporate titles and moved to Wisconsin Battling a bottom line in the red, new management eliminated unprofitable products and scrapped inventory in 1923. The Little Giant tractor was among the cuts. In the tractor’s eight-year production run, more than 500 Little Giants had been built
-
6 points
-
6 points
-
5 points
-
5 pointsSorry guys, I guess the posts are limited to members of this local group. The story is , this old Deere yard art was dragged from a yard on to a rollback in the wee hours of the night. This grainy picture and the help of the FB group members tracked down the thief and recovered the tractor.
-
4 pointsThe last 8" triribs I put on I used 650 tubes in it in front of a heat duct for a couple of days. Then used Armorall get the tires on. Then put the 400-480 tubes in, there still enough Armorall on to seat the tires. I leave the valve out and use what ever pressure it takes to seat the tire.
-
4 pointsI used the @squonk method for throttle cable lengthening to get a god reasonably smooth installation. Got the choke cable movement to a decent level also. To install the rear attachomatic hitch I needed to make top brackets. I want to ad a 2" receiver sometime. I figured now's the time to make the top pieces for the future hitch.
-
4 pointsOh, sorta like never use your 4WD to get to the boonies. Then you can always use is to get back home.
-
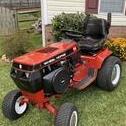
4 pointsYou have to consider the age of these machines. Over the years previous owners will have made changes and or modifications to keep them in service. Finding one completely original dosnt come easily or cheaply for that matter. Clearly its going to need some work. Thats the fun part, making them your own. What ever has been done, can be undone. What ever needs to be done, can be done. Its up to you to figure out how much time and money you are willing to part with. I have been known to spend more then I should have on both of these areas on some of my mine. That being said, I have always been very happy with how they came out. A few I have kept, most I have passed on to the next person. That person could have redone, none, some , most, or all of the changes I made. I get my kicks out of bringing them back to life again. I love getting them running and driving again. For the right price I would load that in the back of my truck and be happy as can be to have it. Cant tell much from photo but Im guessing it is a Wheel Horse 654 ? Im not very knowledgeable on round hoods. Im only guessing. What I find off pudding is the muffler being on the same side as the pull cord. Maybe thats normal, I dont know. Someone will be along shortly who will know exactly. @Achto , @Pullstart @WHX?? , @squonk
-
4 pointsI had these 6 ply mounted on 8.5" rims at the tire shop, He put the first one he grabbed the small blaster the tire hardly moved. He had to charge up the big blaster to get the tire seated,
-
3 pointsA fun day of playing put together / take apart, a game that I have gotten good at with this project. First, unbolt the tranny & throw some paint on the ladder bar reinforcement that I made for the transmission. While I was waiting for the paint to dry I moved on to making a guard to take care of the excess exposed belt issue. Seemed simple enough but this took up a fair amount of my day. To make the guard everything was carefully measured with a micrometer, marked with chalk, & cut with an axe. By the time I finished making the belt guard the paint was dry on the ladder bar so I bolted it & tranny back in place. (hopefully for the last time) With the tranny bolted back in place I was also able to bolt the adjustable hitch back on.
-
3 points
-
3 pointsYep, When I had my cataracts removed and left the office, I couldn't find my car. It had changed from a gray to a tan color.
-
3 pointsMike the most interesting way I ever heard of wire diagram. Even a cave man can understand.
-
3 pointsI used one of those like this. I had a section of exhaust pipe from a blown up KT-17 that I used on the end to direct the exhaust and still use the PTO
-
3 pointsHere is a video about Ed's John Deere subject. Looks like the thief will pay for the crime.
-
3 pointsThey're not $20 anymore but that's where I first found them years ago. I'd buy 2 or 3 of those at a time. Use them on all my customs. Always used to load up on stuff from Pat's but their new website is just about useless. So hard to navigate and find parts that I don't bother any more. Plus they back ordered stuff on me a couple of times and screwed up the orders while wanting more money.
-
3 points@peter lena, @CCW, I hope both of you, when you get the chance, and remember to do it… Tell both of those servicemen thank you from Horse Newbie !
-
3 pointsOh yeah @Shynonturned me on to them years ago. They have a real nice mellow sound ... you can put a tink tink on them ... they fit right on a 1in nipple... And best for us with 30 tractors... affordable. Cub bracket comes right off.
-
3 pointsThe complaint on Horshoes in the review section says they are larger than advertised... Well, that's new.
-
2 pointsWe got this tractor back in the fall of 2018 thanks to our friends @buckrancherBrian and his wife Jo. Of course being a mid 60s square hood short frame it was destined for BBT/ Trina. Brian had already rebuilt the carb and fuel pump. Trina and I did a few other things back then too. Wiring. General cleanup. New transmission seals. HD rear hubs. Cleaner gas tank. Etc..... After running it nearly problem free for 5 years we pulled Pigpen aside for some much needed maintenance. Here's a few pics to start....
-
2 points
-
2 pointsOnly one real reason that I know of - Competition pulling on pavement. I personally have never pulled on pavement but I know that most people run their tires backwards for such an occasion.
-
2 pointsLots of bead lube - and- about 30 to 35 psi. Then Bounce the tire on the floor! DO NOT be a hero trying to catch it - may end up with quite a pinch! May need to bounce it several times - it works!!
-
2 pointsLots of soapy water on the bead to help it slip into place. Maybe some carefully used heat source (like hair dryer, not a torch) to make the rubber softer and more pliable
-
2 points
-
2 points
-
2 points
-
2 pointsSaw the report of the theft on local TV, but didn't hear about the capture. Glad they got it before it went to a scrap yard.
-
2 pointsCouldn't have said it any better Mac. Prolly used the rod for pulling it around? It can come off along with any frame work as required.
-
2 pointsI think a softer rubber compound and less ply’s will provide better traction. Personally would never buy a 10 ply for one of my tractors.
-
2 pointsPolished shift knobs best I could by spinning them on a stud mounted in the drill press. I used scotch brite, then 2000 grit sandpaper followed by rubbing compound then back to black polish. Not perfect but a lot better than they were.
-
2 pointsMoved tractor to shop. Installed seat. Installed seat gas lift and fender protectors. Hooked up headlights. Overall view of tractor as of today.
-
2 pointsThat came from work likely around 10 years ago. The cabinet had been picked quite bare so they let me have it. I was able to gradually source all the missing pieces one by one and it is now complete. It does not get used very often but sure is handy when required. Inside is a shadow board with all the part numbers which made finding the right pieces easier. Some of the puller jaws I ordered new because all the used ones I could find were bent or damaged.
-
2 pointsFender installed along with seal gas lift bracket Seat installed. Seat gas lift seems weak so I installed a new one. New one uses ball mounts instead of the eyelet style so balls had to be installed. Seat stays up better with the new gas lift. Turned on the lights and the taillights both work.
-
2 pointsTractor cleaned and plastics polished. Stainless steel hardware ready to install fender and seat
-
2 pointsHoods back from my painter. One is for this tractor and the other is for a 520-8 I have been working on. These will sit here until the snow melts and can move the tractors from the garage out back easier. That will allow the paint to dry more as well.
-
2 pointsIf I remember correctly, the dies for those wheels were one of my projects. That part was a good runner. Funny how the ones that ran well in production fade from memory quicker than the ones that were problem children.
-
2 pointsMy pin hole seems fine as the pin fits real nice and the hole is round. I have bent hitches in the past, here are two I have as spares. I just thought a spacer would be something different for this one.
-
2 pointsThey look neat but the yellow tape is sure distracting! Depending on the temp and humidity, leaving them for a week or more won’t hurt
-
2 points
-
2 pointsAnother small but important step complete. Brake and foot motion control pedal shafts were left as bare steel for pedal installation. I punched 3/4" holes in pieces of heavy paper to act as a painting guide. Shafts were then given 2 coats of self priming paint using a foam applicator. After drying overnight I cut the paper and carefully removed it from the shafts. This is how the tractor looks now. I will give this paint a few days to dry before installing the footrests.
-
2 pointsWow, that is nice work. If I had a tractor that spiffy, I’d never want to get it dirty. Hence, none of mine will ever look like that. Noticing the clever support of the rear end. Somewhere on the forum is a slide show of the final WH production run. it shows the tractors moving down an overhead track assembly line suspended at the front by the attach-a-matic and the rear by the transaxle hitch pin hole!
-
2 pointsFront spindles cleaned up then painted. How they looked when just de-greased. Cleaned up and painted. Installed with cleaned and greased thrust bearings. Tie rods installed and a preliminary alignment completed.
-
2 points
-
2 pointsEngine installed. Drive belt and hydro cooling fan installed. Throttle and choke cables hooked up. All wiring and vacuum hose hooked up. Battery installed. Engine filled with 30W and hydro filled with 10W30 oil. Wheel Horse hydro filter installed. Fuel line hooked up and fuel added to tank. Installed PTO assembly and adjusted for proper operation. Started and ran engine and also exercised the hydro motion and lift to purge the hoses. Adjusted hydro control cam for proper operation and no movement of rear wheels with foot control in self center position.
-
2 pointsFuel tank cleaned up and installed. Dash and steering wheel polished up. As you can see, I simplified the wiring on this one and eliminated all the warning lights but the low oil pressure. Plug installed where motion lever was.
-
2 points
-
2 pointsalso, i see snow on the ground with a painted frame - - do you paint outside - what temps do you safely paint in -- 50 f or lower?
-
2 pointsHaving that arm on the throttle disc must help. Unfortunately mine do not have that arm the wire goes right into a hole in the disc....I am going to add an arm this winter...







.JPG.9f2ecb26065c66527b0730084ab7fc7a.thumb.jpg.7dc8a04d9a53d44ee2b23f26ee94496f.jpg)

