Leaderboard
-
in all areas
- All areas
- Markers
- Marker Comments
- Marker Reviews
- Articles
- Article Comments
- Article Reviews
- Classfieds
- Classified Comments
- Classified Reviews
- Wiki's
- Wiki Comments
- Wiki Reviews
- Blog Entries
- Blog Comments
- Images
- Image Comments
- Image Reviews
- Albums
- Album Comments
- Album Reviews
- Files
- File Comments
- File Reviews
- Posts
-
Custom Date
-
All time
November 28 2011 - April 23 2025
-
Year
April 23 2024 - April 23 2025
-
Month
March 23 2025 - April 23 2025
-
Week
April 16 2025 - April 23 2025
-
Today
April 23 2025
-
Custom Date
12/09/2023 - 12/09/2023
-
All time
Popular Content
Showing content with the highest reputation on 12/09/2023 in all areas
-
9 pointsAfter 10 years of use I decided to pull some major maintenance on the 520 Snow Chucker. This includes changing oil in the ONAN Engine in the HYDRO belts and Greasing and lubing all bearings an linkages. I ran into a situation with three Molded sealed bearings in the pulleys. Wheel Horse Nor TORO does not intend for these to be serviced just replaced. I looked at some YOUTUBE videos and a gent used a needle grease gun attachment to grease a rubber sealed bearing. This was found at AUTOZONE for $5.00 bucks. Well how about a metal sealed bearing? I decided to mic the needle then use a MICRO Drill & bit drill the bearing with a vacuum attachment set up to suck up any micro fine chips as not to get into the bearing. Once drilled I pumped the bearing full of grease. You can rotate the bearing and reinsert the needle adding more grease. I then used a Q TIP soaked in Lacquer thinner and cleaned the area with the drilled holes. I then mixed up some JB WELD and sealed the drilled hole back up. There are two of these pulleys on the SC Tall Shute 2 Stage Blower and one on the 520. This fix should last for another 20 years. As they say if there is a will there is a way. ~Duke
-
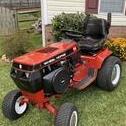
6 pointsI'm not sure what type I have but I believe it's a 1967 Wheelhorse, Want to give thanks for the gentleman who posted the info for front tires, 4.10x6 I believe these will fit my mower, with the deck being on now it tend to go towards left side front tire, and the tires they had on it were way to big was hitting the deck, I found and old tire laying around and noticed it fit but the hub is to big yet, so on the look out for hubs to put these tires on, Restoration project, here is a roof mower that I put in the parade this year, love the older mowers, this Roof Mowe you see was produced in the mid 55 era, and hit the markets about 1960. its a 2 speed and mows and runs great, when I get this wheel Horse done I ll post it as well. thanx for the ear all
-
6 pointsGood info - let us know how it works after a couple of storms. I see the pattern of spot or resistance welds on the black pulley. Using a 1/8" bit those can be drilled out and the halves separated to allow access to the bearing for greasing or replacement. I use #5 button head screws and hexnuts for reassembly. Done this to four different 3" idler pulleys that were riveted.
-
5 pointsUsing the lift assist spring on a Hydro tractor is a question of "can you" vs "should you". The lift will certainly make the snowblower go up and down on its own but the weight of the big Two Stage Snowblower is such that it REALLY should have the spring to take tension and wear off the pivots.
-
5 points@HorseFixer Good to hear from you again Duke ! I was wondering were you have been! I wanted to let you know that your snow chucker inspired me to get one of my own. A 417-A that I inherited, I found a two stage blower and then a cab. I absolutely love it! Added some extras like lights, heat and a wiper.
-
4 pointsThis is a seldom seen, antique, open tiling spade for digging trenches in clay type soils. When digging in clay it is like cutting cheese with a knife, the deeper you go the harder it is to push because the cheese sticks to the knife that is why cheese cutters are made out of wire. This tiling tool uses the same principle of having less surface area for the clay to stick to. These were blacksmith made and many ended up broken from abuse.
-
4 pointsIt is an open tiling spade, used for cutting trenches in clay type soils. Digging in clay soil is like slicing cheese…
-
4 points
-
3 pointsI'm considering putting a leaf plow together for next year's batch. I've raked, raked & tarped, leaf blowers, RD deck with tow behind sweeper, just the sweeper, and this year, my snow plow set about 1" off the ground, then the snow plow and the sweeper. All the above methods work, but each has something preventing it from being the magic bullet for leaf removal. I got the water system blown down at the lake house and anti freeze in the drains. Will finish closing it down tomorrow. Got all the Generac V twins in the neighbor hood exercised this afternoon. Power dropped about 5:15 and came back about 8:30. Thrèe of our neighbors have installed a Generac in the last few years. Really windy today. I'm guessing a branch or tree was the cause of the outage. Will have to check the oil on the Generac tomorrow.
-
3 points
-
3 pointsAnd that is exactly what happened… I tied the middle of the rope to tractor, wove the rope down each side of the tarp and tied rope in last two grommets on each back corner. As I moved the back came over and promptly respread the leaves in a path behind me…
-
3 pointsI Do this routinely. Think burrito. Leaves in the middle, enough tarp all around the wrap nicely. Don't overload... Works like a charm... Overload burritos end up in your lap... overload tarp leaves end up in yard...
-
3 pointsMade an attempt at getting up leaves in the yard today… rain tomorrow. There is only one Magnolia tree in my yard. Got the shop roof and Wheel Horse barn roof blowed off and the rest blowed into piles. This year I was gonna try a tarp instead of loading my 10 cu ft trailer and making a hundred trips to the curb. Gonna let the Work Horse work today… That did not work out so well. I WILL get the leaf sucker running and operating before next fall. I have been saying that for about 5 years. I am whopped and did not get it all done… It started raining and the Work Horse got rained on… Neighbors Christmas lights…
-
3 pointsI will have to pick up some sand or salt or something. Thank you for the advice!
-
3 pointsLast weekend I roasted a turkey to use in turkey/noodle soup....( Aldi had ButterBall for .99/lb..... bought 4 17-pounders.) Ended up with 14 quarts of pressure-canned goodness for the shelf, as well as maybe 1.5 gallons to eat. Finished THAT off during the week.... along with that, I made some cornbread in a skillet..... found a recipe for maple-bourbon cornbread! MAN, was THAT good!!! (sweet, though). This morning, we used our cast iron waffle iron for guess what???? And a small cast iron round griddle for some fried eggs.
-
3 pointsFinally found a sticker that wasn't fully painted over. It's got a Kohler K241S, which according to the PDF manual I have means that it's a model C-105. It's like industrial archaeology.
-
3 pointsI mentor for a high school robotics team. I always tell the kids that you learn from your own mistakes and gain wisdom from other's mistakes. Thank you for providing some wisdom for the rest of us.
-
3 pointsSort of, my neighbor does them. He did my Ford Sierra. And also the first 3 520's in this picture he painted the hoods and fenders. He also painted the hood and fender for my 312H I buy the implement paint, thinner, and hardener at Peavey mart (our local tractor parts location) and he preps and sprays them for me.
-
3 pointsThe large spring under/near the belt is more to stabilize the load keeping it level more than anything. The anti sway stuff is to keep the belt from rubbing the hood. Think Lowell sells those parts https://wheelhorsepartsandmore.com/
-
3 pointsMade a batch of chili in our cast iron chicken fry pan and baked some cornbread in an iron fry pan the other night. Good meal.
-
3 pointsFinally it lives. Started and ran engine to verify all gauges work (they do), and for proper operation of clutch and PTO safety switches. Installed PTO assembly. PTO clevis pin installed. PTO clevis pin removed and swing away clevis in open position. Shift and hood stand plates painted. Steering wheel fully installed. Overview as per today.
-
3 points@ WHX , replaced a number of original pulleys , key for me its same size with a larger bearing , and wide removable side shields , typically a same size pulley / type m has the tiny side shield , poor lubrication quality , cut a , size to size sleeve , from https://www.google.com/search?sca_esv=589398076&rlz=1C1CHBF_enUS866US866&sxsrf=AM9HkKlVwypfVWFwBF6lxvxzlVcr2lAZLg:1702136180102&q=3/8+x+1, typically a 5/8 ID bearing , press this into it , bolt on with a 3/8 bolt . if you paint it red , its hiding in plane site ! very easy fix , done a number of them , repack with Lucas green or marine grease , no noise , or roughness . regular stuff for me , pete
-
3 pointsNICE!! I do think it's inappropriate for your side-view mirror to be calling you a "Loser" though....
-
3 pointsThe Workhorse has gained a permanent parking spot in the garage. Not the car. ........
-
2 pointsI was sorting through dad’s pile of old tools looking for a digging fork and uncovered this thing. He remembers his dad having it in the garage since he was a kid but doesn’t remember grandpa ever using it for anything. Hard to get pix since it was kind of dark and the rusty patina blended in against gravel, rocks, and the ground. the tip is ground pretty sharp and it doesn’t seem to have any welds or modifications that are visible. The little flipper thing doesn’t have any apparent function other than providing a place to put your foot. Handle and grip is all wood. Like all old stuff, has a lot of metal. Anybody know what it’s for? Steve
-
2 points
-
2 points
-
2 points
-
2 pointsYour tractor is definitely not a C-105. The C-105 was made in the early eighties, your tractor was made in the early to mid seventies. Here’s my C-165, the same body style as a C-105. Good luck with your tractor!
-
2 pointsI can't seem to pinpoint the number of military deaths during World War II, what I found is somewhere around 407,000. If it wasn't for men like your social studies teacher this number would have been much higher. Our generation was influenced by those who served and most of us never knew what they went through to secure our freedom. We walk among heroes and don't even know it.
-
2 pointsNothing obvious missing, but it sure seems like it would have had something attached to that thing. It really has very little range of motion so not sure if it was always on there or if it was added at some point. Grandpa was a factory worker and did miscellaneous work, so no idea where this came from or if he just picked it up at an auction or something 70+ years ago.
-
2 points
-
2 points
-
2 pointsI'm trying to keep it narrow. I don't like the front axle sticking out wider than the rear. I got them mounted and installed. All in all very happy with the looks.
-
2 points
-
2 pointsThat red tractor on the end was my life post surgery a couple of months ago. After they put me on a catheter ,it was no longer " shutt " But everything is good ñow
-
2 points
-
2 pointsConsider becoming a Redsquare Supporter. It helps keep the site going and you get unlimited pictures. Perhaps @76c12091520h Brian might have a thought?
-
2 pointsBreakfast this morning using my go to square pan for bacon and eggs 20231209_095942.mp4 20231209_095158.mp4
-
2 pointsThis discussion on caps makes me glad I rebuilt the top of my cap instead of replacing it.
-
2 points
-
2 pointsI checked to see what the bin said we were using and ordered by that. I found a large quantity of 5/32 online. I like the zinc coated for corrosion resistance. Pricing is excellent.
-
2 pointsNice work!! Unlike an engine that has an oil pump, it is best to run your rebuilt K-model Kohler at 3/4 to full throttle for the first 5hrs. Even better if you can put some load on it. Mower deck, mold board plow, trailer full of weight, etc. This is the best practice for seating the rings on a splash bath oil system. Change oil after a 5hr break in, then every 25hrs after that.
-
2 pointsA couple of Lipo batteries hidden under the wet cells should serve as a close equivalent. A flip of the switch changes 36v to 72v. Thank Jim!!
-
2 pointsFrom left to right 1985 Honda CB125 (Only has about 1000 miles on it and all original except the turn signals are reproductions) 1998 Buell S1 (most uncomfortable thing I have ever ridden, but ear to ear grins every time) 2006 BMW 1200GS (My mile muncher go anywhere bike that has taken me all over the country, back before I had kids 🤪) They unfortunately collect more dust than miles recently, but can’t bring myself to move on from these 3
-
2 pointsIf you add a set screw on top of another Make sure to grind the second set screw flat - grind off the cup point. What happens is the second screw cup point will enter the hex hole in the first set screw and flair the top of the first screw which will never be removed again.
-
2 pointsBoy, isn’t that something many of us have come to learn?! Looking good so far.
-
2 pointsMaking little headway on rat rod Suburban. Been really busy with work & with taking care of things at my parents house. Had to get it up higher to work on. Too hard to be bending over etc. Still having issues with my sciatica after injuring my back over the summer.
-
2 pointsI thought about that too.But I didn't want to ruin it so I decided not to mount it after all. Apparently these are pretty sought after.Its a hood ornament from a 1948 Pontiac Chieften.SP? Ive seen them listed for as high as 4/ 500 bucks, more than I payed for the tractor
-
2 pointsSwapped out the worn k181 on the 74 b80 4 speed for a rebuild I did a wile back. Only problem is I the engine looks out of place now ….I should of not painted it. Oh well it’ll get dusted up in no time


