Leaderboard
-
in all areas
- All areas
- Markers
- Marker Comments
- Marker Reviews
- Articles
- Article Comments
- Article Reviews
- Classfieds
- Classified Comments
- Classified Reviews
- Wiki's
- Wiki Comments
- Wiki Reviews
- Blog Entries
- Blog Comments
- Images
- Image Comments
- Image Reviews
- Albums
- Album Comments
- Album Reviews
- Files
- File Comments
- File Reviews
- Posts
-
Custom Date
-
All time
November 28 2011 - November 30 2024
-
Year
November 30 2023 - November 30 2024
-
Month
October 30 2024 - November 30 2024
-
Week
November 23 2024 - November 30 2024
-
Today
November 30 2024
-
Custom Date
03/24/2023 - 03/24/2023
-
All time
Popular Content
Showing content with the highest reputation on 03/24/2023 in all areas
-
7 points
-
7 pointsThis was taken a couple of years ago. Bella and I were waiting for Sunday Night Football. The pre game show put us out be we managed to wake up just as the game started!
-
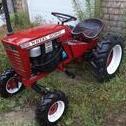
6 pointsHey folks, I wanted to post a recap of the C-100 save I did over the last year or so. Some may remember when I got this rig but thought it would be cool to have the progress in one place and maybe encourage others to not pass on a project. Also showing about the most budget friendly way to save one of these nice old machines and turn into a great user. So this is a 1974 C-100 8 speed that I got for $25. No implements, though it did have a mule drive. It sat for a long time with a blown engine. But this is the day it came home. Total cost/budget for this will be at the end. Engine tear down and inspection. Blown rod. Discovered this engine had been rebuilt before with a .020 over piston and .010 under connecting rod. There was so little carbon on the head when I removed it I figured the engine didn't have many hours on it before it was ran low of oil and that's what caused the failure. There was a nick in the cylinder wall but it was below the ring travel line. So I ordered a rebuild kit off ebay with the .020 over piston and .010 under rod. Cleaned everything up and did a valve job. Also cleaned and rebuilt the carburetor and all new fuel lines, and filter. Fuel pump was bad so changed to electric pump. Cleaned the points and the set gap. Starter wasn't working so took it apart and cleaned everything up on it nice and put it back together and worked great Now that starter was working and verified the engine ran well it was time for the wheels/tires. I got tubes for all tires and cleaned the rims with water and wet sand paper, 200 grit. They cleaned up nice! I'm always surprised how well old paint can hold up. Rear tires are Goodyear AG size 23x10.5-12. They were a little cracked but with new tubes they should be just fine. next was a muffler. It didn't have one when I got it. So ordered the cheap one and welded on some pipe with matching thread. Ugly weld as this was one of my first weld projects. But it's working. A trans fluid flush revealed a leak on one of the axle seals. So replaced that Well with new gear oil and everything greased up I washed it down and gave it an oil rub down. I've probably got around 10 hours running time on it so far but it is working fine. So here is the finished rig keeping it about as original as I got it. So cost for this save project is below. I didn't include maintenance items, like oils, and filters. Just the broken and needed replaced parts: $25 - Tractor $100 - Engine rebuild kit $60 - tire tubes, all 4 $30 - carb rebuild kit, fuel lines, and fuel tank valve $20 - electric fuel pump $7 - Axle shaft seal $18 - muffler and pipe Total is about $260 in this rig to have it a solid user. It was a fun project and I'm satisfied with how it turned out. Well worth the investment and effort to me. Thanks for looking!
-
6 pointsNo need to be hesitant about it. It’s a normal and expected thing for shrinkage to be happening to our hoses when they reach that age. Again the idea is not to try and reinvent the wheel with modern solutions. Stick with the original stuff and inspect it frequently.
-
6 pointsWhen all this discussion about lines went on a few years I mentioned this very fact that the plastic lines get brittle. Then along with the chinzy wire clamps they would leak. I got laughed at by more than one member and they shall go nameless but the Squonk never forgets!
-
6 points
-
5 points
-
5 points
-
5 points
-
5 points
-
5 pointsTried twice with the yellow and blue lines. really not impressed with them. They will deteriorate right at the connection with time and get hard. Also regular spring clamps are too big for them. As a routine maintenance item I inspect and change lines anyway if needed. So far for the flexibility and durability I stick with the black neoprene lines. Not that it is a concern for me but they also look better. If one does regular maintenance there is no need to reinvent the wheel.
-
5 points
-
5 points
-
5 pointsWe're just looking after the Cocker Spaniel for a couple of weeks for friends. Twelve years old and stone deaf. Carol wants to keep him.
-
4 pointsSo….I took all the good advice and knowledge from @Ed Kennell @wallfish and @oldlineman and tried to put it to good use. I used the jack bolts on the bearing. I used some heat along with the jack bolts although I only had map gas. I couldn’t get that bearing to even think about budging. Moved on to the pulley. Tried jamming the next size (27mm) torx bit into the set screw. Success!!! Put a ratchet wrench on it and attempted to turn it. SNAP!!! Well, that didn’t work out so well but it seemed to go along with the rest of the luck I’ve been having. Got the broken torx bit out finally and got the drill ready to go. Drilled the set screw out of pulley and put some heat on it. The pulley is not budging either. Time to admit defeat. Got the driveshaft out of the snowblower with the pulley still attached to one end and the bearing still firmly attached to the other end. Took the whole thing down to a machine shop. They took a look and said “no problem”. They had a 6 ton press and started with one worker to press things apart. It ended with 4 workers, an acetylene torch, a 6 ton press and over one hour spent trying to get those two pieces off that shaft. We told them they could cut the bearing off if it would be easier, they said “no, this is a challenge now”. They finally got both the bearing and the pulley off the shaft but they kept saying how they couldn’t believe the amount of effort that it took. Like I said earlier in this post, I’ve overhauled a few of these snowblowers befor and never had a big problem getting the bearings and pulleys off the shaft but this one kicked my butt. Thanks to the members here for all your good advice and hopefully I can return the favor sometime. Jim
-
4 points
-
4 pointsI'm fairly sure I've posted this one before... Likely not this one.... The original chassis of the generator that held the K582 twin engine. And this. Bonus pic. I call this "chicken".
-
4 pointsGoing back through some older posts... Thank you all for your input. Based on it, I kept by turf tires and bought the "rubber" chains so as not to destroy my driveway. I have used then successfully for the past few seasons, they are awesome.
-
4 pointsThis is not my day for tubing. I have a 175k Mr Heater torpedo unit about 4 years old. Went to use it and it sputtered didn't run well and shut itself off. Some disassembly and research revealed the rubber hose from the air pump to the burner had dry rotted and cracked open in several places. The fuel line from the tank to the burner was also dried out and cracked but not leaking. replaced with some neoprene fuel line and all is better.
-
4 pointsNever doubt the Squonk. There is a lot of wisdom and experience hidden in such mystical creature . The three “L’s” rule applies here. Look, listen ,learn.
-
4 pointsBench testing a K301 this evening that had sat for years, reportedly needing a head gasket (which it does, but I digress). Moved the motor onto the floor of the shop and hooked up fuel, battery, wiring harness, and addressed the safety switches. New ignition switch. Crank and no spark. Power at the coil in the run position. Ground wire to points ohmed out. Cleaned the points and still no spark. Changed spark plug. No change. Changed plug wire. Same. I'm getting to my point This is something I used to do but haven't for years...To check the quality of the ground through the points, take the positive from the battery through a multimeter and check the difference between the base of the points and the ground wire screw with the points closed (ignition off). Today, I had 13.6v from the battery to the base of the points, and 10.6v at the grounding wire. Changed the points and viola! Spark
-
4 pointsThe older hydros with hydraulic lift were notorious for breaking the tower on both sides at the mounting tabs where the four bolts go into both sides of the frame behind the footrests. Rather than a true "Frankenhorse", someone probably just swapped the tower out for one that hadn't broke yet. The one in the pic isn't broken obviously, but if they break it's typically right above those two bolt holes on both sides.
-
4 points
-
3 pointsFound a 654 for sale about 2hrs away. Going to look at it this weekend. It runs & operates as it should according to seller. Overall appears to be in decent condition. Has no implements- tractor only. That's fine w/me. Maybe eventually I'd like to get a snow blade or even a snowblower. From what I've found it was an only 1yr made model??? Are parts, implements, etc going to be difficult to obtain? Lastly, anything else I need to look for??? $400 nego seems reasonable?
-
3 points
-
3 points
-
3 points
-
3 pointsSame exp with clear lines...brittle in a few months. I now use the high-pressure line from an old car engine. No issues for 3 or 4 years now.
-
3 pointsCan't speak for all but the clear I've used was garbage. Turns opaque yellowish in a matter of weeks. If you cut it at the end to reuse it, it just breaks. I'm guessing rubber trees are endangered?
-
3 pointsI laugh at you for lots and lots of reasons. 😜. I do definitely appreciate the clamps you recommended a couple years ago and we've been using them on everything.
-
3 pointsI tried using the yellow stuff for one year. Noticed that shrinkage almost immediately. I switched over to the Blue Line made by Stens. I've had that on Cinnamon for 3 years now and it too is due for replacement. I really do like the idea of being able to see the fuel in the line but I can't honestly recommend. Either the yellow Tygon or the blue Stens line...
-
3 pointsA couple ideas here to consider: First a carb cleaning might be needed, and especially the high jet needle. Sometimes moving them after they have set in same place a while could loosen debris particles that could have clogged something up a little. Other idea is did you check the settings prior to adjusting? I usual make note of the current settings if it's running normal in case I have to go back to it. Some engines are thirstier than others so the manual adjustments usually get you started, I'm guessing it's around 1.5 turns out each or something. But those are probably determined with a newer engine, and not one with hundreds or thousands of hours. I adjust mine by giving it what the engine wants and then leave it. I usually do full throttle and adjust the high jet first. Then throttle down and adjust the low idle jet and than the idle screw.
-
3 points$$$$$ - Knowing how to do the needful and having the necessary tools. Nice job!
-
3 pointsSearch bullet terminal removal tool. There are many variations but it's mostly a stiff metal tube that slips over the terminal and pushes the retaining ears down so they slide out. This is a universal one. Another style:
-
3 pointsVoltage drop at any point in the circuit is a bad thing. While the ignition points are closed a magnetic field is being established in the coil. At the moment the points open the magnetic field collapses and a momentary high voltage surge comes from the secondary winding and jumps across the gap of the spark plug. If the voltage going to the primary winding of the coil is being shared by the corrosion the magnetic field will only have half as much potential to induce a high voltage in the secondary. Any corrosion anywhere in an electrical system is a bad thing. Thanks for posting this and we are all glad you got to the point.
-
3 pointsDon that E Z Rake looks like the trick! Amazing what attachments and functions these Wheel Horse tractors can accept. The allied manufacturers weren’t sitting still back thirty and forty years ago!
-
3 pointsFrom my days in the auto parts business, I witnessed first hand that Wix filters are the best filter far and away over any others. We held an annual Wix sales event at the store I worked at where a factory rep would come & set up a display. He was very knowledgeable about his products. We learned a lot from him about Wix filters. And the rep was always eager to cut open filters for comparison. The real difference between the Wix & John Deere filters will be in the type and amount of the filter’s media. You could cut apart the filter material and stretch it out to compare the amount between the two of them. Good chance the Wix filter will have more of a better media. Which means it will work better & last longer. It just makes sense to spend your money on the best filter you can get in order to get the most out of the good Lucas oil that you are using. -JD-
-
3 points
-
3 pointsWe were bringing groceries in today and Bryant got out again. Right during heavy traffic as parents were picking up kids at school. 2 of them helped out recapturing the wayward pooch.
-
3 points
-
3 points
-
2 points50" sickle bar mower. Was told that it fits a GT14, I have not tried it so I do not know. All the knifes are there and it moves like it is supposed to. There is no model number on it just a serial number.
-
2 points
-
2 pointsgotta pull that seat pan for a 2" lift anyway. Good time to add a couple inline additions!
-
2 points
-
2 pointsIncredibly once one starts to inventory one’s collection of screwdrivers there are many more than one realizes. Hand tools are the norm here and driving screws is no exception specially when it comes to wood screws. I drive more screws by hand in one year that most will in a lifetime . I am also a big fan of slotted wood screws,my screw drivers reflecting it. They are easier to drive by hand and better suited to wood than any other. There is a lot to know about a screw perhaps a subject deserving of another thread. For slotted screws I use dedicated screwdrivers of all sizes. I believe in long screwdrivers which make it easier to keep them at the correct angle and allows more torque and pressure to be applied . Most are cabinetmakers screwdrivers also of the flat type allowing a wrench to be used for additional torque. For Phillips head screws with the exception of #3 heads I don’t use dedicated screwdrivers. They get ruined too quickly. I prefer to use yankee drivers with screw tips which are easier to fit to a particular head and much more durable. As I mentioned in another thread not all Phillips of same size are the same, in reality varying quite a lot. Contrary to common practice screwdrivers do require maintenance. Tips need to be kept clean , flat and straight. Precise careful touchup with a file is routine here. Even a slightly damaged Phillips can be touched up and returned to as new. I am not averse to using a mechanical means of driving screws which is essential if one is to make a living . I have always stocked every type of wood screw there is and the means to drive them correctly and efficiently. In important custom work however I always resort to slotted true wood screws most times brass or bronze. My woodworking screwdrivers The slotted ones used constantly This one is blacksmith made and it has been in family for over 150 years. The smallest one homemade. “Ball” is filled with lead . Great feel and balance one of my favorites to use. Custom ground #3+/- to fit a particular type of brass screw I use frequently. Any other type of head besides slotted interchangeable tips are used with Yankees. Most of the time I use them as a regular screwdriver and not using “push” feature. The length and heftiness provide great balance and torque. Heads are also magnetic. Another versatile one. Every type possibly needed right in it . Great feel to it also. These are essential for places otherwise impossible to get to such as in some drawer/case locks. All the ones above only used in wood shop. These are used on everything else. Last but a very handy set to have for the unusually small stuff.
-
2 pointsI had a mama red squirrel and her four kittens take up residence in my barn couple years back . I found the post they were using to get up into the rafters of the porch on the barn and it just so happened it was the end post which my son built a arm on to hold his bow target . It was perfect place to put a small live trap so I had the boy set it up . With one door closed and some peanut butter smeared on the roof with a marshmallow stuck into it at that end of the trap the game was on . Caught one of the little ones that first day and my daughter took it far away and let it go ( wasn’t my choice lol ) . Got it all set back up and I forgot about it for a day and we had a big storm come through . I looked out the window and seen the trap was on the ground . When I got outside to check it out , the trap was sprung and the mama squirrel was laying next to it dead . My only guess was the trap fell on her somehow . The other kittens didn’t seem to be around and I had the hole where they were getting in closed up . Now it’s just the mice to deal with and have good luck with these Victor’s . I use peanut butter and dog food and place the traps in a spot where they have to go in from the front as their only option . Added bonus is they’re easy to set . The only good rodent is a dead rodent. My nemesis. at the moment are moles. They are absolutely horrible this year and seem to be in everyone’s lawn .
-
2 pointsMake sure the surface of the block where the points attach and where the ground wire attaches will go a long way as well.
-
2 points
-
2 pointsThanks for the info Randy, I too suffer from what I call oldtimers, can't remember what I did 5 minutes ago let alone years past. I got them mounted up on the rim, look really good, now get them mounted back on the tractor to get ready to mow.


