Leaderboard
-
in all areas
- All areas
- Markers
- Marker Comments
- Marker Reviews
- Articles
- Article Comments
- Article Reviews
- Classfieds
- Classified Comments
- Classified Reviews
- Wiki's
- Wiki Comments
- Wiki Reviews
- Blog Entries
- Blog Comments
- Images
- Image Comments
- Image Reviews
- Albums
- Album Comments
- Album Reviews
- Files
- File Comments
- File Reviews
- Posts
-
Custom Date
-
All time
November 28 2011 - November 24 2024
-
Year
November 24 2023 - November 24 2024
-
Month
October 24 2024 - November 24 2024
-
Week
November 17 2024 - November 24 2024
-
Today
November 24 2024
-
Custom Date
03/08/2023 - 03/08/2023
-
All time
Popular Content
Showing content with the highest reputation on 03/08/2023 in all areas
-
12 pointsThe first hub I pulled came right off. The axle key way is worn to twice the width I was soaking the other hub for a week in Kroil and Liquid Wrench. It still wouldn't budge using the @daveoman1966 method. I used my caliper to make sure the five bolts were the same distance between both hubs to help avoid distortion, ensure even pulling, and minimize breakage. I used a 1-14 threaded rod with two nuts locked together on the end. It still wouldn't budge. I pulled the rear and disassembled it and removed the snap ring and pinion gear from the other end. Then I took it to the 20 ton press and heard a loud pop and it moved I continued to put pressure on it several times and heard a few more loud pops and then success It came off I did have to file down the end of the axle a little because of pulling so hard the splines right behind the snap ring were raised a little too much for the axle to slide out Not sure if I did it or someone else tried to remove it in the past. Now I need to try to rebuild my first hydro using the download from @daveoman1966 and also replace or repair the other axle. The original problem was it was driving fine then all at once it wouldn't move forward or backwards.
-
9 pointsI changed out an RJ transmission I had on a tractor I redid. I did not rebuild the transmission and it was very tight for some unknown reason. I had this in Florida and did several things to west in the tight transmission. I have a feeling the brass bushings in the axle tubes and differential were not honed properly to allow the axles to turn freely. So I bit the bullet and decided to use my good spare RJ transmission as a replacement. I use my steel milk crates to raise tractor under frame and both remove and install the transmissions. The milk crates are close to the right height to work on these. I have used them for years. You have to remove tires, belt and belt guard, clutch spring, clutch rod, brake band and brake rod. I also used same drive pulley so removed from the old transmission. The truck to reinstalling the six transmission bolts in the frame is to line up correctly on sides, place a thin board under the transmission and a large Phillips screwdriver or smaller bolts in two of the three holes on one side of transmission thru the frame. You do this while pushing down on a board placed under the transmission and lining up the transmission and frame holes. Yes one person can do all of this and install the transmission. Lock washers and lock nuts on the underside of the frame and tighten it all up. Tomorrow I will reinstall the seat and seat spring and take the RJ for a ride.
-
7 pointsIf you ever run low, you can scratch behind Ryan’s boy’s ear… I’m sure there’s still some lingering from my plow you so graciously lubed for me!
-
7 pointsI always put some never seize on the axle before installing the hub. On the few that I've had to revisit I still needed to use a puller to remove them, but no horror stories involved.
-
7 pointsDon't run the engine any more for now. That shaft that is sliding out should have a round throttle plate that screws into it with 2 screws. (see diagram below 9from attached manual) If the screws recently came out they could be sucked into the engine and are bouncing around/grinding on the top of the piston and valves. You need to pull the carb and see if the disc is still laying in there, looks like the carb might be due a cleaning anyway. If the disc is still in there then I would want to pull the cylinder head to inspect if the screws are in the cylinder. here is the Kohler engine manual. Lots of help here on Red Square to get that horse squared away and working. Kohler K Series Service Manual tp_2379.pdf
-
6 pointsDoes anyone here have a Pond walk behind tractor? And if so what is it like? Just wondering.
-
6 pointsI recently replaced the axle seals on my 1960 Suburban and used threaded rod with a spare hub at the other end and a 6 ton jack in between. I'm not sure if these had ever been changed before and the hubs were definitely rusted on. I used the heat/quench method and was tapping around the radius of the hub with a hammer while heating. It took some patience and work, but both eventually came free. And you bet they went back on with anti seize on the axle.
-
6 pointsWell folks we dragged the Millie into the basement workshop last night... The 10 HP Tecumseh engine was always meant to be temporary so now we're going to swap in the correct 8 HP Kohler engine. Also, Trina wants to put a 6-speed with Limited Slip Differential in this Beast so it's much more work capable. Here's the list as it stands: Steering shaft replacement. Fluid fill ALL tires. Engine swap to Kohler 8 HP. Ignition SWITCH and wiring changeover to accommodate the difference in ignitions. Transmission swap from 3 speed to 6 speed. Fix sticking seat latch. Add or repair hood holder at hinge and forward max.
-
6 pointsMy favorite "goose story" is as follows... When our twins were 6 years old (fraternal boy & girl) we were at our local park when we were approached by about a dozen Canadian geese looking for a handout. When they got up to us, the one closest hissed at my wife, she & the boy instantly ran behind me as my daughter hauled off & slapped it right right in the head! She just stood there glaring at it, as if to say "How dare you hiss at my mother". Preparing for the worst, I watched the somewhat stunned goose weigh it's options. Having received the wrong kind of "handout" & the possibility of another from a fearless little girl & her dad, it turned around & waddled away with the others.
-
6 pointsThe only way to do hubs if the tranny has to get split @cafoose. That press sits in the corner of the shop 363 days. But when it's needed ... priceless. Yes anti seize and won't brown weld BUT this means the hub can come loose easier. Checking set screw tightness should be done often as checking motor oil.
-
6 pointsBought my 20 ton HFT press about 15 years ago. Had to replace a bad front wheel bearing on my Saturn. The press was $140 - the labor cost quoted by a local shop to replace the bearing was $260... Did the job myself, the press has more than paid for itself over the years. There are numerous YT videos out there for upgrades to this model.
-
5 pointsMy oooh shiny kicked in and I started looking for coulter wheel options. Look what I stumbled upon!
-
5 points@Blasterdad we in TN a couple times in the last year due to family health issues. My wife’s cousin ultimately lost her youngest son to leukemia. While we were there the first time, their rooster decided to try to make me submit to him. After the first attack, or during I might say, I did the same and whacked him across the head hard enough that he spun around in a full circle. On our second visit there for the funeral, we were gathering eggs one day and he approached me and got close enough to I suppose recognize me. He promptly ruffled his feathers and walked off to harass another hen.
-
5 pointsHeat helps but even that won't do the job some times. I had to do the same as you with splitting the transaxle and pulling the axle/hub assembly but my 20 ton HF press wouldn't get the job done even after it was red hot while under pressure. Ended up taking it to the local machine shop's 100 ton press. The loud pop we heard there was the hub cracking along the keyway. They had to "V" notch the hub and weld it but all is well.
-
5 pointsThat stuff is similar to roofing cement - a little goes a long way and it always seems to go everywhere. But it does help. Same with steering wheel hubs.....
-
4 pointsUsing some good input from forum folk, I made up a riser and support for my 854 square pan seat. Used ¾” square tubing and ¼” plate. It can be installed in two positions: either with the seat at its normal spot centered over the forward hole in the spring or flipped so that the seat is centered over the rearward hole in the spring (2” of extra leg room!). either way, the seat pan is fully supported and locked from twisting. Time to clean it up and paint it.
-
4 points
-
4 points
-
4 pointsI have a considerable amount of steel. My thoughts are the base of a Taj Mahal fowl house. it’ll be rectangular and split into two rooms- one for clucks and one for honks. The goose run will be extended to a 40’x60’ area. I’ll make it easy to clean out and easy to access both halves.
-
4 pointsHa, that was fun! Timing is everything - didn't plan that, especially with an audience. (Note to self - always make sure your hitch pin has a clip.) Thankfully she felt no pain that evening. LOL
-
4 points
-
4 points
-
4 pointsHere's one of mine pulls from the back
-
4 points
-
3 pointsMy 1979 / C81 , don't really know how or why but one front wheel became very TOE out. Could be I banged it and over time and it just got worse, hard to steer. The Tie Rods are fixed as we know so I decided to give it a bush fix. I set the right wheel to straight, the left front wheel was way toe out, I measured and needed about 1/2 " more Tie Rod to bring it back to pretty straight. here is my bush fix with a drawing., I needed an extension of 1/2 " left side tie rod mount. - Remove both tie rods from the steering bracket where they mount and make a template marking the tie rod mount holes. - -Fabricate a .metal plate to mount on the Tie Rod bracket with an extension on the left side, I needed a tie rod mount hole an additional 1/2 inch out , the bracket is probably 1" extended. - drill 3 holes 1 hole for the extension, 2 holes to match up with the tie rod steering bracket holes and for the right Tie Rod to be remounted. - mount the new bracket to the steering wheel tie rod bracket. - reinstall the right Tie Rod into the original position on the bracket - install the LEFT Tie Rod into the new extension hole. The Toe Out is eliminated , now I have a very slight toe in, Very manageable. I didn't take pictures, so I made a drawing. The whole thing took about an hour start to finish.
-
3 pointsSpeaking of Lynyrd Skynyrd...I happen to have bought this album when it 1st came out. It has the flames on it. After their accident, they re-did the album cover and took the flames off. Collectors album cover. 1977
-
3 points
-
3 pointsSo easy !!!! I do not have points and coil, so I definitely have a magneto coil system thanks so very much !!! ACHTO I did not want power that coil and cook the system, as I have only bench ran K engines with points, coil etc. so asking first is far better !!!.
-
3 pointsSo if I ground the engine...and send 12v to starter...the engine will run from the power generated by the magnets on the outside of the flywheel...and to shut down, ground the male spade on the coil... John
-
3 pointsThe way I see it, if @Pullstart Stables gets some Fainting Goats next, he can open a petting zoo.....
-
3 pointsThanks guys, so much!! Means a lot!! It was a normal Wednesday for me, but a great Wednesday! As Katie reminded me, half way to 80 now...not sure how I feel about that yet.
-
3 points@Pullstart They're smarter than most people give them credit for, I believe they can sense fear like dogs can, hense the one hissing at my wife & backing down from my daughter.
-
3 pointsTake a look at this thread, it was @stevasaurus Carter rebuild and he did a great job sharing with us all. This information from Brian Miller's site should answer all your questions. http://gardentractorpullingtips.com/carbfuel.htm Warning, some members here have had problems with sending items to Miller for repair but the information on the site is excellent.
-
3 pointsLooks like a previous owner may have attempted to put a bushing onto a leaking throttle shaft and didn't know how to secure the throttle plate/shaft screws. hope there isn't any internal damage. Rebuilding your carburetor is preferable to buying one of the cheap Chinese knock-off units you'll see for sale on
-
3 points
-
3 pointsThere's an angle attached to the left side of the receiver hitch bracket with a slot cut in it and the top is bent forward for the chain from the clevis hitch when not attached to the lift. I can also use it for rear attached equipment depth control. Note it's not welded on, it slips on and is helt tight with a set screw from the bottom.
-
3 points@cafoose , lots of threads about difficult removals but not much about what we can do to prevent those going forward...Probably pretty simple but I don't know if there's a preferred or proven concoction.
-
3 pointsMy brother has a cottage on Lake Ontario. Right next to him were his in-laws cottage. We had a party there one day. My brothers father in law (Larry) would always feed the ducks and geese. Well they all showed up when Larry was around. We had to shoo them away so we could eat. Larry's youngest daughter (A grown up)) was scared of the geese. After eating she decided to sun bathe on the dock.. She fell asleep and Larry says "watch this!" He gets some bread and sprinkles crumbs around her. Here come the geese. She woke up just as they were ready to pounce. Needless to say she ended up in the water!
-
3 points
-
3 pointsPicked up a 1971 Fender Super Six Reverb. 99% original, other than tubes and 1 changed screen grid resistor. Will need to replace the old filter caps, but it sounded glorious when I tried it briefly.
-
2 pointsThis is exactly why a good horse person has a ready spare on the shelf... we crunch a tranny on the plow field we can have it back up and running in a hour with a well oiled pit crew... 'Course with our crew they may be well oiled in other ways...
-
2 pointsAnd thats why I call it a bush fix. ! There is some slop for sure and I will address this again going forward , just not today ! Todays bush fix cost 0 and I didn't need to acquire any parts. LOL ri702bill Many thx for the reply !
-
2 pointsI just had the same issue last fall, it sat for nearly 3 months then just about a squeeze and a half is all it took to fire right up
-
2 pointsI also had to resort to a 20 ton on a 'D' axle, there was my buddy an I both on the jack handle with a cheater pipe before it turned loose - POW!!! Geez them things can be tough
-
2 pointsYes throttle plate screws have to missing. Do not start your engine until you locate those screws.
-
2 pointsNice work and writeup Always good to see a good outcome but so many of us don't have 20 ton presses that I wonder if we couldn't pin a thread on how to avoid such a thing (maybe there is one ) Regular maintenance. Anti-seize, Red-n-tacky, whatever works. I'm not sure I know the answer but I probably need to look at the hub removal threads to see how I'll keep from causing problems down the road...
-
2 points
-
2 pointsThe people across the road from my mother's house had geese that would cross the road and crap all over the place. I cut up a bunch of pieces of a cheap 3/8" green garden hose and placed them along the roadside, geese are very frightened of snakes. It worked, sort of! Now the geese would start crossing the road and stop when they saw the hoses, standing around in the road walking back and forth looking for a safe place to cross. Mom said the hoses had to go before there was a traffic accident.
-
2 pointsDon't be tip-toeing thru the tulips barefoot either...!!! Make a wish, not a squish !!!!
-
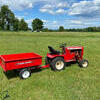
2 pointsTook the blade off the 312 Hydro and installed the front tiller. The 48" blade never got used for snow this winter, although it did get some dozer work. I still have the 520H w/ 54" blade just in case we ever get a snow. Tilled the garden and all edges of the fruit trees and berry beds.


