Leaderboard
-
in all areas
- All areas
- Markers
- Marker Comments
- Marker Reviews
- Articles
- Article Comments
- Article Reviews
- Classfieds
- Classified Comments
- Classified Reviews
- Wiki's
- Wiki Comments
- Wiki Reviews
- Blog Entries
- Blog Comments
- Images
- Image Comments
- Image Reviews
- Albums
- Album Comments
- Album Reviews
- Files
- File Comments
- File Reviews
- Posts
-
Custom Date
-
All time
November 28 2011 - April 27 2025
-
Year
April 27 2024 - April 27 2025
-
Month
March 27 2025 - April 27 2025
-
Week
April 20 2025 - April 27 2025
-
Today
April 27 2025
-
Custom Date
10/29/2022 - 10/29/2022
-
All time
Popular Content
Showing content with the highest reputation on 10/29/2022 in all areas
-
15 points
-
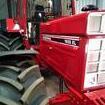
14 pointsFinished up rebuilding and painting a k-181 yesterday,just need something to put it in. Also painted over the dreaded JD yellow 🤢wheel weights too cheap to pass up ! These will go on my 12 auto to help push snow around.
-
13 points
-
11 points
-
11 points
-
9 points
-
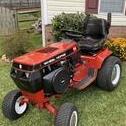
9 pointsI got tired of looking at the torn seat, so I found a solution. Old New Easy install, the bolt pattern matched up exactly. Not quite as comfy as the old one, but does have drain holes/channels that may be nice on rainy days.
-
9 points
-
8 pointsPicked up my new 953 seat made just the way I wanted... no its not "original" colors or pattern. But it's what I like and that's that!! Thanks Matt @grnlark for getting it put together by your father in law It's just sitting there--- someday soon I'll get the thing running and officially mount it Tony
-
8 points
-
8 points
-
7 pointsHi all. Just would like to sort of introduce myself. I have a C125 and very recently inherited a 1054. Gonna have some questions on the 1054, hopefully someone can help. I used to wash and wax the C125 for my grandpa when I was 11 and now I have been using it myself. The 1054 is what I cut grass with for my dad when I was a kid. I also have a wagon and dozer blade for the 1054.
-
7 pointsGot some free wheels, tubes, and tires at work a few weeks ago, so I felt compelled to get them on the tractor. They are 24x12x12 Carlisle Turf Masters, and I mounted them on a set of 10.5x12 wheels. I just had to cut out the centers (they were the wrong bolt pattern) and weld in new center disks I picked up from Miller Tire. It was a fun project and I'm happy with the results. Not show quality, but then again, nothing I own ever is. Still debating if I want to pull them back off and fill them with fluid. They would be a serious bear to wrestle back on after that.
-
7 points
-
7 points
-
6 points
-
6 pointsTHE BUILDERS ARE DONE !!!!! Front: Back: Now of course we have a loooong way to go building a metal workshop, a woodworking workshop, a dojo etc.... More to come !!!
-
5 points
-
5 pointsForgot to answer this one. Done with a customized nail for that effect. There are tools for that called "frosting" punches, or one can make them. Never liked the result from them. Inevitably they leave tell tale signs from their outside edges and or create distinct patterns . They require substantial striking force and do not fit everywhere. My way seems insane but it is actually very easy and quick. One "hole" each time but total control over leaving any specific pattern.Just one constant even background. Just have to control the striking force which is very minimal using a jewelers hammer. One has to however "read" the grain the same way as with the actual carving since some grain areas are much softer. There one has to do it lighter so depth is the same. I usually use the smallest one since it will fit in the tiniest places.
-
5 points
-
4 points
-
4 points
-
4 pointsOn my Hiram tractor I used Chevrolet 16in wheels from a dual wheel truck and mounted some 7.00x16 AGs on them. I made and welded spacers in the centers and redrilled the lug holes. Garden tractor 12in wheel weights fit perfect. You could do something similar and have duals
-
4 pointsThat is cool! No help on the air filter other than perhaps a generic one with flexible hose would fit the opening? Pre-OSHA two-person? Perhaps @Pullstart can test it for you...
-
4 pointsMan that looks sweeeet out and about doing its thing. I agree with Eric. Fluid fill is a good way to go. Weights would help and always look cool of coarse. It does look like you have plenty of power to the wheels. Again, looks great. It looks like a successful first trip.
-
4 pointsHow 'bout fluid filled tires in addition to the weights? Sounds like you've got oodles of power and looks like the implement really wants to grab in. Get that rig to bite ground and you'd be off n running!!
-
4 points
-
4 pointsThanks Steve! Set up will be fun... And temporary ish. We find that our shop space (house too) is constantly shifting improving changing in favor of the best way of working on whatever the current projects are. Works great for me because Trina's not the least bit reserved about jumping into a task and trying new ways. There will be certain tools (drill press) and benches that don't move much. Others will be constantly swapping around. I'm particularly looking forward to having expanded areas for specific purposes like a bench and 4 x 8 wall pegboard for wiring harness, battery cables, and other electric work. Transmission work will have its own bench as it does now. Two big bench vises and at least two smaller ones. I've tossed around the idea of a craft related table upstairs too. Many MANY more ideas to follow.....
-
4 pointsWhen I finally got the grand daddy rat a while ago, I hung him by the tail where the others could see him, only disposing of it when the flies started hatching. The others left.
-
4 pointsWoke up this morning and frost was covering the ground outside. After I took my dog for a walk I pulled the 875 out for a 10 min ride. Parked it back in the garage. Went and filled my gas can with ethanol free gasoline and added Sta - bil. I'm all ready for when the frost turns to snow. Going to look for a set of chains for the rear tires. I used this tractor last year with no weights on the rear to plow and it did just fine. Now that I added the weight I might as well put chains on the tires.
-
4 points
-
3 pointsGot my dads 1992 312-8 when he passed have a snow plow and 42” deck. gathering parts to restore back to new as possible. This is my therapy.
-
3 points
-
3 pointsJust a Recommendation for the calendars maybe Trina can take note of who the picture of the tractor was for that month and put the red square username on one of the bottom corners. Just a recommendation doesn’t actually have to be done
-
3 pointsReal nice, I've got a tractor you can put it in I bet many other people have to
-
3 pointsOk guys, update time. Been playing with the 1054A and decided to hit the starter button after priming the carb with the fuel pump primer lever 50 times. I actually could not believe it as it fired right up!!!! I never touched the carburetor at all, it's how I parked it 25yrs ago.
-
3 pointshttps://www.hemmings.com/stories/liberty-v12-lincoln-motorcar/
-
3 pointsTells me I can trim the “back” tab off the stock mounting plate. *note* I’m not sure if y’all realize this, but the brass elbow is not just an elbow for a vent. It’s a full blown vent system!
-
3 pointsNot so much a history guy but interested in the evilution of old machinery. In the 70's I worked as a mechanic in a turn of the century mine. Some of the earliest was equipment made in the 20's and 30's still being used. Some of it was in the "you must see it to believe it" category. One bucket list item for me is the Henry Ford Museum.
-
3 pointsWe all have my friend and it's ok. Every single thing you've ever done up to this moment is what made you who you are today. None of that was "wasted". 🤠
-
3 pointsGotta be a trick to make that right. Some baker cooker persons around might help. If'n I were closer I'd be glad to sample the results. A lot.
-
3 pointsThat's excellent! Do you mind if I cut a hole in the siding to run a smoke pipe out? It's starting to get chilly at night, need a wood stove. Tell the builders to leave that pile of 'ends'. I'll burn them. (or I might have to raid your wood pile!)
-
3 points
-
3 pointsWhy wouldn't you just use a cube of bromethalin and eliminate it? I made a bait station like this. Dog cannot access it, neither can chickens or turkeys. I never have issues with mice/rats... Don
-
3 pointsLol, eventually ill order in the red PLA. Right now just have red in ABS(NOT food safe). I have a couple already printed in the orange. I'll put 'em up in the store and the vendor section just as soon as I actually eat a cookie they stamped out!
-
3 points
-
3 points
-
3 points
-
3 points
-
3 points


