Leaderboard
-
in all areas
- All areas
- Markers
- Marker Comments
- Marker Reviews
- Articles
- Article Comments
- Article Reviews
- Classfieds
- Classified Comments
- Classified Reviews
- Wiki's
- Wiki Comments
- Wiki Reviews
- Blog Entries
- Blog Comments
- Images
- Image Comments
- Image Reviews
- Albums
- Album Comments
- Album Reviews
- Files
- File Comments
- File Reviews
- Posts
-
Custom Date
-
All time
November 28 2011 - November 28 2024
-
Year
November 28 2023 - November 28 2024
-
Month
October 28 2024 - November 28 2024
-
Week
November 21 2024 - November 28 2024
-
Today
November 28 2024
-
Custom Date
08/04/2022 - 08/04/2022
-
All time
Popular Content
Showing content with the highest reputation on 08/04/2022 in all areas
-
9 pointsAnd, lubrication and service… If you’re changing the oil in the transmission, most any 90W lube will suffice. The manual will call for 1.5 qts but I like to stuff 2 qts in mine. There is a hump cast into the transmission case, so when draining it is advised to safely lift the front end as high as possible. If the gear oil is milky, a flush with diesel or kerosene would be advised as well. You can filler’ up and drive it around in circles left and right in each gear, then drain. Repeat as needed to run it clean. A fresh shifter boot will be your best bet to prevent moisture from getting back into the case if ever left outside. While you’re at it, the thin viscosity of the flush fluid will tell you if any axle seals are in need of replacing. If so, and even if not, it’s a great idea to check the tightness of the set screws on your rear hubs. They are known to loosen over time and waller’ out the keyway slots. If they are in good shape, tighten the set screw, then loosen a quarter turn, then tighten more, repeat. You’ll be amazed at how much more you can drive it in, making small increments in either direction. The jam nut is meant to be tight, but not super tight. You don’t want to pull the set screw away from the axle. And then.. chassis grease! When lubing the front end, it’s best to jack up the tractor BY THE FRAME not the axle, to let the axle, spindles, etc. droop and allow grease into where it is needed the most. After that service, you’ll be golden!
-
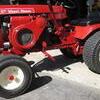
8 pointsGood day, I bought this wheel horse to mow grass. It was on CL. I had been mowing this grass pictures for about 30 years with a Honda push mower but I can,t do it all the time. I was looking for something narrow like a snapper but they're difficult to find also so I started looking for anything narrow. So I bought this wheel horse because the lady replied and its in nice shape. I was told it was a 1957. But I did a little looking and it looks more like a 60s Wheel horse. I drove it home and it cut the grass, after I figured out how to get the deck to run. I went backnm then went back next day, and it starts right up easy. It's my first rider and I flipped it over geting it in the truck. and bent the seat and broke the tail lights off. It came with a snow plow but I couldnt move it so I left it. It cuts about 3 times as fast as the honda so im real happy. Saying that I wish I knew what year it is to get some parts I guess. The tie rods loose. front tires, taillights, maybe fix the choke but it works . Its gonna need something eventually. So heres the pictures fire away. Thank you.
-
8 pointsSo I got the paint brushes out again. With some high temperature paint I detailed the muffler on the 856 Forsaken. After that I wanted to paint the shifter knob so it looks like a marble, and I detailed the steering wheel a bit. I know the tractors overall look isn't for everyone but I like it. Besides this tractor has a great story.
-
8 points
-
7 pointsYesterday I replaced my 2017 Honda Ridgeline with a 2022 Honda Ridgeline. Same thing, only 5 years newer and with 106k fewer miles. When I bought the black one in 2017 it was the replacement for my 1997 F250 that I'd bought new 20 years prior (mentioned HERE ). I expected to keep this one longer than I did, but I was ready for something new and I felt the deal worked out to be pretty fair so it was worth the expense of the upgrade. The 2017 had held its value extremely well, but of course they aren't giving new cars away. I was very optimistic when I traded my old body-on-frame full size for one of these but was a little skeptical it would handle my needs to my satisfaction. To my delight, this first Ridgeline hit a home run for me and I hope this one comes close. In the 5 years this generation has been out there have only been minor upgrades. The front clip is a little boxier and they added a second exhaust tip to the rear. The tires are the same tread as before, but they've added little sidewall tread blocks to make them look more aggressive. These are concessions to those that are more interested in style than I am (those of you who have seen me can attest to this...). I will admit that I was never crazy about the looks of my 2017, but I couldn't see the outside when I was in it so didn't really care. The only significant change was that the in-house Honda transmission has been replaced with a ZF unit with three more gears. The prior 6-speeds have some sporadic heat management issues that have apparently been addressed. Mine was always rock solid. One of the things Honda has usually done was made their vehicles very easy to maintain. They still put drain and fill plugs on everything so changing the fluid is easy. Very easy for a DIY'er This transmission apparently requires the thing to be a specific temperature to get the fluid level right, but they are apparently still generally easy to service. We'll see. The things that are surprising to me are how well the 2017 held up. I take care of my things and I'm not hard on them so I didn't expect much degradation. But in over 100k miles I still didn't have a single squeak or rattle and all the controls still operated with precision and solidity. The only real issues that belied its age were the cracked windshield and some minor parking lot scratches and dings. When I drove the new one with only 7 miles I was surprised how close it felt to the old one. Honda doesn't have the quality reputation they once had, but they still screw things together really, really well. I used to be a die hard Ford guy, but too many piddly things with my last several Fords have strained our relationship. These things carry a bit of a reputation in some circles as being a NART (Not A Real Truck) because they lack a ladder frame, don't have bug chunky tires and lots of ground clearance, and have the engine sitting in there sideways. But with 1500 lbs of payload and plenty of power they can hold their own for applications like mine. And the fuel economy is decent for a 4500-lb brick. My 2017 - and hopefully my new one - excelled at pulling my boat, getting lumber, and carrying trash. The composite bed didn't show any wear from gravel or junk and doesn't need a spray-on or drop-in bedliner to thwart off damage. The trunk under the bed is the best feature ever incorporated into a pickup truck, and the AWD has proven for me to be way superior to any part-time 4wd system I've ever had in other vehicles. It's no F350, but I don't need one of those monsters. Anyway, this is my new horse hauler. Steve
-
7 pointsIn relative environments… a hood could be considered small
-
6 pointsI had a couple of leaking rear Ag tire.I buggered the bead slightly installing them. They would slowly leak,flat the next day. I decided to try a bead sealer . I have to say I’m pretty impressed.You don’t have to break down the tire all the way.Took about 35 min.to do two rear tires.
-
6 pointsRichie you still have a path down the middle so you're one up on some of us. Myself included. On occasion.
-
6 pointsCorrect. It is conveniently adapted to existing plane’s handle without modifying it to allow easy use of it as a shooting plane . Without it , plane is hard and awkward to hold properly. The tilting of handle towards board helps putting pressure in the right direction.,
-
6 pointsPut on a Bllack Talon seat from Northern Tool. Model 355000BK. Fairly easy install. First adjusted tracks on new seat so they were 7.5" apart CTC to match the original flip bracket. Used 5/16" coarse thread x 2" bolts with 1" space sleeves, 1/4" flat washers and the thinner type of hex nut. Slid the tracks off the new seat and installed the bolts through from the inside of the sliding tracks ( technically downward once seat is installed) and then added the sleeve, washer and nut on the other side of the track pieces. The tracks were slid back on the seat and then these "studs" that were created this way then went through the slots in the factory flip mount. I used the set of round holes on the tracks that were 8 inches CTC.
-
5 points
-
5 pointsJoseph - that deck is for the B series tractors that have a vertical shaft engine. Your 312 Automatic has a horizontal shaft engine. The decks to fit a 300 series are similar as far as the shell and spindles, the rest is different. Some folks here have converted them for horizontal shaft use - got a rotted out 36" RD C, 300, 400, or 500 series deck with usable mounts?? Bill
-
5 pointsi like it. Short frame square hoods are my favorites. With all the work that has been done to it knowing the exact model really isnt going to mater much. You have the ID tag for the deck if ever you need a part for that. The engine is not original, the lights are not original so any information on wiring or engine parts you are not going to find with a model number. As far as the rest of it those 60s models are all pretty much the same. The good news is the cigarette lighter is original ! Please tell me it works ! Look under the dash panel for the ID tag. Might be painted over, may have to clean it. I would blow all that grass off it, clean it up, lubricate and grease all fittings. Cool looking tractor. My guess would be it is an 856. Welcome
-
5 pointsWell I have easy access to mine but it’s at my grandparents house
-
5 pointsPulled “Joe” out of the racks.. choosing to store immobile objects on the racking and mobile objects on the floor I forget how large those 27x10-12 Intercos are!
-
5 points
-
5 pointsAlso put on a new clevis hitch and rock shaft kit to be ready for field plowing in the fall.
-
4 pointsI picked this up today from an interesting gent who is a CC and JD guy. I was pleasantly surprised at the tour of his mancave, if that’s appropriate wordage. He did have a couple of Wheel Horse dealer signs from local businesses. He won’t sell them yet. 😂 But man even though it was the wrong color for me it sure was a treat to see this collection and talk with the man who amassed it. What I want to ask from some of you who have done it is how you set yours up. Mine came with a mounting plate although I’m not sure if it’s factory. Are your set ups more a permanent set up or can you easily take the genny on and off? Any pics would be much appreciated as well. Thanks
-
4 pointsThe weight of the wooden five bar gate at the front of the drive, has pulled the gate post over slightly. So the gate needed to be lifted slightly to shut properly. I'd placed a brick at the bolt end to set the gate on. Not a problem to me as I'm the only one who uses that gate. That was until the Management acquired her micro camper, which now has to live on the drive. On Tuesday I received a complaint. She could open the gate but could not lift it up on the brick to shut it fully. As you can see, it slopes to the right. Today was spent making it easier for her to open and shut. Take a salvaged wheel of an old push mower, bit of scrap angle iron and a cut off of a length of 4"x 1-2" box. Some work with slitting disc and welder. produced this. Some spare paving blocks for the wheel to run on, Until it cleared the gravel and job done. Plus one happier Better Half.
-
4 pointsI would test that diode first. Use this position on your meter: And a 'by the way': That symbol for the diode on the meter... the straight line part is the CATHODE, the other end is the ANODE. The arrow is pointing toward the CATHODE. In one direction it should read OPEN, maybe OL, or whatever your meter indicates an open circuit. Reverse the leads, and it should measure around 0.6 or 0.7 or there about. The CATHODE is the end with the black stripe on it and that should be the end that you had the BLACK lead when you had the 0.6 to 0.7 reading. That end goes AWAY from the stator. So to recap, first verify that the diode is good, then install with the CATHODE AWAY from the stator. (The ANODE is what the other end is called, and that goes TOWARD the stator) Let me know if you need a diode. I probably have a suitable replacement.
-
4 pointsAlso nice to know that a good waxing pays off when it gets rained on.
-
4 points
-
4 points
-
4 pointsI want to thank y’all for the wishes! It was a great day. I sold my 310-8 and a cultivator to help out a buddy in need. The girls were at summer church camp for a week and I was able to pick them up at get big stinky hugs, we had take out pizza (gluten free cauliflower crust for one of the monsters) and went to the store for some ice cream. They make malted milk ball ice cream now! Drizzle that (covered oops!) with some caramel syrup and happy dude! Nap for family movie time and Mrs. P let me bid on another Senior but didn’t win. This morning I’m organizing the back barn a bit to see if I can store a few more things INSIDE and clean up OUTSIDE.
-
4 points@sjoemie himself there is a registry on here and it’s about 80-90 registered Seniors from what I can tell. More pop up here and there, but many less than the 500-600 produced are in existence! I missed out on another one in Ontario, Canada last night… the new owner of that one should be proud of it!
-
4 pointsHappy Birthday Maxwell! It’s awesome to see younger generations into these old iron pieces the way you are!
-
3 pointsKevin, I had been watching that auction listing since it came out and the new owner got a great deal! The only thing that kept me from bidding was what problems I might have getting across the border from Canada back into the United States or vice versa. Yes, I have currant passport and have traveled through Canada many times including within 30 miles of where the auction took place but..... many things have changed since I was up in London Ontario and Sault Ste. Marie. Wild Bill in Richmond VA
-
3 pointsFound a couple tire chains today… Probably more around too!
-
3 pointsAny of you PeeAaaers subscribe to the Pa Gane News Magazine. Check the" Hoofing It article" in your August edition. Ed Dog may offer a book signing at the 2023 big show....if enough groupies are willing to pay in advance.
-
3 pointsI wonder how thick the leather on the bottom of that dudes feet is? Why isn't he covered in hair?
-
3 points
-
3 pointsMore fun with Volvo today.. after driving around with only one headlight for a while the yearly inspection finally 'motivated' me enough to fix the problem. Or so I thought.. few weeks ago two new xenon bulbs where purchased (€90,- or $93,- a piece) and installed. As expected the passenger side was easy, drivers side required disassembly of the airfilter box. Way more plastic clips than what I like but eventually got it done without breaking anything. Turned the lightswitch aaaand.. still only one headlight Checked the fuses and sure enough, one blown fuse. Swapped that but it blew again, so there's a short somewhere. Asked my local garage to look at and fix the problem if it would'nt be too pricey. Fast forward to yesterday. Mechanic called and said they could'nt find it but they had a hunch it would be the ballast for the xenon bulbs. Oh yeah.. price would be around €408,- or $420 a piece Which does not include labour cost. Volvo thought it would be a good idea to place the ballast under the headlight which means the frontbumper and headlights have to be removed to get to them. So now what?? Took the car back from the mechanic and took a deep breath and tore into it. YouTube was a big help on getting the bumper and lights off. Did the swaparoo with the ballasts and sure enough it was the problem. Searched on the world wide web and found the exact replacement parts for €99,- instead of €408,- a piece. Ordered two of them and installed them today. Finally everything works again! Just in time to get the yearly check signed off tomorrow before the garage shuts down for three weeks of summer holiday. Sad looking Volvo: Dry run: Works. Headlights re-installed: Back together again. Only the headlight washer caps and some trim needs to be installed. Will do that after everything is signed off at the garage:
-
3 pointsCATHODE is the end with the black stripe... Anode is the end with the white stripe. Got it. Anode goes towards the stator... cathode goes away from the stator. After putting it in like you told me... the charging system is back working. @Jeff-C175... thank-you thank-you than-you... Don
-
3 pointsri702bill nailed it. With some patience, you should be able to find a compatible deck in bad shape and use its mounting hardware. I assume the NOS deck is from the guy who has five for sale. Last night, I made a deal to buy one. I'm putting it on a B-112, so I won't have any modifications to do.
-
3 pointsoh yes! The grease covers have zerks underneath, but you’re best off cleaning all the old grease out and using a sticky grease like Greasy Pete @peter lena’s Lucas red and tacky or corn head grease on the gears directly.
-
3 points@Monya1528...I'm in Albion. I'd be happy to get the raider going for you. Then you can cruise with it and think of Dear ol Dad.
-
3 pointsOf course I don't mind! I think the first was to minimize damage to the wheels when installing / removing the weights. The smooth plastic surface is far less likely to scrape up the paint. Handling them is maybe somewhat easier due to not having to handle coarse concrete. And yes, structural integrity does play into it quite a bit. Since there isn't a whole bunch of room between the edges of the brake drum and the edge of the bucket, there wouldn't be a lot of material holding the concrete together at that point. I would be possible that the concrete could break at those points.
-
3 pointsIf you still can, I'd recruit some help and try to go back and get that snow plow. It's probably valuable if you would either want to use it or sell it. I like the tractor. If you like to tinker, you'll have fun with it.
-
3 pointsLike the others have said the Model and serial # tag is a brass tag underneath the dash right in front of shifter knob. It’s tucked up in there so it’s easily missed.and might be painted over so you may need to scrape it off . This tag reads T 1055 so 10=10hp 5=electric start and the last 5= year. In this case 1965 . Good luck with your purchase
-
3 points
-
3 points!/4-20 was the size when the 953 left the factory but over time they probably got wallowed out and had to be retapped to a larger size.
-
3 pointsUsually a buck a pound is a going price. I picked up a set similar last week they weigh 27.50 lbs ea. They will fit inside the rim . Didn't really need them but for 10 bucks I couldn't pass them up
-
3 pointsLike Pullstart said just look under the steering wheel dash. small plate like on your deck. Not sure if that is the original engine, but if it runs good that is ok. Keep it clean blow it off after use. Grese and oil two main things for maintenance. Once you find the plate everything will fall into place. Enjoy it take care of it.
-
3 pointsRealized I’ve lost my hood… Found a spare with no latch.. so it’ll do for now.
-
3 points
-
3 pointsAs for front tires, model isn’t really specific. Just getting something to fit the wheel like an 18x6.50-8 will be enough to get what you’re looking for. There are vendors like WheelHorsePartsAndMore, K&B Horse Parts, or A-Z Tractor in our vendor site that could hook you up with many of the items you need. https://www.wheelhorseforum.com/forum/92-vendors/
-
3 pointsSorry to hear about it flipping over, they tend to be rear heavy when they are off camber! Most recommend if power loading, walk beside it You’re right at thinking it’s a 60’s model. In ‘65 they went to the square hood and seat pan vs. round hood and round fenders. In ‘64. The diamond imprint would be where the model decal is, but direct under the dash on the tower should be a model and serial ID plate. Either way, the engine should be a Tecumseh or most likely Kohler but if that Briggs runs well, leave it as is. You could easily reference any 60’s model, it much changed in the gear jammer world. We’ll reference, say an 857. That would be 8 hp, electric start gear drive, ‘67 build year. That will get you what bolt on items are needed for sure. Have fun on your “new” rider! They are better built than anything from a store these days!
-
3 pointsAfter Winter in spring i uses the Snowblade to push the moleholes before first mow. As long as he was staying away from my field, we both can coexist. Over the summer periode i mount the Rake behind the Horse to flat them out while mowing. If i must passing a molehole i Stop the Blades and pass it, the rake will do the rest at once. that works like a charme.And i just mulched In my opinion the mulch system have three Advantages: 1. first it shall be used each week what means just a week for him To come. 2. than the Sound from the Engine drives him away again and he was leaving for another Week. 3. Some seattime for me to relaxing. ( i knew i may be sound strange, but for me is Enginesound like perfect Music) Most time of the year it Works, if not my secret Weapon is... He have the most a party to dig him out... and i don‘t want to work with poison in his or near of where my meals will grow.
-
3 pointsFrom what has always been known only 600 Lever steer/Seniors' models were hand built from 1946 to 1956. Hoods were an option in 1954 and non-hood models looked close to a Lever steer model. Hoods were standard in 1955 and 1956 models. You cannot always tell what year model you have because the Pond's purchased the Briggs and Stratton and Wisconsen engine in bulk package lot, so we do not know what year engine serial number was installed on what year model frame. Wild Bill in Richmond VA
-
3 pointsThe BBT and I have been working on clearing the new garden area in preparation for her daughter's wedding coming up soon. Trina's evening fun was using the battery weedwacker to clear a path for an ATV, then moved to her own 867 Pigpen and trailer to move some more stone. More pathway work. I ran the Cinnamon Horse C160 powering the Mackissic chipper shredder. There are several brush piles from the land clearing last fall and spring that need to be processed.






.thumb.jpg.b8ee29e8697a2b85a5741cbb1a33fad5.jpg)


