Leaderboard
-
in all areas
- All areas
- Markers
- Marker Comments
- Marker Reviews
- Articles
- Article Comments
- Article Reviews
- Classfieds
- Classified Comments
- Classified Reviews
- Wiki's
- Wiki Comments
- Wiki Reviews
- Blog Entries
- Blog Comments
- Images
- Image Comments
- Image Reviews
- Albums
- Album Comments
- Album Reviews
- Files
- File Comments
- File Reviews
- Posts
-
Custom Date
-
All time
November 28 2011 - April 28 2025
-
Year
April 28 2024 - April 28 2025
-
Month
March 28 2025 - April 28 2025
-
Week
April 21 2025 - April 28 2025
-
Today
April 28 2025
-
Custom Date
05/26/2022 - 05/26/2022
-
All time
Popular Content
Showing content with the highest reputation on 05/26/2022 in all areas
-
10 pointsWell awhile back @ebinmaine gave me one of his old tow behind trailers. It was old big and pretty solid. He had put a pulley system on it to crank it up and dump heavy things. Well I used it this summer to move loads of sand and it worked great. But I wanted to re do it and upgrade it. It originally came with a crank winch so put a 2500lb electric one on it instead and added some pulleys to the boom to allow the cable to roll nicly and help when the dump body was lowering. It use to bind up and would have to be almost pushed back down so I also added a tension spring to pull the boom back to its stock position allowing the dump body to lower under its own weight. And a spring latch to lock the body down, it will be on a pull cord to unlatch it from the tractor. Trailer will also have a quick disconnect power supply for easy on and off. Will soon be painted to match my 314-8 that it will be used behind.
-
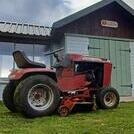
7 pointsI mowed this evening with my late grandfathers 416H. I love how it stripes. I’m pretty sure my neighbors love the fact that my headlights now work and I can mow well into the evening. Tonight was til 9 and I still have about a 1/3 left!
-
6 pointsWell, I finally got up the steam to get this one done. It was one of those jobs you walk a circle around of about 20 feet for a while as it seems like it was going to be an "ordeal" I am happy to say the cut and cave method worked great. I cut it open up to the block adapter then only a small slice in the hole. I didnt get into the threads of the block adapter. However the nipple was so brittle from age and heat, it collapsed without a fight at all and it pretty much fell right outta there. Its done. Phew. Wasnt the "ordeal" I thought it would be.
-
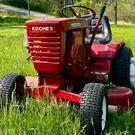
6 pointsThird wheelhorse in their temporary new home. One more joining them tomorrow but the last one will stay for yard maintenance until the day we leave. Off early in the morning to pick up the two Yanmar diesels
-
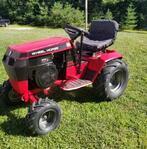
6 pointsPut on a new "Stens" replacement gas cap for my 1981 Wheel Horse Manual C-125. Before and after photos are below. Very happy with the new product!
-
6 pointsIt's not that I didn't warn you guys But you're right, I probably could've gone lighter on the sheetmetal gauge but I just don't like (working with) flimsy stuff. My only concern are the front tyres, not that they can't handle the load, but more the fact that they're quite narrow and might sink into the dirt.. might have to go for something with a little more flotation..
-
6 pointsI found a mouse nest a couple weeks ago on a shelf in the garage, it smelled nice. The dryer sheets lining the nest were a nice fashion statement!
-
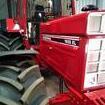
6 pointsI never did show my hood now did I? Better late than never.. my dad bent op some sheetmetal according to a buck I made to follow the shape of the grille as closely as possible. This is the result. Unfortunately I had to notch the hood to make the cylinderheads fit. No biggie in itself but the "International" sticker will read something like "Inte_____onal".
-
5 pointsThis is the continuous if my post from a couple weeks ago of "Picked up a few engines". Makes load #2 from same place and still got a truck bed full of horse parts to get and few tractors but also gotta deal on few other goodies lol
-
5 points
-
5 pointsPut them out in a hedge row, let some trees grow up through the frame for 20 years. When you are ready, cut them loose, tow them back to the barn. Fresh gas and a spay of carb cleaner in the carb and they will start right up. How many of us have seen that happen ??
-
5 points
-
5 pointsThat's the best way to do it! I got my 1981 Wheel Horse Manual C-125 from my grandfather and am working on fixing up a 1976 Wheel Horse A-90 that my Pap bought new and passed down to my father and now to me. Definitely started a new addiction! haha
-
5 points
-
4 points
-
4 pointsThanks! That didn't translate to well I guess @Snoopy11 first of all, thanks! Second, I agree with mister @Dan.gerous pick up the tig torch again and give it a go. My advice would be to don't bother with the filler rod straight away. Just take a piece of steel and make some puddles and then 'beads' to get the basics down, angle of the torch, stickout of the tungsten, speed, amperage and so on. Step two would be to get two (or more) nice and square pieces and fuseweld them together, still without using filler rod. When that goes well add the filler rod and.. keep practicing. You'll get there eventually.. Oh also, might not hurt to have a bench grinder or other make-point-on-tungsten-again-machine handy when you first get started!
-
4 pointsFinally got the axle seal replaced on the C-100. Seemed to all go well so hopefully no more puddling oil under it... pressed in pic didn't turn out well but it seated well running the skinny tires for now. Will get tubes for the wide v-tread next!
-
4 pointsLikely. A warm engine turns easier. Battery got a fresh charge....etc But I did not state that after the repair, it turns over much quicker now both cold and hot. So I think a little from column A and a little from Column B.
-
4 pointsI often do that too....figure with my 11 thumbs and it's already broke I got nothing to lose.
-
4 pointsI like the idea of putting a little oil down the Spark Plug hole and rotating the engine and putting the tractors on jack-stands or cribbing to get the tires off the floor. For unwarned guests I use the baited glue traps, just need to take a peak at them from time to time.
-
4 pointsBoth Dan and I have Green Mountain Daniel Boone models. Small ones designed for tailgating and camping. Runs on 12vdc but comes with a power supply for 115. Plugs into a cigar lighter or alligator clips. You can run yours off a small inverter if it's 115 only so there's no excuse for not grilling at shows! Well maybe if it's a big heavy one and takes up real estate on the trailer. Dan tending a heart attack loaf.
-
3 points
-
3 pointsDo you have the belt cover for it? The belt cover has guides on it for the belt, it keeps the slack out of the belt when disengaged, it wont work right without it... I would take the belt cover off that awesome (what I'm guessing is a C-160) one in the background, they should be the same setup, compare & see what's missing on the Charger....Make sure the belt goes back on top of the guides otherwise they will shred it.
-
3 pointsSeriously, great ideas above. Draining gas, fogging, a little oil in the spark plug hole, turning the fly wheel (at least once a year). That's the way to do it. My Dad had 4 horses that sat for 20 years in the pole barn, that I inherited, got them all running without much effort. He did drain the gas out of the gas tank...not sure he did much else. Yours look show room. Maybe put them in the dining room for storage.
-
3 pointsStill work to go! But just wanted to show progress!! This has become a quite expensive project!!! Why are the parts worth more then the whole tractor? Bought rims and tires one tire ripped out… had to take tire and rim off 61 suburban to finish mowing… then will put new on… 50 some year old tires what do you expect… 😢 This tractor isn’t charging? Husband wants help and ideas how to check…
-
3 pointsHere is information from a web site that has trusted information on Kohler engines. Information About the Kohler Engine Models KT17 (First Design), KT19 (First Design), KT21, and KT17 Series II and KT19 Series II Oiling Systems - Kohler engine models KT17 (First Design), KT17 Series II, KT19 (First Design), KT19 Series II and KT21 all have a gear-driven oil pump, and use one of two types of pressurized lubrication systems. The KT17 (first design), KT19 (first design) and KT21 engines use a pressurized SPRAY lubrication system. The oil pump delivers oil to the main bearings and camshaft bearings at approximately 5 PSI. The main bearings are under pressurized oil, but lubrication for the connecting rods/journals is provided by oil sprayed continuously from two small holes drilled in the camshaft in alignment with the connecting rods. On the other hand, the redesigned KT17 Series II and KT19 Series II (including all Magnum opposed twin cylinder engines) have a full pressure lubrication system, much like in a modern-day automobile engine. The Full Pressure Lubrication System delivers oil to the crankshaft bearings, camshaft journals, and connecting rod journals at approximately 25-50 PSI. A spring-loaded pressure relief valve, located in the engine crankcase, behind the closure plate, regulates and limits the maximum oil pressure in the system. These engines have a spring-loaded pressure relief check valve (steel ball) to regulate the oil pressure, and the KT17 (first design), KT19 (first design) and KT21 engines do not. The Series II and Magnum crankshaft is cross-drilled for oil passages from the main journals to the connecting rod journals, and both the main bearings and connecting rod bearing surfaces receive full lubrication from an oil passageway in the block through the crankshaft. Oil does not spray out of the camshaft onto the connecting rods in the KT17 Series II, KT19 Series II and all Magnum opposed twin cylinder engines. If there's no oil filter adapter with no oil filter on a KT17 Series II, KT19 Series II or any Magnum opposed twin cylinder engine (oil filter adapter port blocked-off), it's still important to change the oil on a regular basis with these engines, too. Again, fresh, clean oil is cheaper than another engine or an engine rebuild.
-
3 pointsIt's good that you seem to recognize that early on. Construction on a larger building is highly advised.
-
3 points@WHGuy413 amazing , clean deck and sharp blades ! nice looking set up , also the cut and lay of the cut fits the yard , looks like it should . changed over my cut pattern , so its exactly oposet what I was doing , looks better and just fits the various angles and slopes I have . go green , pete
-
3 pointshoping they say that about one of mine in a few long years!
-
3 pointsAlways love to hear of a treasured family being loved by subsequent generations of the family.
-
3 pointsI sanded the old muffler with sheetrock sandpaper - just perfect for all that scale. Gave it a coat of black. Now, off to get the pipe nub to attach it. After that, START! Note on the vibration. When on its rubber mounts, it always had a serious vibration band just off idle. Narrow band not in any working RPM but interesting. Changing to solids ended that and she was very smooth. I am anxious to see how the gear removal will affect it. 4 day weekend coming so, yippee!
-
3 pointsYou will need help because you can not shift gears with the belt guard off. Have to start it in gear. Remove the belt guard and see if the noise disappears.
-
3 pointsYou could run a hose from the air pump into a tub of soapy water and blow bubbles!
-
3 pointsWhat ever you do, don't take the same approach as Tulsa OK did with Miss Belvedere. https://en.wikipedia.org/wiki/Miss_Belvedere
-
3 points
-
3 points
-
3 points
-
3 pointsWelcome to the forum. This Troy built model may work but would require a ton of modifications. For plug and play you need one of these 1983-1985 tiller model 07-36TL02 Uses tiller hitch 105543 Rear axle hitch mounts under rear axle First belt guard on front idler assembly to be retained by bolts to a welded-on bracket [Drive belt # 1599 (HA x 139.00in 1/2" x 139") If used on later twin-cylinder models use belt # 103635 which has been replaced by # 110265 (1/2" x 141.00")] 1986-1989 tiller model 07-36TL03 Uses tiller hitch 105543 Rear axle hitch mounts under rear axle [Drive belt # 1599 (HA x 139.00in 1/2" x 139") If used on later twin-cylinder models use belt # 103635 which has been replaced by # 110265 (1/2" x 141.00")] 1990-1991 tiller model 07-36TL04 Uses tiller hitch 105543 Rear axle hitch mounts under rear axle [Drive belt # 103635 which has been replaced by # 110265 (1/2" x 141.00")] 1992 tiller model 07-36TL05 Uses tiller hitch 105543 Rear axle hitch mounts under rear axle [Drive belt # 103635 which has been replaced by # 110265 (1/2" x 141.00")] 1993-2001 2003-2007 tiller model 79370 Rear axle hitch mounts under rear axle [Drive belt # 103635 which has been replaced by # 110265 (1/2" x 141.00")] There are older models that could fit with slight modifications
-
3 pointsWe have a freezer full of pork Also drink a lot of tea....
-
3 pointsI could keep those batteries charged up here at Pullstart Stables…
-
3 pointsFor long term you might consider 'fogging' the engines. How's the rodent situation in your garage?
-
3 pointsI used to keep a box of "someday I'm gonna open this up to see what happened to it" stuff. Finally took my London friend's advice and binned it.
-
3 pointsWell, I decided that it was best to go ahead and check the operation of the ACR, adjust the valves and replace the head gasket. I had noted earlier it was starting to weep. So nothing surprising went i removed the head. I found the gasket was failing and the torque on the bolts had backed off. The head checked out ok, I am detecting less than .002 warp distortion. So I think its just a case of big thumper motor and a 45 year old head gasket gave us the goat. While the head was off, I did observe the operation of the ACR. I havent measured the ACR lift yet, but I will tomorrow. Ive quit for the day at this point. My observation suggest its most likely going to be within tolerance. But I did take the time to begin proper preparation to installing a new head gasket. Chasing the cylinder head bolt holes with a tap. Clean em' up and clean all the crud out of them. If you dont do this along with cleaning the bolts and washers as well, you wont get a proper torque reading. the resistance the bolt has going into the hole or grubby washers will rob part of the torque value and your head will not be torqued down evenly. Once this is done you can use compressed air to clean the dust out of the holes. Some guy dont do this and the head doesnt go down even. Then they wonder why the head cracked or it blew another gasket. The bore and valve seats look great tho! Better than i expected. That was a nice surprise. I have an old 8 speed I know needs to TLC. Burns a little oil. But not this one. It looks good to go. Cheers for now.
-
3 points
-
3 pointsToday I set out to cure a design flaw that plagues most of our tractors. First let me start off by saying - "If you've never cut 10ga sheet metal with a jig saw, then you are definitely missing out on life!" You really need to add it to your bucket list. I'm here to tell you that it is like hitting your self in the head with a hammer. It feels good to stop. Now back to the task at hand. What flaw was I fixing? Why did I need to cut 10ga with a jig saw? Well first off I did not have a hole saw big enough to do the job, this is why I used a jig saw. Why was there 10ga sheet metal on a D160? IDK, don't know the back story on the custom fenders and seat set up. Guess the PO wanted to make sure that they were heavy enough. As for the flaw, well I plan on using my new to me D160 with a double seat as a show cruiser and there was just no place to safely set my drink while I'm cruising around. To cure this issue as well as cure the issue for my passenger I added two cup holders to the center counsel. But wait!! There's more! Because I saw them and decided that it was a GOTTA HAVE item. Also because I think that even a rusty old tractor deserves a little "BLING", I stepped it up a little with my cup holders. Can you say LED?? Sure, I knew you could. Should have no problem finding where to put your drink while cruising around in the dark with these babies.
-
3 pointsHere is a fact that a lot of people don't know. An unwashed egg will keep for up to 2 weeks on your kitchen counter at room temperature. When the chicken lays an egg it is coated in a protective layer known as "bloom". This keeps bacteria from entering the egg and causing it to spoil. Once an egg has been washed it must be kept in a refrigerator at temperature around 45 degrees or less to keep bacteria from growing inside the egg. Refrigerated, eggs will keep up to 3 months.
-
2 pointsSkill... which I.... do not have... I tried TIG ...1 time... I will never attempt that again... MIG 120 and 220 all the way for me!!! Don
-
2 points
-
2 pointsI like to spin my motors over by hand every few weeks to keep the top ends fresh, a few drops of oil down the plug holes helps as well. With the dip and splash motors hand spinning will only do so much. Consider lifting the tractor up off the ground so as not to leave all the weight on one spot of the tires. If you can take some of the tension out of the belts. If mice could be a problem I put steel scrub pads in the carb throat and literally moth balls and dryer sheets in anything I dont want mice to get ahold of IE wiring and air cleaner boxes. Vary nice pair, keep them in the shine!
-
2 points@drewd been using this for years now , mounted mine in front of frame area , also installed evil energy 5/16 fuel check valve , vertically just before carb , for a holding fuel charge , no problems , cannot hear it , pete


