
Leaderboard


Popular Content
Showing content with the highest reputation on 02/03/2022 in all areas
-
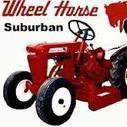
15 pointsHad the Bronco out yesterday. Went inside for a minute and came back out to find it trying to pick a fight with my truck. Cocky little rascal...
-
10 pointsOn a flat work top the Holdfast has no peer. Nothing even comes close to its effectiveness and versatility . As it’s name implies it will clamp anything on a table from1/16” to 12” or more, fast and securely. Besides a wedge it is probably the oldest work holding device ever. There is evidence of its use for over one thousand years. Although still somewhat available it is being increasingly hard to find pricing reflecting it. In its simplest most primitive form it is something fashioned by any competent blacksmith. There are a few commercially made versions but they are too small and not really constructed correctly. The modern version of it adjusts with a hand turned screw and has an articulated arm unlike the ancient form. It was made by our friends across the pond and like every tool they make an example of quality and craftsmanship. I believe it is no longer made. Years ago for selfish reasons I essentially cornered that market by buying every single one that showed up. The mechanics of it couldn’t be any simpler. All types work by inserting them through a proper sized hole on bench top. It’s the diagonal wedging action of its shaft through the hole’s thickness that creates the clamping action. New versions will have a steel collar that is mortised into top to reinforce hole and prevent wear and are tightened with a vise like screw. On the traditional form ,one one simply hits the top of it with a hammer to clamp or hit the back of it to release.The arm on it also flexes increasing the clamping force. They are mainly a woodworking tool although very rarely seen there are ones made for stone carvers that get “ nailed” onto a beam rather than using a hole . The arm slides up and down on the shaft to a accommodate material thickness. Wedging of arm on the shaft creates the clamping action. These are really unique to where I am from. Most will use only one or two holes on work bench. I however use six strategically placed along length of bench . If outside of its clamping range a simple “ extension “ is used with them. Traditional and modern versions Depending on task several may be used Some of the NOS for grandchildren’s future benches Modern version complete with collar and mounting hardware Reinforcing collar also adds additional mechanical holding ability with ridges making it impervious to accidental release from vibration. Large capacity The secret to it , the wedging action Extending its range On traditional version clamping occurs by hitting top To release hit back Unique stone carvers version Used at quarry site by nailing it to a wide beam Arm slides up and down on shaft . Clamping happens by hitting arm
-
9 pointsI only have one running tractor with a Delco/Remy starter generator- my 867. I have a 701 that hasn't been touched since I got it. One day I'll tackle that one. Anyway, my 867 cranks quick and runs like a top. But lately the starter generator had a growl to it, and it had some vibration the last time I drove it. So I decided to swap out a spare I picked up years ago until I could rebuild it. My luck is never that good... The spare was almost an inch narrower. I have no idea what it came from. So much for a direct swap. So I opened up the 867 s/g. There isn't much to them. I found the front bearing missing balls and half the cage was mangled. The bottom bearing needed grease, but was otherwise OK. Brushes were about 1/2 worn, but fine for now. So I opened up the spare, and stole a bearing. Cleaned out the grime, packed them with grease, and put her all back together. Also added a quick disconnect, as I do with all my machines. There is no more fear of welding a wrench to the belt guard now. Charging, battery tending, or even swapping batteries now is quick and easy. No more fireworks. Yes, I know about disconnecting the ground first. Still hard to get the battery out without sparks. So now she cranks and runs smooth as butter. No strange sounds whatsoever. Guess I'll put a rebuild kit on the maintenance list for summer. Right now she's back in the lineup!
-
9 pointsNext time, hold the hammer with both hands....
-
9 pointsHere is a replacement steering gear for the early suburban tractors part number 3607. This gear has an offset bushing so the back lash can be adjusted on the steering gear. This part fits right in place of the original part and works great. No more loose steering on the early suburban tractor with this part. These can be purchased on our website a-ztractor.com or you can purchase them via phone by calling us at 1-717-821-2542. We also have them listed on ebay in our ebay store. The price on this kit is $100 except on ebay it is $110 because of ebay fees. You can also email me directly about this part at aztractor255@gmail.com.
-
8 pointsAsking price was 500…and you were able to whittle it down to free?? You must be the best negotiator/ haggler ever!!
-
7 pointsThank you. Many of the students are taking turns at painting the tractor parts. They range from 9th grade to 12th grade. Some of the parts have been painted a couple of times because of mistakes or getting scratched during assembly. They are getting a lot of painting practice on this project. I’m really pleased with how good they are doing.
-
7 pointsI know that Briggs used the shorter S/G on their vertical shaft engines.
-
7 pointsMade some good progress this week. Installed the dash and hood, got it running, painted front wheels and started making a side pipe exhaust from an old motorcycle exhaust system
-
6 pointsSince I am on street frequently plowing this should make it safer and easier on my neck.
-
6 pointsThat is hurt spot for sure. Any chance you can get through 3 months without hurting yourself?? No bet here...I don't think you can do it. Just saying. Poke that thing with a needle on the edge and...let the blood out and grill another squirrel.
-
6 pointsTechy carb # 631067A Just a leak may just need gasket and repair set 31840 Lots of cheap knock offs around. Some work well others not so well you pays your money you take your chance. I usually try to repair the original first Knock off and original O
-
5 pointsSo I get this text from Trina: I may have destroyed the kitchen!! 🤔😊 Today she decided to tear into moving the stove (over) and bar (out) of the kitchen. Here's some pics... Unfortunately we didn't think to get a true "before". You can see the bar off to the right in this shot. Partially removed. Bar gone. I'll get more pictures later. Basically on the far side of the stove as you see it there was a 2" thick butcher block section about 25 by 28. Absolutely stupid location because you couldn't even use it. We're taking the butcher block out, cutting it in half, moving the stove towards the wall, and laying out the butcher block on top of a counter sort of as a miniature bar but actual work surface this time.
-
5 pointsI pretty much did the same thing as Bill. Used a round bubble level on the flat machined part of the axle and wooden shims on a drill press Never though about the bar through the pivot hole to level one way. Good idea. Used split bushing then ran a reamer through both to correct for any misalignment, Was a little off but good enough for the women I hang out with. I approached several machine shops to do it and they turned me down ... said set up would be too costly and not interested in saving an old tractor. Never thought to take pics of the setup just the finished piece. My first mechanical only resto.
-
5 pointsAnother to add to the list of excellent stuff! Absolutely perfect fit, and it looks great! I was so upset after the last PA show that I attended. I had a very cool steering cap made by Glen Petit, and it disappeared the day I was leaving. I have no idea how it came off but it did. Glen's work was also excellent! I'm so glad we have someone helping to customize our tractors like this again!
-
5 pointsThe Stevebo of Europe maybe?????
-
5 pointsMy shop air is regulated down to 70-80- psi so that's what I use. According to OSHA... yep that small town in WI.... not supposed to have over 30 psi shop air but who am I to follow regulations!
-
5 points
-
5 pointsHated to cannibalize a smooth starter, bit it wasn't gonna work anywhere else! I look like I've been mining coal with fingernails as my only tool! Gonna just have to wear out!
-
5 pointsYeah that one was off a Briggs vertical. Since most of my herd has a SG I always have a rebuilt spare on the shelf and replace bearings in them alot. Odd thing is I'll put a tractor away in the fall, get it out in the spring and the front bearing will have a whine to it. Oh well the bearings are a real common one and I seldom replace the brushes. I was always going to do an instructional on overhauling them and have all the pics just need to get off my keester and do it! Yep yer fingers are gonna be black for awhile!
-
5 points
-
5 points🐻 Was 💤 sleeping. Woke up to read this. Hahahahahaha. Yeah but what fun is THAT???? Missing out on all this highly intelligent useful conversation??? Never!
-
5 pointsSomething about that pipe, just turned this view into a Rat Fink look.
-
5 pointsLike. It. Was. Meant. To. Be.
-
5 pointsExhaust elbow is pie cutted and tacked up. Me likey.
-
5 pointsVery quiet, maybe running the gas into the wood stove to save on matches
-
5 pointsI'm nervous, he isn't responding, hope he's not taking the gas pipe.
-
5 pointsOh Balls EB is remodeling..... we're all gonna die..... Be like any of his other projects be forty pages into it before we see any results... Sorry EB calling it like I see it!
-
5 pointsSo maybe you can hear the boom or see smoke plumes?!?!
-
4 points@TJ Salyers Do not be discouraged if people on here prod you to step outside your comfort zone… I was working on my first horse , the 1994 520H, trying to get all the systems up to snuff. I forgot what I was trying to figure out… may have been the regulator, or trying to figure out how to wire a non-factory oil pressure sensor. Whatever it was, I had the Onan manual and was on here asking questions left and right, and members here gladly answered them. But one time @lynnmor suggested I read the section in the manual, perform some tests, and post the results, then he or others here may be able to help… In other words he was trying to get me to learn on my own, read the manual, and not be too quick to ask others to fix my problems. It’s that teach a man to fish, feed him for life thing… Of course I still reach out to people here with questions just about every day, and I’m sure I will continue to do that. Each time you come to the Redsquare you will learn something… I know I do ! Keep making that Horse better, stronger, faster… we can rebuild him… oh wait, I had a flashback to an old TV show…
-
4 pointsDon’t go over budget on that cable gentleman… you got almost $13.00 big ones on this build so far…
-
4 pointsKev, You can't get that kind of damage from key boarding.. The things you do put the hands in harms way, Got a blood blister doing things in the shop this week. Sewing needle and back to work. I would say be careful but Sh#t happens.
-
4 pointsThe construction reamer eliminates all that precise set up and doesn't waste those toothpicks. It basically self guides into the hole like a thread tap does but you want to keep it straight as you drill.
-
4 pointsThe bronze goes into the hole tight (which is what you want anyway) so it may squeeze the hole too tight for the 3/4". I used a Dremel with a fine grit drum. Sand, test, sand and repeat. You don't want to over do it and clean the dust out well before final fit. Don't forget to drill the hole for the grease zerk. Take your time and this method works pretty easy. Test on the pivot hole first then do the axle because you have a feel for it. After all these are not 200 mph race cars so it's hard to totally screw this up. Like Jim you may end up bushing everything since you have the tool to do it. For $60 bucks you can now do the entire herd of axles and pins.
-
4 pointsAKA... His honey doed it.
-
4 pointsTheres always the Caballo Diablo...looks pretty mean especially in black.
-
4 pointsi have a lead to a Indiana Manufactuering Assn I plan to chase that apparently has been around since prior to Ponds and WH -- have no idea if it will be productive but its a start
-
4 pointsSpiffed up the side of my tool cart at work. Spreading the Wheel Horse love…….
-
4 pointsKevin, I know it's extra cash but wouldn't it be easier to put 2 separate pod air filters on those carbs? Would buy you a lot of space.
-
4 pointsIf it was me, I would cut everything straight there at the edge of the hole, and either leave it open like it is, or buy one of these... Don
-
4 pointsNow you have it too nice to use, you'll have to buy another one to use out in the dirt.
-
4 points
-
4 pointsNice job undercutting the mica between the contact pads - gives the brush dust and any grit a place to go. Reminds me of being back in Automotive Trade Shop School in the early '70's doing the same to late 50's and early 60's car generators - only thing missing is the "growler" to check for shorted windings.... Bill
-
4 points@Jeff-C175 not sure will have to check, I just know from past snowfalls I have done about 7 driveways ranging from a few feet to a couple of hundred feet and no problems ate everything in its path and filled the tank up only once.
-
4 pointsI can't get over the quality of work in your classes. You and those students should be commended. I wish you had been teaching WAY back when I was in school. And whoever does the paint? Talented folks.
-
4 pointsyessir! about 10-14” I’d say. I plowed a couple places twice today and I’ll run a cleanup route tomorrow!
-
4 pointsTwo to do’s done on 2 2 22. seat and exhaust, both crossed off.
-
4 pointsHow's the homeowner's insurance. ... paid up I hope? !?
-
4 pointsDon't tell me someone in that household is bored. Must be all this snow or something. In all seriousness please be safe with that LP Gas line. Nothing to take lightly.
-
4 pointsYou want to go some where when it snows put her chains on and go


This leaderboard is set to New York/GMT-04:00