Leaderboard
-
in Posts
- All areas
- Markers
- Marker Comments
- Marker Reviews
- Articles
- Article Comments
- Article Reviews
- Classfieds
- Classified Comments
- Classified Reviews
- Wiki's
- Wiki Comments
- Wiki Reviews
- Blog Entries
- Blog Comments
- Images
- Image Comments
- Image Reviews
- Albums
- Album Comments
- Album Reviews
- Files
- File Comments
- File Reviews
- Posts
-
Custom Date
-
All time
November 28 2011 - November 29 2024
-
Year
November 29 2023 - November 29 2024
-
Month
October 29 2024 - November 29 2024
-
Week
November 22 2024 - November 29 2024
-
Today
November 29 2024
-
Custom Date
11/16/2021 - 11/16/2021
-
All time
Popular Content
Showing content with the highest reputation on 11/16/2021 in Posts
-
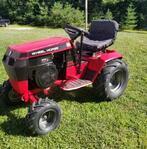
10 pointsOh no you don't, old man winter. I remember being caught with my pants down in November 2019. Not this year. I got the wheel weights swapped, the set screws tightened and a brand new #40 chain on the blower. Bring it!
-
10 pointsI came across an ad tonight in the classifieds that brought into question something I've been considering posting for awhile: are all Wheel Horse steering supports the same? The answer is no. Interchangeable yes , but not the same throughout the years. There may be a couple of other part #'s assigned to these things over the years, but you get the general idea. Starting with the earliest # shown (4412) you can see that it is 3/8" thick and the bore for the lower steering shaft does not accept the replaceable bushing. Moving on to the 6396 part #, you can see that it shares the same dimensions as the earlier design, but now accepts the replaceable bushing . Lastly, we have the #88-2710 steering support which has a thicker mounting flange ( + - 1/2" ) and accepts the replaceable bushing. Just some info I thought I'd share.
-
10 pointsThis is kind of like an EB post… on what BBT did today. Rylee is in a class called Odyssey of the Mind. It’s geared towards kids figuring stuff out on their own. Lots of failures, some wins. She has been double slinging hot glue guns but one jammed up. I told her to cool it down and get a screwdriver out. “Tear it apart. It’s worthless the way it is, so you might as well try to fix it.” I says. This was Sunday. Yesterday, she has it all torn apart on the table. “I thought you fixed it?” “I did, but it’s fun to take it apart now and I wanted to show you how it works.” ❤️ oh, that kid…
-
8 pointsThis machine that originally came dubay’s tractor collection in Danielson Connecticut and since been sitting in a barn for the past 5-8 years . I was lucky enough to get a message stating they where interested in making room so I quickly took the ride. Turns out to be a nice patina original 753 with a sms-42. With some work in progress I’ve been salvaging the original tank as it had some bolts cracked on the 2 piece tank and been repaired prior . This machine will be kept original and brought back to life .
-
7 pointsIn 1989 when I bought my 312-8 one of the options I wanted was a set of rear WH weights. I remember coming home from work and driving in the driveway to see a new beautiful Wh tractor that was delivered with the wrong weights. Long story short I settled for a pair I did not want but use them to this day on the 400 series workers in the Winter. Last month I ended up , finally after 32 years with the OEM weights I always wanted. A big THANK YOU to one of our best members from CT who you all know that also delivered them to Maine with no delivery charge. The weights are way to nice to use but you may see them at some point on Side Shot Saturday & Sunday on the 312-8 where they belong and then back on the shelf to save them for the next RS member to enjoy them. Buddy.
-
6 points
-
6 pointsOk as requested…..there the the little Work Horse. Check out the custom headlight inserts!!
-
5 pointsI haven't finished leaf clean up yet. The blower is on the 418-C but it only takes a couple hours to mount the snow plow and loaded turfs with chains. Rest of the crew is ready to go, same players as last year.
-
5 pointsA rub on a bird is good but I prefer to brine or inject as well. A brine will even lessen your cook time a little. I soak my turkey in a brine for at least 24hr before it goes in the smoker. Recipe for the brine I use. https://www.allrecipes.com/recipe/54614/turkey-brine/ Then I stuff it with apples and onions, Put it in a aluminum pan with a little bit of the brine in the bottom, (about a 1 1/2 cups) Then in the smoker it goes. If you have room to place a pan of water off to the side or under the bird in the smoker this is a good idea. The steam from the water will help drive the smoke flavor into the bird. Safe meat temp is 165 degrees. I like to run my meat temp up to about 180 to 195, this will give you that fall off the bone meat. Figure around 30 to 40min per pound at 225 degrees. I start smoking at 250 for a large bird (19+lbs) until the meat temp reaches 140+. You do not want to be in the 40 to 140 meat temp range for more than 4hrs, this temp range is known as the "Danger Zone" , bacteria can grow rapidly in a bird in this temp range. Leave your bird uncovered while smoking unless you notice that it is starting to blacken the skin. If you notice this you can stop that process placing a lose piece of foil over it. Never had a dry bird yet following these steps.
-
5 pointsMaxwell: I purchased a Harbor Freight unit a few years ago and did some of the MANY modifications that are on youtube. Added wheels on one end, improved the interior lighting, and lowered the shelf - doing that allows you to blast a 12" rim. Tossed the original gun and used a US Blasting unit - HUGE difference. I prefer Black Diamond coal slag from Tractor Supply - but for best results you need dry shop air and low ambient humidity. Bill
-
5 pointsI eat, drink beer, and watch TV. It is possible this is why I'm 25lbs heavier now than when in my 20s...
-
4 pointsHhhmmm… so, you bought it for the articles and just happened to then “notice” the pictures… uhm… I’m trying to remember the name of that magazine that teenage boys were fond of before the internet… they would use that same excuse when Mom found them with it… what was it …? Tractorboy…? No, that’s not it… Pondboy…? Nope… hhhmmm…WheelHorsler…?
-
4 pointsEd thought he was being careful... famous last words, right ? He had been doing this for at least ten years. I believe he was doing something like 20-25 birds each T'giving. He had a pulley system he used to lower the bird into the oil slowly. He had sheet metal heat shields all around and under the cooker. He kept towels as 'pigs' on the floor around the cooker to catch spilled oil. But whatever happened was so fast that there was no stopping it. And that old farmhouse was dry as a bone. Went up like a Lucifer! Those people in that video are STUPID! Here, hold my beer, I'm going to burn down the house! The video calls them 'accidents' but most of them seemed intentional! ID10TS!
-
4 pointsIs that tractor a Wheel horse from the 80's. Ya never know your luck, I bet the plans for this cab are still on file. Popular mechanics, February 1980
-
4 pointsDeep fried is always great but yes the bird must be fairly dry and lowered into the fryer. Lets be careful out there.
-
4 pointsAdded 6 Ball Oilers to the X Axis ways and acme screw - the original one in the center of the back on the table is covered by the glass scale, so I added 3 recessed into the table from the top, clear of the vise. Added 2 additional ones in the front like the original, horizontal with a vertical intersecting hole. The one in the botton of the T slot is to oil the leadscrew - all too easy now, start at one end, turn on the power feed to medium speed, spritz the oiler, count to 5, repeat again for the travel. Bill
-
4 pointsIt looks like it's shocked at something in front of it. Did you take that pic while sitting on a C160 or something?
-
3 points
-
3 points
-
3 pointsIt's all back together again, sort-a. I took the wheels, tires, and seat off of one of my other Masseys for now. I have a seat on order, but I haven't decided about tires yet. I am satisfied with the paint job, being it was my first try with a gun. It's not as good as what my nephew painted for me, but then he knows what he's doing. Me? Not so much. I haven't received my engine decals yet, I don't know what the hold up there is. Went on it's maiden voyage up and down the street a couple times, everything worked as it should. Might have to adjust the brakes a little tighter.
-
3 points
-
3 pointsI own my Raider 10 with a resto-mod Kohler M12. But I have been fighting with the tranny and carburetor. After been looking for a Kohler M12 carburetor, I found this NOS Walbro K301 carburetor. Didn't want a Chinese one. I thought It would just bolt up, but that was not the case. Their are some differences. 1. Bolt holes 2. choke lever 3. PCV breather. It will bolt on to the engine with no problem, but being able to run the M12 air-filter, that takes some modifications In this picture you van see the choke-linkage is in the way. the K-series airfilter housing has an offset for this. The M12 airfilter housing is dished As you can see, It doesn't want to 'touch' the carburetor. An option could be removing the choke, but I prefer having a choke, and switching out the choke arm wasn't possible. So we are going to make a spacer so the airfilter housing from the M12 and the choke can both be used. so I start things off using this big plastic board of 15mm or 0.60 inches thick, I believe this is the minimum that was needed. Used the OLD carburetor to see the outline of the spacer, it is very important to use the old one or 2 holes are not going to be sealed, and unfiltered air can enter the engine. For the holes, You have to use the NEW carburetor Insured It would also fit the dished air filter holder of the M12 Also used a holes-saw that was exactly the same diameter as the inside of the carb to cut out an opening in the spacer. The bolt keeping the airfilter-holder on will need to be upgraded to longer ones. Make sure they are not to long as this may clamp choke lever stuck. (ask me how I know ) The M12 airfilter only has the bottom hole and the two bottom ones. So I had to drill two extra holes so the K-301 carb will bolt up, as you can see by the gasket So now it is time making or buying some gaskets: You know will need two instead of one. So I had an OEM one, an decided to make the other from left overs from a WH tranny gasket. I used @Achto trick with the leather punches. They sure make it an ease to cut out the prefect holes. Next problem is that the PVC breather hose will be too short to fit, so this will have to be lengthened. I used a this plastic hose connector . You could also use the exit at the K carb instead of the exit on the M12 filter housing. I didn't go for that option. As sealing off the carb exit will be easier. I still did had to cut off the horizontal tab on the choke lever. And we are now ready to bolt everything up. View on the choke lever: Choke OFF: Choke ON: And voila the filter and filter housing of the M12 is now on the K-series carb which is now on a M12.. Now the plastic cover has a final minor issue. The tab that goes into the the front engine cover, that keeps the plastic cover from turning is now too short. So I used a small metal strip to make up for it. A question: Could you keep the plastic cover out, or is it important for keeping the airfilter clean? Since this cover is now sticking out more, I barely clears the hood.
-
3 pointsThe original thread topic was about battery hold downs… zip ties work as battery hold downs. You’re good… Reminds me of a Haiku: Battery must hold Wheel Horse go rain sleet sun snow Whatever works use
-
3 points
-
3 pointsA number of things may work here, gas, paint thinner, etc. I know Acetone works great and fast and does not ruin the decal. Tried and true!!
-
3 pointsPete, he said not much oil and what is there is sludge like. He also has other issues, he needs to open it, clean it out and see what is wrong. As most members know, I am not a fan of flushing out Wheel Horse manual transmissions. Why?? Because loosening what you have in there can cause more damage then good (dirty bearings). Flushing does do one thing, it can make opening and cleaning out your trans a nicer job. If you just bought a horse and you find sludge, the only way to know what you have, is to open it up. Then you know you have another 50 years of use. Also, in this case...if you put 2 qts of diesel in the trans and drive it around...your seals are most likely dry and while they may not leak 90wt they could leak the thinner diesel all over your yard. You will be able to see where you drove all summer. Pretty much, it is a waste of 2 qts of diesel. Now, if you take my 702, which I rebuilt the transmission with all new bearings and seals a few years ago, and I drained the oil...depending how it looked...I might just put in new oil. The sign of any moisture, which would be from condensation, a diesel flush might be an option.
-
3 pointsThis is the cabinet that @ri702bill mentioned that many of us use here in the states - as you can see its very likely to be a clone of the one you are looking at. They are a bit under $200 at Harbor Frt here. And, TSC (which you probably dont have) carries a brand of blast media called 'Black Diamond' (coal slag) in 50# bags for under $10. It is a pretty decent cabinet out of the box, .... but by getting on you tube and cking out the MANY mods that have been adapted to it ... well, its really worth the time to adapt some of them, and all are uncomplicated and inexpensive. Using one of the mods that allows minimum use of media, I can stretch a 50# bag to last ..... a LONG time! Now, I would again point out the "Big Compressor" statement --- size doesnt matter all that much, its the amount of CFM (cubic feet per minute) that it produces that is VERY important with blasting - it loves LOTS of air!! I would say that .... probably about 15cfm is as low you'd want to go, under that and the compressor will just run & run and not produce good results. I consider my blast cabinet to be in the top 3-4 tools in my shop, I'm constantly putting something in there for a quick clean-up - from a single rusty bolt up to - as you want - a 12" rim. FWIW, my rig is an 80 gal tank producing 18-19cfm which I run at about 80-90 psi at the gun.
-
3 pointsThis 48'' SD deck is one that came on my 91 520-H in 2002 when I bought the tractor. I never mow wet grass and when I remove it in the Fall have to clean next to nothing underside. Then wash and wax the topside before dry storage inside for Winter. It is pictured before the wash job. The 36'' RD deck is a 1996 and gets the same treatment. Both are non recycler decks.
-
3 pointsClean / scrape after use. Spray /wipe with oil…used or spray on…Don’t store them caked /wet… @peter lena has a good approach to deck maintenance…
-
3 points1961 support 3923 replaced by 88-2710-03 1962-1965 support 4412 1966-1983 support 6396 replaced by 88-2710-03 1982-1991 support 109733 replaced by 88-2710-03 1992-1996 support 88-2710 replaced by 88-2710-03 1996-1997 support 88-2710-01 1997-2007 support 88-2710-03 The last replaces the first so must replace all.
-
3 points*tangent/off topic warning* we went to a Celebration of Life on Sunday. 42 years old, 3 sons and a wife without a dad/husband. The officiant said “never say “I know how you feel.” because only those kids and wife lost Kyle the way he was to them.” Being able to relate is another subject… but only that person truly knows how they feel.
-
3 pointsSimple but stronger then anything out on the market today! Like Wheel Horses. My lathe guy, makes these types of log splitters. Maybe he wants to make me one to fit on my WH?
-
3 pointsI use big plastic zip ties wrapped around the whole battery tray. I have a couple of those metal rods that are in good shape, but when they need replacing, a large zip tie would hold if the tractor flips over. And a bag full of them is $3...
-
3 pointsThat thing’s got all kinds of wedgies! Sorry @SylvanLakeWH… we know you’re a visuals guy!
-
3 pointsHey ummm. I don't think yer gonna like that box Steve. Why don't you just save the grief and aggravation. Bring it on over here. I'll take care of it for you.
-
3 pointsWell hello wheelhorse family! If any of you remember me I'm Oldworkhorse Steve! It's been a few months since I've posted on here not by choice but rather just lack of time and crazy life last few months. I finally got a little free time from the 6 to 7 day a week work weeks and even tho I didn't get a chance to work on one of the horses I did do a short before it snows house project witch was to build a new bed. Didn't want to waste my money on cheap store bought so I decided to make 1. My wood working skills are not the best but to me they will get the job done! So here are a few photos of the project. Hope every1 has had the best year they could have and every1 is well! Enjoy the holidays and I'm sure I'll b back on here more often once the snow flys! OH and I scored myself another tool box for all the horse tools!
-
3 pointsThe rain and wind kept me out of the deer stand this week. So I spent some time rigging the new (1962) crabbing boat for next year. Tore out the old 15" transom and installed a new 20"er. Made a cleat and roller for the bow to assist in pulling the large crab pots and the anchor.
-
3 pointsRemember this and it morphed into this? After I completed it last spring, it never snowed again. I never got a chance to try it out. I've heard we can expect an early snowfall. It's baaaaaack! Only Casper is white now. The 2 Lawn Boys fired right up after a summer nap. Is this one 2 stage snow blower, or two single stage snowblowers? Or maybe just a bad idea all the way around. We shall see. Let it snow. Let it snow. Let it snow. Just once. That's all I want this year. Then I'm done.
-
2 points
-
2 pointsAchto's recipe is how I do it. I use a large tin foil pan (no clean up). I add about 2 cps of home made wine. The gravy and the dark meat are to die for. My rub is just salt, pepper, poultry seasoning, sage. An 18 lb turkey takes about 4 to 4 1/2 hours...depending on the temperature outside. I usually smoke for about 2 hours and then cover bird and braze.
-
2 pointsThat is the beauty of these types of projects really- the stakes are low and fixes are pretty easy. Still looks fantastic.
-
2 points
-
2 pointsThat is a great idea! Didn't taught about that. That will decrease crank time and if not, won't hurt anything.
-
2 pointsI might have a good puller for that, I will send you a picture as soon as I can. I used it as well to remove tranny bearings. EDIT: here it is; We have them in difference sizes. Look how little is left of that bearing and still managed to pull it out.
-
2 pointsI‘m not sure, how they be called on your site. Here they be called Rotwild and Dammwild.
-
2 points
-
2 pointsYeah that is my FIL's idea. I have a welded steel elbow that is 6" ID, but he wanted to keep the 7" ID. He says it doesn't clog as much.
-
2 pointsAn old Ford Transit from 1983. there is still a ton of Work until he get the old Charme back. Like this one looks. It was converted 1985 to a Camper. i drove such a Van in my first Job trainings several Moons ago... I loved it, Rock solid and simplest technic inside. but this Van missed over the years definitively some TLC and Maintenance.
-
2 pointsBegan with the Right Rear Fender to reconstruct. What you can see from outside... Will give an impression, what‘s behind the Scene.. Yap, lot of rotten Metal. And more rotten, the last worker just sticked the Repair Sheetmetal simply over the gunk.. Ain‘t be a Work that lasts longer. So grind all down to bare Metal as far as possible. Reconstruct the Rear structure just by spot welding parts in to prevent welding distortions. And allway‘s check it the Work will fit. A gently coat of rust prevention primer on areas, they be delayed in Work to prevent Rust while working. Check fit rework, check... Grinding primer off, next section reconstructing... Slowly but steady it gets it’s complete new Structure all handmade. It’s a ton of Work. Than spotwelind the new parts in. Spot by spot with cooling phase for non distortion. Is it worth the Work? Maybe no, but for me it is.
-
2 pointsI used 1/4" all thread to make j- bolts and used #9 galvanized wire and made loops on the end for the j bolts. Cost <$2




.jpg.8ca755f0175140fd974a8b033d7f3501.thumb.jpg.71f06ed90f3a14a3b565d8387e418b61.jpg)


