Leaderboard
-
in Posts
- All areas
- Markers
- Marker Comments
- Marker Reviews
- Articles
- Article Comments
- Article Reviews
- Classfieds
- Classified Comments
- Classified Reviews
- Wiki's
- Wiki Comments
- Wiki Reviews
- Blog Entries
- Blog Comments
- Images
- Image Comments
- Image Reviews
- Albums
- Album Comments
- Album Reviews
- Files
- File Comments
- File Reviews
- Posts
-
Custom Date
-
All time
November 28 2011 - November 29 2024
-
Year
November 29 2023 - November 29 2024
-
Month
October 29 2024 - November 29 2024
-
Week
November 22 2024 - November 29 2024
-
Today
November 29 2024
-
Custom Date
08/04/2021 - 08/04/2021
-
All time
Popular Content
Showing content with the highest reputation on 08/04/2021 in Posts
-
14 points1960 Allis D14 to help with the field mowing and other small chores around the property.
-
12 pointsThis should make Pete happy. Picked up a box of nearly full grease tubs. @peter lena Also picked up a stack of buckets. Enough to double my WH parts storage system.
-
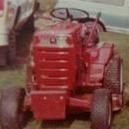
11 pointsWell here is a photo of when I went to see it and a photo of as it is today. In between then it received... New head gasket New points, condenser, and coil Cleaned and rebuilt carb Air filter 4 New tires with tubes New fuel lines and tank cleaned New engine and transmission oil New drive belt New spark plug New seat Drive belt cover welded Paint touched up
-
9 points
-
7 points
-
7 points
-
6 pointsSo I was going through the box of takeoff parts from my scrap yard C 120 build , I was looking at the rotted muffler and saw that it was really only the bottom half of the outer jacket that rotted out and the internals ( baffles ) and tail pipe were in pretty good shape ,so I decided to give her a new Jacket and a quiet upgrade to the sound. I first started with a piece of 22 gauge metal ,being I do not have a roller or a bead die witch is what is really needed to get a factory finish I decided it might make a good DIY with hand tools only ,and being I have a feeling that most of these types of mufflers suffer from the same death of bottom rot due to moisture . So first I rolled the 22 ga. sheet metal to a 3.5 diameter with leaving a 1 inch overlap using a 3'' piece of pvc I had laying around , then I wrapped it around what was left of the old muffler core ,before I wrapped it I applied rutt land 2000 degree stove/ furnace cement on the top and side seem using vise grips firmly locked the jacket in place , the proceeded to rivet the new jacket seam and to the top section and then using the squeeze out of the cement to form a sealed bead along the seems , Now here might be the problem I do have a welder and I was trying to do this with simple hand tools only ,but I felt welding in the tail pipe would be the right choice , So i used a 1 1/4 hole saw to make the hole for the tail pipe and welded it in at the proper location for the stock fitment . after that I turned my attention to the bottom termination cap for the muffler , I used a divider to mark a 4 inch diameter circle on the sheet metal then another mark line at 3 1/4 , then I cut out the sheet metal at the 4'' mark using tin snips the proceeded to make notches to my 3 1/4 mark , then bent the notches up 90 degree using needle nose pliers , now I turned my attention to the quiet upgrade , I had a old motorcycle baffle that was wrapped with fiberglass baffle packing ,I removed the packing and wrapped it around the secondary baffle thinking that it would lower the noise a bid ,I could have really packed it in there but decided to only so a small wrap . after that was done I ran a bead of the stove cement around the end of the jacket and pushed in the termination cap 3/8 of a inch in to the outer jacket leaving me about 3/8 of a inch of the notched edge sticking out then proceeded to bend the notches over the jacket to lock the cap in place again taking my finger to smooth out the squeeze out of cement , I then drilled and riveted the cap in with 4 rivets . I would normally drill the rivets out and tack weld , but I want to see how they take to the expanding and contracting as the muffler heats up and cools down , So I just put a few tack welds here and there on side top and bottom connection seems . and lastly I brushed a few coats of high temp stove paint on the rebuilt muffler . the cost was 0 because I used what ever I had laying around .
-
6 pointsDO NOT RELY ON A LITTLE BATTERY POWERED IMPACT TO TIGHTEN ANYTHING ENOUGH! (Especially those no hub iron pipe band clamps when the sewer pipe is above your bosses desk!) I torque to 50 ft. lbs. We ain't running these Horses over 40 on the highway or at Daytona!
-
6 pointsThought you'd be further along by now! Rebuilt the exact same k181 as you're doing. Started at the same time as you. Sent it to Maryland Sunday finished.
-
6 pointsSo I changed the wheels out to flat free, and put casters on the front. Now I just need to redesign the handle. If it is fixed so it only moves up and down, it will work better with the casters. At least now it can be backed up when pulling it with a tractor. The handle redesign will make it even better.
-
5 pointsI've had this thing for years. I built it back in 2012, and it has had little upgrades ever since. Original build thread What isn't in the pics are the ramps used to drive on or off the lift. Just regular ATV ramps. Trouble is, when it has a tractor on it, the thing is hard to manuver around. The steering worked fine, but it won't turn sharp at all since it is so long. The other issue is when the tires sit sometimes for months, one or all leak down. Guessing the sidewalls just don't get exercised enough. Even factory mounted tires would leak down. The pics here are the 'before'.
-
5 pointsHappy Birthday to the U.S. Coast Guard. Proudly serving our country since 1790.
-
5 pointsThe price was right. $1.00 for 12 buckets and $1.00 for 12 cans of grease. Minimum bid is $1.00.
-
5 pointsTruth be told about the only time they might be of use is working & using a ground engaging implement in a muddy garden. Maybe turfs & mowing on a slick slope??? No benefit other than the cool factor having them on the fronts but is is different just to say I did that.
-
4 pointsI'd have given you a buck to take the ones I have stacked in the back garage! That's the component in coffee that "gets you going" !
-
4 pointsNo pressure here. If I get this done too fast I'll have to work on stuff I don't want to work on!
-
4 pointsWell if you have a flat the spare is already on? This guy is not taking any chances! Had this biker friend 40 years ago that drove one of those choppers. He wheeled up one day, dismounted the leaned backed bicycle sized seat, straightened his back out and said "man what you got to do to look cool!" Cool is always Cool!
-
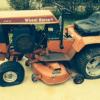
3 pointsSo my youngest son just bought a house. I spent the l5 whirlwind days there doing some repairs, re-stretched the carpet, some minor electrical the PO butchered and some painting. Then we all move him and his wife from a second story apartment. I resurrected a self propelled push mower for him (I’m a nice dad after all). After his first mowing he was groaning, Dad I need a riding mower. He probable has the least mechanical experience of my 3 sons, but has done his car maintenance such as water pumps and alternators type repairs. So a tractor project would be good for him except he now lives 3 hours away. I have enough projects but since I restored the 312-8 for my oldest son I’ve always figured I would do a WH for the other 2 sons. Anyway, awhile back I picked up a Commando 8 parts tractor, no engine and transmission internals in a box. Needs some bearings and typical gears ruined by shift grinding I have two 8 speed transmissions that could be parts donors for the Commando 4 speed transmission or upgrade the Commando to an 8 speed. What do y’all suggest I also have the NOS 8 HP Kohler Magnum I picked up a few months ago. I believe @Sparkey has this same engine shoehorned in a medium frame tractor. Am I correct this should bolt righ in with maybe some belt guard mounting modification. I have some manual and electric PTO parts that I would need some help figuring out what would work best. I have a 36” later model WH mower deck that I originally though would not fit this tractor. Then a few days ago @ACman posted this picture. So It looks like the deck would fit . Could I use a newer front mule drive instead of the side one. My thought is we could get it pieced together and work out any issues for him to use next summer. Then do a full restoration in the future I appreciate all y’all input on what I would run into piecing this together.
-
3 points
-
3 pointsI’m surprised nobody has mentioned... you’re supposed to crank it on until it snaps, then back it off 1/4 turn!
-
3 points
-
3 points
-
3 points
-
3 points
-
3 pointsToday I built this piglet drinker as a prototype, need 14 more now... There are five more slightly modified versions half completed in the workshop, hopefully will get them done by the weekend 🙂 Now it's time for a beer - oh, and upload some more Grizzly Bar action, as we have been digging up the back yard this evening!
-
3 points
-
3 pointsI find my backup cameras to be most useful when hooking up to any type of trailer solo. Backup cameras are like gps's you just can't put 100% faith in them.
-
3 pointsThis is a 16hp Magnum on a Charger 10 (same as your raider 10 except it is a hydro) Also have a K341 on a Charger 12 .
-
3 pointsThose sticks are darn clever technology. They use them here too. If you already know how they work, skip this paragraph...if not, read on! The impact guns apply force only over a small rotational angle before their internal mechanism "releases" to prepare for the next impact. The stick is designed to twist and absorb some of each impact and then untwist before the next impact. By calibrating how much twist it absorbs, the stick allows just the right amount of torque to reach the lug nut. At the tire shop I use they have 10 or so different colored sticks for different torques and they, too, do the final with a click wrench.
-
3 points
-
3 points
-
3 pointsEye candy and a couple hundred bucks of ammo gone in seconds
-
3 points
-
3 points
-
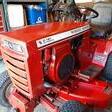
3 pointsSo after @squonk put the voodoo curse on mine when he visited. I had to have all new points, condenser, and coil installed. Plus had the carb cleaned and rebuilt. Since then it runs perfect. Starts after the second pull every time and runs smooth. If I still have it the next time he comes over I will hide it over in the neighbors garage.
-
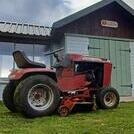
2 pointsI had to take some pics, as all my It turns out all my pictures were of details and assemblies - no portraits. Here’s my favorite little machine and its big bro:
-
2 pointsA busy evening after work today, we got the Grizzly up and running for real. I added some mesh to make it sort finer material, and it works amazingly well! The soil is for the garden and the rocks have new homes in the muddy part of our tracks. Very happy with the results of this little project 😁
-
2 pointsChanged the oil, filters, and serviced both trucks today, it's a job I enjoy doing. I don't have to look on you tube to find out how. I'm afraid rust may be overtaking the rocker panels on my '88 Chevy 1 ton. It was bound to happen sooner or later. I have had the truck 9 years. I am the second owner. Also cleaned out the freezer. I left 2 bottles of beer in there, and they froze and broke. I don't mind cleaning the freezer, but I lost 2 bottles of beer !
-
2 pointsI've twisted off so many bolts and stripped enough threads that I use a torque wrench to keep from over tightening not under....
-
2 pointsAgreed. That's what I was going to suggest. As a DOT certified Commercial Driver I'd like to put in here... a disclaimer. I do NOT believe that a backup camera should be relied upon to reverse any vehicle anywhere on a regular basis. That said, my parents just put one on the back of their camper to increase the margin of safety while they're in campgrounds with tight spaces and small poorly or unsupervised human objects running around. I'd be happy to find out which one they purchased and how they like it.
-
2 pointsThis style is real easy to install. https://www.amazon.com/LeeKooLuu-Wireless-High-Speed-Observation-Waterproof/dp/B07Y36GD9C/ref=asc_df_B07Y36GD9C/?tag=hyprod-20&linkCode=df0&hvadid=416694464775&hvpos=&hvnetw=g&hvrand=1211436350102346795&hvpone=&hvptwo=&hvqmt=&hvdev=c&hvdvcmdl=&hvlocint=&hvlocphy=9018822&hvtargid=pla-904628271963&psc=1&tag=&ref=&adgrpid=94693386675&hvpone=&hvptwo=&hvadid=416694464775&hvpos=&hvnetw=g&hvrand=1211436350102346795&hvqmt=&hvdev=c&hvdvcmdl=&hvlocint=&hvlocphy=9018822&hvtargid=pla-904628271963
-
2 pointsWhere they use those, they plow west in the morning and then turn to plow east in the afternoon. Lotsa room!
-
2 points
-
2 points60 it is ! Even 60 seemed excessive. I used my wifes 1/2" drive, 24" torque wrench, and I turned them a LOT !
-
2 pointsI use grade 5 bolts for the lugs on all the tractors we build. I set the torque around 35 to 40 FOOT pounds and retorque after a bit of use.
-
2 pointsFunny I just saw these adapters on fleabay yesterday. Kind of pricey and not my thing, but I guess it's a quick way to do it.
-
2 pointsI restored almost all I had, but that's me for what my purposes were. There are plenty that are sitting in outdoor bone yards rusting away. You made good use of yours. Some get restored, some cut grass, some plow and some off-road!If I could get away with going to a bar on a tractor, I probably would too
-
2 pointsI'm thinking maybe a 1976 or 77 B80 with an 8 speed may have the 1-1/8" axles factory. No limited slip though. LSD was only on SIX speeds and some hydros from 1967 to 1970.
-
2 points
-
2 pointsYour talking about the techy knock offs not the Kohler ones right Old Red? I don't know any guys that are other than Squonky @squonk and he don't count.


.jpg.8ca755f0175140fd974a8b033d7f3501.thumb.jpg.71f06ed90f3a14a3b565d8387e418b61.jpg)


