Leaderboard
-
in all areas
- All areas
- Markers
- Marker Comments
- Marker Reviews
- Articles
- Article Comments
- Article Reviews
- Classfieds
- Classified Comments
- Classified Reviews
- Wiki's
- Wiki Comments
- Wiki Reviews
- Blog Entries
- Blog Comments
- Images
- Image Comments
- Image Reviews
- Albums
- Album Comments
- Album Reviews
- Files
- File Comments
- File Reviews
- Posts
-
Custom Date
-
All time
November 28 2011 - December 2 2024
-
Year
December 2 2023 - December 2 2024
-
Month
November 2 2024 - December 2 2024
-
Week
November 25 2024 - December 2 2024
-
Today
December 2 2024
-
Custom Date
01/02/2021 - 01/02/2021
-
All time
Popular Content
Showing content with the highest reputation on 01/02/2021 in all areas
-
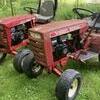
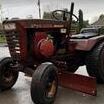
15 pointsthought id share some pictures of my 552 that i found abandoned in a barn here in the uk i managed to purchase it got it home tipped some petrol in it and it fired right up after a points clean i then stripped it down and had it clear coated by a friend who owned a paint shop this really brought out the colour in the original paint i then re assembled it and found out that it had the rare hy2 hydraulic kit on it so i will be re building the pump and ram next i also have a new set of tyres to go on it and i will re spray the rims and also fit a hl5 light set and some hub caps coming from the USA for in in the next month or so along with my rj58 i have purchased hope you like my little project ive been working on
-
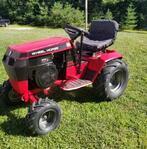
11 pointsHere's the 312-8 I picked up New Years Day. The story.... it was owned by a teenager, his father runs a construction company (SUPER NICE PLACE) He built the custom pull hitch you see on the tractor. Long story short... the tractor "sucked" due to gas clutch release... crummy 22" tires, no weight and so on. He listed for $500... dropped it to $300 after a month... I went and looked... cried about the "clutch" and so on and took it with no attachments for $200. Looking at it this morning... it has 2 loose hubs, the gas clutch has gotta go in exchange for a spring... it needs a full service in the oil and grease department. The 22" rear tires are going in exchange for 23x9.50 turf savers and chains and whatever else I see it needs along the way. 735 hrs... check out front replacement tires, I like the tread. One slow leaks and may need a tube. OH YAH!! ITS AN "SS" And has the ultra rare Hurst Indy Wheel Horse shifter! Be Safe Tony 20210102_093047.mp4
-
10 pointsMore Senior pictures? My youngest niece’s first tractor ride...
-
9 points
-
9 points
-
8 pointsWe got about 4 inches of snow today. Towards the end of the storm the temperature was headed up and the snow was melting fast. We went right out and cleared the yard. Wouldn't want to waste good snow like that.....
-
8 pointsNew shoes for the main passenger car of the SL & WHN RR. The little 3” casters gave up the fight a few days ago, which I knew they would, so they got replaced with 10” pneumatic casters... (the frame is an old folding chair cart. The 3” casters could handle the weight but the didn’t like the asphalt paving...) Rides smooth and quiet as a mouse now...! I’ll be doing the same thing to the caboose when those wheels crap out... but for now they work so I will keep them...
-
8 pointsMax comes into the Shed today and we talked a little. He remembers my Licenseplate and offer me a Christmas Gif. look at the left, isn‘t that sharp - like it fit‘s perfectly to the Wall. Thinkering while supper, because i have let running the heater continousely for the Paint to dry. after supper i went back into Shed to check the Paint. It dries faster than i expected. Great, so i can put the Stickers on and do a optical Check. No high glossy perfect surface, but a nice looking. yeah, nooks licely - hum - looks nicely.. Ok, so i decide i keep it for the moment as it is, because Pistonrings are not available within the next 2 Weeks here. So grab the toolbox and change the second charging Coil to my new built 86 wdg. Version with 1 mm Wire to test it. Yap, it is a little smaller than the Ignition Coil, so there is no danger that it will touch the flywheel. than i rebuild the Engine for now. While rebuild i thinkering of a Predator with 13 HP maybe... but the Tecky will be kept. Depending on the Lockdown here and if i have longer troubles to get Pistonrings, i may swap Interims to a predator until i have the Tecky reworked - we will see. Tomorrow i will do a testrun and see what the charging Coil tells me in result. Edit - sorry i forget to mention - Thanks Terry @Vinylguy for all the great Decals ! Edit end
-
8 pointsTook a stroll on the Senior today... Family snowman building, testing a new crossbow and some handgun lessons too.
-
7 pointsSo i created a thread here when i started the project. - It is finally complete. New bearings/spindle rebuild, blades, bushings, spacers, rubber bump stops, all hardware and paint. I'm happy with it. Cant wait for my first mowing season with my new wheel horse. might even paint the tractor this summer. We shall see!!
-
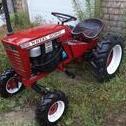
7 pointsMy New Years resolution was "no more tractors"... I almost made it 19 hrs! 🙄 God I love Wheel Horse... this one gets a plow, weights and chains tomorrow. Along with grease and fresh oil... Stay Safe Everyone!! Tony
-
6 points
-
6 points
-
6 pointsMy 1076 has 4.00/4.80-8 Dee Stone's mounted on the stock rims. The original tires were 16-5.50x8's
-
6 pointsThis is why my machinist has me bring him the new pistons before he punches the hole out. A very good practice.
-
6 pointsIf you did that the voltmeter would show 12 volts all the time and run down the battery I would run the volt meter off the ACC or I terminal
-
6 pointsPicked up a nice original 401 suburban this morning. All original just need to find a patinaed fairbanks recoil. Way to start thr new year off with a bang
-
6 pointsTHE 520-SC <<< SC for Snow Chucker Wheel Horse only made a prototype when I got her. Well she don't eat rocks so good. So while I'm at it I'm replacing bearings. She used to be up front of garage but now has to set in back Cause the F-350 nudged it over.
-
5 pointsThat picture brought back memories of my childhood. We would take a few old car hoods tied off to a tractor and all the kids in the neighborhood would pile on and go for a ride. About ten kids could ride on an old Buick straight eight hood. Hope no one out there is looking for that hood!
-
5 pointsKey to safe use - Lots of practice... loading, unloading and shooting... People think guns protect people, but the people holding the gun protect people... in an actual situation the nerves etc. will change things a lot... calm repetition of something practiced hundreds of times will save the day...
-
5 pointsWorking on old Rusty, my winter project, I found water and milky fluid in the transmission. No surprise with the machine being outside a length of time and a bad shifter boot. I drained the bad oil and put a couple quarts of kero in ran it on stands, drained and filled with 90W. Plus installed a new boot. The transmission turned very smooth and shifted nice. I put the project on the back burner from last spring and now just getting back to it. When I pulled the dip stick this year I noticed the oil level was high/milky and I know it was filled up just right when it went out under the tarp. I drained it again and some water came out but not much and the fluid was rusty. I again filled twice with kero, ran and drained. Then once with motor oil. Using motor oil I figured the dirt would suspend in the oil for a longer period of time and flow out with the oil. Looking in the case i could see the axle shaft looked good but the bottom of the case was covered in goo. A quick dip of the magnet and result were confirmed, this was going to take more than a flush. The first pic was the drain magnet and it is pretty cool because if protrudes into the case a bit. I can see were the water followed the shifter lever into the case and across the top then down the side. Most of the rust was coming from the top of the case as it worked loose. Unbelievably, none of the bearings are rusted and there is only a little rust on the axle bull gear that should clean up. Don't steal my idea of that high tech transmission stand either. I did check out @stevasaurus 8 speed transmission video and to see what was going to fall out where! Very help stuff Steve.
-
5 pointsGot 2 of those Ropers sitting out in the FILs barn, don't think they will do 9mph unless unleashed in neutral from the top of one the hills next to the house.
-
5 pointsKicking off the day With a delicious breakfast Scrolling on Redsquare Viewing some topics Seeing wonderful people Helping each other
-
5 pointsI picked up an engine for the 855 today. It came out of a 72 Raider, and I was really hoping I was going to be able to leave it alone and just bolt it in and adapt the wiring, keep the gear-drive starter and flywheel alternator, but that wasn't in the cards. The starter hits the battery, so I had to swap everything back to the belt-driven S/G setup. I should have it running tomorrow,
-
5 pointsBecause i don’t have my Rims until now, i decided today to give the Engine a closer inspection today. first i remove the Head to see what‘s happen. This is what i found. That Screams for a decarbon urgently. Ok, i will do that, the result looks so. than i checked the Head and align it. after that i install a new headgasket. I see while cranking the Engine, the Piston pumps some oil, seems i need new Pistonrings and a rehone the Cylindre. While thinkering i begin to rework The Enginecover a little. So let‘s grab few tools and let us begin. After cleaning and degrease a coat of Primer and after cure a new Color skin. While it needs little time to dry, i stop the work for today. Time to search for pistonrings... or maybe...
-
5 points
-
5 points@Handy DonAn Ole Pilots Trick is to use Red Lights it does not take away from seeing outside Sure Miss the Ole Gal November 4970 Lema. That was 31 years ago!
-
5 pointsGot the front lights wired up and working on Trina's Pig Pen 867. Weight on. Front roller chains on. Plow is mounted. Both of our tractors are ready for snow. Expecting 4 or 5 inches by mid afternoon tomorrow.
-
5 pointsI have not been happy with the way my C145 snow pusher steers with the turf tires on the front. Even with the blade lifted it would push really bad when trying to turn. I had picked up a used set of Carlisle X Trac tires to try out. Yesterday I stopped over to @WHX24's for a visit so I took my front wheels along to change the tires out. BTW the Harbor Freight small tire changer works well. It would work a little easier if it were it was mounted solid instead of on a rolling cart. It is much better than trying to mount them with spoons while trying to hold them still. This morning I put the wheels back on the tractor & went for a test run. With the turf tires I would have to constantly counter steer to keep the tractor strait while plowing with the blade at an angle. With the new tires turning the steering wheel is a little bit harder but, the tractor now goes where ever I point it. Very happy with the new kicks !! Of course it didn't happen with out pics.
-
4 pointsMy dad parked his 79 Chevy pick up under a carport every night but it was still wicked cold. He hung a 100 W bulb between the battery and the engine every night during winter easier starts and quicker warm-up of the engine. That little bulb really made a difference.
-
4 pointsAnother alternative is skinnier tires! I put these 3.50x8 Deestone on an RJ. I wanted to see how well they would look. I think they are good looking! yes a smaller profile than the 4 x 8 tires. last pic has 4x8 tritium next to 3.50x8 tritium!
-
4 pointsDan and I were just talking about this the other day on the price of the Dee tri ribs in 4/8 and how they make a nice tire for the money. Both my plow mules have them on stock rims and they perform well. A pair can be had for 50 -60 bucks. In the little more pricey category the Firestones (last pic) are real nice if you can get over the cost. 70-80 clams a piece. Definitely a beefy tire and better suited to heavier tractors. They have a very pronounced center rib and that's all that hits the ground unless soft dirt. They steer like a dream because of this. This tractor is my first love so no expense spared on her shoes. If I won the lottery all my tractors and a bunch of other fellas tractors here would be sporting these. I think these measure in at 16.5/8
-
4 pointsI'd go with brush on Rustoleum for 2 reasons = ease of application originally, ease of touch up. If you run this on anything other than fluff it will scratch the heck out of any paint... so I would stick with Cheap, easy, readily available...
-
4 points
-
4 pointsExcellent purchase I'd say! LOVE that rear hitch! Nice running Magnum. Low hours. His lack of desire to do minor repairs and maintenance will likely make a great machine for you.
-
4 pointsI have them on my Hesston so I can disconnect the battery. I plan on making a trickle charger attachment that I can plug into them all. Eventually, all my tractors will have them.
-
4 pointsIt's hard to tell, unless you're knowledgeable on JD two cylinder tractors, to distinguish some models and years of an old JD. The styled tractors will look sort of the same, i.e. A, B, G, 50, 60, etc through the styled years, 1939 to 1955. In 1952-53, JD switched over from letter series to number series without much difference in the appearance of the tractor. The big change came in 1956 when JD added yellow to the hood of the tractor. The two cylinder JDs had tons of torque, and a lot of lugging power. And of course, that unique sound - you can tell a working JD in the field from miles from the sound.
-
4 pointsSo Kev, is the disturbing new line "keep your eyes on your own weenie?" Cant beleive i had to say that to you, kinda figured you knew better
-
4 points
-
4 pointsFor sure a deer track. With he amount of melting that I see there, that track was much smaller when it was fresh.
-
4 points
-
4 points
-
4 points
-
3 pointsbeen using these reflectors with a 75 watt HALOGEN BULB , that gives off heat , under my magnum 12 engines , using this aluminum reflector , under the center frame TECH matic frame edge , https://www.walmart.com/ip/Bayco-SL-300-8-5-Inch-Clamp-Light-with-Aluminum-Reflector/14003467?wmlspartner=wlpa&selectedSellerId=1122&&adid=22222222227001247075&wl0=&wl1=g&wl2=c&wl3=40838691632&wl4=pla-78652182872&wl5=9003310&wl6=&wl7=&wl8=&wl9=pla&wl10=101593696&wl11=online&wl12=14003467&veh=sem&gclid=CjwKCAiArbv_BRA8EiwAYGs23K_33Cl7wCOndMK0_2KVgZw13W3ccziNryXbtj6yG_oQUa2jfMjOjhoCFscQAvD_BwE, standing the reflector on clamp end vertically ,holds it simply in place. install from clutch pedal side. just enough heat to really improve cold starting , in a cold shed . been regularly using it , with no issues , and instant starts , just an experiment , that works for me , pete
-
3 pointsI cobbled together some old tire chains for the C-145. Hopefully now it will get some grip for my son. With a little snow coming tomorrow maybe we can test it out.
-
3 points
-
3 pointsFront and rear, nothing better looking than Firestones! They perform well too!! For example @prondzy Randy
-
3 points
-
3 points
-
3 pointsEver hear of the 'Baking Soda and Super Glue' trick? I'm sorry I didn't take any pics of the process but with Super Glue and Gloves I didn't dare touch the camera, and I didn't even think of taking 'before' pics. I honestly didn't think it would work and there would be nothing to write about. Here's a pic of the hydro knob. You can just make out the repair and I've outlined the area on the right side that was missing. In actual light without the camera flash, the difference is even less noticeable. You could paint the knob I suppose but that would look 'too new' for my taste so I went with the black sharpie method described below. The knob on my hydro lever and on the mule drive both had big chunks out of them. I had some time on my hands so I decided to try the trick... and was EXTREMELY happy with the results! Basically what you do is clean the surfaces very well however you like. I used soft scrub and a teeth brush. Rinse and dry. I used the 'runny' super glue but I suspect that the medium would work better and not run all over the place. Apply the super glue to the area and with a 'coke spoon' or something similar, dump some baking powder on (QUICKLY!). I used a popsicle stick as a shovel. The super glue INSTANTLY sets ROCK HARD! and gives off copious NASTY FUMES! (see warnings below) Do a little at a time, take your time, and keep repeating the process until the missing area is built up past where it needs to be so that you can 'machine' it back down. For the hydro knob I found that a 'Sharpie' pen barrel was just the right size to stick in the hole and give a form to keep from having to do excess shaping afterward. BUT!!!! I didn't think it would... the glue stuck to that pen barrel. I suggest finding something that it wont stick to or possibly a thin layer of vaseline on the pen barrel. After I got the knob built back up I rough shaped it with SHARP files. When I say this stuff dries ROCK hard, I mean it! It's harder than the phenolic material. I don't know why I didn't think of using my Dremel tool with a sanding drum but I bet that would work dandy. After the rough shaping I put it in my benchtop lathe and used a strip of fine sandpaper to finish it off. Finally, I found that Black Sharpie bonds to the super glue extremely well. Paint only the white part of the repair with the sharpie and immediately wipe it down with a paper towel. The end product is nearly indistinguishable from the phenolic. You have to know where the repair was in order to see it! The mule drive knob was more challenging due to the flutes, etc... I felt like Michael Angelo sculpting a statue. I used a combination of flat, round, and jewelers files to shape it. It came out perfect... again, almost indistinguishable from the original. I intentionally left a few gouges and stuff so it looked like the rest of the knob. The scratches you see are on the original part of the knob, repair is just below that, looking close at the pic I could probably smooth it out a bit more. The repair starts at about 0530 and ends at about 0800. I used three of the small tubes of super glue from the dollar store (2 tubes in a package) and a couple tablespoons of baking soda. So material cost was nil. I did spend about 6 hours total, it's a pretty slow process but IMHO well worth the effort. Very pleased... now for the WARNINGS!!!!! WEAR GLOVES AND SAFETY GOGGLES!!!!!!!!!!!!!!!!!!!!!!!!!!!!!! WORK IN A WELL VENTILATED AREA, OUTSIDE IF POSSIBLE!!!!!!!!!!!!!!!!!!! The FUMES are VERY NASTY and if they get in your nose or your eyes you will be in a world of hurt. You may end up in the emergency room. I imagine they could permanently damage your sinuses, lungs, and eyes. They may even be POISONOUS. (cyanide? Dunno... maybe) If you try this, do not take these cautions lightly PLEASE!










(800x673).jpg.cc3aefcd170c6bab1f22408014a1eb53.thumb.jpg.37c62115dec7a1fc65b8e86afd6af643.jpg)


