Leaderboard
-
in Posts
- All areas
- Markers
- Marker Comments
- Marker Reviews
- Articles
- Article Comments
- Article Reviews
- Classfieds
- Classified Comments
- Classified Reviews
- Wiki's
- Wiki Comments
- Wiki Reviews
- Blog Entries
- Blog Comments
- Images
- Image Comments
- Image Reviews
- Albums
- Album Comments
- Album Reviews
- Files
- File Comments
- File Reviews
- Posts
-
Custom Date
-
All time
November 28 2011 - December 2 2024
-
Year
December 2 2023 - December 2 2024
-
Month
November 2 2024 - December 2 2024
-
Week
November 25 2024 - December 2 2024
-
Today
December 2 2024
-
Custom Date
12/05/2020 - 12/05/2020
-
All time
Popular Content
Showing content with the highest reputation on 12/05/2020 in Posts
-
14 pointsKati the other day tell‘s me she knew what she want for Christmas. She likes a bigger Kitchenplate to work, where the Stove side is. The old Kitchen was built in from one of our previous tenant and had lot‘s of rips and cracs in. Her wish, becomes today truth. So yesterday after Work i started to Hardware Store in the hope i will find exact the same Kitchenplate in the optics as before. - as an addon o buy her also a new watertap and a round basin. I begun with dismount the old Kitchen where i see a horrible result of wrong built. Because of worse sealing water was able to go behind kitchenplate... Even by the Watertap.. The oven was cutted wrong and bothed with a piece of Wood to fit. just sealed by a little Silicone in the backside. Boy, that old kitchenplate begin allready to compost in the house... 😳 So i put the new plate on the Top and sealed it arround. than i make some marks and templates for the Basin and for the Stove. Ok, i maybe cutted it a bit lazy, but hey it is Saturday..🤪😂 After Cutting i check if all fits as it should. Yap, it fits perfectly Than i cutted the hole for the Stove and fixing all the under cabinets and even align them together To get a little addon i set the whole cabinets 13 cm to the left, to have on the right side more Space for a push pull towell dryer and sealed all holes with silicone, to prevent such waterdisaster again. Than i checking the Stove and while all is well, i glued it with Silicone into the Plate. When it must be exchanged someday a Stanley knive is your Friend here. Even the same on the Basin The whole plate will be screwed to the Under cabinets and they will be screwed together. So a very stiff Kitchenline is now set up here. under the Oven i will built later a drawer, but i need bit more material for that Task. The Whole Kitchenplate is sealed thru the Wall‘s so Water can‘t affect into such a disaster again. The final builds the Deco Lines between Wall and Kitchenplate. And with that Topper she can also use the basin as Workplace. I think She is glad.
-
9 pointsWe've got a right regular good ole fashioned nor'eastuh goin' over tonight. NWS forecast is for 12"+ but it doesn't seem like it will stack quite that high. We got the walk behind snowblower out and running. Did some final yard cleanup. Rearranged the outdoor workshop some so we could get the horse in there for winter changeover parts. Installed new to me 2-link ice cleat chains, put the plow on and added a set of steel weights to the rear wheels. I have another set of the same weights I'll add later but needed longer bolts. Did a quick test to see how she went.
-
8 pointsAnyone else see the "Strange and Funny Lawn Mowers" on the MSN Home Page. Here are two of the WH ones. It also showed the Wheel horse Dan tilt-bed model.
-
7 pointsThanks to this forum and sharing members I making some progress on the dozer blade for the 312-8. I appreciate all the input and ideas todate!
-
6 pointsSo, in “treat all the kids equal” form, I am wishing my baby girl a late night happy birthday. Jada’s 13! Ahh!!! It really wasn’t that long ago!
-
6 pointsWaiting patiently... How ‘bout you send some of your snow our way @ebinmaine...?!?!
-
6 points
-
6 points
-
6 pointsAs noted yesterday in response to @WHX24’s liberal interpretations of words and their correct application in the hitherto strict world of Haiku, The Haiku Police have given up... they are defunded and relegated to putting virtual trophies for submitted Haikus in everyone’s shed... And PETA has now filed a lawsuit against The Haiku Police for its use of the emoji, claiming it depicts an inappropriate visualization of animal abuse... The Haiku Police are referring all further inquiries to attorneys, who may or may not ...
-
5 pointsSaid to he double hockey sticks with the work I was supposed to get done around the ranch so built a nice fire in the shop and played with the new love of my life a 1045. Little backround here Mike @prondzy had this tractor and was not even a bucket list tractor for me and I had saw it many times at shows it just never dawned on me how stupid I was for not making a 1045 a bucket list tractor. We worked out a deal at plow day for a 854 that needs love but ran well and has character that wouldn't quit. Perhaps Mike will give us a update when he works his magic on her. I thought I might have got the short end but not anymore. I mean whats not to like? A crossover in early '65.... it was the last of the roundhoods and round fenders & tool box ..... big block stuffed in a shortframe but yet with the "new" square hood. How can any horseaholic not love that? Its like puppy dogs and kittens and a good stable mate for the 1055. This girl is going to be my ride around at next years shows no doubt. Mike says I resto it I'm out the club! I Don't feel so bad now Mike about saddling you with an old sway back 854 that needs both new axle bearings and lots of other love. This one needs new left side. She ain't a gonna get it right now unless somebody comes up with a way to do it and not have to split. Don't want to disturb all that nice stuff nestled in back ther. Maybe a PO had a deck on it once , lots of left turns, and that would explain why the right side was goodntite? Not real bad slop on the left but doubt just seals would stand up. She did get new keyways & set screws as both keyways were trashed and the woodruffs were trashed. Hubs pretty much slid right off as did the steering wheel and all the other rites of passage 'cept for the hitch pin ... kroiled, freed up and battle left for another day. Lower steering gear was pretty much knackered but repaired well. All up dated wiring & got her running like a swiss watch !
-
5 points
-
5 pointsUnfortunately I couldn't catch the culprit in the act could it have been this lil V6 wonder with the Caddy wheels or something with a bit bigger set of lungs...
-
5 pointsThat's the end result and I'm pretty happy with how it turned out. Now just waiting for the next storm.
-
5 points
-
5 points
-
5 pointsSmoke detector is only way I know supper is ready!
-
4 pointsPiddled around a bit this morning with Rodger’s old M. Worked on the carb a bit more and got it reinstalled, but she still wouldn’t start. Little bit of diagnostic work and I discovered the old coil gave it up. Borrowed the coil off my Super M and she cranked right up. Ignore the flat tires in the video, tires and rims are shot anyway and I needed to get her to more level ground. Planning on next weekend rounding up some help and putting the tires and rims off the Super over on her until I can afford a set of new ones.
-
4 pointsWe all ...well most of us anyway have come across battery trays with the hoobie doo that holds the the battery retainer on either corroded off by old battery acid or just plain snapped off. Just thought I'd share how I repair them. First grind off the remains of the factory ones. The holes are from some PO cobblement. Next cut the heads off two 1/4-20 x1 1/2' bolts. longer bolts will work too as long as they have a unthreaded shank. You can always bob them to length. This part is my favorite as I might have been a blacksmith in a past life! Heat them to cherry red and commence to flatten the unthreaded shank. Use your nuts to protect the threads and something for the vise grips to bite on to. Hammer them to shape. you don't need a BFH, I use a small ball peen. Anvil is a chunk of railroad iron. Reheat & repeat as required to get the desired shape. Doesn't have to be perfect as it goes to the bench grinder for final shape. Measure out and clamp them in the desired location on the tray. Weld them on. I braze mine on I am not a welder yet. I have guys that are welders that I pay to be my friends so maybe when they tell me to stick it I'll buy a welder! Pretty sure the Ponds spot welded them on so I coulda took them to work but this was a giterdone. Make a strap for it and all done ....its Miller time! Ready for red. This one is going on an original so I just spot it a bit with rusty primer and it blends in with most fine patinas.
-
4 points
-
4 points@WVHillbilly520H if you ever figure out who the rabble-rouser is that done that tell them I said "Nice work".
-
4 points
-
4 points
-
4 pointsThanks for the positive Feedback. Oh, forgotten a Pict, i also sealed and insulated the Plate on the underside with a hightemp selfsticking Aluminum Foil especially where dishwasher and oven is. I used 2 layers with 6 cm width and 0,5 cm overlay and decide to expand it to the complete front of the Plate. I think it is a good idea. That also prevents any Moisture can drain into the Plate. lot more place to Work for my Honey. The only thin what annoy‘s me is, the dust hood doesn‘t allign to the Stove now, but i thinkering may be to exchange it with a bigger one. But that is also another task maybe later on. She love her new Kitchen.
-
4 pointsReminds me of the stone fences on the Aran Islands in Ireland... I was fortunate enough to visit about 30 years ago... Centuries in the making... it is a beautiful place... the soil is from composted sea weed brought up and dumped by the farmers over the years... Notice the “gate” - they just knock down the wall, move the animals, put wall back up... don’t waste wood on a gate...
-
4 pointsSearching back hoe stuff and up pops this... Man he did great stuff!!! Easily adapted to most models...
-
4 points@SylvanLakeWH I motion that @19richie66 not be punished by the because although the syllabic structure is a tad off count the accuracy and comedic count is dead on.
-
4 pointsHorses are red Fords are blue A garage full of green is extremely taboo. best I got
-
4 pointsI have reused kohler head gaskets by spraying aluminum paint on them and they are still running today. Randy
-
4 points
-
4 pointsWorked on the 1045 a bit more tonite... after the battery tray fixed and got the batt back in rolled her over to just see if would turn over as should and she fired right up ...... with no oil in.... whoops.... musta been a little gas in the bowl yet! I am head over heels in love with this girl Mike @prondzy! Got the steering fixed up tighter than a nun's ....never mind tell you later.....
-
4 points@Achto turned me on to using angle instead of flat stock... makes for a bit beefier strap. Longer thread section gives an option to make some cushions. I also use some foam tape on the bottom & back side for cushioning as well. Dan has a to the cushion hooby doos.
-
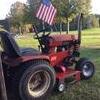
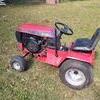
3 pointspullstart requested an updated video because my original square hood now wears a stretched round hood. New look, same WH, tons of fun. Who else has air under their front wheels? 00105.MTS
-
3 pointsLooks great just as it sits! Maybe paint the rims, but that’s it. I too love that square hood round fender stuff, couldn’t find one near me so I cobbled up a 657 and made my own. Someday I’ll come across the real deal for sale.
-
3 pointsJust... now and come out when they are both in their mid-20’s... Great stuff!!! Enjoy!
-
3 pointsI'll consult my Packaging And Distribution Department and we'll be in touch.
-
3 points
-
3 points
-
3 points
-
3 points
-
3 pointsSaw it thru on the inside with a sawzall or hack saw blade. Then peel it in with a chisel. Tip... make the saw cut where you can use the chisel.
-
3 pointsWell I went a half hour east of me and got these for 40 bucks. I was fortunate the people I got them from were good enough to to hold them for me. WV Hillbilly was correct when he said his didn't line up as the wheel hole spacing is 5 inches and the weights holes are 4-1/2 inches. I marked the spots with paint on the end of a 3/8 bolt, center punched and drilled them to 25/64. After checking fit, I wiped them down with gun cleaner and painted them Regal red. Each one is a hair over 20 lbs so I can't wait to see if they help. I also added a pic of the 9 inch diameter by 4-1/2 thick steel I'm trying to get cut.
-
3 pointsFound another pic of my 1999 classic Chevy K-2500 350 engine with 3.73 rear, average 13 mpg new in 99 up at camp. Real nice simple truck, a thing of the past unfortunately.
-
3 pointsUPDATE..The evolution of my wheel stander. The original version is my avatar from the video. I then tried a round hood and decided it needed stretched. My final version photo is the stretched side shot in front of the garage door, while the original has a blue engine
-
3 pointsI didn’t mean to throw your haiku into a hiatus. I retract my attempt. try this again: Horses red gasoline fumes Chicken wing
-
3 points" This part is my favorite Use your nuts to protect the threads and something for the vise grips to bite on to. "
-
3 points
-
3 pointsAt the old house ours did that about 2am in the summer, freaked us out us too, heat was shut off, no garage, nothing to trip. Just an expired co2. They should make countdown timer or some flashing light to warm you it's expiring
-
3 points
-
3 pointsI had to go out and put the hood back on to see what it looked like. Even has my name on it !
-
3 pointsAs a Medico, I had a couple come in one night with dizzy headaches and red cheeks. They smelled like burnt fuel. They were using portable kerosene heater inside “ with a window open” Danger close i bought some new smoke and carbon monoxide detectors with lithium batteries it’s you and your families life. Don’t skimp






.jpg.8ca755f0175140fd974a8b033d7f3501.thumb.jpg.71f06ed90f3a14a3b565d8387e418b61.jpg)
