Leaderboard
-
in all areas
- All areas
- Markers
- Marker Comments
- Marker Reviews
- Articles
- Article Comments
- Article Reviews
- Classfieds
- Classified Comments
- Classified Reviews
- Wiki's
- Wiki Comments
- Wiki Reviews
- Blog Entries
- Blog Comments
- Images
- Image Comments
- Image Reviews
- Albums
- Album Comments
- Album Reviews
- Files
- File Comments
- File Reviews
- Posts
-
Custom Date
-
All time
November 28 2011 - December 2 2024
-
Year
December 2 2023 - December 2 2024
-
Month
November 2 2024 - December 2 2024
-
Week
November 25 2024 - December 2 2024
-
Today
December 2 2024
-
Custom Date
12/04/2020 - 12/04/2020
-
All time
Popular Content
Showing content with the highest reputation on 12/04/2020 in all areas
-
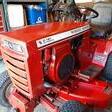
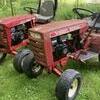
10 pointsWell I bought this over a month ago and didnt have the room for it in my garage, so after purchasing it I took it straight over to a friends house. I finally brought it home today. Couple question for you guys. First one is I put the plow on. The only places it connects to the tractor is at the rear end and where the lift lever connects to raise and lower it? Seems like I have it on there right but having never done it I want to make sure. Second question is that it is hard to put it in gear without it grinding gears. Maybe if some of you can tell me what to look for or what adjustments to make I would appreciate it. I said earlier that I like the wood grain look so @Vinylguy made me a special set to put on it. Well I didnt want to wait until spring to put them on so I took the hood off and brought it inside to warm up so I could put the decals on. I wasnt going to repaint it anyways. Im ok with the paint chips and scratches. Great job Terry thanks a lot, love them. I will put the rest of them on another day. I also changed the seat. Makes it easier to step over it to sit down. Last photo is when I got it. Love to hear any feedback, tips or suggestions.
-
10 pointsI had to go out and put the hood back on to see what it looked like. Even has my name on it !
-
9 pointsWe all ...well most of us anyway have come across battery trays with the hoobie doo that holds the the battery retainer on either corroded off by old battery acid or just plain snapped off. Just thought I'd share how I repair them. First grind off the remains of the factory ones. The holes are from some PO cobblement. Next cut the heads off two 1/4-20 x1 1/2' bolts. longer bolts will work too as long as they have a unthreaded shank. You can always bob them to length. This part is my favorite as I might have been a blacksmith in a past life! Heat them to cherry red and commence to flatten the unthreaded shank. Use your nuts to protect the threads and something for the vise grips to bite on to. Hammer them to shape. you don't need a BFH, I use a small ball peen. Anvil is a chunk of railroad iron. Reheat & repeat as required to get the desired shape. Doesn't have to be perfect as it goes to the bench grinder for final shape. Measure out and clamp them in the desired location on the tray. Weld them on. I braze mine on I am not a welder yet. I have guys that are welders that I pay to be my friends so maybe when they tell me to stick it I'll buy a welder! Pretty sure the Ponds spot welded them on so I coulda took them to work but this was a giterdone. Make a strap for it and all done ....its Miller time! Ready for red. This one is going on an original so I just spot it a bit with rusty primer and it blends in with most fine patinas.
-
8 pointsMy hauler. Had the rj58 about 15 years. Hard to see tractor and no the wood is not on it
-
7 points@Achto turned me on to using angle instead of flat stock... makes for a bit beefier strap. Longer thread section gives an option to make some cushions. I also use some foam tape on the bottom & back side for cushioning as well. Dan has a to the cushion hooby doos.
-
7 points
-
6 points
-
6 pointsI have 2 of them that I installed at the same time. One day both of them started going off with in about 10 min of each other. Freaked out !! Opened all the windows, took the detectors out side, couldn't get them to stop. When I finally removed the batteries I noticed the installation date that I had written on the inside of them, it was 5yrs & 1 day previous to this incident. Under the date that I had written in them was a notice that the unit expired after 5yrs. Apparently on the units I have an alarm goes off not stop on their expiration date. I even tried leaving the batteries out for a while and then reinstalling them, alarm still went off. Shut the widows, warmed the house back up & purchased 2 new detectors. Life back to normal. Very good items to have in the house, but remember that most have an expiration date.
-
6 pointsIf you really want to be cool you should put triples on it, than you would be cooler than the dual people
-
6 points
-
5 points
-
5 points
-
5 pointsDan is absolutely correct.. sensors normally go bad after two or three years for the cheap ones. In my business go on ALOT of calls fore CO alarms going off. Most times it's a faulty unit but can't be too careful as I have found some issues at times. Had a call the other day and a gal was charging her golf cart in an attached garage and that set them off. CO poisoning is nothing to mess around with so watch out for running tractors in enclosed spaces. I've caught more than one buzz running tractors in the shop!
-
5 pointsWell I took my extra 520 wheels with 23/10.5 AGs and did a little mock up. Suffice to say it looked cool but it would be ridiculously wide! I think I may search for another set of 520 rear rims and put 24/12/12's on them. That would be more practical and increase weight (loaded by a place in Maine, thanks Eric) and stability.
-
5 points
-
5 pointsWorked on the 1045 abit, put some cushion where the gas tank was rubbing. Shoulda put the tank in before bolting the motor back down tho!
-
5 pointsWell, fellas, I am trying something a little different, and although it may sound crazy, it has it's origins in WWII. The guys who kept the fighters in the air did not have te best access to spare parts and they reused the metal head gaskets by first applying aluminum paint. So after flattening the decks of the cylinder head caps as much as possible, i took some rather well used and thick Rustoleum Aluminum paint and tried it out. The paint was really thick and nearly a paste, but it went on OK, and i discovered that my finger smoothed it right out flat as can be. I did the gasket as well and even in cold weather at about 50 degrees and sunny, they were nearly ready start to finish in about 30 minutes. The source for this info was the guys who use pulling tractors with the old cast iron Kohlers. i figure that I am not gonna hurt the tractor by trying it out. Don't worry, I cleaned the paint off where it did not belong... I also found out that the style of head shown here is about the best for a working tractor, but the ones with the centered spark plugs are sought after for pulling tractors i posted previously about using ultra high temp JB weld on the pitted head [first picture] don't do it. That stuff is pretty rough and does not harden correctly without heat. So this head cap is gonna be a test bed for regular JB weld and aluminum application while being checked at 5 hours.At least the inside edge has decent flatness and no corrosion.
-
5 pointsHoly crap have I got the haulin pics! Dan says it fits it ships! When we went to pick up Denny's 520 we had to pull the cores out of all four and then it fit by 1/4" !
-
5 pointsPlunge and almost missed it but did you have to ring Kev's bell ?!?! OK few of mine and maybe one of Dan's @Achto 's... Portage Show 2019 WH feature..Kev knows ...
-
5 points
-
4 pointsI have 40 acres of glacial till in the Adirondacks and I can't stick a shovel in the ground anywhere without hitting a rock. There is some decent soil in between in some areas but every time I challenge the earth I fight rocks. Some as big as vehicles but even when the big ones are removed I still fight rocks. ROCKS! Anybody used one of these? Or anyone want some rocks?
-
4 pointsi have three of them and one of them just went off. i don't do this often since my daily driver pickup has to sit in the driveway , but i was warming up a car in the garage (with the garage door open) and the one in the entryway from the garage triggered . in 35 years of living here it's never happened before. glad i have them , now i need to get one in the garage
-
4 pointsSearching back hoe stuff and up pops this... Man he did great stuff!!! Easily adapted to most models...
-
4 points
-
4 points
-
4 pointsJust buy trina some brazing rods for Christmas, they make good stocking stuffers
-
4 pointsI agree that a single tooth might be all that the tractor can handle in very rocky soils. It would allow the tooth to flex the arm and slip around one of those furniture-sized rocks where a multi-tooth implement might get stuck--might be able to run deeper, too. At some point, it seems like Brinly offered a ripper tooth as a swap for the plowshare on their moldboard plow arm--not in their current lineup, though (I suspect the AG Supply's 16" bolt on's might work here if you already have the arm). Nice feature of this setup is the adjustable angle of attack but I'd think it might need some weight to get it stay down in rocky soil since most WH sleeve hitches are gravity only for down pressure. Am on the lookout for something like this to make or buy for use on the Tug Hill in upstate NY (west of @DennisThornton's neck of the woods)
-
4 pointsThe square hole in the rim is the correct size for the shoulder of a 1/2" carriage bolt.
-
4 points
-
4 pointsFirst off, I’ve never realized how much the burnout dude is wheelin’ that thing! Second off, I was a broke teenager... meaning I had an awesome job or two, making tons of dough but had jet skis, quads and whatnot to be dumping money into to afford a decent set of tires.
-
4 points
-
4 pointsHeaded to the BS 2018 I think this was heading to AJ's ...Dan making room..... For another it fit it ships! Can't go to a show without the RR can we?
-
4 pointsIts nice to have especially when selling tractors and other machines. I just drive them on to the flatbed then roll the bed right onto the buyers trailgate, and roll the machine in. Plus its 4x4, diesel, and an slt model still pretty much new with 55k on it. They gave it to me with 23k
-
4 pointsThats what I did with no issues... @pullstart has her now... perhaps he will return her to the fat bottom glory days...?
-
4 points
-
3 pointsI know the length is going to vary based on what weights you're using but are they all 1/2" carriage bolts? I need to pick some up on the way home...
-
3 pointsI thought this is a cool little backhoe for not being your typical Kubota or other brand scut. They have it for 5000 which isn't too bad considering used Terramites seem to go for 8000 and up.
-
3 points
-
3 points
-
3 pointsWhat if you turned the points around with the slope forward Maybe it would take some tractor down pressure to keep it in the good soil, but would ride up over the rocks Because of our hard clay soils when dry I saw a local farm pond builder with some homemade pivoting rippers on the back of his dozer blade. Going forward they pivoted horizontal, then when backing up he just barely drug his blade and the rippers rode against the back of the blade and dug in. No lost motion.
-
3 pointsI forgot one. 1930 Ford Model A roadster pickup. It's what I learned to drive a manual with many years ago.
-
3 pointsOn the plus side you'd be a nice silver shade like the character Colossus....
-
3 points
-
3 points
-
3 pointsThe Haiku Police considered the source, proximity to excessive cheese consumption, association with known organized syndicates, and affiliations with questionable folk from Michigan, Maine and Minnesota, and have given up...
-
3 pointsI used a Mr, Gasket #42s rated at 2-3.5 psi. No return line, works great.
-
3 points
-
3 points
-
3 points
-
3 points


