Leaderboard
-
in Posts
- All areas
- Markers
- Marker Comments
- Marker Reviews
- Articles
- Article Comments
- Article Reviews
- Classfieds
- Classified Comments
- Classified Reviews
- Wiki's
- Wiki Comments
- Wiki Reviews
- Blog Entries
- Blog Comments
- Images
- Image Comments
- Image Reviews
- Albums
- Album Comments
- Album Reviews
- Files
- File Comments
- File Reviews
- Posts
-
Custom Date
-
All time
November 28 2011 - November 16 2024
-
Year
November 16 2023 - November 16 2024
-
Month
October 16 2024 - November 16 2024
-
Week
November 9 2024 - November 16 2024
-
Today
November 16 2024
-
Custom Date
04/19/2020 - 04/19/2020
-
All time
Popular Content
Showing content with the highest reputation on 04/19/2020 in Posts
-
15 pointsSo like most of you who have been at home, I have been catching up on a few things. For me the following: I finally got to finish all the wiring/lights/water to the garage. I used 4' damp location LED direct-wire lights I got from 1000bulbs.com. Very happy with them. Snap in mounting brackets included. Garage doesn't get wet, but it's very humid in FL at times and things get damp. $35 or so each which was pretty reasonable. I used 8 (4 per side) that fit exactly on the 4' roof braces. Building 24' x 40'. Posted for "intruders" Lights I used. I FINALLY got the 1276 up and running and took her out for a spin. And decided to put fatty red spark plug wires on my Harley. Hope all is well. Fortunately, we don't know anyone (friends/family) with the Covid thing so far . . . . can't wait to get back to business
-
12 pointsI’ve always thought that the 520 seats with the arm rests were nice, so when Ray @grinchsr listed a really nice one in the classifieds I grabbed it. Don’t get me wrong, the 416 has a nice seat too, but this one is just a little extra! Ray, great to meet ya!
-
10 pointsSince i hadda ask help, might as well let the Horse outta the bag, lol. 3 decks, non factory belly blade imma c if i can get fitted, snowblower worth keeping (i think), plow, and almost new set of vbar chains. Also a set of front rims n tires; WH branded rubber😊 AND Its on my list of 'BIG WANTED' Horses...the mighty c160! Tho ida preferred an 8 speed...*shrug* All for a boomstick that was collecting dust, n got 50bux to boot. I kno i did ok😉
-
8 pointsWell some may have seen this project in different posts. I will run through the story quick. Picked it up last weekend after seeing an ad for it on Craigslist. Owner just purchased the house and things had been left behind that he just wanted gone. He told me I could have the tractor for 20 dollars but later gave me everything for free. My first trip I picked up the tractor and the dump cart. I am not @pullstart so that is all I had room for in my truck. After getting it home and posting it on here we are all in agreement that it is a Speedex frame and rear end, a Borg Warner 3 speed transmission, an Alling-Landers gear reducer, a Briggs 8hp engine and a Bonanza hood and grill. A true Mad Scientist fabrication. Took me little time to get in running and moving under its own power. Surprised as it sat outside for a few years and I have limited mechanical skills. I went back today to get the rest of it today, a plow and lawn roller. Started raining and I have to work in the driveway so I couldnt finish monkeying around with it but here it is so far. I think it is missing some mounting brackets for the plow. Have to try and figure it out when rain stops. What cha all think?
-
8 pointsReplaced my Rigid drill press with this vintage Delta. Gonna reseach and see how old it is, then just clean it up abit. Course it's going to stay original.
-
8 pointsSo much for ‘only need one tractor’ HA. Snatched this one owner out of a barn today, been sitting for years. Checked the fluids, put a quart of gas in it and hooked a set of jumpers up for the heck of it and she lit right up! This ones gonna get belts and maintenance and go bye bye, perhaps to the big show if someone wants it
-
8 points
-
7 points
-
7 pointsI have been looking for a Farmall M for several years now. Had the chance to buy several H's over the years, but always skipped over them in hopes of finding an M. Wednesday night I went to see my friend Glen with the intent of trying to buy a 1949 Case S that I knew he had in the barn. Long story short he wanted way more for the S than what I could afford to spend. So our attention turned to the two M's that were on the other side of the barn. He said he'd take $1200 for the one that had 3 pt and $650 for the one without. Thought about it for a bit and offered him $600 for the one without, and he took it. Then we went out in the pasture and found an old John Deere pull type brush beater. Ended up picking it up for $150. The old M is pretty rough looking but starts right up and runs well. Got her home and changed the oil, gonna finish checking all the fluids and greasing her up tomorrow, then might find a couple tires to put on the beater and try to start cleaning up some of this overgrown mess around here.
-
7 pointsWell, I have been trying to get a rototiller for a few weeks and found one for sale with a wheelhorse attached. I promised the wife that we could always sell the wheelhorse and keep the rototiller, but I have no real intention of doing that 🙂 Anyway, it's another C125 like my other one, although it's a bit rough and ready. Now we can get the garden done!
-
7 points
-
7 points
-
6 pointsAWESOME Is that a brake pad on the tire? That could get ugly with the chains on. This may be some of his work.
-
6 pointsI wouldn't mind drinking a few beers with the dude that built that machine
-
6 pointsWhile I was messing around learning how to weld, Trina and her mom were building a little hedgerow in the front yard. There is going to be yellow forsythia some sort of purple bush plant deal and some small evergreens mixed in. It'll be a border on the front lawn. They used her favorite 867 and her 1976/7 Ohio Steel trailer to mix and move the loam and Pro Mix.
-
6 points
-
6 points
-
6 pointsI started on fabbing up the front axle. Some beads came out good. Others are ugly but functional like me. I've been mentally processing how to accomplish what I need for the front axle given the materials, skills, and tools I have. I decided that as much as I like the idea of having an axle that looks like one solid tube I just don't have the tools or skills to cut the angles required... Yet... So I went with a modified version of the step down plan. What I've come up with gives me the width at 40" or so after tire installation. The frame height addition is 4" plus the axle I used is 1" taller. (Not counting additional tire diameter). Also I put a forward sweep of 2" in the new piece. Total front frame lift will be about 8". I'll cap all 6 open ends and also the V notch where I put the sweep. Materials used were at least 1/8", maybe 10ga. I didn't confirm but there's plenty of meat there. Welding is all with the old Lincoln 225 AC set to 105 amps. 1/8" 7014 rods. Here's a pictorial. I cut a piece of 2" tubing 23" long and cut 3 sides, relief cut the fourth and hand bent it to a 2" V. Set the pieces in place and triple double checked where I was... Cleaned all the paint and mill scale off the metal and burned some rods. Here's where I was at yesterday at quitting time.
-
5 pointsI decided I wanted a small wagon to pull behind my horse. Started out with hubs and spindles from a snowmobile trailer. I should have taken pictures of earlier steps, but I’m more than happy to supply measurements and close up pictures if anyone wants them. More pictures to come..
-
5 pointsThis morning I got the steering shaft cut, it was easier to cut/weld a new gear on the end of the shaft than it would have been to remove the steering wheel. Here is the difference between the two steering shaft gears first one is the standard steering gear Here is the reduction gear I cut and welded the two halves together using a coupler from the hardware store. A little math was needed to figure out how much needed to be removed. Now that the steering is done i needed to make a brace for the hydraulic pump bracket. When the pump is under load it flexes the bracket and the belt squeals. Before With the new brace this thing is super rigid. The brace is close to the belt but it will be okay there is enough clearance. To aid in the manual belt tension adjustment i have been throwing around the idea of a screw type adjuster. No better time than the present, so heres what i came up with turn the nut on top clockwise to tighten the belt counter clockwise will release tension. Looks like its gonna work great And then i got the motor bolted back in not bad for a days work.
-
5 points
-
5 points
-
5 pointsNo worries, will become a supporter, this is such a great resource. It's a bit like the forum I use for my RV, so useful.
-
5 pointsI wont ever paint it. I wiped it all down with some boiled linseed oil. It still needs more cleaning. There was caked on dried out grease and dirt all over it. Scrapped and power washed alot but needs more. I have to figure out the plow. Dosnt seem like it would push a lot without folding up. I can raise it but only about an inch of the ground. I am thinking with the other tires I can lift it higher. I think of Chitty Chiity Bang Bang when ever I see it. But instead of Chitty... Sh&^y Sh*&Y Bang Bang. Forgot to add I got these tires and rims as well. Havent tried putting them on yet.
-
5 points
-
5 pointsC'mom man, it's Sunday, the sun is out for a few hours, it's warm and we are still in lock down... and you had to say the word "math"...
-
5 points
-
5 pointsHere you go Mike. First, measure the width of your tire...say it is 8". Now measure the width of the chain...if it is 14", you should have about 3" of chain hanging on each side of the tire. 14-8 = 6 6/2 = 3. Now measure from the center of your axle to the outside edge of your tire...say it is 12"...now remember you have 3" overhang on each side 2*(R - 3)*Pi = Circumference so...2 * (12 - 3 ) * 3.14 = 56.52". 2 * 9 * 3.14 = 56.52 Now measure the length of your chains. If they are 56.52" or a few inches longer, your chain will fit that tire. Pretty easy, without even moving that chain on the floor. Plug in the numbers that the chain measures and you can figure out what tires it will fit.
-
5 pointsWelcome to and thanks to become a supporter. there shall be 2 added stiffners, to not prevent to bend the Frame and spread the forces to larger Areas like a Parallelogram. So you have a Wider area for the working forces. To illustrate that a bit better i use few Pictures from my Build. i did this for another Project, but the illustration clears what is meant. this Picture from bottom View illustrates the Rear axle linkage and even the Front linkage. The front linkage shall be connected to the Main Arms, to reduce the torque they come from the liftarms to the Main pillars. The Front linkage itself between front support and Main pillars is here not visible. The whole load is so on your Frontaxle, what must be reduced with a Counterweight behind the rear axle to balance the whole system and remove the Weight from your Frontaxle, otherwise you can crack it. Your Center of the complete Weight is also allway‘s the rearaxle, because the balance must be doint in relation on that. If you measure the lenght between the bucket to Rearaxle this is you first Lever, the lenght to the Counterweight in rear is your second lever. With this equation you can simply calculate how much load in the Bucket will load on your Frontaxle. at your design i estimate the load in the Bucket will additionally load your Frontaxle with about 5 - 7 times the load in the bucket. plus the load of the FEL itself. That must be released by a Counterweight, otherwise a crack of the frontaxle is just a question of time, even steering becomes more than a heavy Job. Also the torque of your Main pillars goes fully on your Tractor‘s Frame.
-
5 pointsWe should've ordered more when we had the chance......
-
5 pointsDon't forget to become a supporter... It'll help keep the site going as well allow you to post unlimited pics.
-
5 points
-
4 pointsI know I have sorta hi-jacked @PeacemakerJack's "let's go plowing/rolling dirt" thread with my gardening madness so I'll start it over here with some pics of the progress I have made so far and as planting and growing season continues... I also encourage any other RS member who is preparing a garden this year to contribute to this thread as well like @Greentored, @Andy N., @ZXT, ect so here it goes...from sinking a plow in the ground to tilling and discing to bringing over all of dad's sleeve hitch gardening implements to making rows and planting potatoes and onions today at the in-laws plot. Will update as things proceed like planting other veggies and maintaining plants and soil/weed control ect.
-
4 pointsFor today's entry. I know you guy's have seen that last pic before but I couldn't resist, my two favorite things in life, WheelHorses and Chevys . Oh, and a good Manhattan with Makers Mark.
-
4 pointsHad the 854 out today for something else and was getting ready to put it away when I thought hey, let's do this ! First time this machine has cut grass in over 30 years and the first time in about 40 years that I've cut grass with a 60's era Horse. Not the 520 with a recycler deck, but the old girl did ok.
-
4 points
-
4 points@TractorJunkie I am sad to say that I dont think there are any Wheel Horse parts on it. The frame and rear end are Speedex so I guess that makes them step brothers or cousins? I love this thing. The more you look at it the more you see.
-
4 pointsYou got a winner there!! -- and look at that table, a few small dimples. they usually look like swiss cheese! Do yourself a favor and get one of these vises, man do they add versatility to a DP - and, you can drill an OOPS hole in it instead of the nice table! HF has got a jillion of them, this 4" one was $48 free ship ....
-
4 pointsOne thing I noticed is your bucket is fairly small. I think that’s a good idea on that size tractor. It should be really handy and maneuverable. If you’ve never had one before you’ll be amazed at how useful they are and how much work you can actually accomplish.
-
4 pointsThat plow is a work of art!!! So is the roller and trailer!!! My - Don't touch that thing with any paint! It is way cool as it sits!!! Grease it, adjust it, oil it etc. to get it going and then just keep it going... It is a classic!
-
4 pointsSo happy with Fred and his little trailer. The petrol generator fits on it so I can use power tools in the field. I guess that's the end of this thread. Thank you to everyone for your help, advice and encouragement through this project. Still lots to do but I will post a thread when I start on implements. Beat regards Mick
-
4 pointsWe’re turning into a demonstration event! Rylee just taught her mother how to plow with Hot Wheels!
-
4 pointsLook closely at the long needle and you wil see holes crosswise through it. Those are the passages that need cleaned out, but be careful to not team them larger. A wire off a wire brush held in a vice grip works if you don’t have a tip cleaner.
-
4 pointsThought you guys might enjoy these! Dad and I picked up these wagons today. Very cool and actually hard to come by. They look pretty good behind the C195. They have been in a barn for 30+ years. These are not homemade, they were made for a few years by Parker that made large gravity wagons
-
4 pointsI use a lot of 20 V tools for work so my kids got me the Dewalt chainsaw for Christmas and I really love it. It is comparable to my small Stihl limbing saw and it cuts nearly as fast. I have a lot of batteries so they bought just the bare tool and it was fairly inexpensive from what I understand. We heat with wood so we use a lot of chainsaws. This thing is handy around the house but also out in the woods for limbing and clean up and it’s very easy to use. I liked it so much that I bought myself the Dewalt weedeater and that thing works great as well. My wife has a small garden area that’s difficult to get a riding mower into and I’m thinking about trying out the Dewalt push mower. You can use the 60 V batteries or two of the 20 V and it has pretty good reviews.
-
4 points
-
4 pointsA short video of the tractor running, sorry for the wind noise. Hard to find a day in Oklahoma that the wind isn't blowing at least 25 MPH
-
4 pointsNow, some of you may be thinking that if I have never seen another one, not even a photo and have no idea who the manufacturer was how can I be certain of what it is? If you indulge me I’ll tell you a little story. Sometimes the story behind an object is more precious than the object itself; when I was in my mid to late 20s I did a lot of work at Columbia University in New York City. We did a lot of restoration work keeping in line with the existing woodwork which is nothing short of breathtaking in some spaces. My work partner was an elderly carpenter. His name was Zev ( short for something very hard to spell). He was a Holocaust survivor. Had a long number tattooed on his left wrist. I recorded that number and still have it somewhere here. He was very instrumental in influencing me for the rest of my life along with many others ( lots of stories). Through out the process of carefully dismantling some of the existing work from the 1800s, there were these curious marks on everyone of a certain part of such work. Curious I asked him what it was from, he then describing a tool for that work, stating also that although he had used one in the past he actually had never seen another one again. Scratched my head for a couple of months and then just forgot about it. That is until a few years back. On my knees going through a box of old door hardware in an antique shop I frequent on a regular basis all of a sudden I see these weird looking tools. Took me less than one minute to realize what it was. Surreptitiously I tried one on a piece of wood there. There were exactly the same marks. I have to say that I immediately had a tear running down my face because I can still hear him describing it to me word by word. So that is how I know what it is . I have used them ever since. As I paid for them owner asked me if I knew what they were for? I certainly did know and always refer to them as the Zev .......
-
4 pointsFinished another gt14 tank and made Lil’ Red a steering tower/ headlight cover assembly. Think I’m just going with an LED light bar instead of trying to fit factory style lights. Still have to trim it a little and not sure if I should paint it or not.
-
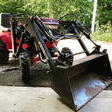
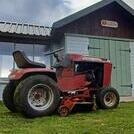
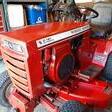
3 pointsHello y'all, I'm new here. Picked up my 82 C-85 a month or so ago and fell in love. I'm looking forward to picking your brains and learning more about these awesome machines!















(800x673).jpg.cc3aefcd170c6bab1f22408014a1eb53.thumb.jpg.37c62115dec7a1fc65b8e86afd6af643.jpg)

