Leaderboard
-
in all areas
- All areas
- Markers
- Marker Comments
- Marker Reviews
- Articles
- Article Comments
- Article Reviews
- Classfieds
- Classified Comments
- Classified Reviews
- Wiki's
- Wiki Comments
- Wiki Reviews
- Blog Entries
- Blog Comments
- Images
- Image Comments
- Image Reviews
- Albums
- Album Comments
- Album Reviews
- Files
- File Comments
- File Reviews
- Posts
-
Custom Date
-
All time
November 28 2011 - November 12 2024
-
Year
November 12 2023 - November 12 2024
-
Month
October 12 2024 - November 12 2024
-
Week
November 5 2024 - November 12 2024
-
Today
November 12 2024
-
Custom Date
07/07/2016 - 07/07/2016
-
All time
Popular Content
Showing content with the highest reputation on 07/07/2016 in all areas
-
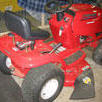
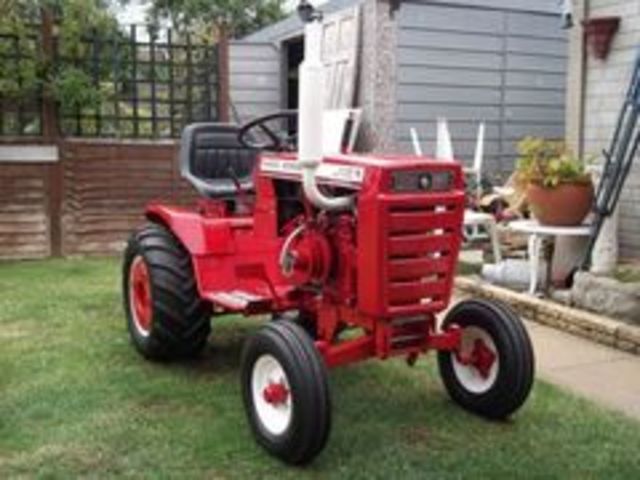
17 pointsThese are the first shots of the 607 off the lift. It has been almost a year. Some of you may not of heard of these they are straight recoil like the 606 and the 605 and so on. Hard to find these 607`s not so much the 606 I have of had one seen many. All is left is put on the sheet metal and the decals. The first pick is what it look like when I first got it. The frame and sheet metal was not painted but engine was because not original but the right engine for this / HH60 . I just cleaned ever thing and buff out sheet metal. Should be a nice example of a RARE 607 when done. I hope you enjoy my progress so far. Will post when done.
-
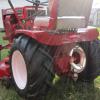
9 pointsanything old and rusty with an engine really mostly smaller stuff tho, like lawn and garden machinery. this is my latest purchase, originally bought as a parts machine but after finding out parts won't change over it'll stay like it is.
-
9 pointsOh for the days before OSHA.... Or as the bumper sticker says: If you think OSHA is a small town in Wisconsin, you are in trouble...
-
8 pointsMine would have to be classic Ford trucksMy grandpa's old 1965 F100...used to be a daily driver until I had my accident three yrs ago...sadly it was vandalized while I was in the hospital for a month...hope to get it fixed up someday My all original 1966 F350...sitting out at the farm needing new brakes all around but still gets used in our landscaping business 1962 Ford C600 I owned back when I was doing construction and remodel work...wish I never would have sold the old truck. I must say garden tractors are a much cheaper to mess with than these old trucks LOL
-
7 pointsPut my Harbor Freight Generator Head onto my GT 14 using the front Tach-o-matic I installed a few years back (so I can attach the single stage Snow blower from my C81) onto the GT14. Used Heavy Duty 2" inch square trailer hitch tubing which Fits over each other and slides so that I can adjust the b belt (welded nut and bolt) on the bottom of the unit. Use a 3" pulley on the gen set and the outer pulley on the Tractor. Works like a charm easy to take on and off, ran the Tractor at 1/2 to 3/4 throttle and it had no problem powering the drop light and heater I plugged-in to check the operation. Ran it for over an hour with no issues, then it started pouring so I quit. Belt is 5/8" X 71" long
-
7 points7-7-1930 Building of Hoover Dam begins On this day in 1930, construction of the Hoover Dam begins. Over the next five years, a total of 21,000 men would work ceaselessly to produce what would be the largest dam of its time, as well as one of the largest manmade structures in the world. Although the dam would take only five years to build, its construction was nearly 30 years in the making. Arthur Powell Davis, an engineer from the Bureau of Reclamation, originally had his vision for the Hoover Dam back in 1902, and his engineering report on the topic became the guiding document when plans were finally made to begin the dam in 1922. Herbert Hoover, the 31st president of the United States and a committed conservationist, played a crucial role in making Davis’ vision a reality. As secretary of commerce in 1921, Hoover devoted himself to the erection of a high dam in Boulder Canyon, Colorado. The dam would provide essential flood control, which would prevent damage to downstream farming communities that suffered each year when snow from the Rocky Mountains melted and joined the Colorado River. Further, the dam would allow the expansion of irrigated farming in the desert, and would provide a dependable supply of water for Los Angeles and other southern California communities. Even with Hoover’s exuberant backing and a regional consensus around the need to build the dam, Congressional approval and individual state cooperation were slow in coming. For many years, water rights had been a source of contention among the western states that had claims on the Colorado River. To address this issue, Hoover negotiated the Colorado River Compact, which broke the river basin into two regions with the water divided between them. Hoover then had to introduce and re-introduce the bill to build the dam several times over the next few years before the House and Senate finally approved the bill in 1928. In 1929, Hoover, now president, signed the Colorado River Compact into law, claiming it was “the most extensive action ever taken by a group of states under the provisions of the Constitution permitting compacts between states.” Once preparations were made, the Hoover Dam’s construction sprinted forward: The contractors finished their work two years ahead of schedule and millions of dollars under budget. Today, the Hoover Dam is the second highest dam in the country and the 18th highest in the world. It generates enough energy each year to serve over a million people, and stands, in Hoover Dam artist Oskar Hansen’s words, as “a monument to collective genius exerting itself in community efforts around a common need or ideal.”
-
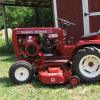
7 pointsWent to go look at an 876 today, and came home with the tractor, and a complete all original set of bug-eye headlights with the switch and tail light! This is my second pair of bug eyes that I have and I will definitely be keeping this pair also. The tractor and plow will be for sale though! Did I make out good?
-
7 pointsI've been there twice in the past 8 years on vacations. Going back to Vegas next spring I believe and will most likely visit again. Awesome experience. Done the tour inside the dam and the power plant as well as walked inside the old abandoned sniper huts. Something very well worth visiting. Here are a few pictures from spring of 2015. Notice how low the water in the lake is. It was a good 50+ feet higher back in about 2008 when I was first there. Drought and over consumption are draining the lake. From the top of the dam looking over the lower river. Notice the new 4 lane bypass bridge. Local car traffic is no longer allowed on the dam, for security reasons. Looking backwards over Lake Mead. The following three pictures are panoramic if you line them up next to each other. The structure in the background that looks like a dam is the over flow for Lake Mead. The towers are the water intakes for the power plant. The over flow. Notice the cat walks to give you some scale. The rusty steel are actually gates that raise and lower to adjust water level on the lake. Bypass tunnel for the over flow. I'd guess maybe 100 feet in diameter. Standing here, you could feel a cold wind blowing OUT of the hole. Kind of creepy. Backside of the dam. Museum and parking garage.
-
7 pointsI saw a documentary on the History channel how some of the work was done on the Hover Dam. It is amazing to me how they ever finished it. They didn't have all the modern machinery back then like they do now. They did have some very smart people though and very hard workers, guess that makes all the difference. Thanks for sharing the photos.
-
6 pointsI know this subject has been addressed in several other threads, but I wanted to add my experience to all the excellent help I used on this website to help me with my dilemma. I recently took my 14 hp Kohler engine flywheel to a machine shop to have them rebalance it along with the crankshaft, piston assembly, and rod. I got a call from the machine shop to tell me the magnets in the flywheel were loose and they couldn't balance it. When I went in to inspect the "damage", they informed me they hot tanked the flywheel, which to me was a mystery since there was no grease or oil on it to require degreasing. Evidently, the hot tanking loosened the adhesive holding the magnets. So after bringing home the mess, I set out to re-glue the magnets, but I wanted to reinstall them as precisely as I could to keep the original flywheel balance intact. So after doing some measuring with the magnets positioned in the flywheel, I came up with a solution to equally space the magnets precisely around the inside diameter of the flywheel when I re-glue them. I purchased two pieces of brass tubing, one square tubing and one round tubing, both with 7/32" outside dimension. Brass tubing is non-magnetic so the magnets have no affect on their installation or removal. I cut the square tubing into lengths of 2 5/8", and the round tubing into lengths of 1 1/4". I placed the square tubing behind the magnets to hold them out from the inner edge of the machined surface in the flywheel. This will place them in their original position to align them with the alternator stator assembly when the flywheel is installed on the crankshaft. The 7/32" round tubing spacers are used between the individual magnets to position them equally around the flywheel inside diameter. 7/32" diameter will do just that with no gaps in the spacing. The tubing is just finger tight when installed, and easily removable. After thorough cleaning, I glued the first magnet with JB Weld Original grey formula, and clamped it with a paper clamp as suggested in the hilarious video seen in another thread on this subject. Then after waiting overnight for the first magnet to set up, I glued the 5 remaining magnets to the flywheel with JB Weld Original grey formula, spacing them with the pieces of tubing as described earlier The brass spacers made the positioning very easy and precise! I have attached some pics for your inspection. Unclamped magnet is the first one installed I bought a fresh pack for my satisfaction...
-
6 pointsDid someone mention an 867? Technically a 6 speed though. At least that's what the hood decals say. The two in reverse didn't count I guess?????
-
6 pointsMy other addictions are small briggs engines, motorized reel mowers, and farmall cubs.....love those little cubs lol This is all I have pictures of on this computer.
-
6 pointsthats neat i saw a show on history where they have sniper huts on the hills, during world war II they where afraid of it geting bomed. its neat that you do this every day. thanks
-
5 pointsGood morning, I want to thank everyone on the forum for all the great resources and the personal knowledge shared on this forum. It has helped me greatly over the years. I have been referencing this forum since I was bit by the wheel horse bug several years ago. My little habbit has since grown and its high time I stand up and say. "Hi, my name is Marlin, and im a Wheel Worse-aholic". Lol My current project is my storm damaged 74 C-160 8 speed. Part of a big maple fell and crushed the hood and dash tower. I have been searching for another C series to part out localy without success. So my question to you knowledgeable folks is: What other models share the same sheetmetal and has anyone done a parts interchangability list?
-
5 points
-
4 pointsOk , I'm going to jump out of my chair ! UUUMM...BIG BLOCK SQUARE HOOD SHORT FRAMES !
-
4 points
-
4 pointsI'm a Ford guy but I must admit old square body Chevy trucks are my other weakness...in my opinion the last good Chevrolet truck ever built...my daily driver/service truck is a 79 K20 that has been nothin but good to me
-
4 pointsJust a heads up, finding the correct trans pulley for that swap is not easy. Some aftermarket pulleys can work, but the keyway is not standard on the 5/8 input shaft and the offset on universal type pulleys is usually to wide. I found this out the hard way
-
4 pointsOrdering trucks was interesting back in the day. In 80' Chevies still came stock with the cheapie " checkerboard" seat pattern in different colors. The sales manager had to check every box on the form correctly or look out. We had a shipment of pick ups come in. First one off the hauler was a nice red job. Only problem it had a green seat! Not to worry, There was a green truck to come off and it had a red seat! Then in 82 a friend of mine ordered a 1/2 ton van. straight six with a 3 speed on the floor. It came off the hauler and the boss says bring Bill's van in and get it ready for delivery. I go to get it and there's no seats! Just a wooden box to get it off the hauler!
-
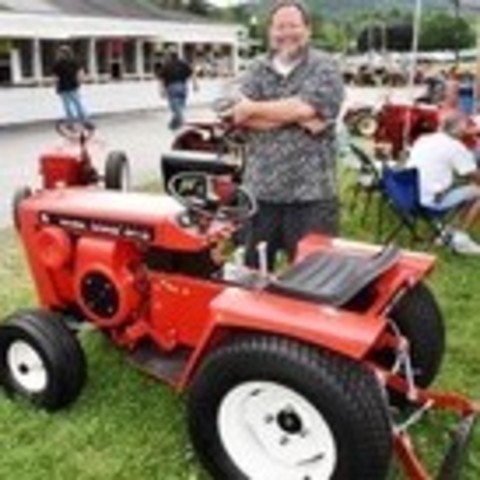
4 pointsI thought I'd bring this old thread back up to add this. After a wonderful time at the show we went to Indiana to see the kids up there. Shortly after our visit in 2014 when I was reunited with this tractor Larry, the owner and neighbor, was diagnosed with terminal brain cancer. Sadly, he passed this past February. The first evening we were there his wife, Lou Ann, came to the door with a crock pot of bbq cocktail wienies. It wasn't long in our conversation when she asked me if I could get this tractor running. Absolutely! It had a battery problem but she didn't think anything else. The first thing I did was check the voltage. It was .03 volts. Her son had worked on it without success and left the key in the run position for who knows how long which would explain the voltage. The terminals were corroded and the battery was toast. I installed a new one and cleaned the connections. I don't thing Lou Ann was confident it would start but with very little cranking she was purring like a kitten. I told her that my baby would never let her down We talked a while and she told me that when Larry found out about his illness he decided to sell his Power King and just keep this Wheel Horse because he understood it the best and loved it. Their place is always kept in tip-top shape but he worked hard to make things perfect while he still had the strength to work. The tractor looks much the same but does sport a new seat and a plate over the headlights. Lou Ann understands that, at her age, she won't be able to keep the place up to Larry's standards but she wants to stay there for now. I assured her that, while difficult from 1000 miles away, i would do all i could to help. She's a strong lady and I'm betting she will do better than she expects. She obviously misses Larry a lot but manages to talk about him with ease. At one point she even joked that she figured he decided to pass when he did is because he didn't want to vote this fall with the choices we have. I have deep regrets that I didn't have a chance to get to know him better. I spotted some ammunition in the garage and asked if he was a shooter. Yes sir, he was an avid shooter and also, sharing with me, a NRA Certified Instructor. I have no doubt that Larry and I would have gotten along great. Rest in Peace Larry. You are deeply missed.
-
4 points
-
4 points
-
4 pointsRacinbob, got one I am putting together here. That's the one that you, Steve and Mike were helping me on that 6 speed. Short frame with a 6 speed. Talk about a working tractor. There again I love the short frame square hoods. Sure put a lot of them together at are dealership when I was a small kid.
-
4 pointsYep, and I think the 867 is considered a short frame with the #5060 transmission. 10 pinion, limited slip with hi/low.
-
4 pointsThe 867 was the first Wheel Horse Tractor with a 6 speed as they called it then.
-
4 pointsMilitary Vehicles...I have a 1953 M-37 3/4ton cargo truck with winch, a M274 Mule and I maintain a neighbors M35A2 2-1/2 ton Case Farm Tractors 1953 DC3 AND A 1951 VAC 1944 Farmall M also am working on a friends Farmall H
-
4 pointsSorry to see a wounded first thing in the morning. Dash and riser from most any similar vintage should be a direct swap, post a want ad with photos and dimensions on here, lots of members in your area.
-
4 pointsWelcome to the group. Any C series except the black hoods would work and some B series.
-
4 pointsThat gearbox is used o0n these: 02-11BX01 1980 B-112 4-Speed Briggs 252707-0206-01 11 Peerless 601-001 02-08BP01 1980 B-82 4-Speed Briggs 191707-1136-01 8 Peerless 601-001 02-11BX02 1981 B-112 4-Speed Briggs 252707-0206-01 11 Peerless 601-001 02-11BX03 1981 B-112 4-Speed Briggs 252707-0222-01 11 Peerless 601-001 02-08BP02 1981 B-82 4-Speed Briggs 191707-1136-01 8 Peerless 601-001 02-08BP03 1981 B-82 4-Speed Briggs 191707-1160-01 8 Peerless 601-001 02-08BX01 1982 B-85 5-Speed Briggs 191707-1136-01 8 Peerless 601-001 A2-083201 1982 LT-832 4-Speed Briggs 191707-1160-02 8 Peerless 601-001 02-11BH01 1982 SB-371 4-Speed Briggs 252417-0245-01 11 Peerless 601-001 D2-113601 1983 LT-1136 4-Speed Briggs 252707-0657-01 11 Peerless 601-001 D2-113701 1983 LT-1136 4-Speed Briggs 252707-0657-01 11 Peerless 601-001 D2-163701 1983 LT-1637 Twin 4-Speed Briggs 402707-0132-04 16 Peerless 601-001 A2-083202 1983 LT-832 4-Speed Briggs 191707-2138-01 8 Peerless 601-001
-
4 pointsWhen i tightened the step or running board against the sheet metal, it felt like there was too much give. Sometime in the past life the Raider10 had a spacer or something to support and keep the sheet metal away from the transmission drive pulley. With no way to get washers back there, i needed a way to stick a spacer behind the sheet metal with no way to hold it there .Just looking around the shop. I found some 3/8" rubber fuel hose and it fit a bit too tight to stay in the drilled hole. A bit of taper and a couple of slits with the knife and it stayed in the sheet metal with room for the bolt through the floor boards. A five minute job and happiness was mine. The pulley had worn a little groove on the back side of the sheet metal without damage, but this little fix cured the noisy condition and it was free with only a quarter inch of hose used.Maybe it will work for someone else faced with the same condition
-
3 pointsYes, that's a long frame. Compare the hood length to the 867 above and the extra space between the front tires and the deck. Didn't WH make a short frame square hood 10 or 12 horse in 1966 or 1967? I thought I've seen one? One year only deal? It was a three speed I know.
-
3 pointsDoes this look like a long frame, there's no description in the ad . It's sure pretty .
-
3 pointsJeff...the 1067, 1267, and the 867 came with the #5060 10 pinion, limited slip with 1 1/8" axles and a hi/low (your basic 6 speed transmission). Of those 3 the 867 is a short frame square hood.
-
3 pointsMy apologies to everyone for being absent for 6 years and 20 days, not that anyone noticed. Anyway, I am back, and will be updating the fuel pump kit thread with any changes that have taken place over the past 6 years.
-
3 pointsI'm thinking, that a 867 might be my next tractor . Sorry 857 , I'll try to stay on my side of the barbed wire . My 1075 made me fall in love with short frame square hoods . @stevasaurus , so does the 1067 have the #5060 transmission too ? That tractor got a lot of attention at the show, and I don't know why , so did the 1075 .
-
3 pointsNot my B/R but my buddies . I envy that . Just love finding turn of the century stuff out on the wheelers .
-
3 pointsNot really old iron for me, I'm afraid I'm one of those who like to chop motorcycles.
-
3 pointsThis one of my projects a few years ago. I love the old step sides, this one when I bought it had been a special order for a chemical plant in Iowa. Then it sat for about 14 yrs. and rusted every where they rust, it was a 6 cyl. with a 4 speed, 14 bolt rear with 5 bolt hubs and 456 gears, and it had 16 5 bolt wheels that I sold and put chevy 10 in. ralleys on. The interior was also redone with an S10 interior. Hope you enjoy the pics. I am looking for another one to redo. I want a 4X4 this time. Sorry for the pics, I will get then right yet.
-
3 pointsI need to get a new list. Mine shows a 857 and an 877 but no 867. But sure enough, you guys nailed it. I found the OM for an 867 and it is a shorty with an 8-speed (6-speed) tranny.
-
3 points
-
3 pointsHere is the thread I have been working on doing the conversion from CDI to Points. I had to stop and do front end brake job on my Horse Hauler but hope I can get the conversion project finished in next several days. Hopefully by the end of the weekend and Ill try and update the thread. BTW @PeacemakerJack , the symptoms you described for your failure were identical to what happened with my Lazarus GT14. I did not troubleshoot to which particular part of the CDI had failed but as I had completely rewired the tractor and had all new components other than the CDI I deemed it more efficient o just swap the older electronics out. I likely would have done it sooner but had some anxiety over removing the plug that the Points Push Rod slides through. As you can see in the attached thread, It is not a difficult operation once you have done it. Of course I say that not having actually finished and fired the engine up to test
-
3 pointsYou can test the coil easily with a multimeter. Trigger testing requires pulling the flywheel.
-
3 pointsThose ignition systems were totally different from anything Kohler used anywhere else, and were similar to the Tecumseh SSI ignitions that they started about the same time. Tecumseh continued to use a solid state system, but Kohler went back to a battery ignition with mechanical breaker points. In many ways, the solid state transistorized ignitions were better, but the early electronic components weren't as good as modern stuff, as well as the fact that it's all about 45 years old. It really functions as a capacitance discharge system (CDI) which is commonly used today on atvs and motorcycles. You have three basic parts to the system and any of them could fail, although it is often the small trigger module mounted above the flywheel. Under the flywheel, the stator coil is actually a double wound coil. One coil sends two wires with AC current into the regulator/rectifier to charge the battery. The other coil is internally grounded and sends one wire with AC current to the trigger module above the flywheel. This is also where the kill wire to the M terminal is connected. If this circuit is grounded, the trigger loses AC power and the spark stops. The second part is where the magic happens. In that little box above the flywheel is the electronic circuitry to store current in a capacitor and trigger a pulse to the coil when the flywheel trigger comes past the module. These modules are often the failure point in any CDI system as they have to deal with rapid current charging and discharging, as well as the vibration, heat, and other environmental stress. The timed pulse of current is then sent to the exterior coil, where the voltage is elevated enough to fire the spark plug. This "coil" is distinctly different from a battery ignition coil. In battery ignition, the coil stores energy in a magnetic field, and releases it as a high-voltage spark when the field is collapsed. In a CDI system, energy is stored in a capacitor and is simply released to a pulse transformer "coil" where the voltage is elevated. As far as testing the Kohler system, I think the appropriate Kohler manual would have a few pointers, but there is really not much that can be be tested. The AC output from the stator can be tested, but you already did that and your reading sounds about right. The pulse transformers rarely go bad, so I would guess its the trigger module. One thing that will kill those systems is 12v DC on the kill wire. It should never have battery voltage on that wire. It should be open circuit for "run" and grounded for "stop". I've got a Tecumseh OH160 in my horse that has died a couple times. So far, I've been able to dig the potting out of the module and replace a few defective diodes. Never dug into the Kohler system that much. I was looking at using atv/cycle parts to come up with a replacement system should my module fail again. Never followed through with it as mine is still running.
-
3 pointsSound right to me, if you use the known good coil on "Blackbeard" with no wires at all connected to it and have spark that would confirm it. @Aldon did a conversion to a battery ignition using points, search his posting on this or perhaps he will chime in here.
-
3 points
-
3 pointsThanks for the support and some of the thing I missed. I see I missed some good laughs and fellowship. Already counting down for next year.
-
3 pointsSo I have always been into old outboards and boats but as of about 3-4 years ago my buddy Kenb invited me to a meet (kinda like meet and greet). After that my son and I were hooked. We joined the club and another member sent me this photo of my son Brennan changing motors at a local meet on the river in Shelton last fall. This photo was on the cover of the club's magazine. Pretty cool stuff and thought I would share.
-
2 pointsOkay, an update. I have been busy on this project for the past few weeks. My hat is off to you guys that do these regularly. Progress has gone pretty well. I swapped the 12 horse that was in this one into a C-121 that I bought with a broken rod. I'm using that one to mow on some land I own. Will resto it (maybe) in a couple years when I get moved up there. The plan was to rebuild that engine but the piston skirt had a pretty nice hunk out of it, so I opted against that for now. I sourced a M10 from a guy that had it on a compressor. It was smoking a bit. So I rebuilt it with new piston and valves. It was right on the edge of needing to be bored, so I am gonna give it a shot. If it needs boring, I will do that this winter. First step was to take it to the carwash to remove 50 years of crud. I started dismantling. Probably could have done a better job of marking parts, but I will just have to figure it out. Sandblasting and knotted wire wheel until I was blue in the face, but finally got everything cleaned and primed. ( or red, it's hot in Texas!) Tried for 2 weeks to get the steering wheel off. PB Blaster and a gear puller and a lot of cussing. Finally through in the towel. Will do the best I can with repainting. When I got to the transaxle, I gave it a shot of PB and a few whacks and went straight to the sawzall. Will replace with the TS pin everyone has talked about. Found a couple of stress cracks on the frame and welded those up, as well as cracks in the hood. Couldn't figure out how to get the pictures to come along with the story, so I guess they will all just be at the end.... Been using filler primer and wetsanding the seat pan, hood and belt cover. Ordered paint and now I am almost a standstill. Will start blasting the wheels in the meantime. The seat was beyond hope. the rust made the bottom see-through so will have to order a aftermarket seat. Considering ags for the rear and maybe ribs on the front and a stack exhaust. Will probably reincorporate the headlights, though not positive. Decided on Rustoleum Regal Red for paint. Will shoot it from my HVLP gun. Man I must have read 30 pages of painting tips. A wealth of information! More to come! I have been relying so much on the wisdom and experience found here, that I pulled the supporter trigger. That's probably been the best bargain of this whole resto project! Like I told several friends, I have proven I can tear one down....soon the bigger task of putting it back together will present itself. Curious to see how all the pics I added show up...... June 22nd at Carwash...
-
2 pointsI'll help anyone that needs it. I have my own remote access software, so I can help long distance in most cases. If it requires a visit, I know techs across the country, it's quite possible I can connect you with someone I trust.













.JPG.9f2ecb26065c66527b0730084ab7fc7a.thumb.jpg.7dc8a04d9a53d44ee2b23f26ee94496f.jpg)
