
Leaderboard


Popular Content
Showing content with the highest reputation on 02/20/2016 in all areas
-
15 pointsSINCE, sense,cents all 7999 of my other posts were of the "Intelligent" variety, I thought I'd buck the trend with a totally aimless rambling post!
-
7 pointsSteve you can pickup a reasonably priced 1" reamer on e-bay for doing the axle bushings you will get a round hole with a good finish you do need a bench or floor drill press and the end of the reamer turned down to fit the drill chuck I have used a large vise grip on the reamer and reamed the bushings by hand starting from the plate side of the axle side plate this helps you keep the reamer perpendicular to the side plate but a drill press is best Brian
-
7 pointsI think all the hot air at my house has kept most of the snow away!
-
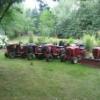
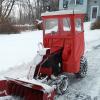
6 pointsFelt like hi 70's today,,,, opened the shed,,,,2 started and the winter worker....So,,,,3 out of five got a pic.... and to the R&D department...special notice of the last minute winter headlamps////brighter than i thought ,,,,i know....I KNOW,,,,you would think i have another favorite or something......,,,,just noticed,,,,,,#3 needs a battery and its hood back on....hidden in the back...
-
6 pointsWell, made it to the show this afternoon. It was a little better than I expected for the first year. Unfortunately the only forum member I ran into that I knew was Kate from LAGT Magazine. Her and Brandon were both there. I expect this show will be a lot bigger next year when more people get wind of it. It was in the 60's here today which was a BIG change from last week when it was about 15° with 40 MPH wind gusts. I think next year I'm going to take couple to show. Thursday is setup from 8AM-8PM. Friday and Saturday are show days, closing at 5PM on Saturday. Kind of nice if you want to hang for two - three days, like the big show in June and have Sunday free. Nice to have a tractor show to attend during the winter. Anyway here are few pic if you are interested in what was there - tractors of course, so I didn't take million. I tried some "panoramic" shots. 20160220_140736.mp420160220_140736.mp4 20160220_140736.mp4
-
6 pointsI like what Brian said about the reamer. I have a bench press and I might even have the reamer. I have a couple of more plates to do...I will give it a try. I had a 1" stone that worked great, but I think I loaned it to Jake and when I went to ACE the other day...the largest they had was 7/8". I know they look a little rough in the picture, but the hone makes them nice and smooth by the time I am done. You really aren't taking out a lot of material here, and it only takes a couple of minutes. Lane, I did not oil anything until I had the fit I wanted...then, yes I oiled the bearing and axle. Jim the carriage tubes do have some slight grooving going on. Not much I can do with it...short of cutting the tube welds and replacing the whole tube. I am not equipped to do that. I usually emery cloth the tube a little to get some of the ridges down and smoother, but I don't want to take out too much material and have a sloppy fit. I kind of think that these machines are pretty much done working in the field, and they are just going to shows, pulling the kids around and doing cruise nights. Remember, I am re-using the old gears and bearings if they are good. I replace bad gears with better used ones. I can replace all of the bearings with new...if need be. Seals are new. Pretty much, I am just giving the transmission a good cleaning (sometimes...it's first one) and putting it back together with fresh oil. I hate to say it...but it sometimes comes down to how much money do you want to put into the transmission of a $250 machine?? As it is, if I get 2 transmissions out of these 4, we will have about $70 in each...that does not count any labor...it is a labor of love.
-
5 pointsWell of course your at 8000 posts.....you have no snow to plow so your parked in front of the puter! Congrats! (Just passed to 10K mark myself....not to snowy here either! ) Mike..........
-
5 pointsI don think so iI am preparedI
-
5 pointsThe Parking PAWL is designed to HOLD the tractor in a STOPPED position. It is NOT to be used (engaged) when the tractor is in motion and only applied when at FULL STOP. That is to say, NEVER pull up the lever while moving in either direction. For the same reasons that you wouldn't put your car/truck auto trans into PARK while moving, you shouldn't jerk up the lever in a PANIC STOP. (Lecture ends...). Every time the lever is pulled up when moving (when you hear that little annoying GRINDING sound), tiny bits of the parking PAWL (or the trans GEAR that it locks to) gets chipped away and into the trans fluid. Eventually, the PAWL gets ground off to where is doesn't engage the gear anymore and the parking brake won't work because of that. This is the likely condition that DADDY DON has with his tractors. These tiny, even microscopic, bits in the fluid pass thru BRASS components & pressure ports / valves of the HYDRO PUMP and the HYDRO MOTOR where they scar and gouge the mated machined surfaces... namely the 18 Piston Slippers and the 2 Valve Plates (and other parts). When these brass surfaces become scratched / gouged, the result is LOSS OF HYDRO PRESSURE, especially when the fluid reaches normal oper temps. If your tractor seems to have good power when first started (cold) then looses power with every passing minute as the fluid heats up....you have worn internals as I am defining herein. Inasmuch as the fluid (oil or ATF) is common to the pump and the motor, similar brass parts of each will become scored from metal chips and that is why it is necessary to rebuild BOTH the hydro pump and motor. They contain nearly identical machined brass components and, accordingly, all need to be restored. The pump END CAP and the GEROTOR SET may also be damaged but to a lesser extent as they are steel. ps...another cause of damage is DIRT in the fluid. Be extremely careful to keep dirt and debris of any sort from entering the refill spout when topping off or changing the fluid and filter. Here are a few pics of the damage caused by the floating particles in the trans fluid. Some of these are DEEP gouges and could not be completely removed. I've also posted a couple pics of the two types of parking PAWL(s).
-
4 pointsso it was real nice up here today also,and the driveway had some ice that needed chewed up so it will mely faster,so I got the new to me(6 months ago)c160 8 speed out and put the new hitch to use,this is my homemade ripper and lift that I built years ago,this is why I like to have a reciver on all my tractors,you can put anything on the back,this setup works with my bottom plow too,i gave the 160 a treat and blasted and painted the rims,and put a new set of chains,they are only 4 link but they have the v bar and are very aggressive and she is almost unstoppable,i love all my tractors but this machine is so tight and runs so good I cant believe someone painted her black,oh well she don't look too bad
-
4 points"Cassie" relaxing .
-
4 pointsPhatboy...I think you are reading tooooooooooooooo much into this token mile stone. But it does kind of make cents...especially if you have invested in the Loretta Stone so to speak Squonk. GET BACK LORETTA!!
-
4 pointsRacinBob and I were talking yesterday, and Bob had an idea to be able to use an axle and axle gear from a 2 piece transmission and incorporate it into the 3 piece transmission. We all know that the axle gear and spiders are the weak spot in these 3 piece transmissions, and replacements are getting hard to find. We have already shown in this thread that you can use the spider gears out of a 2 piece tranny differential and use them in a 3 piece tranny differential. We think you can use the axles and axle gear from a 2 piece tranny and put them into the 3 piece tranny differential. Here are a couple pictures of the 2 types of axles. The one on top is from the 3 piece tranny, and the one on the bottom is from a 2 piece tranny (#5025). They are both the same length and diameter...10 5/8" long and 1" dia. Both have the 1/4" hole for the roll pin on the axle gear end and both are keyed for the hub on the other. The only difference...one is keyed and the other has a spline. The 2 types of axle gears are the same gear and the teeth are also the same width. The one on the left is keyed and the one on the right is made to sit on the spline. If you cut off the flange and use it as a spacer in the differential housing, you could switch the axles and axle gears. The flange has the same OD as the bronze bearing...so everything would stay in it's place. The bronze bearing is 1 1/2" long and 1 1/2" OD...the flange is 5/8" wide and the same 1 1/2" OD. Pretty cool...and Bob may have found a bushing that works, so you don't even have to cut off the flange. If the bushing is less then 5/8" you just have to cut the bronze bearing a little longer to compensate. What do you guys think??
-
4 pointsYou must read my posts in the football threads Ed!
-
4 pointsWTG Mike....I don't care what they say. Everything you say makes scents to me.
-
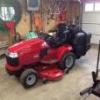
3 pointsI found a 312H during the fall that needed some love. Cleaned, painted, new solenoid, head lights and tail lights, and finished it off with some of Terry's decals. I think it came out pretty good. Can't figure out how to rotate the pictures, sorry!
-
3 pointsI have a gravel drive that is over 650' long.The ground is not always frozen hard and deep enough to use skids without digging trenchs.I added 8" wheels in place of the skids. The wheel mounts are slotted so that they can be raised or lowered just like the skids.The default setting keeps the cutting edge 1/2" above gravel and it can go up to 2" higher. One added benefit of using wheels is that the blower can be rolled around when not attached to the tractor and it moves easier than with skids when blowing snow.I am very pleased with the modification,Luck,JAinVA
-
3 pointsI am not going to make a Squonk type comment on your light bar since you are a Virginia Gentlemen but it looks like it needs a little more engineering. I love the herd.
-
3 pointsI am sitting here trying to think of an intelligent congratulations and >>>>>>>>>>>>>>>>>>>>>>
-
3 pointsJust for clarity, here is the Sundstrand CYLINDER block and PISTON-SLIPPER assembly. These are very similar for the hyd PUMP and MOTOR sections. There is a heavy spring inside the block that applies pressure between the piston slippers and the thrust washer as well as the cylinder block and opposing valve plate. The whole thing is spring-loaded when the end cap is bolted to the cast iron base. The base of the cylinder(s) and the thrust washer(s) MAY also have scoring as well as the valve plate(s)that they ride on. Shown here is the HYD MOTOR section....the HYD PUMP components are very similar.
-
3 pointsSunshine and 60 + degrees today in Greencastle, Indiana. Decided to take advantage of the Spring like day. Primed and painted my rear hitch (thanks to Jake Kuhn), my steering block parts and my steering shaft with new steering wheel (one of the Cub ones from Ron Greco that has been drilled out in center and for a roll pin) . The Cub steering wheels were splined and had to be drilled out in the center to fit the 3/4 inch Wheel Horse steering shaft. The steering wheel hub had to have a hole drilled for a roll pin to install on the steering shaft.
-
3 pointsFirst time for me was cane syrup when I was about 10 years old. My granddad had a little donkey hooked to a pivot pole that powered the stalk press. My job was feeding the cane in the press.
-
3 pointsCongrats on all those intelligent and pithy words. Keep 'em coming. Oh, and welcome to the 8000 club.
-
3 pointsI bought mine from Amazon before Craig posted the link. First time I've been ahead of the curve in weeks!
-
3 pointsCame across two NOS Generators. Couldn't pass it up.
-
3 pointsSure did....back in the '50s when I was a kid living in the Allegheny Mts. of Somerset Co. Pa. We collected sap till we had 3-4 barrels, cut firewood for the fire, then had the boil off in two butcher kettles for up to 20 hours. I don't make my own now, but 100% pure maple syrup from back home is the only syrup we use. If we go to Waffle House, we take our own syrup.
-
3 pointsI used to tap our big maple when the kids were young. Mostly just to show them how it's done without the use of corn syrup... Lots of fun, not much syrup, priceless time and memories...Oh yea - it tasted good right off the pan!
-
2 pointsI think it's black paint looks pretty cool Don.
-
2 pointsBob, that wasn't a typo was it? Looking forward to meeting all of you characters at the "Big Show".
-
2 pointsMike, never feel that your words are feckless, fustian, or nugatory! I always find them eloquent, sententious, and succinct.
-
2 pointsI was there this morning and saw several familiar faces from the Big Show and Karen and Jim from Red Square. Impressive for a first time event and room to grow. Hope they have another one next year.
-
2 pointsThanks to AMC RULES & stevasaurus! You guys know the RS map like the back of your hand, while I'm still trying to unfold the first flap of the map to begin to find my way around. There's a lot of data here and its going to take me some time to soak in even part of it. I'm a witness to and the beneficiary of enormous good will and profound knowledge here at RS. All of you are so helpful, sharing, and caring. Many, many thanks to all of you. Regards, Steve
-
2 pointsSteve, most of this stuff and more is in the Reference Section on the Main Page. Click on manuals and then go to the Misc. files. All this stuff is tucked in there and more. http://www.wheelhorseforum.com/files/category/16-misc-items/
-
2 pointsOh I looked at the specs on the northern tool site. they read 4.8 gpm at 4000 rpm i didn't see the 8gpm at 3600 rpm spec. The kwikway pumps (delta/mte) are 6gpm at 3600 rpm. Nevermind i looked at the other spec sheet its 4 gpm at 1800 rpm and 8 gpm at 3600 rpm thats a good pump. youd want to tailor the pulley ratio to be around 6gpm. 8 gpm might be a bit much.
-
2 pointsWell I figured out the value of a snow blower to me. $450. I got a really nice tall chute blower on Thursday. Many thanks to TheRoundHousernr for sending me a link for a very clean unit for sale near him. Here are a few photos. I got it mounted today, slowly working around a giant mud mess in my shed. Some day I'm going to build a garage, but for now, I'm celebrating a new blower. Of course it's 50-degrees today, but I know we'll get more snow some day and this baby is going to chuck it as far as I want! Thanks everyone for the input and for steering me away from that other unit. This unit is so clean there are only a couple places where the paint has worn off due to use. The skid plates still have paint on the bottom! I do have a couple questions but I'll start a new thread for specific questions about this blower. Again, thanks to all the great input.
-
2 pointshttp://www.portal.state.pa.us/portal/server.pt?open=514&objID=1592549&mode=2 Down near the big show... in Hanover Pa. A bit of history on the Hanover nest: The first record of an active nest in this area is from 2005. Records indicate that eaglets have fledged eight times, most often two at a time. There are no records indicating that any of the adult nesting eagles have been banded or otherwise marked. These cameras (provided by HDOnTap) were installed in November 2015. The cameras are powered by a hard line running down the tree to an electrical panel several feet from the base of the tree. Comcast Business is providing the internet service. Together, these partners are creating this dependable, high-quality stream. Friends of Codorus State Park supplied the bucket lift and other items necessary for installation and the landowner is donating the electricity to power the camera. Codorus State Park staff have been instrumental with on the ground staff and in facilitating this project. The Game Commission is grateful for all those involved in providing this spectacular view of nature at work. Sign up to receive Watchable Wildlife emails, including Hanover eagle updates. http://www.dcnr.state.pa.us/stateparks/findapark/codorus/
-
2 pointsBro, you're on a roll...don't stop now.
-
2 pointsSure thing Ed... that's why I'm posting them.
-
2 pointsI installed a rod to guide the cable down away from the steering as it could get caught at full lift and full turn.
-
2 pointsHas me puzzled. I have heard of cavitation on diesel engines due to the micro flexing of the cylinders at high rate creating air pockets around the cylinders, which then as you say steam starts to pit away at them. But as I understand it, that was really only a diesel issue due to high compression. The way to monitor that in a diesel engine is watching the nitrate levels and additives. The real question is , is that what has happened here and how is that possible on such a low hour motor? Could be heat I guess and it is spinning that big 60" deck. I have searched a bit on here and turned up nothing in the way of head gasket failure or cylinder deterioration. Was wondering also if the gasket some how failed and left exhaust gas into the cooling system area and burned away at the aluminum.
-
2 pointsBoth Mikes! 1 is overweight and the other is ugly!
-
2 pointsLooks like Mommas rearranging the nursery today. She moved #1 egg over to the side. Getting ready for #2 ? Great pic Craig...OK if I share it ?
-
2 pointsTook the new family portrait today.
-
2 pointsSure thing Gene.
-
2 pointsWell, I finally got to do a head to head comparison between the old short chute single stage and the 2 stage blowers. No contest, the single stage will be sold. Single stage has new idlers, bearings, proper Wheel Horse belt etc. 2 stage has been completely redone. Next will be to try out the blade with the newly constructed blade angle adjusting handle.
-
2 points
-
2 pointsFar & away my favorite "tool" is not really a tool at all . It's the Battery Tender Jr I use it for all my toys that have 12V electric start . I've also picked up ( at Autozone ) these little plugs (in the trailering section) that I've hardwired to all my toys making connection of the device as simple as plugging it in . The plugs fit the device perfectly. This is not a "charger" but a maintainer that keeps the battery " active " .
-
2 pointsamazing stuff ,to be born into a family that had horses before you were born is pretty neat
-
2 pointsI bought a set of the short Grace roll punches yesterday Steve and Mike ! I wanted to see how they preformed in optimal conditions in Steve's garage and basement before buying! I am convinced they work great after the load of roll punches Steve has removed and reset! I did not realize they were made for gunsmithing application until purchasing the set yesterday! I also see in the 10th and 11th picture down in your latest posting that you also use the roll pin punch to line up the roll pin placement for two of the spider gears (and the other two I assume) when reinstalling the roll pin to hold them in place in the differential housing. Craig: I wish you had posted that Amazon.com link on Grace roll pin punches yesterday! I would have saved $5 bucks -Ha ! Steve: I just can't get over the details of this rebuild thread you are providing for all to see and use on Red Square!
-
2 pointsHey welcome to red square here's before and after of my rj After is wd40 and #0000 steel wool and a couple of hours. Looks like some tire foam as well. Go get'em.


.thumb.JPG.1b2a1a39cdcedb1e001571713350b32c.JPG)


This leaderboard is set to New York/GMT-04:00