Leaderboard
-
in Posts
- All areas
- Markers
- Marker Comments
- Marker Reviews
- Articles
- Article Comments
- Article Reviews
- Classfieds
- Classified Comments
- Classified Reviews
- Wiki's
- Wiki Comments
- Wiki Reviews
- Blog Entries
- Blog Comments
- Images
- Image Comments
- Image Reviews
- Albums
- Album Comments
- Album Reviews
- Files
- File Comments
- File Reviews
- Posts
-
Custom Date
-
All time
November 28 2011 - November 15 2024
-
Year
November 15 2023 - November 15 2024
-
Month
October 15 2024 - November 15 2024
-
Week
November 8 2024 - November 15 2024
-
Today
November 15 2024
-
Custom Date
10/02/2014 - 10/02/2014
-
All time
Popular Content
Showing content with the highest reputation on 10/02/2014 in Posts
-
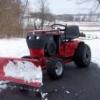
7 pointsSo I had a single bottom plow given to me and when I used it my front end was a little on the light side so I had a friend fab me up a bracket and suitcase weights he has a ton of pulling tractors so the weights are something he came up with but I thought I would share even though you guys have probably already seen it
-
5 points
-
3 pointsSEEMS LIKE MOST OF THE 300-400 AND 500 TRACTORS THE HOOD HINGES ARE SHOT. THEY CAME WITH NYLON SLEEVE BUSHINGS THAT WORE OUT OT MISSING WITHIN 300 HOURS. THIS IS HOW BEEN REPAIRING THEM FOR NOW. THIS IS THE 1992 310-8 I BOUGHT JUST A FIVE DAYS AGO. THE STEEL BRACKETS WERE EGGED OUT AND MY STEEL ROD WAS GROOVED BAD. I JUST USED A PIECE OF 3/8" OD STEEL DOWEL ROD AND SOME 3/8" ID STEEL BUSHING AND WELDED THEM IN PLACE, THEN I COTTER PIN THE ROD. HERE SOME PICTURES. BOWTIE IN OHIO
-
3 pointsSo I was in the shop today off and on between posts on here and eating dinner. I spent the better part of an hour trying to figure out how to mount the darn coil. I knew it filled a hole somewhere and I lined up the wires leading to it but I could not find that hole to save my soul. Then it dawned on me that the hole is in the front engine shroud. Picked it up and sure enough there it was. Another lesson learned. Here's an update on what I have done so far. Put another coat of black on the engine shrouds. Painted the black on the hood. Put the decals on the hood. It's a good thing those decals are a bit forgiving. I had a tough time lining them up and took a couple of them on and off several times until I got it where I thought it should go. I like the way they look. Terry should be very proud of his craftsmanship. He does a great job on them and a big service to all Wheel Horse aficionados.
-
3 pointsJust picked this up sunday afternoon, guy said it was froze up... he was right but nother alittle pb blaster didnt fix.! should fit nicely behind the new c-160.
-
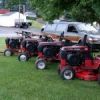
3 pointsSet up day... looks like an interesting weekend.... lotsa cool iron. A couple makin steam The Iron Horse The ultimate party trailer Big Wheelie Toys A pair of red twins Local truck A cold front is forecast for Friday, so I loaded a couple of snow machines..just to be safe.
-
3 pointsRemoving wheel Hubs A friend of mine stopped by and asked how is the best way to remove wheel hubs that are stuck on the axles. In the past I had built a wheel hub puller we decided to try. But the transaxle had 1-1/8 inch axles and the puller was to light duty to remove the hubs. So it got me to thinking. How to build a heavy duty wheel hub puller with what I had lying around. I had and old 10 pound barbell weight and a short piece of 1 inch althread rod with a couple of 1 inch nuts. I drilled 1/2 inch holes in the barbell weight to match the holes on the hub. I then threaded a 1 inch nut onto the 1 inch althread rod and welded it to the end of the rod. I then inserted the rod through the barbell weight and put a 1 inch washer in place and screwed a 1 inch nut on the end of the rod. Using 3/8 inch bolts to connect the barbell weight to the hub and snugging it up to hold it in place. Using a wrench to fit both nuts and now it was time to see if this would work. The first hub we tried a little heat. The hub came off with no problems. The second hub we pulled with using no heat and the same results. Hub came right off. I need to say before we tried this heavy duty puller the hubs were sprayed with PB-Blaster all week and the light duty puller wpuld not get the job done. The threads stripped right out of the nut and plate. but this heavy duty hubs worked great with no problems at all. I guess bushings could be made to reduce the size hole in the barbell weight to accommodate smaller althread rods for smaller axles. I will try and attach PDF files to this message for both pullers. Figure maybe someone could build their own. I will try to attach some files for the light duty puller as well for the heavy duty puller Joe Wheel Hub Puller Heavy Duty.pdf Wheel Hub Puller.pdf
-
3 points
-
2 pointsYou can buy the Wheel Horse logo decals for the Craftsmen black plastic 12 inch wheel weights from Vinylguy (Vendor on Red Square) that are round and fit right in the center of the Craftsmen weights.
-
2 points
-
2 points
-
2 pointsI'd start that shredder up at 1st. light Saturday morning...the games are on at noon.
-
2 pointsThanks guys. Last week when I thought it could be the ignition switch I bought one off Ebay. I put it on today and it starts right up!! Thanks again!!
-
2 points
-
2 pointsNick, if you want to run ags on your 416 with standard 12 x 7 rims and you are using one of the cheaper brands like deestone or duro, i would recommend you go with the 23 x 10.50-12. the carlisle tires are going to be your only choice if you want closest to the correct size, but even they are under what is on the sidewall..... i read somewhere that of the cheaper ones, the deestones are slightly larger than the duro tires, but the height on any of them won't be 23 high, they are all undersized. i used duro 23 x 10.50-12 on my boys 875 and they look great. also used the deestone 4.00-8 tri rib on the fronts, but they used narrow rims on the early tractors and your 416 would have the wider 5.38" wheels. because the duro are undersized on the width as well they look just right in my opinion on the 7 inch rims.....
-
2 pointsI noticed that, in the last of 3 pdf pics, you have the trans split in half trying to get the hubs off. With a couple of long box-end wrenchs, you could have reached into the trans and remove the 4 (or 5) differential bolts which would let the trans completely separate. At this point, just remove the axle circlip(s), then pull the axles out with hubs still on them. For those with access to a hydraulic press, this is sometimes an easier way to pull the hubs. What you've done would work equally as well. I have made the same type of puller using a HD worn-out 1 1/8" ID Wheelhorse 5-lug hub instead of the 10lb barbell weight. It, of course, is already drilled to the pattern of the offending hub so I didn't have to drill anything.
-
2 pointsGREAT,did i say that it plowed GREAT. last year my 90 520-H with Carlisle 23x10.50x12 on plowed as good as my 416-H with Carlisle 23x8.50x12 with chains on basically the same tractor but a lot of difference in the way they plow eric j
-
2 pointsWell... it's commonly used to refer to the mid-engine 1960 and 1961 models, the 400/550 and 401/551. Beyond that in a much more complicated fashion though... Wheel Horse used the term/name Suburban for several years. Just the term "Suburban" refers to the fact that this was a tractor for the "Suburban households" that were gaining in popularity in that mid-50s era. Expansion of housing into Suburban developments where people wanted their small patch of land with a lawn and a garden. Many people were losing interest in living in the "urban" city. In advertising, Wheel Horse started referring to the RJ-58/59 as a Suburban tractor sometime during production. Then, in the 1960 brochure, they named the tractors the Suburban 400 and Suburban 550 as shown in the brochure and on the manual. In 1961, the manual cover removed the "Suburban" title, but the advertising literature still referred to them as Suburban tractors. This is generally where collectors quit calling tractors suburbans... although interestingly if you look at the cover of the 1962 manual, they were still called Suburban Tractors! They were still referred to as a "Suburban Tractor" in ads as well, but I think this was going back to the original reference to Suburbia itself. Even as late as the 1963 brochure they used the term, but I think clearly this was used as a general term. After that though, I don't recall seeing the term used.
-
1 pointPicked up a real nice 522Xi. These models are really starting to grow on me Thad (Ohio)
-
1 pointHi all. Picking up this horse this weekend. Owner is not a horse guy and has little knowledge of the tractor. Wish he was giving it away though! From the pic could you guess the year?
-
1 pointSo I am at work and my wife is blowing up my cell phone with calls and text messages.... Course I can't answer becasue I am in a meeting with a client. I finally have a minute to call her. She asks me, "did you see my text?" I said " I have been in a meeting, what do you need?" She replies " do you think we have enough branches now for the mulch we need?" I finally look at he photos... What in the H#(( happened to the fornt yard.... Well, you did not call me back so I just told them to keep piling the brances up!!!!!!!!! The pile is 7' high, 10' wide and 30' long. It does tapper off slightly in the last photo, but still! Judge for yourselfves... I had to take 3 photos in order to show the entire massive cluster of brances I have to chip/shred on Saturday........ Rob
-
1 pointIt is a 60" deck, which I have always liked. They are just so stinking heavy though Thad
-
1 point
-
1 pointThe ones I pictured above are actually trailer wire clips for 1/8" steel. I use them around here for lots of tractor and trailer applications. If the metal is thinner I bend the tooth end in a little. I suggested them cause they are $3.55 for 25 (14 cents each) and you can afford to go crazy with them.
-
1 pointim back again i got that B.S. fuel pump made up the plate same as what the gasket looks like.drilled an tapped the hole in center of plate.put in the pipe fitting with a nipple on the end .hooked it all up primed it an she started right up.go back out again in a few to see if it starts up again.an then put the whole thing back together.keep your fingers crossed.
-
1 point
-
1 pointThat's a nice looking 551! I have a 551 but it was mutilated by the PPO (previous previous owner). It will have to be a restoration/modification.
-
1 pointYa. I've tried mixing and matching. But I'll take another look. Wish I had the origanal. It had a primer lever on it.
-
1 pointI Got a room for Friday also.Loading up the trailer tonight. Hope all three fit as Scott said he wanted to get 200 machines Smitty
-
1 pointI sent this to Nick already but for those of you who want to see a Carlisle 23-850-12 on a 414 rim here it is, I just put these on dads old tractor. The Carlisle is truer to spec.
-
1 pointNick, like i said earlier, the sizing depends on the brand of tire, they are all different. the 520 mostly had 12 x 8.5 rims and 23 x 10.50-12 tires, (but the older tires are more true to the correct size). when you say on a 400 series, i assume you are talking about 7 inch rims, the 10.50s in the older tires will go on there, but they look bulged out compared to the newer cheaper tires. my 418 i just finished have 23 x 10.50-12 carlisle all trail on 12 x 8.5 rims, they are a lot closer to the true size than the duro or deestone tire. with ags, you really need to do a lot of digging on sizes to get the info. many members on here have been disappointed with the lack of true size on some of the brands...... agree with you on everything except the narrow rim was a 7 and not 7.5.
-
1 pointGood title, and good write up, someone doing a search on pullers should hit this quickly. So -- since I had just completed another variation on a puller I thought this would be a good place to show it. As with mrfixit, and a lot of us, I just scrounged around in the shop and came up with the materials -- a slab of 3/8" steel plate about 5 1/2" square (4 1/2" bolt circle on hub) five 7/16-20 bolts, a little to long but its what I had, and a 3/4-16 bolt. Set up the mill and drilled the 5 holes to match the hub and drilled and tapped the 3/4-16 threads. mounted ti up taking care to maintain equi-distance on the 7/16 bolts to prevent 'cocking' and hit it with my 1/2" impact wrench. The 2 hubs would no doubt been ones that would have defied any lesser means of pullers - 3 jaw, etc they were TIGHT!! Even when they started moving, they fought till the last 1/2" or so. The bolts were common hardware items and probably wont last but another couple pulls, ideally Grade 8 would be used
-
1 pointthank you Geno. Kent built this one with help from Dad. well to be honest, it took more than just help and also a little 'encouragement'....... he quickly realized i wasn't going to build it myself, he also realized the tractor wouldnt build itself!!!!
-
1 pointThank you Martin, I just purchased the same coil from gorilla moters 3 ohm and should be in by the 8th. I will update after I install it . Thank you for your time and information Jesse
-
1 pointThis may sound odd but I look at the end of the axle in the hub and measure it...... Sent from where I am.......
-
1 pointMight be a change of plans. I may be there after all Saturday morning until lunch time.
-
1 point
-
1 pointgood work... might be worth popping over to our sister site myoldmachine.com to say hello and see if anyone can help....
-
1 point
-
1 pointMight have to resort to fabricating the hitch " pipe" from a bit of pipe to try and make it look original. The welder has seen a lot of use recently fabricated a new deck shell from 3 mm steel:) If anyone knows of the castings or a whole trans please let me know.May be willing to pay shipping from USA? Thanks Thomas
-
1 point
-
1 pointClear POR -15 was used (two coats and one spray paint rustoleum overcoat) on two of my deck restore projects several years ago. They are both still operating and no rust or undersurface holes!
-
1 pointSomething just hit me about a comment I made. Assuming the newer stop pin is longer it still has to let the balls clear the rail. Isn't the purpose of that pin to just be a guide for the spring? I would think the spring determines how firm the balls hold in the detent. A different spring isn't mentioned in the service bulletin. Is a different spring used along with the newer pin?
-
1 pointFinally the long road to restore my C-141 to its former glory is complete. She looks good and runs great.
-
1 pointThat's one of the best original suburbans that I have ever seen, don't restore it
-
1 pointI agree with john , the GT14 is an awesome tractor , wheelhorse designed the tractor like a tank. Here in UK they are very rare & I only know of around 6 , but rumour has it that on 50 were imported to UK . Here are a few pics that a took yesterday of mine. My good lady even likes to have a go every now & again .
-
1 pointIt might have been a special tractor but when you get down to it had nothing special on it Mechanically. Maybe the engine was a one timer. Other than that it was all cosmetic. I have a NOS GT 14 that was given to my Granddad when he was a dealer. He was in some kind of a dealer contest sponsored by Wheel Horse. He was awarded a special plak given to him from C. Pond himself and one of the new GT 14's. He never started it. Before it was crated up he had his Pic taken on it at the factory. They crated it up and sent it to him. We still have it, never been started. I could never sell it, but if I did I could not ask that kind of money for it. Heck the tires are dry rotted and belts dry rot to. Actually time just sitting has not been kind to it. Would not surpise me if all the seals in it are rotten to. Myself I just don't see what's so special about that tractor to warrant that kind of money.
-
1 pointYou're doing a heck of a job Kent, It was good to talk to you at the show saturday.... Looks like your tractor shines a little more than the ones your dad has . Keep up the good work.
-
1 pointSay Bowtie, until you said that I assumed mine were tubeless, so I went and looked at my B-80 and sure enough mine say tube type, but when I got them I did'nt pay any attention, I just mounted them. So far so good, although I did put some tire slime in one of them a couple days ago because it was going low and I did'nt feel like dismounting the tire, it stopped the leak. On most tubeless tires I have mounted the bead of the tire goes onto the wheel easily without having to really air the tire up to make it seat, but these were just like a tubeless, I had to air them up to 20 or 30psi before the bead seated. They have been on my horse for a month now and I did'nt even know they were tubeless, so I say go for it, mine dont seem to need them. Why should yours? Bowtie to Bowtie
-
1 pointI used the 400x8 deestone tri ribs in mine, bought them for $40 a pair plus $15 shipping from tucker tire on ebay, and I love them.







.JPG.9f2ecb26065c66527b0730084ab7fc7a.thumb.jpg.7dc8a04d9a53d44ee2b23f26ee94496f.jpg)
