Leaderboard
-
in all areas
- All areas
- Markers
- Marker Comments
- Marker Reviews
- Articles
- Article Comments
- Article Reviews
- Classfieds
- Classified Comments
- Classified Reviews
- Wiki's
- Wiki Comments
- Wiki Reviews
- Blog Entries
- Blog Comments
- Images
- Image Comments
- Image Reviews
- Albums
- Album Comments
- Album Reviews
- Files
- File Comments
- File Reviews
- Posts
-
Custom Date
-
All time
November 28 2011 - November 12 2024
-
Year
November 12 2023 - November 12 2024
-
Month
October 12 2024 - November 12 2024
-
Week
November 5 2024 - November 12 2024
-
Today
November 12 2024
-
Custom Date
10/01/2014 - 10/01/2014
-
All time
Popular Content
Showing content with the highest reputation on 10/01/2014 in all areas
-
8 points
-
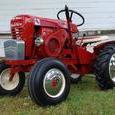
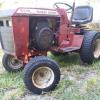
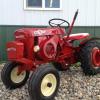
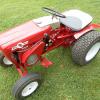
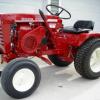
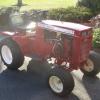
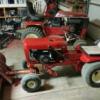
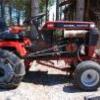
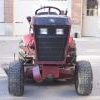
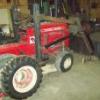
6 pointsYes, thank you, just created an account for this WH site. Really great site from what i have been looking at and reading to answer some questions, My brother got the tractor in the late 80's Started to restore it, and never finished, so it has been sitting arounfd for a very long time until last year. This 400 was a year long build,. Sometimes progress was minor and even slow, to leaps forwards in progress. Parts list, 3-5 hp Industial series briggs engines( picked briggs, for fit, easy to get parts, and easily modifyable, these engines are drag raced, so i have the option to go very radical) Troy Built pony tiller electric start system, 3-plumbling chrome fittings for the exaust, 3 chrome air cleaners, 3 thecumseh H50 carbs, 1 fuel pump operated from the crankcase pressure, 1- triple snowmobile trottle sysem, 1 john deere belt gaurd/ elevator sheet metal, 8 pulleys, 3 idol pulleys, made the battary box and used a motorcyle battary for the small space i had left under the seat that was not taken up by the gas tank/ seat bracket, and belt gaurd , made and mounted the steering system on top the middle engines's L head offset the steering shaft. Deck lever(shortend to fit under air cleaner and remade bracket), reworked clutch/brake pedal, wider tires for the back, 5" ones for the front. and many more hours with metal brackets, intakes manifolds , air cleaner mounts. overall i just got it running and driving late spring of this year, I still have to finish it, just not now, maybe next year,, but painting, will not be an option, i kept it as gotten condition and i wanted a Ratrod themed tractor, lot of work just to get it to this point, a lot of EBAY parts since my brother lost a decent amount of the parts he took off
-
3 pointsWell... it's commonly used to refer to the mid-engine 1960 and 1961 models, the 400/550 and 401/551. Beyond that in a much more complicated fashion though... Wheel Horse used the term/name Suburban for several years. Just the term "Suburban" refers to the fact that this was a tractor for the "Suburban households" that were gaining in popularity in that mid-50s era. Expansion of housing into Suburban developments where people wanted their small patch of land with a lawn and a garden. Many people were losing interest in living in the "urban" city. In advertising, Wheel Horse started referring to the RJ-58/59 as a Suburban tractor sometime during production. Then, in the 1960 brochure, they named the tractors the Suburban 400 and Suburban 550 as shown in the brochure and on the manual. In 1961, the manual cover removed the "Suburban" title, but the advertising literature still referred to them as Suburban tractors. This is generally where collectors quit calling tractors suburbans... although interestingly if you look at the cover of the 1962 manual, they were still called Suburban Tractors! They were still referred to as a "Suburban Tractor" in ads as well, but I think this was going back to the original reference to Suburbia itself. Even as late as the 1963 brochure they used the term, but I think clearly this was used as a general term. After that though, I don't recall seeing the term used.
-
3 pointsI will be using my first Wheel Horse. Just got a free 314-8 and went out and picked up a snow blower attachment.
-
2 pointsHere is what I believe is causing the condition. The shift rails are supported by blind bores in the transmission case and machined to a fairly close tolerance. Add gear oil to the mix and it gets even closer. The top rail in the illustration is for 2nd and 3rd gears and the rear rail in the transmission. Both shift rails are in the neutral position. The 2nd and 3rd rail when shifted into 3rd gear is slid farther into the case bore. When you shift back to neutral from 3rd gear vacuum is created behind the rod. If you go through the neutral gate the shifter lets go of the 2nd and 3rd rail and enters the 1st and 2nd shift rail. The second the shifter leaves the 2nd and 3rd rail the vacuum behind the rail (rod) sucks it back into the blind bore and engages 3rd gear again. BUT the shifter has already selected 1st or R gear. If you are is 2nd gear and shift to 1st or R the same thing happens but this time it is pressure in the blind bore that returns the rear rail to 2nd gear without the shifter in the rail. To vent the blind bore my plan is to grind a shallow spiral groove in the rod so that the vacuum and pressure is relieved faster. Location of the ground groove is critical at the detent ball notches in the rod so it does not interfere with them. A spiral groove would minimize future wear in the casting. I discovered this many years ago and have lived with it by pausing at neutral before shifting to the other rail. The pause gives time for the pressure or vacuum to dissipate and it works. I have since acquired a short angle drill and wonder if a vent hole could be drilled into the bottom of each shift rail bore. That would be even better but don't know if there is room to get the drill in to do it. Garry Adding Wheel Horse addressed this problem in late 1964 As a result all the transmission model numbers used in 1964 got new model numbers in 1965. I suspect this was a result of the change. It would be interesting to see what tractor models or transmission models still experience this problem today.
-
2 pointsWow! That just about sums it up. Mounting tires on a tractor is a chore. It took me all day, but I am proud to say I did it myself. Anyway, looks good. Much better than the tires I had... I haven't seen a surface like my sidewalls since someone spilled a bucket of oil on a dry salt lake bed! I mean, they were CRACKED. 3 of the tires had tubes in them, otherwise, I don't think they'd have held air. Before I took on the task, I browsed the net, watched videos, read tips and even researched tools available for the job. I settled on making my own bead breaker using a 6' long 2x4 bolted to my work bench. This was the lever of the bead breaker. I bolted a short 2x4 to the first one about 18" from the bench to act as the "shoe horn." Both bolted joints articulated. Later, I cut a taper on the shoe horn, making it more pointed where it met the rim. To the tapered surface, I then screwed a 1/4"x1-1/2"x3" brass plate for strength. Worked like a charm. I was glad I had the extra leverage on the front tires. Aside from the bead breaker, the only other tools used were two of the cheap $5 tire irons from Harbor Fright (typo intentional) and a flat bar (wonder bar). Okay... here are my tips... things I didn't see elsewhere in my research. #1 Measure the rim!!! BOTH SIDES!!! Geesh... SOME rims the tire will only go on one way! I wish I had known that. Futzed with one of the front wheels for 2 hours before I figured out one side of the rim was a good 1/4" larger in diameter. Once I flipped it around, the tire slid right on (relatively speaking). #2 NO LUBRICATION! (if mounting manually). Rather, only lubricate AFTER the tire is on the rim. I had more trouble with lubrication than without. Seemed to make the tire iron slippery enough, but couldn't get purchase necessary to stretch the tire over the rim. Dry was no problem. Once the tire is on the rim, I sprayed the bead with windex prior to inflating. I figured that might help the bead seat. Tip #3... take your new tires and rims to a garage and PAY THEM TO MOUNT THEM! Okay, I doubt I'll ever follow that tip, but boy will I be tempted. Finally, I'll finish with this... I decided on BKT tires. Since I plan on using my C-125 as a FEL, I bought 6-ply turf tires for the front. I also plan on using the tiller, so I chose the TR-315 trenchers for the rear. I had seen someone on this site talking about the diameters of the Deestones being considerably smaller than comparable brands (Carlisle?). For that reason, I avoided the Deestones. Sadly, the BKT's are also small. Same size Carlisle Turf tires (23-8.5-12) were a good 2" larger in diameter. I can't help wonder if the larger turf tires won't have nearly as much traction as the smaller trenchers. I'm really disappointed about this. I may try to sell them and get something else. Anyone have any recommendations?
-
2 pointsYes that blower is a 1962 and should fit your 702 and looks to be in VERY nice condition. Jason is correct about removing that suburban bracket. That bracket and the lift arm make it the st302 for a mid engine tractor but those are the only differences I can remember between it and the st3072. If it's only a 1/4" too narrow then it's probably just tweeked in a little and bending the mounting brackets back out should work. It bolts directly to the frame with 2 bolts each side in the front 2 holes of the frame. You'll need to make a lift arm. Maybe cut the pipe of that one and weld in a new length of pipe or rod?????? Or just make a new one out of angle????? I might be interested in that bracket for a suburban. Made one for my blower and thought I bought one to replace it but just haven't seen it around.
-
2 pointsThis is what I use. Do not pound out on the back of the hub you may pull the axle out of the transmission.
-
2 pointsI think that most of the "Spray Bed Liners" have a rough-softer surface (to keep things from sliding around in the bed of a truck). On the underside of your deck, you want a very smooth-hard surface so the moist clippings slide off easily and don't stick. POR15 alone is excellent, hard and very smooth. I like to also use "Slip Plate" (liquid Graphite) on the underside, and then redo the graphite every year. IMO, the Bed Liner may not be the better choice if it is rough-soft, unless the actual surface itself resists grass sticking (like a silicone coating would).
-
2 points****UPDATE**** The beans are coming off the field. Make sure to pack those plows and be ready to turn some soil!!!!!!
-
1 pointCaught this little, tri powered, custom Suburban 400 cruising around the show field today at the Kent show. Nice young man by the name of Ethan, said it was originally his brothers long term restoration project that languished a few years before he got it. Ethan wasted no time shoe horning three Briggs under the hood, which starts on one engine, then engage the clutch to bring the other two on line. Little guy sounds like a mini top fuel funny car sitting there at idle. I asked him if he's done any mowing with it...he replied, yeah, some...really fast mowing. I told him about us here on RedSquare...so hopefully he'll be joing us here soon...also mentioned, he's built a rotary engined Raider that eats gobs of gas.
-
1 pointcan anybody tell me what this snow blower will fit (i have a 702). and the bar for the turning rod is that supposed to be bent?. the serial number on this is a-10286. also if anyone has pics of one like this mounted that would be great. thanks.
-
1 pointLoaded a couple WHs and others for the show tomorrow thru Sunday. No selling this trip, just relax and enjoying. Anyone going, stop in and chat.
-
1 pointHello all, I've returned again. The B-80 is slowly coming along, photos will come sooner or later. I am planning on putting ags on the rear, and tri rib's on front. However, my B-80 is the '74 model, and it has the 22.5x7.50x12 tires. Obviously, the Ags are 23x8.50.12. So, those tires wouldn't fit right, I imagine? I have a Wheel Horse 856 in my shed, (Spare wheels anyway), would they fit on a B-80? I believe they are 23x8.50. It's in pieces currently, so I can't find out myself.. (It's off frame now, thats just the only picture I currently have.. dismantled anyway.) Spenser.
-
1 pointOkay, I know this guy and he just doesn't give a flying beeepity boop what people think.... The cops pulled him over and made sure it was secured twice so far... Makes me laugh and shake my head all at the same time... Tony
-
1 point
-
1 pointJust received my Original Tractor Cab and glass windshield. New tractor is supposed to be delivered Monday. [emoji2]Can't wait.
-
1 pointwell,well you learn something new everyday. i didn't know you had to remove the "suburban" bracket to mount it on a 702. thanks guy's i'll let you know how it works out.
-
1 pointHere is the hub puller I had built (since I do not have welding or machining skills). It is super heavy duty and I have not found any hub that will not succumb. It is made from 1/2 inch steel plate with a 1" grade 8 nut welded to it and uses a 1" fine pitch grade 8 bolt to apply the load to the axle shaft. Bolt the plate up to the offending hub with five 7/16-20 bolts, put a 1 1/2 open end wrench on the welded nut. (These wrenches are long enough so that it will touch the floor and provide the resistive force to the torque you will apply to the bolt). Drop a 1 1/2 inch, 3/4 sq drive socket onto bolt and crank away. Because the threads on the bolt are not long enough to completely remove the hub, halfway through the removal process, I have to remove the puller and insert a 1 inch diameter cylinder into the partially removed hub and reassemble the puller. If I had to do this all over again, I would use a 7/8 diameter bolt so it could be used on 1 inch axles. How well does it work? I have pulled 3 sets of hubs. Two sets were real nasty and one was relatively easy. An impact wrench would have speeded up the task. The puller that an earlier RS member made from a hub will work as well, I just did not have a spare hub lying around.
-
1 point
-
1 pointAnd not to ignore the OP... that is a beautiful looking 551! It never ceases to amaze me that some of these things are found in that condition after 50+ years! Congratulations on the score! My 400 also has those old diamond turf tires... I love the look.
-
1 point
-
1 point
-
1 point
-
1 point
-
1 pointVery nice. Just went back and read the whole topic front to back again... congratulations on a fine looking machine. Just in time for Scott's, eh? I'm sure it will get some well deserved attention there!
-
1 pointSorry.. my Horses don't like snow. I'm using a 1969 Bolens Tube Frame 1256 with a snow blower, and a plow.
-
1 pointMight have to resort to fabricating the hitch " pipe" from a bit of pipe to try and make it look original. The welder has seen a lot of use recently fabricated a new deck shell from 3 mm steel:) If anyone knows of the castings or a whole trans please let me know.May be willing to pay shipping from USA? Thanks Thomas
-
1 point
-
1 pointI used spray on bed liner on foot rests for one horse. It seemed to hold up well for that application. Looked pretty good to. I too will be going the POR15 route for my deck one day.
-
1 pointEngineering Overkill: The sill plate on my house was nailed to the foundation instead of bolted (built 1975). One wall in the basement had shifted so we had a structural engineer out to give us a plan... wait for it: Bolt a CONTINUOUS 6" x 6" x 3/8" structural angle around the entire house (bolt to every joist, anchor to wall every 16"). That would have been almost 2 TONS of steel to make up for a couple 1/2 in bolts. (and would have cost $20K). We had another engineer come in and design it in sections that reduced our cost to $1k and keep just as much strength. I am an engineer (electrical) and can appreciate a little over-engineering as much as the next guy (look at those churches that were built in the 1700's)... but you have to know when to be smart about it.
-
1 pointwheelhorse-c-161-1979, one word of caution here. When I was cleaning out my daughters goat pin using my C-141 with a Ark on it. In the short time I was off the tractor on the end of a pitch fork, a goat ate off one of the valve stems on a front tire as I had the wheels turned and presented the irresistible valve stem to it. Then one jumped up on the seat and started to do a number on the on the rubber lines running into the Control Valve. Don't turn your back on those destructive Horse eating creatures for one second.
-
1 pointMy 42" deck does this.. You can see the deck flex when it's lifted... You'd be better off to find out why it's twisted (my bet is stress cracks like mine) and repair it...
-
1 pointYessir! One heckuva job for sure!! Welcome to Redsquare! Looking forward to more pics of this beast! :-)
-
1 pointthis is my c-120 restoration project (gear drive) I got 2 weekends ago I paid 100 dollars for it came with an awesome non wheelhorse really heavy snow plow.IT has a twelve horse kohler that I had to just adjust the points on it and clean carb and adjust it.
-
1 pointWas thinkin', "Son has a trashed handicap rail from a recent job." We cut the rail, stainless with welded flanges. Pulled out the pop rivets. The Dewalt cutoff saw did the trick. Then we thought, sounds great. We tried to use the fall off from out first try. Sounds great and the heat is rising. Sounds like sunrise at Camp Lejeune!
-
1 point
-
1 pointI will be sending a few more pics to put up on the main if possible, mostly one of the hood looking down, and a similar one with the hood off
-
1 pointFinally got the trans fluid drained, and cleaned up a bit... visually, everything looks OK in there, found no bits in the bottom... gears seem pretty good, all except for that B-1816 needle bearing in the axle tube. I'm hoping I can just replace it, add a new axle seal, then button it back up.
-
1 point"If I buy a new "tractor/mower" honey, I will have to buy all new tools too. You know the new machines are all metric and the Wheelhorse is SAE standard. I sure would hate (snicker, snicker) to spend all that money on tools you know, just to fix one "tractor" but if that's what you want me to do......" Seriously though. Total the cost of a new "tractor" to mow the grass with. Then compare the cost of a new tractor vs. the cost of repairing/maintenance on the one you have. If she is anything like MY girlfriend, she will see keeping the older maintained one will keep you in the black longer than a newer one breaking and putting you in the red. My GF may grouse about me having too many tractors a few times a year but when I have to pull a bush, mow a patch, plow the driveway, till a flower bed etc... she doesn't have too much to say.
-
1 pointYes, 1 stick in each gallon for 1 to 2 weeks. The bad thing is you have to taste it to see where it is at. Take the stick out when if has the hint of Cinnamon that you want. You could also ferment the juice to make wine. Here is a couple of pictures of my grinder and press. I have not used the press in a while...as you can tell. We rebuilt the frame some years ago with full dimension oak. I am not wanting to hi-jack your thread...I am just thrilled to see another press and someone using it. Let me know if you want a recipe for making wine. The press is like 4 feet high.
-
1 point
-
1 pointAll the Horses love snow, plow, plow, plow. 416-8 and 414-8 aren't set up but, here's how they'll look.....shortly. The 520-8 will be setup too. For what? Grandsons love snow too ya know!
-
1 point312-8 with 48" blade and a sb421 with a homemade back plow
-
1 pointVery cool custom Lane. When talking with Ethan, who fabbed the tri po 400... he mentioned he was very adamant about not modifying the frame or factory sheet metal when building this .
-
1 pointJeesh! Tough crowd! Can't a girl get a break for burning her hand? It's tough to produce a video with one hand! So, here it is. Ed, it probably still wasn't worth getting up early for https://www.youtube.com/watch?v=plLoCF6tJpw
-
1 point
-
1 pointThe Dunning–Kruger effect is a cognitive bias manifesting in unskilled individuals suffering from illusory superiority, mistakenly rating their ability much higher than is accurate. This bias is attributed to a metacognitive inability of the unskilled to recognize their ineptitude. Huh???
-
1 pointWhile waiting to paint the hood I have been making several adjustments in how the panels fit up, installing new amp meter and replacing the carriage bolts with stainless steel bolts. Also looking into a surface mounted tachometer.
-
1 pointThanks for the encouraging words. Much appreciated. Well, its time for another update. I got the wheel weights painted, and on the tractor. While not as nice as OE wheel weight, they're very functional, and look decent. I'm currently running 115 pounds per wheel. I took the tractor out for a good workout today. We decided to expand the garden, and I decided to give the Brinly plow a go. This ground has never been broken before, and our soil is very, very hard to plow, till, etc.. Not to mention, this is the area we have been parking a big class A RV in the past, so it was well packed. While the plow works great, the tractor had a hard time keeping the plow moving. It did it, but it didn't like it! The pics below are of the hard packed soil. After that, I ran the plow through an area that had been broken last year, and it ran down through that like nothing. After breaking the ground with the plow, we hooked the tiller up, and finished it off. I also took a short clip of it tilling. I've ordered a hydraulic flow control valve for this Case, to help with tilling, and such. On Case Garden tractor, the travel control doesn't just increase/decrease speed, it also increases, decreases hydraulic pressure, so when your trying to go slow for tilling, your not putting much power to the ground either, so when you try to slow down, it ends up stopping, so you push the lever farther forward it goes to fast. Its very annoying, especially when your used to working with a that has an 8 speed. Gotta love those low gears on a Horse. Anyway, the travel control I ordered will allow a very slow ground speed, while still maintaining maximum power to the ground. I'll try to get a better video soon. Thanks Matt

