
Leaderboard


Popular Content
Showing content with the highest reputation on 03/25/2014 in Posts
-
3 pointswell i was a trip to sweden to day and i went in to a liquor Store.. and geeeees i found TT's beer.. so i just had to buy a few boxes of it..
-
3 pointsThis is another load that was going to scrap. The man that I bought the load from inherited it from his brother who was pretty big on his Horses. He went to the big show every year and had several restored round hoods among other newer models. He had a pretty good parts stash too. To shorten up a long story the brother met a woman dropped everything and moved...to another country...So that left the guy that I bought this stuff from to clean out his brothers garage and put the tractors in storage. He is sorting out and selling some stuff and keeping a few tractors. Not being a Wheel Horse guy a lot of stuff was scrap to him,including this load of parts and the "all most" rolling 520 chassis. I plan to go back next weekend. I am trying to work a deal with him on 3 tractors,some early 60's Tecky's of Wheel Horse's and some other parts.
-
3 pointsrusty, so where are the pics of all the scrap and junk? All I see is gold. Glenn
-
2 pointsI pick up a nice 1054 Wheel Horse tractor today needs Little TLC but a lot potential and also picked up a wheel horse 702 in which probably going to sell. I been looking for a 1054 for awhile now a plan to restore this one next winter. The 702 seems like its all there but seems like someone was taking it apart.The deck is in decided shape. I also picked up a nice searsss15 with and bower and a mint deck. The John Deere 111 also came in the package most likely sell both of them to. To top of the whole buy today there were about dozen engines and parts I also got to.
-
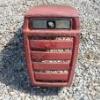
2 pointsThis is one of the scrap yard bound tractors that I drug in the other day. Turns out,it runs and drives nice. The transmission feels great and the deck even seems quite. This would make a very good fix up and use or restoration candidate.
-
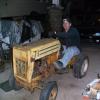
2 pointsSHES ALIVE .. Had her running today for a short time before the newly painted muffler smoked me out. Gotta get her outside tomorrow for a test run and carb tune. New oil and filter, decarbed combustion chamber , valves cleaned and set, new plugs, new oil drain pipe, new gasket under oil filter base, ,cleaned carb, and removed around on gallon of gunk from tins and cooling fins. Still needs some wiring clean up including a new switch and steering tightening. Might try to look under the brown rusty hub caps to see if there is any chrome left.
-
2 pointsGreat save! I have a 1054 coming home this weekend, very excited! Mike.......
-
1 pointhey guys, as you know i work for a wheelhorse dealership. i recently transfered to another one of our stores, and in doing so found a huge shelf in the upstairs portion of this place that houses a ton of used wheelhorse parts. i want to get this stuff sold to make room for other things here at this dealership. just curious to see what everyone was interested in seeing me throw up in the classifieds section. or rather what parts are popular among all of you that i can sell on here. im sorry in advance if this post is in the wrong place. i wasnt sure of where to put it all. pm me or let me know here what you guys wanna see sold in the classifieds section. oh yeah i forgot to mention, there is no part numbers on anything so bear with me on this stuff
-
1 pointgreat haul whats the model of that green briggs motor brian
-
1 pointGreat haul! The 1054 looks kinda purple....is that just the way the picture came out? Mike...........
-
1 pointlike i said, we will see how it works out. i used permatex ultra black. i have a hard time removing any of this stuff when i don't want it somewhere, so i will see how well it sticks to the lining and the band. i have reserves of the lining if need be......
-
1 pointSame duck, different year...I picked up a 953 this past weekend.
-
1 pointman, the 1054s are coming out from everywhere........
-
1 pointmore progress.... clutch, brake pedals and linkages on and got the brake band lining stuck in the brake band....... heres how i did the brake band....... brake band ready to have lining glued on. it was previously blasted and yellow zinc plated. lining purchased through mcmaster carr, http://www.mcmaster.com/#6175k813/=r94hwf the lining needs to have two holes put in one end to clearance the rivet heads in the band... hole positions marked. the lining was easy enough to drill with a drill bit so thats how i made the holes. i picked a drill size just slightly larger than the heads of the rivets. holes look positioned ok around rivet heads..... then i needed to cut the lining to length, i marked the side of the band where the old lining ended and then marked the new lining the same. squared of mark and cut to length. the lining cut easy with a large sharp pair of scissors.... i used the brake drum as a mandrel to clamp the lining tight to the band. i smeared black silicone on the lining and using a battery clamp bolt and spacer, drew the band together tight around the drum. the band and lining needed a couple bar clamps as well to keep pressure all the way around. i will leave it for a good 24 hours and see how it worked out. i haven't done one of these before but heard others on here use silicone to glue the lining. i guess i will find out how well it sticks.....
-
1 pointThank you, and no I don't mind. After paying for fuel round trip to pick it up, I had $600 total into this Case with all of the attachments. I got a great deal on this machine! If this had been up north it would have brought much more, but there are very few garden tractor collectors down here in my part of the world. Thanks Thanks chazm! It is a big garden tractor, and I'm really liking it! I finally got around to getting the Brinly plow that came with this 444 back in working order today. It was very rusty when I got it, as it had been sitting in the same place so long, that it was actually under the ground, with only parts of it above the surface! I knew it was going to have rust pits, but after removing it from my E-Tank the rust pits had become rust canyons! Thats ok, as its for work, not show. I did give it a coat of paint to prevent further rusting, and it got all new adjustment hardware, and coulter wheel from Brinly. It seems to work very well, but I still need to do some adjusting on it. Here are a couple pics. Thanks Matt
-
1 pointRe the tag I'm no expert and I'm sure others will chip in if I'm wrong but heres some observations regarding the 1977, 1978 and 1979 models of the D-200. The word 'model' refers more to design than factually indicating year of manufacture and like the auto industry models were introduced earlier than Jan 01. The 1977 model (I have one) was the last with the red & white WH decals and things started to change with the 1978 model. Keeping it simple the rear rims that could be put on either way round for wide or narrow track were replaced by wider rims that only fitted one way. A band brake was added to the tranny, and decals changed in a kind of odd way. Initially the 1978 model was given a mix'n match set of decals some from the Red & White style, some from the new silver on black for controls, and an interim newish style D-200 for the sides of the instrument dash. Example in a thread here: I have a second D-200 that is a slightly later 1978 model but it has the full set of later style decals. Both my 1978 D-200 and the one in the above thread share the same parts suffix of 01 despite the differences. There never was an 02 variant for that years model. Technically yours is a '79 spec model that apparently went into production earlier in the preceding year than would normally be the case so perhaps they decided to hurry on from the confusion Andy
-
1 pointThat's It! After hearing that I Quit Drinking! :help:
-
1 pointNow thats what I call a BIG BOY TOY.... Nice job Matt ...
-
1 pointLooks Like Your on yer way. Make sure your tightening sequence and Torque's are Correct. ~Duke
-
1 pointThat is a beautiful tractor. Mind if I asked you how much you paid for it (pre restoration)? I have no idea what the pricing is like in the Case world.
-
1 pointI would love one of those tractors one day.
-
1 pointI hate to muddy the waters on this whole topic but Cub Cadet used both Sundstrand and Eaton transmissions and they recommended hydraulic fluid in them....If you read up on Eaton trannys, Eaton recommends many different types of fluids to be perfectly acceptable for use in their transmissions but suggests you check with the manufacturer of the equipment for what they suggest..... I personally think the 10w-30 was a Wheelhorse spec to make things easier for owners....
-
1 pointGreat service......The gaskets I ordered from Onan Parts on Thur were delivered Monday. BTW...I could not get the old gasket off with the plastic scraper. I reluctantly used a razor blade. I kept it very flat to the head and block surfaces to prevent any risk of gouging the surface. I then used a block plane (w/o the blade) as a surface plate covered with 500 grit emery paper to remove the remnants of the old graphite gasket material. Then scrubbed with Sea Foam. The surfaces still have the small indentions from the metal points on the old gasket. This seems to result in a good flat clean looking surface...hope It holds the new gasket. The most difficult part to clean was around the valves on the block, as the stick up above the surface making it more difficult to scrape and keep the block plane flat.
-
1 pointThat commercial should come with a public health warning!!! I feel like I should listen to some Metallica to restore the balance
-
1 pointWOW , WOW & WOW ! B E A U T I F U L !
-
1 pointGood job of saving all this stuff. After seeing the muffler and rain cap, my question is: Do you have a lot of horizontal rain?
-
1 pointNice save! Looks like a lot of useful goodies there.
-
1 pointOne heck of a haul! Hard to believe people junk stuff like this all the time. Better get back there soon to scarf the rest of it! LOL!
-
1 pointI only ever knew of one size, 6.40-15 as has been stated. B.F. Goodrich Silvertown power grip was used as the lug tread. Not sure what the turf tread tire was. Mark.
-
1 pointChris, there is one on CL in your area with some sweet looking bug eye headlights! Looks like it needs a LOT of work though.
-
1 pointLeave in Barn for 50 years! ~Duke
-
1 pointIf these are going to be "users" , I'd love to see some bedliner on the inside . If they are going to be for show , please disregard the above . Awesome work !!!
-
1 pointYeah, so good, they even made a commercial about it. http://www.youtube.com/watch?v=GUhmaTXlUDg
-
1 pointmust be nice! Around my neck of the woods, 2 WH's on CL at the same time would be considered a gob. And the ones on there now are sold items that for some reason the sellers won't take down. If I want to drive 3 plus hrs. Then yes there is much too choose from
-
1 pointThis thread is one of the longest on Red Square because this winter has been one of the longest in memory and it's not over yet! We will have to post a few more of the action shots before this week is over!
-
1 pointGene, I have remembered. He is 2nd in line on the tractor.
-
1 pointThe next order of business was the paint, and body work. This is the part I dislike the most, but it can be very rewarding when done. The hood, and fenders were the only parts that I stripped down to the bare metal, as I really wanted them to turn out nice, and smooth. The chassis, and wheels got a couple coats of Case Power Red, which I mixed myself using IH Orange, and IH Red, the color I use on my Horses. The Desert Sunset color for the hood, and fenders I had mixed at my local paint supply, as I didn't have the necessary colors for mixing that. I used hardener in the paint for added durability, and shine. I then picked up a set of decals to finish it off. Thanks Matt
-
1 pointI am a lineman for the county And I drive the main road Searchin' in the sun for another overload I hear you singin' in the wire I can hear you through the whine And the Wichita Basketball Team is now off the line I know I need a small vacation But it don't look like rain And if it snows that stretch Down South won't ever stand the strain And I need you more than want you And I want you for all time And the Wichita Basketball Team is now off the line And I need you more than want you And I want you for all time And the Wichita Basketball Team is now off the line ~Duke
-
1 pointNice old horse, nicer old wrecker. I did not see an old onan generator, no collection is complete without one or two
-
1 pointAfter some pressure washing.
-
1 pointekennell, You wont be sorry for ordering from TJ. I purchased a complete engine rebuild kit from him 2 years ago on my 520 SNOW CHUCKER and everything came out perfect. His prices are right inline and he is great on delivery. Good Luck ~Duke
-
1 pointalright, thats enough nonsense, its Friday night and the last thing i want to think about is work...... except on the tractor that is! update. got the intake and carb all bolted up with new gaskets and mounted on the engine...... also finished off the wiring to the starter solenoid and up to the headlight harness plug, i didn't have a 2 position connector so i just crimped the push on terminals and will install the connector at a later date. theres always something that has been forgotten and can't finish off an area on the tractor.....dont get me started on that...... few more of the engine, put an extra harness clip or two to hold the wiring so it won't rub on the paint. got a new filter gasket so that went on..... also got a different air cleaner the other day (different breather hose position than the one i had) so the base got painted along with the dipstick tube and engine pulley.. this air cleaner had a chrome lid, not sure if i will use it or just go with the black one. (this one has more power than the one that was on it though, wonder if i would notice the difference?)
-
1 pointWell, that certainly is the common description of a fuel problem - will run on spray and wont without. Since you did work on the fuel system just prior, then retrace your steps, something must have changed.
-
1 pointThe Cubs aren't playing this year?
-
1 pointwas going to say it looked like a kentucky headhunter. no pun intended
-
1 pointWow, what a great day Duke! Looks like you all had a great time.
-
1 pointWay to go Duke . Looks like you guys had a great time.
-
1 pointNice little collectible there, having him sign the magazine article too. Looks like everyone had a great time...you're a good ambassador Duke.
-
1 pointWell congrats Duke, looks like and sounds like you had a wonderful time. Looks like you made a great ambassador for are hobby and Red Square.
-
1 pointWow What an honour that must have been Bob You and the family looked like you have a fantastic time with this Guy And such great pics Any of those pics are calender worthy Congratulations Bob Just had a thought perhaps you could get this guy to be a member here at RedSquare That would be awesome


.thumb.JPG.1b2a1a39cdcedb1e001571713350b32c.JPG)


This leaderboard is set to New York/GMT-04:00