
Leaderboard


Popular Content
Showing content with the highest reputation on 03/19/2014 in all areas
-
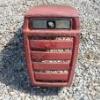
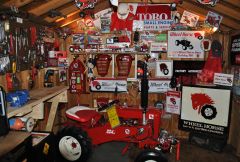
5 pointsI picked up a nice little 1980 Craftsman mower from a co-worker last fall for about the price of the gas to go get it on top of the gas to go get it. He had bought it new in 1980 and had taken care of it but now wanted it out of the garage. I listed it on Craigslist and a guy called and asked if I would be interested in taking some old tractors on trade. To make a long story short I traded him even for his "scrap".I ended up with a parts Bronco 14,a 65-66 short frame ( I haven't even taken the time to look at the tag yet.),and a 1054.The hood and cast grill shell for the 1054 is here but not on it. I started the 1054 tonight,it seems to run good and the hydro lift seems fine. I also got a Case 444 with sleeve hitch and hydraulic PTO out of the deal. Some has put a B48 Onan on the Case. Lots of Kohler engine parts came with the deal. I also got a Wheel Horse snow plow and a Case snow blower. Pretty good trade I thought. Here are some pictures.
-
5 pointsNot quite...
-
4 pointsYep that's him! Rock n Rye in the Cup!
-
4 pointsSteve does look funny in his ice fishing outfit doesn't he!
-
3 points
-
2 pointsThe B-80 is a very good little machine. If it is in truly, truly excellent condition, I'd give $600 for it. If you bought a beater for $200, you would have much more than $600 in it to bring it to the condition this one appears to be in. Look at it closely. Picture's don't always tell the story.
-
2 pointsHell even trade for a Crapsman??? Dude had no idea what he had. I drive past a Case 444 everyday and it hasn't moved in 2 years, but I am too chicken to ask about it.
-
2 points
-
2 pointsI didn't know there was a "flyby"window at Starbucks.Guess I should start leaving Double Lattes at the bird feeder. Nah, On second thought the Squirrels would probably hog them up.
-
2 pointsI'm sure you already know this Jake, but after you blast the block, clean, clean and clean again to make sure you get all the media out of there. if the block is getting rebuilt then a hot tank at the machinists would be good. i like how you've taken it right down though, its the only way to do it right......
-
1 pointOk folks I am in need of your assistance. I am currently in the planning stages and working out the details here at the elementary school that I am teaching at to start a “tractor club†for boys and girls in the 5th and 6th grades. This will be a unique opportunity to share in my hobby with the kids that I work with each day. My goal is that the kids will be able to get their hands dirty and learn about a vintage piece of machinery while taking pride and ownership in a project that they can see through to completion. I feel that this is almost becoming a dying breed as electronics have taken over the interest of young minds. I am currently on the search for a vintage Wheel Horse machine that is not ultra collectible and one that is fairly simple to work on, gear drive tranny is a must. Since this project will be funded on my dime, I am looking for a inexpensive machine that will fit the bill. I will then be searching for parts from time to time once the tractor has been designated. At the end of the project we will auction it off and take the money from the sale to purchase the machine and supplies for the project during the next school year. We are still working out the logistics here at school and hoping to get this project started very soon. Any help you could give would be greatly appreciated. I will try my best to document our progress for all of you to follow along and enjoy. I am excited at the possibilities that we may have. Thanks again! ****UPDATE**** David Rice has been gracious enough to get a nice running C-120 in to my possession for this project. A thank you goes out to Terry Dennis as well for the new decals that this machine will have once it nears completion. I am continually impressed with the hearts and generosity that so many of the members have. I am looking forward to this project with much anticipation!!!!!
-
1 pointSaw this and just had to have it. Its a kiddies pedal car from the fifties made in the UK by Triang. Unlike kids toys today, this was made from steel not plastic and although it's got some surface rust over the years it's in amazing shape for its age. I've seen them for sale on stalls at shows but only very occasionally and usually with more rust than paint and with tyres or other parts missing. This one's got four good tyres (well 5 actually) and all with the hub caps still in place. Despite it's simplistic design it still captures the iconic Willys MB / Ford GPW 'WW2 jeep' look. If the paintwork was in better order I'd just wipe it with oil and keep it original but there's a couple of welding repairs to do where the front fenders have come away from the body tub and overall it's just a bit beyond avoiding a repaint. Looking forward to taking it to shows along with the real thing Andy
-
1 pointrusty,,,,,,,I knew it. Lol Sure looks nice to me. thanks for all the pics. Glenn
-
1 pointGlen,not quite a trailer queen but a nice one. This one went out Saturday.
-
1 pointI’m posting this in the hope it may be useful to somebody somewhere, if not to RS members who seem to be generally able to turn their hand to pretty much anything, perhaps for the many out there that trawl the net looking for basic information to give them the confidence to do a job. After all, it’s from the ‘guests’ that a forum’s membership often grows. Having just finished overhauling my 216-5 ready for the new season which included fixing the brake it was time to overhaul the 227-5. The 200 series rarely seem to feature on RS, possibly because they are vertical shaft and considered to be ‘lawn’ rather than ‘garden’ tractors. Anyway, on with the job in hand – sorting out the brake which was poor in that it just about operated with the pedal fully down and the parking brake lever ratchet wouldn’t stay locked in the ‘on’ position. The 200 series are fitted with the ubiquitous Peerless transaxle found on many makes of garden tractor from the 80s era and which have with a transmission disc brake. The rod from the brake pedal applies force to the calliper operating lever via the larger strong spring with the result that you can control the degree of braking action by the amount the pedal is depressed. Adjustment to compensate for the brake pads wearing down is made by tightening locking nut securing the lever to the calliper. If this adjustment is not maintained then eventually the brake only just works at full pedal depression and there isn’t enough tension in the big spring to hold the parking brake ratchet engaged. So it’s simple, just adjust the nut eh? Well, having just overhauled the brake on my 216-5, I would say that having got this far always take the whole assembly apart unless you are certain it’s in good order as you’ve done it in fairly recent years. Removing the lever revealed the first sign that dismantling was indeed required. The disc must be able to move on the shaft and those splines looked ominously rusty to me so continue on. The two ‘plungers’ (for want of a better word) that transfer force through to the pad can be removed at this point. These were clean and still shiny; those on the 216 were a bit rusty but still came out and cleaned up ok. On removing the housing, the brake pad it retains dropped out in two pieces! Be careful to locate and put aside the metal plate that sits between the pad and housing to take the force of the ‘plungers’. So now to the brake disc which when new would have simply slid off the splined shaft. A bit of wiggling and it came off (just) by hand. The problem here is that the disc sits very close to the transaxle casing making the use of a proprietary puller difficult if not impossible. With the 216 it was stuck firm and even penetrating fluid left overnight didn’t help so I had to resort to some tapping. There’s a bit of end float in the shaft so I made wedges from scrap steel sheet of various thicknesses that would just fit either side of the shaft between the disc and casing. A few taps with a copper mallet and it moved a bit allowing a couple more thin ‘wedges’ to be inserted and so on. The idea was to bring it far enough forward to use a puller but by the time it had moved that far I managed to pull it by hand. The second brake pad sits in a recess in the transaxle casing and was part worn but intact. There appears to be a thin fibre shim between the casing and the pad, possibly it was used to hold the pad in place during assembly or possibly it provides a smooth surface. On the 216 it had pretty much disintegrated so I cleaned what remained of it out. It was time now to remove the grass debris, and clean the splines on the shaft and the disc. When the splines on each are clean of the rust and solidified grease mix the disc should move easily on the shaft – almost a tad loose in fact. The disc on the 216 cleaned up well and was pretty much perfect but this one was pitted. Looking at the pad surfaces they seem to have broken up a bit and developed pockets that held moisture causing the pits during winter storage year on year but hey, ho – it’s a tractor not an automobile so it’s going back for now and I’ll keep my eye open for a better one. The pads however, needed replacing. Re-assembly, as they so often say, is pretty much the reverse of disassembly but here are a few points: Grease the splines and wipe off any excess. Remember to install the rear pad before putting on the disc. Remember the metal plate that sits behind the outer pad in the calliper housing. Remember also that the bolts securing the calliper casting go into ally – don’t over tighten! Some Peerless diagrams show a coil spring that sits on the adjuster thread before the lever is installed but I didn’t find one of these on either tractor. I think it must have been an anti-rattle device so I’ve added one to each tractor but I guess it’s not that important. I greased the surface of the lever that actuates the plungers and the reverse face that moves against the washer. Now it’s time to adjust the brake calliper by tightening the lock nut. I’m not sure what the OEM guide for this is but I tightened it till there was just a little forwards / backwards movement left i.e. in the ‘off’ position the lever isn’t touching the ‘plungers’ but starts exerting pressure through to the pads as soon as it is pulled forward slightly. Having reconnected the brake rod to the lever and also attached the return spring to it one can check the operation of the brake and the parking brake ratchet – they both worked well. I’m sure someone will chip in and correct me if I’ve done something drastically wrong here but it seems to have worked ok on both tractors now. I've used tags for this post and images uploaded to the forum gallery! As I said, hope this is useful to someone out there. Andy
-
1 pointAre those youngins for hire? Looks like their doing a mighty fine job. ~Duke
-
1 pointWell it is Wednesday night and that means one important thing........Tractor Club Update!!!!!!!! Well after an awesome field trip last week to the powder coater, we are now back in the barn. We do not have the entire tractor back and have also ran in to some issues with the transmission. Hopefully those little hiccups will be solved soon. We at least had enough to start bolting things to the frame. It is slowly starting to take shape. The tires are just about done, and the motor will be taken back to our shop to get the final prep before primer and paint. Now the tough part.......keeping all of these little hands busy. They all want to jump in and turn a wrench but as you all know, it is a process as this jigsaw puzzle goes back together. I might just have to get one of my tractors over there for them to redo. Well only snapped a few pictures tonight so I hope you enjoy!
-
1 pointNice iron! Lots to work with! WOW! Keep us updated, we're nosy busy bodies.
-
1 pointWow, what a save from the scrap pile. Some guys have all the luck! James....have you shaved yet?
-
1 pointAnd these. I likely have more but this is all I can think of right now ( some are buried under snow and ice). Makes your tractor very versatile. I would not be without mine. Cleat
-
1 pointHopefully someone bringing a 1054 or c-195 for sale? Sent from my LG-D800 using Tapatalk
-
1 pointThey are on ebay....just search kohler delco remy starter. Around $15 for new bearings and brushes. I had to put some in my 702 about a year ago as the previous owner was deaf so he never noticed the sound of the noisy bearing.
-
1 pointWhen we hear about some of the great deals some guys get we all hear this statement "man I wish I could find a deal like that sometime". Well ......... You don't get to say that for a while!
-
1 pointto Garry always steers you correctly, Got one last week, similar, but some PO had welded a 3pt lookin' piece to it. Like the angle adjust knob on yours; have to unbolt on mine. Where got mine fellow has a what appears original walk behind WH with B&S engine, PTO and tiller. Course I know it's a long way from you, hate to see it go to scrap, but I don't have room for it. Hope ya find a good new home for cultivator!
-
1 pointWere you looking at this manual? There are 2 manuals in that file. An old one and a newer one. Looks like the drawbar is upside down from the parts list. Garry
-
1 pointThanks guys. Y'all are helpful as always. And I know, pics needed. :)
-
1 pointI paid $600 six years ago for a 1975 B-80 with a 36 inch mower deck, two wheel cart, snowplow, chains and cast iron real wheel weights. It was in great condition and I mow, plow and haul with it all the time. A good all-around garden tractor. I have two mower decks as I always want to have one ready in case something breaks , etc to keep mow-ready! I like the B-80 a lot.
-
1 pointThat looks to be a 74 or 75 with the flip up fender and hood ornament, also kinda looks like it's been repainted, not a bad thing just saying.
-
1 pointYou give him your no. and tell him to call you the next time he gets a older tractor in ??
-
1 pointI was going to buy it for resale, so you might as well sell it yourself.
-
1 pointNice "save" James! Trading up to some keepers!
-
1 pointThere was no 1968 B-80. 1974 to 1977 are the years for the B-80. Check out what the little metal tag says -Below your B-80 decal and post it. We will be able to tell you ( and the seller) what year it it.
-
1 pointSent from my LG-D800 using Tapatalk
-
1 pointAccording to my records a 633 should have a K141-29102A engine. I am not super familiar with the 633's but my pull-start 502 still did have the welded in battery box, but instead of containing a battery it held a "toolbox".
-
1 point
-
1 pointGot the block cleaned up after being soaked in mineral spirits and blasted the head and oil pan. Will work on blasting the block tomorrow. Here's a couple pictures.
-
1 pointJohn...you need to bring some of what you are smoking to Mentone. Please!!!
-
1 pointI agree 100%! The first sign of WHA (Wheel Horse Addiction) is when you pick up a Horse to keep the Stallion company. One Horse dozin', one sweepin', one mowin', one tillin', another Horse culvatin', after another Stallion finishes plowin'. Don't forget one with a cart to pull the grand kids 'round in!
-
1 pointBarbell weights
-
1 pointThat seat looks great but I tried one and there wasn't enough padding in it for my taste. I got the first seat pictured here from TSC. Very comfortable. The 2nd seat pictured I got from The Surplus ctr. I've had it 8 yrs. or so and it's the best tractor seat I ever sat on!
-
1 pointI remember working in an auto shop. We had a guy who always kept a rag hanging out of his pocket. He was cutting off an exhaust when the rag caught fire. I yelled to him and he put it out. The guy next to him, who was a ball buster had gotten the water hose out. He let him have it even though the fire was all ready out!
-
1 pointIt happens.
-
1 pointOhhhh now I see, I thought it was a frankinmachine like that cut the grass, I guess it's just like a powered push bike then? Doesn't seem a bad idea..... This is what I thought you meant Ahaha!
-
1 pointHi Guy's, many thanks for all the offers of using your videos, it's much appreciated As you will of noticed I'm rather behind with this project, life has been a mad mixture of chaos and exhaustion of late, which has made me so behind on so many things... I will get this project rolling again as soon as I have the chance.. Sorry for the delay, meanwhile here's some light music
-
1 pointhehe, the amount of times I get hot bits of weld and spatter in my ear... or down my sleeve... or in my shoe... I've done a few jigs they would be proud of on riverdance
-
1 pointNot that mine are awesome by any stretch, but I do have a couple on Photo-bucket. (potato bucket... )
-
1 pointIan, I just saw this. Quite honestly, I'm not sure my videos are good enough for what you are trying to do. The videos are good, but my ad lib leaves a lot to be desired. They are yours to use, if you want, but they are not on U-Tube. How would one go about putting them on U-Tube? I think my best one is "Watching Paint Dry". The transmission ones are good, and serve their purpose, but I sure would like to re-do some of them.
-
1 pointThe pump in my Sovereign 18OHC appears to be a Sundstrand 15U with an iron housing. I believe Vickers was the only other supplier of hydro units used in the Simplicity / AC garden tractors.
-
1 pointsince brian is hogging this month all to himself and nobody else is posting up their tractors (and theres quite a lot of very nice customs by members on the forum)............ edit: i see that fireman just got one in before i finished this post....... i will post one of mine...... most of my tractors have small custom fabrication but look basically oem, the one that stands out the most i guess is my 1057, it sort of fits into this category.... not what you would call a full custom or whatever, but it has a few non oem details, first and for most would be the vinyl 'blackouts' on the hood and seat pan. another not readily noticeable custom touch is all the cast iron has been smoothed before being powder coated. and speaking of powder coat, all the paint on this one is powder, everything, which means all of it had to come apart and be painted individually, because theres a lot of parts on these tractors that doesn't like to be heated to 400 degrees f for 30-60 minutes....... heres some pics of my 1057......
-
1 pointHad to wait for the new disc pads to arrive in the post before reassembly so for completeness here are the final pics. I've stuck to uploading them to the forum gallery but I'm not really happy about the way they're displayed in the post. Not sure if this can be overcome - if not I'll return to hosting the photos elsewhere which seems a shame. Probably I'm doing something wrong. Caliper assembly back in place, 'plungers' greased, and additional coil spring added. Everything else back in place and the lever arm adjusted. I'm not sure about this being the correct arrangement for the return spring which has been rather stretched in the past. This is how I found it and how I put it back. The wrench is just to indicate the size I used in order to minimise the risk of overtightening the caliper retaining bolts. I'm probably doing something wrong in the way I've put gallery images in the post. - Can anyone help on this or is it just the way it is? Andy


This leaderboard is set to New York/GMT-04:00