Leaderboard
-
in all areas
- All areas
- Markers
- Marker Comments
- Marker Reviews
- Articles
- Article Comments
- Article Reviews
- Classfieds
- Classified Comments
- Classified Reviews
- Wiki's
- Wiki Comments
- Wiki Reviews
- Blog Entries
- Blog Comments
- Images
- Image Comments
- Image Reviews
- Albums
- Album Comments
- Album Reviews
- Files
- File Comments
- File Reviews
- Posts
-
Custom Date
-
All time
November 28 2011 - November 12 2024
-
Year
November 12 2023 - November 12 2024
-
Month
October 12 2024 - November 12 2024
-
Week
November 5 2024 - November 12 2024
-
Today
November 12 2024
-
Custom Date
03/10/2014 - 03/10/2014
-
All time
Popular Content
Showing content with the highest reputation on 03/10/2014 in all areas
-
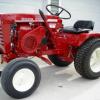
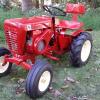
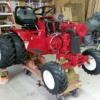
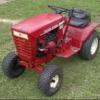
8 pointsI want to first off thank all the folks here on this board for helping me with my project. My wifes grandfather passed away in 1989 and this tractor had sat in a pasture since the 70's. He purchased it new from the dealer and as some pictures show, he completely "farmerized" numerous pieces. He somehow installed a power steering pump, heat shields, and other items to just make it work. I was able to finish this project this weekend and give it back to a stunned mother-in-law and father-in-law. I tried to leave parts and pieces in original-ish form, but obviously had to fix others. You have all been so kind and generous with your time and answers. I have never worked on cars, or farm implements. I borrowed tools, asked questions, and for the first time in my life listened to advice. I am the epitome of someone who had never even heard of Wheel Horse 4four months ago. Sure there was some money spent, but this has been very fullfilling. My favorite parts were the heat shield that I was able to design to use her grandparents names, the id tag which is his birthday, and the engine tag that I had done so that it showed his DOB/DOD on it so nobody would forget. I told them the only rule was this has to be used, driven, played with, wrecked, fixed, used. It is not allowed to sit in the garage and looked at. I used rattle cans, so that if there is a scratch, we can just touch it up and put it out to be played with again. I will probably never own a Wheel Horse again, but I would like to think the knowledge you guys gave me, will stick with me. I feel like one of Ken's kids in the Tractor Club! Enjoy the pics. I have some before and afters, and a few of my wife back in 1975 playing on the tractor with her grandparents. There were plenty of tears shed yesterday when I unveiled it. I told them I just was going to get the engine to run, they had no idea. I know this board's motto is "pics, pics, pics"! so here you go. sorry the pics were so small, I needed to make them small to fit so many...
-
6 pointsI was tiling a bathroom on a hotel recently and i had a few old broken tiles left over, so i thought rather than just throw them away i would put them to good use . Here are a few pics of what i managed to conjour up , The mosaic even has some chrome wheel nuts which i took off some plumbing fittings I thought i would use the display when showing my tractors at the shows
-
4 pointsHere is his B-100 auto, / B-80 auto as it sets here It now has a 12hp in it with 10hp decals but looks correct, here it is as it sets now with the bigger engine.
-
3 points
-
3 pointsI would like to Thank everyone that buys parts from me. My wife has been driving the same van for near 13 years, I have kept it repaired over the years, but MI winters and road salt have taken it's toll on the body with many holes some very large, and the near 300,000 miles it has on it, we knew the end was near for it, so I began selling a few more parts this winter, putting out the "I have your part send me a PM" line in a bunch of post, well last week her van died on a morning it was -19 deg. so I took the money raised from selling parts and bought her a nice used van, it's even red. All thanks to the great buyers here on RS and a few other tractor site, We both THANK YOU ALL for your patronage. Here is pics, I drove all over the state looking at junk, and was about to give up I was tired of driving and looking at vans people said "It's in great shape" only to see junk, then this one came up, we drove 3 hours to see it after getting many pictures and talking to the owner on the phone, so glad it turned out to be as nice as she said, there are honest people out there.
-
2 pointsThanks to all for the birthday wishes. I had a good day topped off with dinner at Cheesecake Factory. No donuts though.
-
2 pointsDont light all the candles tho....dont want it to look like the side of Stevebo's barn ! Mike............
-
2 points
-
2 pointsWow, you got even closer to my stuff... Most all of my junkpile is in dad's polebarn in Alton. Had you headed up the hill just a couple of miles you'd have been there. The cable stay bridge at Alton is a beauty. PBS did a Nova special about its construction back around 94 or so. I think they called it "Superbridge". I went to the dedication which was in the middle of winter on one of the worst days I can remember for weather. Cold and windy! Can't imagine what it would be like to have to had work on the thing in that weather. That's the Clark Bridge by the way. You also crossed the Lewis bridge when you went over the Mighty Missouri at West Alton. I suppose you can guess the famous duo for whom the bridges are named. It looks like you took the river road out of Alton towards Jerseyville. Did you see any eagles? There's a glut of them this year for some reason. Yesterday my wife took the kids up to Grafton, IL and stopped counting at 50 separate Bald Eagles. Next time you're in southern IL be sure to send me a note! Steve
-
2 pointsThank you everyone for the kind words . I plan to do another in a few weeks but next time it will be something different but still on the Wheel horse theme . I also plan to so do something on the same lines but this time it will be with Stained glass . I qualified to do stained glass windows some years ago but like everything else life just gets in the way .
-
2 points
-
2 pointsAre you sure that you have the right size drive belt? The belt should go tight before the idler pulley comes up far enough to hit anything.
-
2 pointsIt came to in pieces, disassembled by the PO. Seemed to me pretty straight forward to reassemble...no problems there. Checked the parts diagram in the gen set manual, seems like it went back together correctly. Rebuilt my other Fairbanks Morse recoil this past summer using a $2 Tecumseh replacement recoil spring from Ebay...worked like a charm. Seems to me like something with similar ends on it would work well in this application too. I'm thinking two dollars...I'll roll the dice, and take another chance.
-
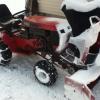
1 pointAfter lifting the plow 40 to 80 times the old arm was sore. This is what i came up with and the things i had to work with.Note to self keep 65# of lead in front and have it hope you guy's like it works great wish i'd done this years ago!!
-
1 pointGreat band, these guys played at Toad's place in New Haven, CT Sunday. Michael Martino and his wife stopped by to see them. I love watching my daughter perform! f0ac073c4b7621574737430175c53e76
-
1 point
-
1 pointHODGE 71 is right on the money. Get the 7473 OEM belt and be done with it. If you buy an aftermarket belt, it wil NOT precisely fit the contour of the V pulleys, giving rise to belt slip which results in burn-out and premature belt failure. Whats more, the aftermarket belt will ride the V pulley a little bit higher, or lower, either of which will cause malfunction in clutch linkage / engagement. I have a 1972 Bromco 14 that I bought new in 1973. It has drive belt # 7478 and, sadly, I had to replace it 3 years ago...for the FIRST TIME. That belt cost me $35 and I expect it to last another 38 years. I can't even imagine an aftermarket belt with that kind of longevity.
-
1 point
-
1 pointI hate sounding like a idiot asking these questions. I didn't own this machine very long before it was taken down and that's the way it was for approx. 2-3 years. Got married, bought a house(fixer upper) and had first child ten months ago. Long story short I finally am getting really close to the light at the end of the tunnel thanks to all of your much needed help. I didn't plan on not getting back to it for that long of time but it happened. Well my problem was an easy fix. I didn't have the belt on...................I know im an idiot but they don't tell you this stuff in the manual!! LOL belt fixed the problem. thanks for the help and im sure I have a few more as the final assy continues.
-
1 point
-
1 point
-
1 point
-
1 pointyes it sure is a beautiful bridge. especially at night when its lit up. I remember the old one having to Cross it semi that was fun..
-
1 pointWOW...there is a ton of negativity here. All we need is a guy with a garage and a stash of stainless steel.
-
1 pointsimply amazing, how many hours does it take create such a nice project like that
-
1 point
-
1 pointI may a bit dense but it would seem to me the big pulley would spin at the PTO speed and the blade spindles would be going much much faster..screaming. The big pulley looks just like the one that comes with my woods L59 finish mower that goes on my Case VAC. It has a standard 540 PTO and the big pulley spins at that speed and the blade spindles spin faster...Big pulley is 18inch, spindles about 4.5. I think that jumps the spindle speed to about 2160 rpm. The pulleys on my WH finish mower are all about the same size so that would make the spindle speed about 2000rpm Sorry I do not have a picture of the pulley mounted on the PTO shaft
-
1 pointJust a little update on my progress or lack thereof. I had to replace the bearing plate after I discovered that the threads were stripped in one of the 1/4"-20 holes in a tab for mounting the fan shroud. Thanks to Joe's OPE for a good deal and fast shipping on a replacement. Having done that, I had a good day for painting, so I applied a some paint to dress it up. Here's a couple of pictures:
-
1 point
-
1 pointYour ceramic version is beautiful but can't wait to see the stained glass version! Great work!
-
1 point
-
1 pointGlad everything and everyone is safe Steve! My wife thinks I'm crazy because I don't allow candles anywhere, nor have I ever lit a real fire in the fireplace (we have a gas log in there now). I've always believed that if you light a flame in your house, regardless of how controlled the environment is, you're asking for trouble.
-
1 pointI agree, awesome road trip and nice RJ! I don't mind a nice long road trip for a tractor. My round trip limit I set for myself is a 10hr. road trip for a tractor I can't possibly live another moment without. All I need is some good 70's rock on the radio, a CD of Waylon Jennings, Johny Cash and a few good cigars....I was interested in a nice single stage snow thrower a few weeks ago but I couldn't get into the 5hr road trip. Different rules for attachments I suppose..
-
1 pointGreat story Kelly.....hope you hit 300K with this one as well! ...Do I see a trailer hitch on it..hmmmm.....a new horse hauler ?? Mike..........
-
1 pointits an important service you supply us,old machines need parts,plain and simple
-
1 pointIf I ever hit it big on the lottery I'd by the rights to wheel horse and produce parts and tractors for better or worse. :)
-
1 pointBINGO!!! with wires hooked up.....1st pull a sputter and 2nd pull we were off and running. Running pretty smoothly as well. I am very happy right now. This was a nail biter for me. Hope to get the fine tuning done this week. thanks you were a big help!
-
1 pointi think the way they are going with spare parts availability and pricing, they would rather see wheel horse just disappear into history. doing an anniversary special would only be a reminder of what used to be......
-
1 pointIt is amazing the amount of talented people who just happen to be HORSE-A-HOLICS. Over the top awesome Neil.
-
1 point
-
1 pointSteve : The new bridge is nice. The old bridge route going into Alton was a mess on Friday afternoon as we hit rush hour traffic! We had a little more room and I was thinking you were not far away from where we were. I see now where you get all you stuff! That route to Jerseyville is filled with guys who buy, sell collect and store lawn tractors!
-
1 pointNeil, now sir if something has the WOW factor, its that creation. Attention to detail is super. Job well done. Glenn
-
1 pointMade the belt guard for the RJ 35. Thanks to each for your help, especially Brian. One note the 1-1/2" dimension, for the front mounting tab, on Buckrancher's pictures does not work for my tractor, it may be good for all the rest of the RJ 35's in the world, but not this one. The first picture is of the mandrel I made to bend the flat bar around, the OD is just over 4". It should be noted that one should restrain the unbent end of the bar by clamping it securely to prevent slippage and bending. Again thanks to all for your help, David
-
1 point
-
1 pointMore parts painted. Got to make sure I lay down 2 coats of paint and than a good wet coat. Really like my 3M full face mask!
-
1 point4th picture up from the bottom: That stuff is sticky. Guess that's what I'll try next time. Thanks Terry.
-
1 point
-
1 pointToday is valve day. I took the block with the cam, tappets, and crankshaft installed, to the machine shop to have the valve stems ground. As you should know, the smaller K's do not have adjustable tappets, so if you grind or replace valves, the valve stems have to be ground to obtain the proper gap. Since I don't have a way to accurately grind my own valve stems, it's off to the machine shop. My shop has a policy that if you have machine work done to the engine, they will grind the valve gaps for you free of charge. I have done this on the last K161, and the K181 before. I was unpleasantly surprised today when I was presented with a bill for $47.50. Seems I didn't have any work done on this engine, so...I think I will start looking for a nice stem grinder. I brought the block home and began the process that I hate most in these engine, trying to install valves with my FAT fingers. I have yet to find a simple way to install the valve keepers without having them fall off at least 10 times before I have success. Anyway, just a note for the novice engine rebuilders here, read the manual...thoroughly. I made this mistake on my first rebuild, so I thought it important to point out one of things that might get overlooked. Valve springs have an up side and a down side. The exhaust valve and spring was installed with a few swear words intertwined with the sound of little valve keepers falling to the bench below. Finally I remembered that the last time I put a dab of oil on the inside of the keeper to hold it to the stem while I was trying to install the next one. So after completing the exhaust, it on to the intake. Just as much trouble with that one, but I got 'er done. Checked my gaps. .006 on the intake, and .017 on the exhaust. Ready now to start putting things back together and see if it runs again. That's a job for later. Now it time for a cup of coffee.
-
1 pointIf the problem with the 520HC is the Onan engine, were it me, I'd swap the 16 hp Kohler into the 520HC, add Matt's foot control kit. That gives you two hands free for steering and moving around the chute - like on a gear drive, one heck of a torquey engine, hydro lift and the heavy 1 inch spindles/swept forward axle. Just a thought.
-
1 pointNo model number needed. Its a vertical shaft snow plow for the A series (A80,A90,A100) 6-7122 or 23. Its the same as the 70-73 6-7121 plow, except they slotted the mounts instead of just having through holes. Easy of install was the reason I've been given. Will it fit any of your horses? NO!! Not with out alot of modification. These mid mount just behind the front wheels, but not in the same spot as a mid mount attach-a-matic. So you would have to cut off the ears and extend the frame, and also fab a new lift point. The verts lift the plow by pushing down and forward using the mid mount as a fulcrum, instead of lifting like the horizontals. My advice, would be to save the $100 and put it towards the proper blade. They pop up for that or less quite often. Just my $.02


