
Leaderboard


Popular Content
Showing content with the highest reputation on 03/01/2014 in all areas
-
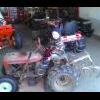
6 pointsI picked this 657 up this past fall on a whim. It was listed on Craigs List for what seemed like months for 75 bucks. I contacted the seller to arrange a look see. The engine was a Techy off a snow blower, strike one. The rear diff and the shifter were both locked solid, strike two. To make a long story short I couldn't find anything else to convince me to close my eyes and walk away so we settled on 50 bucks and I loaded it up, I got it home and dragged it in my shop. Within ten minutes the shifter was freed up. I pulled the plug on the diff and the water came out first and the sludge tried to come out. I then filled the rear diff up with kerosene and let it sit for an hour while I went inside and ate some dinner. I made my way back into the garage and what do ya know, she now rolls. Pulled the plug again and all the nasty sludge made its way out. Filled it with Kero again. I then monkey'd around with the Techy enough to get it too run. It ran ok but just like any Techy snow blower engine, kinda dizzy and kinda crappy. I ran it around for ten minutes and flushed the diff a few more times and then filled it with oil. All is well there now. The next day I tore the Techy off and put on a K141 that I had "In Stock" I wanted this tractor because I wanted a pull start tractor, a tractor I could leave outside in the coldest weather without having to worry about a battery going dead. Not too mention if I had to buy ANOTHER new battery it certainly wasn't going to go in this tractor! This old war horse starts within two pulls every single time, even if there is a foot of snow covering it. She has hauled firewood from the wood pile out back to the house all winter without a single problem. I've thought a few times about doing a total restoration on it as a reward for good behavior but there isn't really room inside to store it with all the other Horse's taking up my space. I think the only thing I'm going to do is add the proper style seat and call it done. At least that is the plan for now, when warm weather finally gets here and if I'm feelin it ya just never know....
-
6 pointsMy son did he was impressed with the black soot around the burn.
-
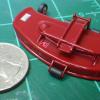
6 pointsThere's much to report on the little Electro! The progress has been slow but steady as I had some time. Here it is in the "service bay" getting ready to have the lift valve installed and plumbed. At that point it was almost complete. The hood had been prepped already complete with a decal for the headlights. The headlights that came in the kit were never going to look right so I tried this and it looks pleasing to me! Steering wheel ready to go. After adding the levers and neutral pedal she was done! Of course, it had to have a Harrison Elementary Garden Tractor Club logo on the rear fender. Go Huskies! I brought it to the Baton Rouge Scale Modelers meeting last night and the guys were floored! Nobody had ever seen anything like this built before. They enjoyed the stories about interacting with the people on Red Square, too. It's a world they didn't know about. So this has been an adventure that I wouldn't mind repeating. There are already plans in the works for another possible Wheel Horse project and I can't thank all the forum members enough. This couldn't have come out like it did without all the help and support. I will definitely keep checking back in to this really cool forum! See you soon!
-
4 points...er ah well sort of. I bought an 18 Automatic from a fellow Redsquare member that had it (the 18) listed in the classifieds. This 18 was being job lotted together with a rear grader blade, three point hitch, rear quick attach axle bracket and rear wheel weights. I also was given free delivery!!! When the tractor arrived there was an old rusty Brinly plow on the trailer, I thought that it was for somebody somewhere else. I was surprised when one of the gentlemen delivering the tractor picked up the plow and set it down with all the other stuff. Well after I had it stored in my shed for some time while I was working on a resto/mod of my 18 I decided I would have a go at disassembling it piece by piece and sanding, primering and painting them or having my brother take them to where he works and powder coating them. (Best part about this is he does it free.). I had to get some replacement parts because the "U" bolt and clamp were missing for the coulter standard and the crank had stripped threads due to someone trying to remove both of the nuts at the same time. I also used all new hardware. Then I added the decals (Repo.). I only have one before picture of the plow. P.S. I also was given the three point hitch adapter for the plow, seems to be modified a little.
-
4 pointsHow'd you take that picture ??
-
3 pointsThis is a long story so bear with me. My wife and I go to my brother's Elks lodge for Friday dinner quite often. The last time we went a little over a month ago, sitting at my brother's table was a man named Bob Shinsing. Quite a friendly fellow and we quickly learned he had been an aircraft mechanic during the Korean war. As we talked he told us about his hobby of making airplane bird feeders. He showed us some pics of them all with different themes. I got thinking he probably could do a plane but I didn't want to ask. After we left the first thing he says to my brother is, "Do you think they would like one of my planes?" Of course my brother said yes and suggested the theme. Fast forward to yesterday and a certain Dino finding a box of VCR tapes of old monster movies on his step. What a surprise!! A giant "Saurus sitting in a lawn chair in his basement with a TV tray full of chips and his mug watching B movies. On my birthday no less Today I get home late after a really long week. sitting on my porch is this airplane bird feeder with emblems on the tail! .I tried to think of who could have sent it as I only got to know Bob for like an hour. Then I saw the card inside from my brother and it all came back. Needless to say I was shocked! I called my brother and he got a big kick out of it. Gotta figure out how to get on next year's calendar! Enjoy the pics!
-
3 pointsLots of folks need them - some folks can make them and others will need to buy them. I'm assuming the average guy doesn't wish to invest $100 - $200 into supplies and tools to re-create a C series wire harness in a professional manner, What price would you be willing to pay for a complete C series harness ? Not a 520H, Lawn Ranger, or 416, but a C SERIES harness. all new connectors all new tin plated terminals heavier duty marine grade wire heatshrink and soldered terminals dielectric grease on all terminals tested, packed and shipped to your door. What's that worth? Is it profitable for someone to take on the task of becoming a vendor of new wiring harnesses?
-
3 pointsI've had trouble with the knob on my throttle cable spinning on the shaft when I try to lock it in position so I drilled a hole and put a roll pin in it. I'm hoping that will cure the problem.
-
3 pointsMust've been signed by Cecil at some point.
-
3 pointsI got this finished up today, overall I'm pretty happy with how it turned out considering I painted this one myself.
-
2 pointsHe called a half hour ago and "I will be out front at your place in two minutes. Get your coat on and come outside." I said I will be there. I go outside and what do I see a newly gathered RJ! He got a K91 motor with it (but not on the tractor) ,. A little rough but $300 and he is on to another restore project. A gave him a points cover and a recoil cup to help him on his way!
-
2 pointsInstalled the foot rests, cover, and guards on the rear 520. Front 520 rear wheel in the tire changer showing protective tape on edge of rim. Rear tires assembled, leak checked, and installed on front 520. Cleat
-
2 pointsAs always pics would help but it doesn't sound like a bad deal to me. The Electro 12's are one of my favorites for getting the job done. I just wish I still had one! I traded mine off to a loving home a few yrs. ago. I'm always on the look out for another one, they are a very capable snow pusher as well. http://www.youtube.com/watch?v=OSbaHkb0OqY
-
2 pointsNow , what are the chances of you making a scale model of ME so I can ride it ??? J K ^ . Stunning !
-
2 pointsCongragulations on the new project. I'm happy to hear your boys will have a wrench in their hands.
-
2 pointsAfter Cecil signed my first tractor at the first show W.H. Show he attended someone standing next to me said WOW do you know how much you just increased the value of your tractor ? This was in no way, shape , or form the reason I wanted Mr.Pond to sign my tractor. I just thought man holy cow I got one of my tractors signed by the man himself, how cool is that ! The next show he came to he signed another one of my tractors and the signatures don't look the same. Now I did not get pictures of him signing them but I don't care because I know they are real and I feel very fortunate to have them. God bless this man who inadvertently gave so many of us such a good clean hobby that can be shared by all age groups.
-
2 pointsI have already done that a few times
-
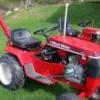
2 pointsI took the sickle bar off and put the mower deck on this morning. I bought this with the intent to make it a worker, I'll use it to mulch leaves this fall then put the snow blower on it for the winter. I've been tinkering with Wheel Horses for a few years now and I finally have one that I can use. This is what it looked like when I brought it home.
-
1 pointAll I can say is.... FREAKIN OUCH !!!!!!!!!! .....
-
1 pointThink that stump was signed by Cecil?
-
1 pointDidn't you ask the same question in another thread? You either have the wrong ignition switch, or you have it wired wrong.
-
1 pointDoesn't matter what any of us think. Is it worth it to you? Thats the issue! Personally, I think it is a good deal with all the attachments, if you have a use for them. Let us know what you decide. Don't think it will last long on the dealer's lot.
-
1 pointOpen the door and start every machine up at the same time. See how loud you can get it and post to Youtube!
-
1 point
-
1 pointCame across these pics @ Thigh Highs, High Heels & Hot Rods Thought you you might enjoy them Craig... I did ... along with the Thigh Highs & High Heel pics...
-
1 pointThat looks way better than the 59 that I had!
-
1 pointSounds like the place. Been by there many times on Motorcycle rides. Stopped there once about 2 yrs. ago but no one was around. I may have to go if I can. When going, stop in at the Wellsboro Diner for dinner and dessert!!
-
1 pointAnd i dont mean snow plow. Come on spring iam ready!!
-
1 pointCURSE YOU RED BARON!!!!!!!!!!!!!!
-
1 pointNice little RJ. Just an observation on my part, and maybe this is a subject for another thread, but why do most of the RJ's that you find for sale have the engines missing or removed?
-
1 pointTractor is not rare, Electro's built from 68 to 70 the 70 has the new style hood, like a C series, gas in the oil can be bad, as said most likely a fuel pump, if the engine runs good and no smoke you have a 80% chance it's ok, the price is fair, depending on overall condition.
-
1 pointWith the fuel in the oil issue could be a problem down the road.... I would mention that to him & throw $300 at him ..see what he says
-
1 pointLove the exhaust! WHOOMBAH!!!!
-
1 pointAs these tractors keep aging and slipping ever so slowly into the phrase of " No Longer Available" on the parts end of things. It is going to take people to take matters into there own hands and doing just as you suggested. That's what the auto industry has done. It's the aftermarket of parts world that keeps old cars, trucks, etc. going. Sometimes the aftermarket can see what was wrong the product or the down side of a part and make it better. Even in a wiring harness. SOI again you have brought up a good point. I hope someone takes the bull by the horns and see's a market for the wiring harness's that we all will need sooner or later. Even if they don't burn up they become frail and need replacing.
-
1 pointFuel pump is the most likely guilty party. The issue is how long had it been leaking into the crank case. Fuel thinned oil is not a great lubricator and the crank and connecting rod bearings may be worn excessively.
-
1 pointVery good question Chuck. We know there is a big need for these. I voted for the big number but some don't have the electric clutch and seat switch and hour meter so they would be simpler like the one I am building for myself.
-
1 pointLet's do the starter safety / PTO circuit first Let's strip down the previous diagram to show only the starter circuit safety wiring. Here is the same diagram without the IGNITION wiring of the safety functions. We are now viewing only the STARTER safety function. Let's begin thinking how the tractor would normally be started. PTO OFF CLUTCH SWITCH NOT DEPRESSED - yet. IGNITION SWITCH OFF Notice the PTO switch is in the DISENGAGED position and the contacts inside the PTO switch are NC (normally closed). In this position, any power applied to the inlet of the PTO switch can be connected thru to the output of the PTO switch connected to the CLUTCH SWITCH. Also note no pwer is applied to the PTO SWITCH since the IGNITION SWITCH is in the OFF position. So let's just turn the IGNITION SWITCH to START Power flows from the BATTERY to the IGNITION SWITCH and out of the IGNITION SWITCH on the "S" terminal heading to the PTO SWITCH Notice the power stops at THE CLUTCH SWITCH as this switch is NO (normally open) in it's relaxed postion. Not until the CLUTCH SWITCH is depressed will the power be applied to the STARTER MOTOR to begin to crank the engine. (more pics and explainations later today ... much later)
-
1 pointMr 856 does this help??? there is a bushing that goes on the shaft that fits inside of console. Gary B..... CLICK ON PICK TO RIN...
-
1 pointHere is a HY-2 seal on Ebay. It is item # 181335921468. 3-days left on the listing.
-
1 pointoldblue, good. No great for you. That is exactly what I have been doing with my 854 with my 2 sons. They are learning thier way around how to use tools. Its good family stuff to do. Glenn
-
1 pointDidnt chris buy a Rj from you Bob & have it shipped over to UK ?
-
1 pointMY WIFE........................................
-
1 pointSent you a PM - fish through those figures for your overhaul costs - shop around for best price.
-
1 pointIf you prefer to replace wiring piece by piece on the tractor, the following diagram might be of some help.
-
1 pointA new wiring harness can be built by taking the old harness off the tractor and laying it out on a "breadboard". Wire by wire, replace the old pieces with new wires and terminals of the same style. When you are finished, lift the new harness off the board and into the tractor.
-
1 pointI've done just as Kelly suggesgted to you. Don't think you can't do it. Just use color coded automotive grade wire. Use good crimp connectors. Solder any wires that are spliced together and use heat shrink. Also use fuse protection on your start/run circuit, and on your lighting circuit. Use a split wire loom anywhere you have two or more wires running together. Use plenty of zip ties. And lastly its always a good idea to install a new key switch as Its part of the wiring harness.
-
1 pointI spent some more time today putting on more bits and pieces. Here are some general views. I want to wait a little longer before mounting the front tires to allow paint to dry some more. Deck lift rod is also hanging to allow the bellcrank paint to dry. Cleat
-
1 pointANY weight made for a 12" wheel will fit with the right bolts, I have a pallet full of weights I can ship most of them, even a set of real WH weights send me a PM for more info
-
1 pointI picked up a new set of vintage tire chains at an auction this summer. They were made to fit car tires so I'm cutting them down to fit my tractor. A guy at work gave me a pair of pliers made to replace cross links, they sure make this job a lot easier. He used to run a service station back in the 70's and used them quite often back then.
-
1 pointJust in case there's some interest, I thought I'd post some pics Valves and tank swing back and forth. Adjusted to drive tractor I sit on the back of the seat. Adjusted for hoe operation


This leaderboard is set to New York/GMT-04:00