
Leaderboard


Popular Content
Showing content with the highest reputation on 02/25/2014 in all areas
-
3 pointsYou need proof too?
-
2 pointsCame across these pics @ Thigh Highs, High Heels & Hot Rods Thought you you might enjoy them Craig... I did ... along with the Thigh Highs & High Heel pics...
-
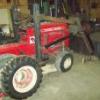
2 pointsJust received my March/April Lawn & Garden Tractor Magazine AND the 2014 Truck & Tractor Show guide. A very nice article from Scott on his Fall Meet & Greet. As I was reading and looking at the photos from Scotts 2013 M & G I saw me plowing! Proof to my wife that I really did go up there!
-
2 pointsI'm sure they're out there. Past member RickV had a bunch of NOS tractors which have since been sold off at auction. Wether or not the new owners oiled and fueled them is yet to be seen. If Rick could find them i'm sure there is more. If you watch shows like American Pickers you see a teeny tiny glimpse of whats out there hidden in forgotten about homes, garages, warehouses, sheds and barns all across America. My family and I spent six weeks three years ago camping across the country. I almost got whiplash looking at all the abandon buildings, homes and barns on almost every road we where on. Definitely makes you wonder!
-
2 pointsAn idle speed lower than 1100 rpm will kill your engine due to poor lubrication. The upper part of the engine gets lubrication from the slinger on the bottom of the connecting rod cap throwing oil up to the top of the crankcase. The engine needs at least 1100 rpm to properly sling the oil.
-
2 pointsFinally got the floor mat material for 520 number 2 ( back one in the pictures). Cut it out and contact cemented the rubber mats down. These foot rests were made at my plant years ago since the originals rusted out from too much salt. Cleat
-
2 pointsFor those of us interested in Military Historical Art and weaponry... http://www.buzzfeed.com/bennyjohnson/inside-the-armys-spectacular-hidden-treasure-room
-
2 pointsUnfortunately we've seen this type of post happen many times in the past! Reminds me of the post a few years back by some new guy who said he ran into a woman, who's dad or grand father was a dealer in the early 50's and had a Senior, Junior and some others brand new in the crates. He was supposed to go back to look at them in a few days after posting. We all posted for weeks looking for an update and never heard another word. Until I see it, I will never believe it!
-
2 pointsPartstree.com, They may not be the cheapest, but the longest it's ever taken from the time I ordered until the time I received the parts was 4 days, most times it's been 3 days and a couple of times it's been 2 days.
-
2 pointssupport your local toro dealer!!!
-
1 pointMy friend has a 312 that he is in the process of making into a puller. He has started extending the front end (?). It has the stock briggs & stratton engine and he wants to use it since it seems to be in good shape. Is this engine okay for a puller, and what can be done to it for more power? If anyone has any suggestions or info, please let me know, pictures would be great . I am obviously completely ignorant on this subject so any help will be appreciated.
-
1 pointI found a new in the box 520H anniversary model. What should I offer to pay? Are implements that fit (snow blade snow blower) hard to find because of the swept front axle? The fact that this tractor has been sitting so long going to have issues such as bad seals, fuel pump diaphragm failure rusty internal parts such as engine cyclinders and bad oil?
-
1 pointI have an RM326 mower deck on my 1076 tractor. I would like to get a new set of blades for it, but cannot find them. Every site I have checked that I type in the part numbers it tells me that they are no longer available. Does anyone know if they can be found and where. I have thought about getting a set the right size and taking them to a machine shop to have the center holes filled and then remachined to match the original ones.
-
1 pointSome tractor music http://www.wimp.com/tractordrummer/
-
1 pointNot much of a close up but this may help! This shows the drive belt and three pulleys with the guards off . I was installing my front cutter bar on the 1958 RJ.
-
1 pointIs it ok to RedSquare on a round stool?
-
1 pointIve never heard of any XI series falling short in any way. I personally never was a huge fan of them because of the lack of interchangeability with the earlier horses. That was until I drove a 523XI 2 years ago. I should have never left that tractor get away from me. It was for sale at a local dealer that took it in on trade for a 30 horse 4x4 Kubota compact utility tractor/loader. The 523 came with a snowplow which looked much bigger than a 48", 44" 2 stage blower, 52" deck and powered rear bagging system that dumped on its own. The power steering was amazing and a quick trip around the lot had me in love with the 2 speed rear end. For 4 thousand I thought it was a bit steep and I didn't pull the trigger. He told me he could come down to $3500 and I waited 3 days to get back to him. SOLD when I called him…my stupid ideas..
-
1 point"No one in CT has a pair" now, that's just crazy talk. Somebody there has to have a set.
-
1 pointhttp://www.youtube.com/watch?v=QY2iKzm62AM http://www.youtube.com/watch?v=UDxahkQUiQE
-
1 pointWhat? The vast network of WH owners in CT and no one has a pair? Steal them off Stevebo's Chevy!
-
1 pointI am feeling a little tired today and I may resume work on the 417A after going out to lunch. I cannot find the belt guide that attaches to the engine closure plate, I'll look for it after lunch. If I continue I should be able to get the tins installed and engine mounted to the tractor.
-
1 pointI went to the bi-annual Mount Gilead Ohio Farm Auction today at a moments notice. I got a call yesterday about the auction and found out it was today!! So no prep time on this auction. Didn't even have time to empty out my van! I figured it would be cold and windy and muddy as all get out. It was all of the above! They had several Wheel Horse's, Cubs, Sears and even a old Bush Hog tractor that was pretty old and cool. I had my eye on a couple WH's and most of them went for cheap! One was a 1970's C120-8 Speed, it went for a very good price of $175.00 with deck and all original paint, a very nice machine. There was a 1968 Lawn Ranger in good original condition with mower deck, it went for a mere $110.00! I didn't see the price of the 312-8 Speed w/snow blade or the Bush Hog. I bid on a descent 1056 with a Briggs motor instead of the 10 hp Kohler and a rare 1962 WH snow blade was on it. It got over my budget of $120, by one bid so it went for $125.00! The best tractor of the bunch was a very nice running 1972ish Charger 12 Automatic with a nice mowing deck. The seller was there running the machine most of the day. I talked to him and he got it 2 years ago with a house he bought. He mowed with it for 2 years and got a new mower because he didn't like the large turning radius of the WH. It was the very last tractor in the auction(ain't it always like that?!!) The auctioneer started off low and at about $50.00 I had to ask him what tractor they were auctioning right now? He stopped the entire auction and said to me, THE WHEEL HORSE!! Everybody looked at me like I was stupid but nobody was bidding on it. It got a few more slow bids and I bid on it at $100.00. There was 2 other bidders and everybody else was talking and carrying on and they didn't realize the nice WH that was up for bids! So I got it for $175.00 when the gavel fell! The seller didn't even know they were selling his machine and not many people knew that it was over until they saw me shut the tractor off. A few guys asked me what I just bought and I said with pride, that nice WH right here! They couldn't believe they missed out on it, since they had been waiting on it all day long! So I got lucky on it and was prepared to bid up to $250.00. The seat was in mint condition until the seller parked it in his garage a day before the auction and his Boxer dog chewed it to pieces! He said the dog got a good thumping after that! KJ
-
1 pointI wonder what the guy was expecting from it? I have a 520Xi with the 52" deck and I love it.
-
1 pointDude ... you got skills !!! I see that just by the way you marked the valves location... good tip for newbie re-builders. Nice paint job as well...Cool build ...keep the pics coming
-
1 pointI finished fitting the valve lash and hand lapped the valve sealing surface, then installed pistons and rings into the cylinders. I used silicon in place of the base gaskets, then torqued the cylinders and heads into place. After painting the engine and letting it sit overnight I added oil to the crankcase and will be working on the fuel, exhaust, and ignition systems today. If I wanted to push myself I could be riding the 417A again this evening, but with temperatures again in the 20's I may wait for another warm day. It shouldn't be long now.
-
1 pointThat's amazing Jim, thanks for sharing.
-
1 pointI personally don't think you will be happy with the horse/blower combo. And garden tractors don't have the same performance as pro line walk behinds for cutting because they were designed to do many different tasks. I doubt you could tow 2000lbs of rock behind a pro line mower or run a 36" tiller. I have three tractors (possibly 4 this week) and MUCH less than $1k invested in all of them. Personally, I think it will end up breaking and being blamed on the fact that you bought a '15 year old tier 2' tractor when nothing was designed for what you are trying to do. These tractors are essentially solid cast iron, and while not flawless, are generally more durable than most late model garden tractors. You still have to move slow into large piles even though the extra weight is of some advantage. You will need weights, chains and a cab at a minimum to meet your expectations. Even on a tractor you will end up looking like a snowman without a cab. And the 'rest of the year' you have to be sure you are doing maintenance on it or anything you buy will break down. "it starts & runs like a horse is touted to" only if it is treated well and taken care of. (Yearly) Change engine oil, transmission oil less often, air cleaner, clean and wash, stabilize gas, grease joints, oil blower chain, keep things painted and not rusty, and repairs will still be necessary. If you can manage just blowing normal snow (not frozen into an iceberg), and doing the maintenance then you found the right place. These guys are awesome and can help with anything. If you want to start attacking piles of frozen snow I would start looking into dozer or dumptruck/plow combos.
-
1 pointThanks Craig, y'all gonna keep on! Those things are sharp. I love the way they look. I never got the Kohler going that I was working on but I put a Wisconsin slant cyl on it and it works great! Painted the motor shroud yesterday (used vintage IH red). Real good match. Also the motor being a slant cyl got the spark plug in the clear of the hood cowling. I know for the purest this is a sin but it got it going so Reese can drive it around. I'll continue to tinker with the Kohler as I get time and patience! I added some pics of Reese trying it out before I got the motor painted, he was one happy fella to have his horse back running! Thanks again guys
-
1 pointVery nice work Scott, and I don't blame you for wanting to take a couple inches out of those cylinders! I really like the better than factory, extra clean job your doing routing those stainless hard lines! Matt
-
1 pointYou should be able to feel the diode under some tape on the DC lead. Garry
-
1 pointHmmmmm, I've been looking for a set for my dump cart for a yr. now too match the full set I have on my son's 854. Did someone say bidding war?
-
1 pointYou could always offer them a newer model trailer in trade? Maybe they need a bigger one...
-
1 pointShould do a" caption this" on the pic of the car hanging. I'll go first. " Well boys, do we put a Ford or a Chrysler trannie in this one?"
-
1 pointat this point it is too late to start my engine, but... I think I used 1.5 quarts instead of 1.5 pints - so hopefully I will know more tomorrow. You guys have forgotten more than I will ever know.
-
1 pointThat was a great history tour,
-
1 pointWell Made some progress on resurrecting the damaged wheel. I brainstormed for a bit an came up with a plan my Dad and I could put into play. First I took the wheel and cut the busted stuff off it with a die grinder. The next step was to get it all steel shot blasted to bare metal. As soon as I get time I will throw it in the milling machine and mill it level. My Dad had a piece of schedule 80 1 1/4" black pipe. We put it in the lathe and bored it to fit a new heavy duty flanged wheel bearing and pressed it into place so the is no play. We turned it down a bit as well so that a factory grease cap will fit with no issues. This is as it sits now. Once we mill the wheel surface level we are going to fit the new "axle" assembly to it and weld it up. As you can see from the thickness its way above and beyond anything the factory ever thought of putting in. This is the damage before After shot blasting and removing the scrap with a die grinder
-
1 pointAll we need now is a history museum.
-
1 pointHow did you get video of this? I take it this is not top secret? What an amazing collection. Thanks for sharing, had no idea of this place.
-
1 pointTurned the big 4O today!! Had a great day as I took today off and spent most of the day working on my loader. Then went to pick gabby from school and we went to a very nice dinner with family and friends. It was very nice and the day went better then planed! So I stated off nice and early and got the brackets welded on the bucket. Then started to make up some brackets to hold the new stainless line on the loader Started to make up the new lines Ran out of stainless tubing, so I pulled the tractor over to chain fall and lifted up the loader with the new bucket on to see how it looked It goes a little higher then I want, so I'm going to remove 2" out of the lift cylinder rods. This is the hight that I want it to be. Not to bad for 6 hours of work
-
1 pointAmazes me how many people come along. 1st time posters, asking questions and advice on things they know nothing about. The dam shame of it is,,,,,,,,,whats it take of them to say, THANK YOU. My feelings to me anyway.
-
1 pointan incredible basement? I love stuff like this.
-
1 pointBeen away all weekend, but did manage to fit some tyres on Friday with the help of my dad and his two tyre machines.
-
1 pointI missed out getting one a few years back. The guy needed some cash and he only wanted $200 for the hole setup. I didn't have it at the time and he sold it the next day to someone else. I know have a new way valve seat cutter.
-
1 pointLeave a space or two between your text and the PB link, or hit enter a couple times and put the link below your text. Also be sure you are using the IMG link and not one of the others.
-
1 pointI noticed that my 2 stage blower was throwing slower over the past few storms. It never really preformed like I thought it should ever since it was hooked up. It would clog up and slow down as it got loaded with heavier snow but the engine didn't sound like it was under load. No burning belt smell or clutch lining stink. Changed the belt anyway but no change so I pulled off the PTO bell. I could see that the lining was glazed and only contacting about 20% of the surface of the bell. So, I took my grinder to the bell to flatten and scuff the surface and used a flat block with 150 grit paper to smooth the clutch lining. WHAT a difference! It will throw that wet heavy snow over the trees now! It's hooked up to a 418 C If your blower is not performing as it should, this may be what you need to do. Single or 2 stage.
-
1 pointI can only speak from experience, but I have a 44" two stage on a 417-A and when I threw snow over the phone wires I was pretty confident it had enough horsepower, and I am not talking powder snow. I have an F-350 with a plow as I am in the snow plowing business and still use my ole' 417 to clear my driveway because it just makes me smile !!!!!!!
-
1 pointI drove 10 hrs to get one with 85 hrs on it or 20hrs if i can believe the PO about the " kid was playin on it & left the key on" " dog ate my home work" ect.etc. Gotta just wait it out, they'll show up
-
1 pointNothing like being teased and tortured!!! Who is this guy anyway???
-
1 pointthats what I saw too!
-
1 pointYes and the SMS-50 and SMS-505 have a different mounting plate and lift assy. than that used on the long frame tractors.


This leaderboard is set to New York/GMT-04:00