Leaderboard
-
in all areas
- All areas
- Markers
- Marker Comments
- Marker Reviews
- Articles
- Article Comments
- Article Reviews
- Classfieds
- Classified Comments
- Classified Reviews
- Wiki's
- Wiki Comments
- Wiki Reviews
- Blog Entries
- Blog Comments
- Images
- Image Comments
- Image Reviews
- Albums
- Album Comments
- Album Reviews
- Files
- File Comments
- File Reviews
- Posts
-
Custom Date
-
All time
November 28 2011 - November 12 2024
-
Year
November 12 2023 - November 12 2024
-
Month
October 12 2024 - November 12 2024
-
Week
November 5 2024 - November 12 2024
-
Today
November 12 2024
-
Custom Date
01/31/2014 - 01/31/2014
-
All time
Popular Content
Showing content with the highest reputation on 01/31/2014 in all areas
-
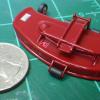
6 pointsHello! I joined this forum pretty recently and I'm probably not the typical forum visitor. I build scale models - usually 1/25 cars - and I've been working on an Electro 12 model. BTW, many of the model cars that I build are my favorite car and another South Bend native - Studebakers. I found this site while searching online for reference photos and manuals. It's a great place with a lot of excellent resources. Reminds me a lot of the Studebaker Drivers Club forum where the members have always been very supportive of my model building. Makes me want to have a real Wheel Horse (and a Studebaker). Anyway, this is where it all started: Probably not many people are more interested in the Wheel Horse than they are in the Indy Car but I'm building the tractor and may never build the car. The tractor in the kit appears to be Charger but after looking over this forum for a while I decided to convert it to the Charger's cousin - a 1969 Electro 12. I had already built the engine as it came in the box but I realized it wasn't correct for this tractor. This is what the first build-up looked like: So I stripped the paint off and did a conversion: The next order of business was building a mower deck since the kit didn't have one and what good is a Wheel Horse without it! I downloaded the manual for a 5-1422 (Thank you, Forum!) and started scratchbuilding. This has been a lot of fun! Here are a few shots from the build-up and the finished mower: The paint is Duplicolor Bright Red which is a GM color. I bought some IH Red at Tractor Supply but didn't really like the drying properties of the paint. The GM Red matches it very well and in fact I brushed on a little of the IH color as touch-up paint in a few spots and can't see the difference. Duplicolor is my preferred paint. It dries fast and hard. There's certainly more to come. I hope you enjoy. Most of the other major components are under construction right now and will be ready to post soon.
-
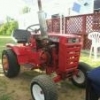
4 pointsjust got dizzy from reading 1533 posts and thought id update a little. can't work on the trans yet, still waiting on a j1816 axle bearing. mocked up the steering tonight with an extra 6472 flange bearing placed on the upper hood stand right where these tractors have an issue with loose support. i have seen other methods of retention here, but decided this was a compact way of tightening up the upper steering shaft. steering still needs adjusting but i can already feel that everything is nice and smooth, and tight. new lower bearing, nice tight gears and fit on lower part of shaft in steering bracket. heres some pics of the flanged bearing and steering. i included the red stool in this pic, just to show its getting used......
-
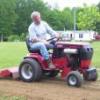
3 pointsThis is my hardest working member of the family. It has a K582 swap for 23 hp, home made ROPS bar that is also an air tank, home made manifold and stack, home made foot operated directional control. It has the 3pt and pto, but no steering brakes. Wanted to see what you guys thought about it.
-
3 pointsjust for those that are wondering what differences there are between the jd 317 front axle and standard wh 416 heres a few pics i took earlier while working out what needed to be changed to use it......
-
2 pointsMany thanks to everybody for the very kind words and warm welcome to the forum. I didn't expect all this! I hope to get a lot done on the weekend so this is probably a good time to respond to some of the questions and comments. Is the spec plate painted or a tiny chrome and black decal. It's a homemade decal using the computer and inkjet printer. I make most of my own decals (all of them for this project) based on images that I find on the internet. After printing the decal I applied it to bit of adhesive backed aluminum foil and then to the engine. What did you use to build the deck? The deck is almost all made from various shapes of styrene stock available at most hobby shops. It took sheet stock, rods, tubes and quarter round of various sizes. There's also a little bit of 1/32" brass rod used. By the way, do you have any full size Wheel Horses? No. In fact, my lawn has so many obstacles that using a riding mower might be more trouble than it's worth. On the other hand, I could ride around the neighborhood on my Wheel Horse if I had one. I love cool mechanical devices and it would be a lot of fun to have an Electro or something. I have a hard time working on a full size one. MIne only has to look like it runs! What else have you built? Mostly cars in 1/25 scale and a few 1/32 scale. I love Studebakers but build lots of others, too. Here's a few samples: I call that one the "Cowboy Cadillac". 1963 Studebaker Avanti 1953 Studebaker Commander Starliner Customized 1953 Stude The "Slant Six Slingshot" 1934 Duesenberg Okay, I'm not showing you the ones that didn't turn out so well! Thanks again, everybody.
-
2 pointsthanks for all the comments guys. got a little shopping done today, picked up the axle bearing and all the seals for the 8 speed, so that can now go together. also got an order of toro parts and some john deere stuff (don't shoot me) for the steering arms. the deere stuff goes along with the front axle assembly, so rather than use aftermarket stuff i just went with the jd tie-rod ends for the steering arms. not sure how many of you noticed that the front end is all john deere. axle is 317, wheels and steering arms/spindles are 300....... i used the jd front assembly as it comes with 1" spindles and the steering arms are 1/2". also has a mild sweep forward.
-
2 points
-
2 pointsI've heard lots of good things about this muffler also. You better address this ringing situation asap because if you don't there will come the day when the ringing does not stop, ever.
-
2 pointsNapa has a decent muffler for around 40 bucks, ill see if I can find the part# 703679 like mentioned above says its for a gravely ,
-
2 pointsI have not looked at the transmission cases yet but you can not do the fix I did on the 1 1/8" trans. axles as the diff. housing end caps are bored bigger for the larger axle and I would be afraid the diff. end cap may shear off at the bearing under a heavy shock load Brian
-
1 pointIt's hard to show any depth in these pic's due to the light, but it's a bit deep. My mutts are between 12 and 15" tall. The snow is about 4 1/2' in the background.
-
1 pointThis looks like fun! http://www.youtube.com/watch?v=EjOOzEfKgoQ&list=PLWMl1tlLkmvu6E19-vqUHNGsk6rAoY4FA&index=5 I want one! Andy
-
1 pointLots of guys swap out to the 8-speed trans and it isn't difficult. The frame-to-bolt pattern is the same, generally. There MAY be some easily resolved issues with the brake band and linkage though. Once again, easily overcome. Benefits are: you'll get a VERY SLOW creeper gear in 1st gear LO. Tillers work best at this slow travel rate. At the other end of the spectrum, 3rd gear HI will be much faster than your current 3rd gear.
-
1 pointDenny and Craig Beat me to it! Ha this Red Square gang is loaded and ready!
-
1 pointI ran out of room last fall when I added my 4th horse. Initially I planned on keeping it under a tarp in the back yard (you might consider that for a worker) but in the end I worked out a deal to keep the machine with blade in the neighbors nice warm garage and let him use it to clear his snow in exchange for the storage. He is a great guy, very mechanical and takes good care of his stuff so it worked great for both of us. There is usually a good answer like that if you look hard enough. Just a thought.
-
1 pointWait until spring and if you have an Ocean State Job Lot near you, you can get one for $90-$125.
-
1 point
-
1 pointYou guys are absolutely awesome. Pulled the panel and there it was...one of the leads had come off the amp meter. Plugged it in - fired right up. I'll need to put some new connectors on this spring but, for now, it works for me. Got some snow coming tomorrow and now I'm ready. Thanks guys. You have never failed to get me through any issue!
-
1 pointHere's a video on rebuilding a roller bearing. I see that reinstalling the cage could be hard, Maybe Charlie an chime in here on that procedure
-
1 pointJust so you know, Sometimes a stack can make things messy. I love stacks and rain caps as much as anybody. (TINK TINK TINK) I built a stack for my Power King. The original muffler came down and out. I used a Gravely muffler in place of the pancake one and put a straight stack up with a cap. I loved the stack and cap but every time I started it it blew soot and gunk all over the hood. so I had to put a turnout on it
-
1 pointi bet the op has a ton of sympathy for the folks down south that got "battered" with an inch of snow.....i'm still laughing about that one. keep kozy!
-
1 pointIn my opinion the Gravely muffler works great on the little Kohlers, but is still a little loud on the big block Kohlers. The Cub Cadet muffler of the same style (but longer) is quieter again. Quietest of all the mufflers I have tried is the Nelson that came on the B and C Series tractors as OEM. The Gravely: The Cub Cadet:
-
1 pointCharlie...thanks for chiming in here...you were rebuilding these bearings before I ever opened a transmission. It would be nice if, in your spare time, you could do a pictorial or videos showing how you take that bearing apart and end up putting it back together. Maybe bring one to the show, and I will video the process. Brian...you are incredible with what you do and are capable of...both of you guys give the rest of us hope. I think it will be an interesting show in June...I know I do not want to miss this. Bob (oldlineman)...this is a great thread. New ideas and techniques happen and to bring this up once in a while is a good thing...Thanks Sooner or later, the used transmissions that we are picking up cheap to get these bearings are going to become scarce...then we will be machining and trying to figure out how to keep these old horses going. I should not have said that. What all the members should do now is make sure they have good oil in the trans...no water...good seals (including the shifter boot) and keep a good eye out. These bearings will last basically forever if taken care of...a little preventive maintenance goes a long way. I would really like to see how Charlie takes one of these bearings apart and puts it back together.
-
1 pointHere you go... It was under child no.2's bed Hopefully it shows the way the drive couples, gearboxes are similar copies of WH ones
-
1 pointI have been wrestling with this also. Really dont have room for two but I can't keep my 314 over my round hood. And I can't sell the only tractor I ever bought new.....guess I'm stuck with two. Maybe three if my dads 607 comes here..dang it.
-
1 pointI have searched through my pictures (I think I have more picture of my tractors than I do my kids) and my two D-series appear to be a little camera shy. If I have done this correctly I should have attached two pictures of my D-200 and one of the D-160. Warning - two of the pictures also contain another brand of tractor Iain
-
1 pointReal nice job on the restoration. This is just my opinion, I think the tall stack on the tractor takes away from the nice job you have done. You want to draw people's eyes to the nice job you have done on the restoration, not the stack. Again, very nice job, and again, just my opinion...
-
1 pointas wqas said tighten the screws, but I have also added a washer to the spring on the turning handle it helps also
-
1 point
-
1 pointMine was doing the same thing. Just tighten up the four screws that hold the chute on - just enough to create some drag.
-
1 pointThat's awesome! My eyes hurt even looking at it on here.
-
1 pointThis may help from a priviest post So I unsoldered the bases and wires, which was as simple as holding the iron on the leftover post while holding the post with needle-nosed pliers. Once the solder melts, the stub comes right out. But here's where I made a mistake of assumption. I assumed that the bulbs were 12V, since the charging system is 12v. After returning from my local Radio Shack with 12 volt bulbs, soldering in a couple and getting nothing, I thought I fried the board! But then I looked at it in the dark and noticed the faintest glow from my replacements. That alerted me to bad voltage and when I put a voltmeter on the leads I discovered that they only drew 2 - 2.3 volts each. So I went back to Radio Shack and this time I got 2.5V bi-pin LED's (from the slide out drawers where all the good stuff is!). The install was easy but Note: LED's are polarized and will only worked when polarity is correct. So, put a meter on the pins to see which is positive. For me, the positive side was closest to the plug. It's a simple process to snip the leads on the LED's (so they are about 1/4" long), hold them onto the indent from where the old bulb leads were, then touch the iron to the opposite side of the circuit board and gently work the leads through. No addional solder was needed. They look great! Here's a Pic:
-
1 pointThe bearing was bought only by Toro and because of this, they made an arrangement with NICE ball bearings to make the bearing proprietary to them. This info came direct from the bearing company whom I called several years ago about the topic. As far as these bearings, they seldom wear out because of use. What kills them is the moisture inside the transmission. I frequently disassemble the bearing, polish the races and insert new 1/4" ball bearings to "rebuild" them. Charlie
-
1 pointYou always need a back-up, especially dealing with 30 or 40 year old machines. And in winter you need one with a plow and one with a blower. Unless of course you enjoy lying on a cold concrete floor switching from one to the other.
-
1 pointMy laptop bit the dust, but before it did,I bought a Hisense Sero 7 inch tablet at Walmart on sale for $79. It ain't fast or flashy, but it gets the job done. I'd love to buy an iPad, but I can buy another Wheelhorse or two for the $$$'s.... ;)
-
1 pointMany things could be causing a long cranking session before it fires. It could be a points/ignition issue but for me it usually means it isn't getting fuel. A bad fuel pump, a seeping fuel line that drains back fuel from the carb, a dirty fuel filter, a clogged fuel screen in the tank, bad fuel lines, a plugged up fuel cap vent hole, etc, etc. The fuel issue could start in the carb itself or long before it. First things first......If you changed out your spark plug as you stated a month ago, pull it and take a good look at it. For as much as they cost, I would replace it and just see if that is the issue since it wasn't in there long and the issues started not long after it was installed. If you still have the problems...........close the shutoff valve under the fuel tank and pull the fuel line from the bottom of the tank. Make sure the valve actually shuts off the gas. (If it doesn't, change this shutoff valve)! If it does, hold a glass jar under the shutoff and open the valve. Make sure you have unobstructed flow from the tank to the jar. If you have a good flow, we move on! Next............if you have a fuel filter in the line before the fuel pump, or after the pump, change it! They are cheap and they will plug up. Especially in cold weather! Change the fuel filter if you have one installed! Next............pull the line from the pressure side of the fuel pump that connects to your carburetor and crank the engine making sure to hold the fuel line away from anything that may make it go boom or from loved ones that will make you go boom if they are hit with spurts of gasoline! The key here is to see "spurts of gasoline" that are substantially more than a dribble from the hose. (Which is how most old men pee). If you see spurts of gasoline, great! Whew..........OK! Now if everything checked out from the fuel tank to where we left off, you changed out the fuel filter if present and you put a new spark plug in the motor, we now know you are getting gasoline to the carb but it still is acting up and hard to start, then you know that you "MAY" have a carburetor issue. Get your trouble shooting to this point and if you have to delve into the carb, we can help you there! It isn't difficult. It is just best to make sure your fuel delivery is OK up to the carb before you start trouble shooting that or "other things". These other things being points, condenser, good spark, timing, etc. It's just best to do the cheap elementary things first that usually make up the majority of the issues seen in these tractors. Get back to us and I'll second the Seafoam additive! Seafoam is good stuff!
-
1 pointI went to 3 different tractor supply stores and no GT magazine, so I just subscribed.
-
1 pointTT...you are too modest...your knowledge is top shelf and you are probably the most knowledgeable member on here that is willing to chime in. We also have "gwest" that is willing to chime in with pictures and links of all the manuals and service bulletins for members. Just talking transmissions...we have a very good network of members that hop in and offer their expertise...I know nothing about hydros...but sorekiwi, martin, DClark, Sousa, Kelly, racinfool40 and now a few of our "over the pond guys" and many others that hop in to help pick up the slack to answer questions are invaluable to what makes this site work. I know I have not mentioned everyone, but my hat is off to all of you. I still learn something every day (I just hate that ), but it is what keeps me and everyone else coming back in every day to see what is going on. My hat is off to all of you guys and gals...you are keeping me young. THANKS Doc...when you look inside a transmission, you would not think that a 1/16" would make that much difference in the thickness of a bearing...but times 2 is 1/8" and it does make a difference. If only Wheel Horse would have used a standard bearing in this spot??? I know this...we are not going to start scraping horses because of the WH # 1533 bearing. We have put men on the moon, gone to the depths of the ocean, cured viruses, beat the best video games (donkey kong), conquered windows 8???, achieved 100% Agave, and we have Rock & Rye...life is good...we will survive.
-
1 pointHey FarmBoy! (I always wanted to say that) If you go to google and type the following as you see it: KT17, kohler, fuel pump kit Hit enter and that should give you multiple choices between genuine Kohler or replacement parts. You can look at whole pumps or kits to rebuild yours. You can also see the new and old parts numbers and if you have a favorite place to buy parts, you can search their sites using those numbers. The KT series pump also fits many of the later twin Magnum motors so they are plentiful. They are quite easy to replace. I did mine and I have trouble walking and keeping my heart beating at the same time! Good Luck!
-
1 pointDenny,of all the pictures of the sms425 I haven't seen on of these covers!Thanks!
-
1 pointKevin, I think this is the belt cover that Lane is talking about.
-
1 point
-
1 point
-
1 pointThe gather fin on the end is homemade but well done.I remember boards out there on older sickle bars.The gather hoop at the base is broke also but all in all I'm impressed with its overall condition.What year was this manufactured,early 60s ya think?
-
1 pointIt's not the ID or OD that is the problem...you can get bearings with those measurements. It is the height of the bearing that is the issue and not out there...the #1533 is thinner then what is available from any of the bearing houses. There are a number of posts here in the transmission section that go into all the details about this bearing plus some alternative ideas. TORO still had these bearings a few years ago. I managed to buy 2 for my #5025 transmission back then...they were about $80 apiece.
-
1 point
-
1 pointWell I'm sure exactly what I may have "taught" you guys, but thanks for the post.
-
1 pointHere's a couple pics from yesterday, the only things left to remove is the gas tank and stands. They came off today and into the blast booth it went. I got it about half done when the sand turned to talcum powder. I'll get some more in the morning and may get it all done tomorrow and get some pics of a Ford in bare metal, the sand gives it a dull silver look. Now for the toys A 1969 Caddy drop top with a worked 472, in the process of getting a new white top A 1964 Merc with air and a big block with 3 deuces that was a Long Haul member for the 2011 Hot Rod Power Tour A 1968 Road Runner with etched quarter glass Mid seventies Nova with circle track suspension, 600+ hp 400, 4-speed and quick change rear. Bare block is a 383 for the road runner, the red one is a dirt track motor with aluminum Pontiac NASCAR heads and other dirt motors. It's a pretty cool place to hang out and restore a tractor I guess!
-
1 pointLOL when I saw this topic,I thought this is what you were talking about. When I was a youngster 3 of us had cushmans,we rode them all over.
-
1 pointMine too. No harm, no foul.


