
Leaderboard


Popular Content
Showing content with the highest reputation on 01/30/2014 in Posts
-
6 pointsdoc...I am by no means an expert...I would consider myself knowledgeable...TT is really the expert. Yes...Buckrancher (Brian) did a thread where he turned out some of the material in the cases to make what is available fit. One thing...whether you have 1" or 1 1/8" axles it is the same bearing that is what I would call the differential carrier bearing...the axle is machined down to the outer size after that. The real problem is that you can not get that bearing with the ID and OD, but without the correct thickness. If you could get one thinner...yes...you could just ad a shim. I want to say that the bearing thickness is 1/2"...not sure with out searching...but say it is 1/2"...when you shop for one, they are 9/16" or 5/8" thick. You need to remove material in the case...both sides...to make that work. That is the problem...removing material where the bearing sits to make it right. Hope that makes since...with out searching!!!...ID 1 1/2"...OD 2 1/2"...thickness 1/2"...contains 12 ball bearings that are + or - 1/4" The actual measurements are found in the threads that address this issue. As stated above...Wheel Horse had their own shortage of these bearings...their fix was to put in a spring steel bushing to cut down the OD so they could use a needle bearing. That bushing may still be available, but it is expensive...which is why we all on Red Square have been trying to figure out a "cost effective" way of making this work. Actually, I like the way Brain (Buckrancher) attacked this problem, but it takes a machine shop or if you know somebody with a lathe...but it means that ...in the long run...all the transmissions are fixable. That is the most important thing...you can get all the other bearings and seals from bearing houses...they are common sizes. Note...the #1533 bearing is not used in the RJ & Suburban 3 piece transmissions...bronze bushings are used there. Their problem is the cap axle seals that are only available from TORO...$18 a piece (at the moment). They are going to become extinct also. You can get all the other stuff for these transmissions...I have a couple of ideas for bypassing these seals...but that is another thread. Bottom line...there are ways to make things work...at this point, in all the Wheel Horse transmissions. The great thing...Red Square members have the expertise to attack these problems and are willing to share what they know...can't beat that with a stick.
-
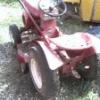
3 pointsWoot Woot is all I can say!I patiently waited out a sickle bar search and poached one down in Laceyville PA this morning.looks complete with no chipped or missing anything but the transport bar,good belt,grease on the Jack shaft bearings and honey in the gearbox!Took me three years but color me smitten!
-
3 pointsTT...you are too modest...your knowledge is top shelf and you are probably the most knowledgeable member on here that is willing to chime in. We also have "gwest" that is willing to chime in with pictures and links of all the manuals and service bulletins for members. Just talking transmissions...we have a very good network of members that hop in and offer their expertise...I know nothing about hydros...but sorekiwi, martin, DClark, Sousa, Kelly, racinfool40 and now a few of our "over the pond guys" and many others that hop in to help pick up the slack to answer questions are invaluable to what makes this site work. I know I have not mentioned everyone, but my hat is off to all of you. I still learn something every day (I just hate that ), but it is what keeps me and everyone else coming back in every day to see what is going on. My hat is off to all of you guys and gals...you are keeping me young. THANKS Doc...when you look inside a transmission, you would not think that a 1/16" would make that much difference in the thickness of a bearing...but times 2 is 1/8" and it does make a difference. If only Wheel Horse would have used a standard bearing in this spot??? I know this...we are not going to start scraping horses because of the WH # 1533 bearing. We have put men on the moon, gone to the depths of the ocean, cured viruses, beat the best video games (donkey kong), conquered windows 8???, achieved 100% Agave, and we have Rock & Rye...life is good...we will survive.
-
3 pointsNo expert here either Steve...... just a guy who was bored - and brave enough to type a lot. I will add this picture of a 1533 bearing - just to show how "odd" they are and because it was handy. Here it is in it's natural habitat: The substitute needle bearing & race (standard in some of the D series transaxles under part numbers 8048 & 8052) were 2 1/2" OD with a hardened "bushing" (inner race) that installed on to the differential end caps. It was similar in design to the large needle bearing in the manual PTO pulley / hardened inner race mounted to the engine crankshaft. Numbers 13 & 40 on this IPL:
-
2 pointsHello! I joined this forum pretty recently and I'm probably not the typical forum visitor. I build scale models - usually 1/25 cars - and I've been working on an Electro 12 model. BTW, many of the model cars that I build are my favorite car and another South Bend native - Studebakers. I found this site while searching online for reference photos and manuals. It's a great place with a lot of excellent resources. Reminds me a lot of the Studebaker Drivers Club forum where the members have always been very supportive of my model building. Makes me want to have a real Wheel Horse (and a Studebaker). Anyway, this is where it all started: Probably not many people are more interested in the Wheel Horse than they are in the Indy Car but I'm building the tractor and may never build the car. The tractor in the kit appears to be Charger but after looking over this forum for a while I decided to convert it to the Charger's cousin - a 1969 Electro 12. I had already built the engine as it came in the box but I realized it wasn't correct for this tractor. This is what the first build-up looked like: So I stripped the paint off and did a conversion: The next order of business was building a mower deck since the kit didn't have one and what good is a Wheel Horse without it! I downloaded the manual for a 5-1422 (Thank you, Forum!) and started scratchbuilding. This has been a lot of fun! Here are a few shots from the build-up and the finished mower: The paint is Duplicolor Bright Red which is a GM color. I bought some IH Red at Tractor Supply but didn't really like the drying properties of the paint. The GM Red matches it very well and in fact I brushed on a little of the IH color as touch-up paint in a few spots and can't see the difference. Duplicolor is my preferred paint. It dries fast and hard. There's certainly more to come. I hope you enjoy. Most of the other major components are under construction right now and will be ready to post soon.
-
2 pointsHi Steveasaurus I did a little looking around after my post, and I agree with your assessment. You can either get a bearing with the correct ID OR correct OD but not both. I have seen thickness from 7/16 to 9/16. I also agree that Buckrancher had a great approach to the problem and as you said, it depends if you have access to a lathe or a Bridgeport with a rotary table. If you have a lathe, you can turn the pinion carrier down to 1 3/8 diameter (yes, that only leaves 1/8 inch of metal between the axle and the inner bearing race, but it should enough) and buy a standard bearing with a 2 1/2 inch OD. If you have the Bridgeport, you can hog out the casing to accept a 2 5/8 OD bearing with a 1 1/2 inch ID.. I don't know how much meat is left in the casing though. Standard bearings are under $10. I don't know how much machine shop time/cost is needed. thx again
-
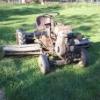
2 pointsLooks good but you are missing a piece that goes on the part in front of the two side plates. The part that the belt makes the 90 degree (the one with the Wheel Horse Logo on it) turn had a cover over it. The two small sheet metal bolts look to still be in the part on top. Check your seals on this as they tend to leak especially after sitting unused for a long time. Great find! They are getting more rare every day! Also I have never seen the end piece like you have on this blade. It must be from another bar or homemade. Here is a photo of our 50 inch Wheel Horse Sickle Bar on a 1965 1054-A Tractor we own. Here is photo of the plastic guard I made to cover the blade when not in use and or when taking to a show. Also I went downstairs and took some photos for you of some weed guards (the heavy rod that is broken on yours that were on various sickle bars I have owned) to give you some ideas of measurements for your replacement. Should be an easy thing for a welder, machine or blacksmith shop to make up for you. The bar keeps weeds that don't get cut fully or just get caught in the bade from jamming it up. The rod is about 18 inches long by 4 inches with the round twist to bolt it on the bottom blade guard/foot closest to the tractor.
-
1 pointHI Guys, Thought I would finally put up some pictures of the rj I have been working on. I have had it together a few weeks, but today I finally manned up to put the decals on. lol. It still needs some stuff fixed on it, but it is complete and driving. I still have to fix my gas tank for it, borrowed one from my dad, and need to tear into the carburetor as it is leaking. The motor runs very well considering the only thing I did was paint it and put a carburetor kit in it. The trans make a little bit of a whine but it is not very much and the more I have driven it the quieter it has gotten, I'm very happy considering it was rusted solid....BAD. The only other thing I will need to fix is it the belt guard will not stop the belt so I have to start it in gear or grind the transmission...anybody have any advice on it? I'm running a NOS 29" belt with the correct pulleys but it has a repop belt guard. I am very happy with the way it looks though, here are some pictures of it from today. Thanks, Jake
-
1 pointYeah, like "the horse" said!
-
1 pointMany things could be causing a long cranking session before it fires. It could be a points/ignition issue but for me it usually means it isn't getting fuel. A bad fuel pump, a seeping fuel line that drains back fuel from the carb, a dirty fuel filter, a clogged fuel screen in the tank, bad fuel lines, a plugged up fuel cap vent hole, etc, etc. The fuel issue could start in the carb itself or long before it. First things first......If you changed out your spark plug as you stated a month ago, pull it and take a good look at it. For as much as they cost, I would replace it and just see if that is the issue since it wasn't in there long and the issues started not long after it was installed. If you still have the problems...........close the shutoff valve under the fuel tank and pull the fuel line from the bottom of the tank. Make sure the valve actually shuts off the gas. (If it doesn't, change this shutoff valve)! If it does, hold a glass jar under the shutoff and open the valve. Make sure you have unobstructed flow from the tank to the jar. If you have a good flow, we move on! Next............if you have a fuel filter in the line before the fuel pump, or after the pump, change it! They are cheap and they will plug up. Especially in cold weather! Change the fuel filter if you have one installed! Next............pull the line from the pressure side of the fuel pump that connects to your carburetor and crank the engine making sure to hold the fuel line away from anything that may make it go boom or from loved ones that will make you go boom if they are hit with spurts of gasoline! The key here is to see "spurts of gasoline" that are substantially more than a dribble from the hose. (Which is how most old men pee). If you see spurts of gasoline, great! Whew..........OK! Now if everything checked out from the fuel tank to where we left off, you changed out the fuel filter if present and you put a new spark plug in the motor, we now know you are getting gasoline to the carb but it still is acting up and hard to start, then you know that you "MAY" have a carburetor issue. Get your trouble shooting to this point and if you have to delve into the carb, we can help you there! It isn't difficult. It is just best to make sure your fuel delivery is OK up to the carb before you start trouble shooting that or "other things". These other things being points, condenser, good spark, timing, etc. It's just best to do the cheap elementary things first that usually make up the majority of the issues seen in these tractors. Get back to us and I'll second the Seafoam additive! Seafoam is good stuff!
-
1 pointAhhh you beat me to it. I saw this on cl this morning. Good luck with it.
-
1 pointIf it's bought and paid for...it does not eat much...I would keep it if you have the room. It will keep you from doing wild spins trying to kick yourself in the behind later!
-
1 pointThe nylon gears will wear out on the shaft if the engine is run with low or dirty oil. Wear causes wobble and chewed or broken teeth. That gear is far from the sump and oil slinger. Good maintenance is key to longevity.
-
1 pointYou have to copy and paste for it to work. They should all come up. Garry
-
1 pointYes I do buddy.
-
1 pointI have not been to any wheel horse shows but since i have retired this past year i would like to come to this one. Since it is in Pa. and only about 4 hours away i am going to try to come. Could you give me the dates again i did know them but lost the paper i had them on. Thank you Terry!
-
1 pointCraig, I just wanted it to look the way it did before and I was thinking that I'd scratch the paint on the hood over time just removing and installing the cap.... like that's not going to happen anyway.
-
1 pointNice mower! Mine gets used a few times during the summer, but I wish it was back on a hydro tractor or 6 / 8 speed. The 3 speeds are geared too fast for thick weeds or working around steep banks.
-
1 pointCopy and paste this into the Manuals search box Mower Sickle Side 50in Garry
-
1 pointNice looking mowing machine.
-
1 pointIt ain't easy Craig!You know!
-
1 pointDarn nice score there friend! I'd love to have one of those on LAGT someday.
-
1 pointSure would like to have one of those. Lucky you. Marvin
-
1 pointGreat find , have fun with it , i would mind one of those myself
-
1 pointahh....yeah. 1960. Thanks for the correction. Sent you a P.M.
-
1 pointYou can find the specs to make a travel hook in the "implements" section.
-
1 pointThe engine weight is around 110 lbs if it's an AENL.
-
1 pointNICE SCORE!!!!!! Like they say... patient is a virtue....
-
1 pointI think Wesbster defined this product as PROPRIETARY...just sayin'.....you know somewhere there might be a "bucketload" of these bearings but as a senior buyer for 20 years, I was never able to find em'!!!
-
1 pointI'll give a go at a description - I know you have heard a million times the saying "its really very easy" but honestly in this case its true. First you gotta find the points location - of the 2 wires coming off the coil one will go down to the side of the engine to the points, locate where it leads and remove the 2 screws from the little tin cover and set the cover aside, you are now looking at the points. Watching the points, rotate the engine by hand til the points open fully and leave the engine in that position. Now remove the wire that comes from the coil off the points (just loosen the screw and it should be a slide off). The points themselves are held on by only one screw (there are 2 others that hold the points holder to the engine, they dont need to come off) Remove the one screw, the points are held in position by a 'pip', just wiggle it out. Now to do the install - get the points 'pip' back in the its socket and re-install the one screw. This screw should be "just snugged' up allowing just enough drag when moving the points that they will stay. Get your .020 feeler guage out and move the points till the .020 guage gives a slight 'drag' feeling between the the two contact points, tighten the screw and reconnect the wire from the coil. Rotate the engine and confirm they are indeed opening and closing and maybe re-check the setting. Next turn the key on and slowly rotate the engine again and you should see a slight spark as the points open - if so put the cover back on and it should fire up The point gap is some what flexible with some leeway OK being closer to .018 - so shoot for this range with .020 being the ideal. Good luck, and let us know how it goes...
-
1 pointWhy is this link and the link chasm posted not pinned here in the transmission forum where they can be found quickly?
-
1 pointCheck Glenn Pettits store, they are usually included when purchased with hub caps,
-
1 pointThanks for the comments guys. I forgot how these things "float" down the road, you kinda have to get used to it again. Remember when power steering was done with a finger tip! As was said, it is a 'HOOT". Didn't know I had so many friends, either a wave or thumbs up going down the road. In the process of getting it road worthy again. Wife and I are planning on driving Rt. 66 this summer.
-
1 pointI have a pretty good idea why shifters break, and I seriously doubt it has anything to do with a locked differential. I can see axle key & hub problems, stripped/broken pinions and axle gears, and broken differential bolts, but the "front half" of the tranz should hold up just fine.
-
1 pointThanks all! Forgot the before picture....
-
1 pointPut it this way, I run 27" atv tires now. Itp 589's specifically. I can go where most 4x4 quads go with relative ease. Mud snow dirt gravel rocks hills logs all not an issue.
-
1 pointJust a humorous look at forum posting guidelines: http://www.albinoblacksheep.com/flash/posting
-
1 pointThat is most likely an AENL or AENLD engine on there and you're right it is a beast. Wisconsin engines are known for being heavy and having lots of torque. Heck I had a 2-2.5 hp Wisconsin. That engine weighed at least 60lbs and was considerably larger than an aluminum Briggs 3.5 hp engine.
-
1 pointi cut a square plate to fit the transmission,,,,added 2 pieces of angle that slid inside the back of the 401 frame...used the 3 holes on each side of the frame where the old 3 piece trans fit,,to attach the adapter,,, it almost looks original W/H.......the last issue to address is the brake and cross shaft...im hoping a day in the garage fixes that....then disasembly pics..posts paint.. atleast...thats the plan.......thanks for your comments
-
1 pointSpeaking from experience with a locked rear in my "trail horse" as far as wear and tear, I've broken the high low fork twice and just today broke the shifter off because of too much strain on all the gears when trying to navigate a trail. But other than that i havent had a problem with it As far as turning, it's not as bad as you would think. The right kind of tires help tramendously. Just takes trial and error until you find the right ones. I was on the fence about locking the rear for a while but it's one of those you won't know unless you try kind of thing
-
1 pointYes it is a cool magazine for sure! I have been featured in it twice over the years. The first time was in the March/April issue of 2008 on the back cover! The 2nd time was in the July/August issue 2013 thanks to Jake Kuhn on the other garden tractor website! That was my Christmas Garden Tractor Light Show! Proud to be involved in the hobby! I started collecting way back in 1985, people thought I was crazy, now look at us! Wahoooo! KJ
-
1 pointIt's so cold outside....I actually saw a teenager pull his pants up!!
-
1 pointSo this looks like another open ended thread. Sorry It's too cold to go out and I have way too much time on my hands.
-
1 pointThere were these three Eskimos in Alaska, and one time while they were at their local bar, they got to talking about how cold it was outside, and how cold their igloos were. They could agree on everything but whose igloo was the coldest, so they decided to determine who, indeed, had the coldest igloo. They went to the first Eskimo's igloo, where he said "Watch this!" and poured a cup of water into the air. Well, the water froze in mid-air and fell onto the floor. "Not bad" said the other Eskimos, but each maintained their igloo was colder still. So they went to the second Eskimo's igloo, and he said "Watch this!" and took a big breath and exhaled, whereupon his breath froze into a big lump and fell to the floor. "Wow, that's colder than mine! "said the first Eskimo. But the third Eskimo exclaimed his was colder still. So they ended up at the third Eskimo's igloo. He said "Watch this!" and went into the bedroom, threw back the thick furs, and retrieved one of several small balls of ice there. He took it, put it in a spoon, and held a match under it. When it heated up enough, it went "FFFAAAARRRRTTT". He won.
-
1 pointI made mine for the 56" plow on the 18 Auto out of a used cutting edge from a state snowplow. It was 5/8"x almost 6 inches used. Darn thing weighed about 100 pounds when I got it cuz it was 10 feet long. I whacked in half wit the torch, drilled new holes as the factory ones were way off and mounted it up. It works awesome and it was free!!
-
1 pointI'm an Insurance Adjuster and I would recommend you also look at the various show associations you participate in to see what the limits are of the coverage they offer you. If they have for example $250000 coverage for liability and you are sued for $1,000,000.00 you got a big shortfall that is on your shoulders. Your biggest concern at shows is Liability for Injury and allegation of Negligence. I know Canadian & US insurance laws are somewhat different but the principle of indemnity is pretty much the same, State to State & Province to Province but if you want your show tractors covered for loss you will likely have to insure them separately. Understand property value policies and liability policies are not the same. It is also important to know how values for the property policies are established. An Agreed Value Policy is more expensive but you know what you will get in the event of a loss. As was mentioned, theft coverage may not apply off premises so you have to decide what your expectations are, what premium is acceptable to you and how much risk you are willing to assume. Insurance companies will only cover what they are obligated to cover. The obligations are established by a contract. As was mentioned, do not assume, make the effort to determine for sure what is in that contract. Pay attention to limits and exclusions within the contract.
-
1 pointStarbucks was serving coffee on a stick!
-
1 pointOUCH! That poor girl was rode hard and put away wet. I still think it's worth saving. It would be a labor of love.
-
1 pointWorkin on my gas tank today, I needed to extend the filler neck a half inch or so. I unsoldered the neck, then cleaned the tank and removed all the J B Weld on the bottom of it. This tank hasn't leaked while I've had it but it must have at one time. With my little propane torch I ran some solder into the seam around the tank to fix any leak that was there. Next I needed a 1-5/8" O.D. pipe to extend the neck, the only thing I could find that diameter was a 1-1/2" copper street elbo at Menards. I cut about an inch off of it and soldered the neck to it then soldered that into the tank.
-
1 pointRideaway Seniors from the big big Biglersville show 2013. AM next year.


This leaderboard is set to New York/GMT-04:00